Lock Picking 101
Lockpicking, Locksmithing, Locksport, Locks and Picks
           

Lock Picking 101
Login
Profile
FAQ
Members
Search
Lock Pick Shop


Information
FAQ & General Information
Locksmith Business
Pick-Fu - Do... Not try.
Got Questions?
General Chatter
Lockpicking 101 Lapel Pin


Hardware
Automatic/Mechanical
Lockpicks - Manual
Locks
Eu Locks, Picks & Hardware
Buy - Sell - Trade


Advanced Locks
Advanced Locks Information
Combo, Electronic & Safes
Automotive Locks and Picks
High Security Locks
Advanced Lock Pick Tools


Locksport Groups
Locksport Local
Chapter President's Office
Locksport Board Room

Featured Picks
Locksmiths
Locksmiths Forum
 

HOW TO: Homemade Bumping Hammer

Tool recommendations, information on your favorite automatic and/or mechanical lockpicking devices for those with less skills, or looking to make their own.

Moderators: Kaotik, Chucklz, SFGOON

HOW TO: Homemade Bumping Hammer

Postby unbreakable » Sat Jun 09, 2007 9:34 pm

Hey all,
So, I've been gone for a while, and I had a half day today (suppossed to be studying for exams), so I decided to do something new.

Hence, the homemade bump hammer how to.

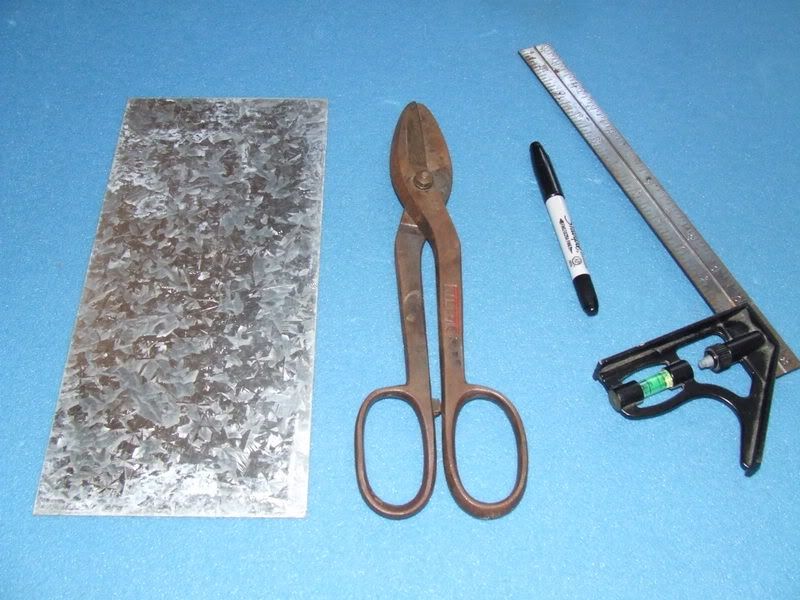
First, you will need-

  • Sheet metal, or a 99c metal ruler
  • Block printing rubber (used to make stamps, available at art stores.)
  • small bolt, and nut to fit. Bolt should be long enough to go through 2 layers of rubber. I used a 20mm one, it could have even been a bit shorter.
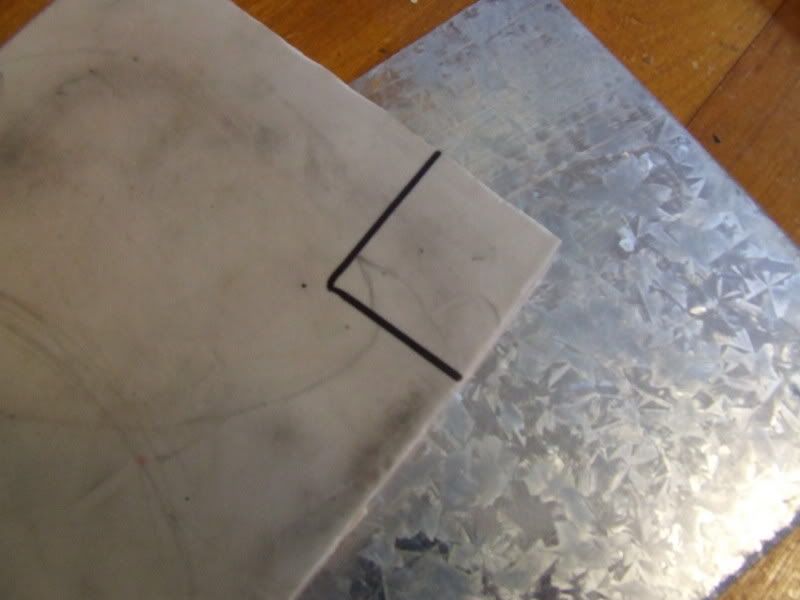
  • Square
  • Sharpie
  • Duct Tape
  • Drill
  • Rivets and rivet gun
  • Tin snips, Pliers, Vice and a Drill and bits.


Image
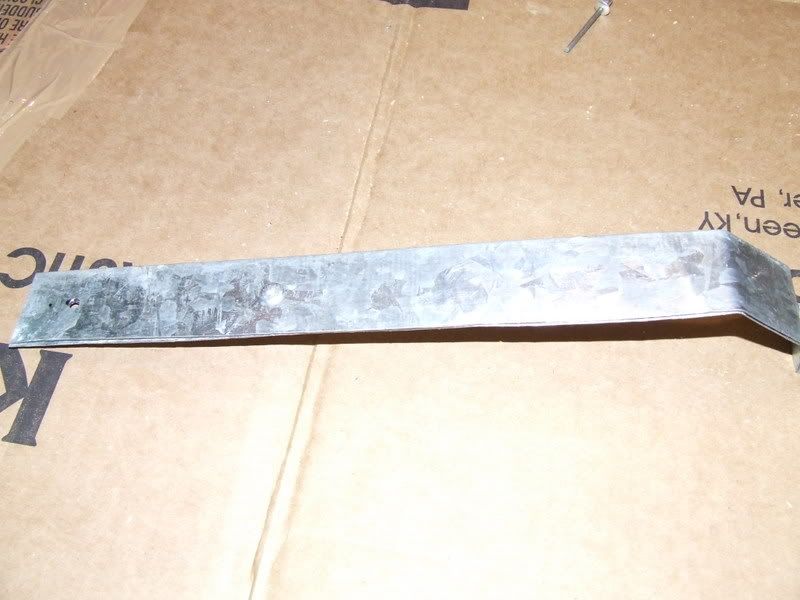
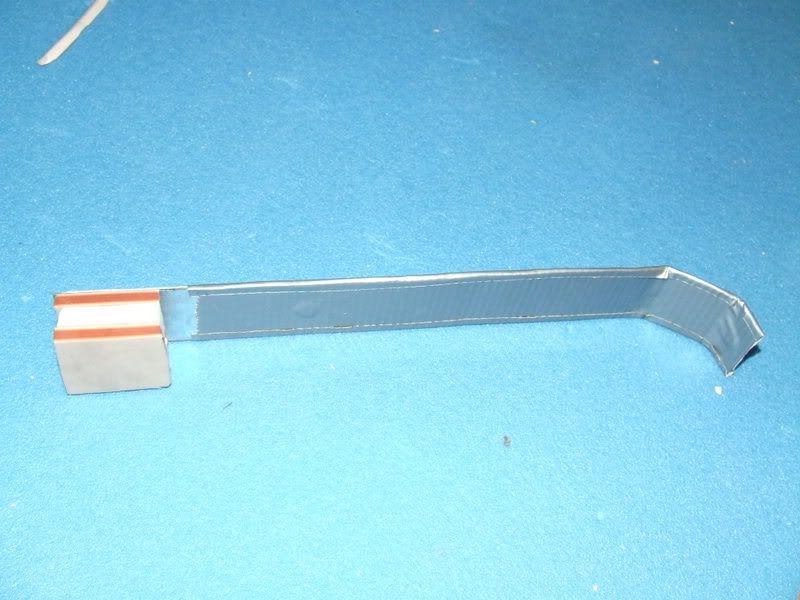
First, cut your sheet metal into strips, I used 35mm wide, by 290 mm long.
Image

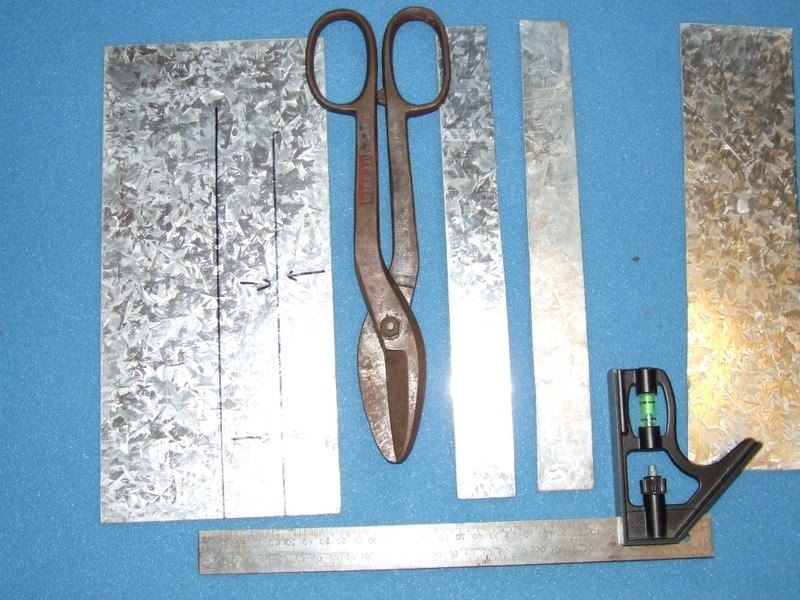
Clamp them together and drill 3 holes, one 22mm from the top, one 100 mm from the top, and one 15mm from the bottom. The holes should be the right size for the rivets you are using.
Image

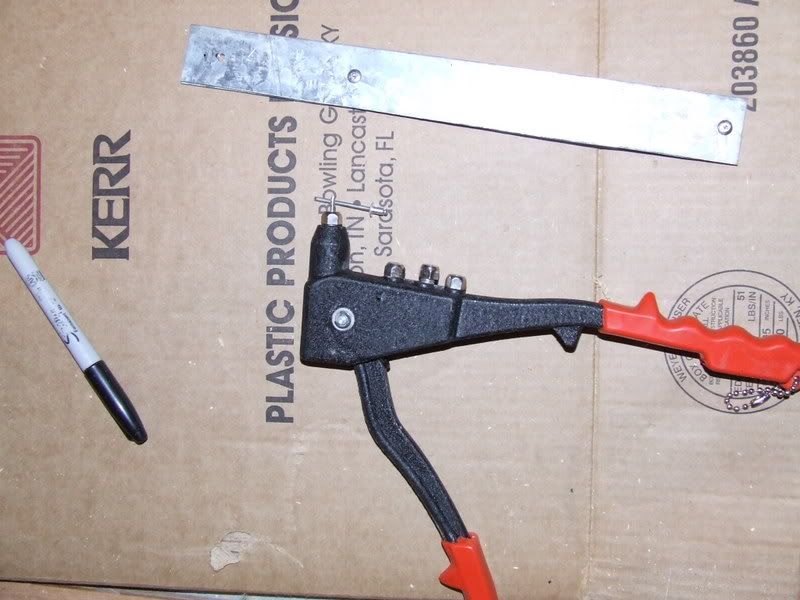
Place a rivet in the bottom and second from the top hole, riveting both pieces of metal together. Then, hammer the rivets as flat as possible with a hammer.
Image

Bend the metal into a handle shape at the end, I bent at 15mm up from the bottom the 35mm respectively. This is best done using the vice.
Image

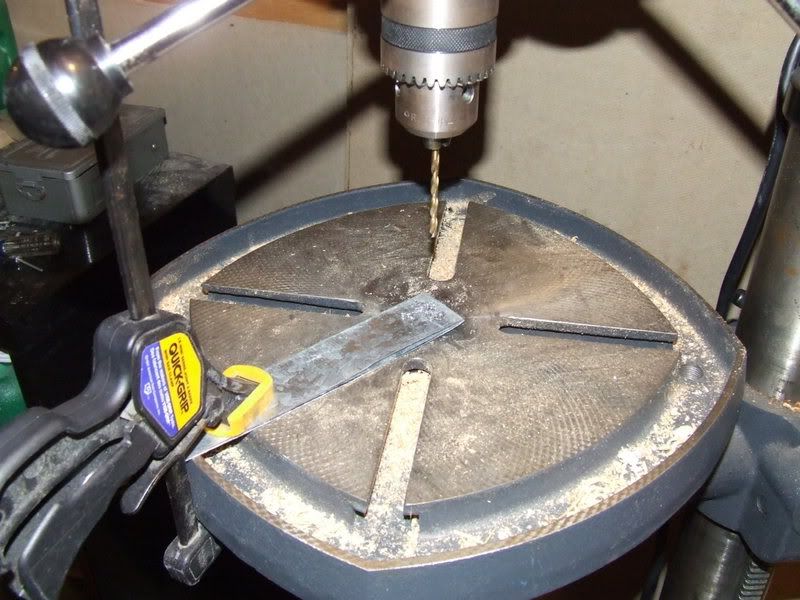
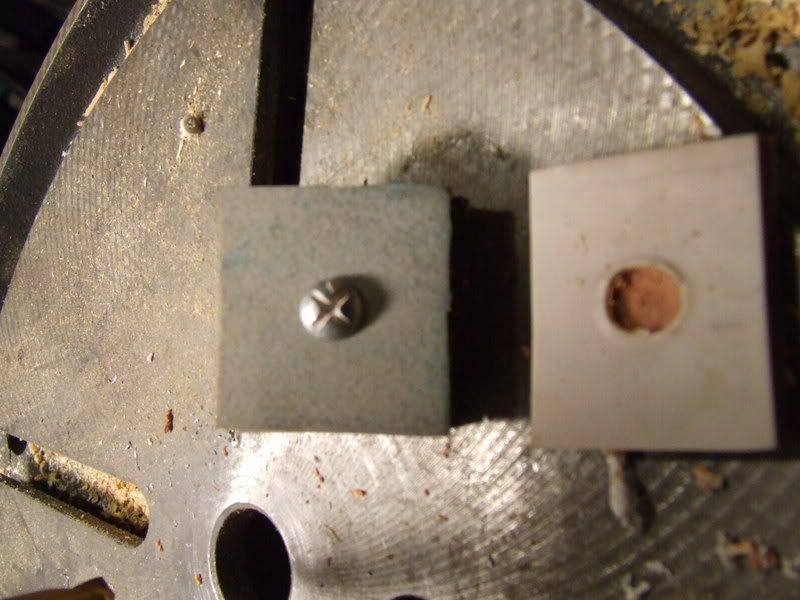
Cut your rubber into 35mm by 40 mm strips. Use as many as you want to get the thickness of the striking pad that you want.
Image

Drill a hole through the center of the first 2 strips, the size of your bolt. In the third piece, drill a hole the size of your bolt head halfway through the material. Glue this piece onto the other two using superglue.Image

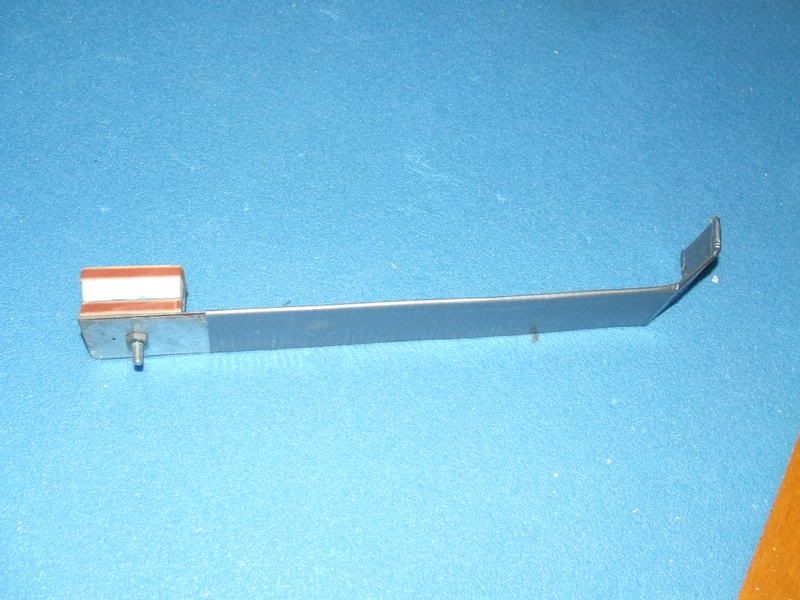
Bolt the whole striking pad assembly onto the hammer. Wrap the handle of the hammer in duct tape, and then you're done!
Image
Image

*NOTES*
Instead of sheet metal, you may use a cheap ruler.
I don't know the gauge of the metal I was using(found it out back...) but it was fairly thin. If you have thicker sheet metal, use it, and skip the double layering.

Enjoy!
Image
unbreakable
 
Posts: 1681
Joined: Sat Oct 29, 2005 7:55 am
Location: Nova Scotia, Canada

Postby Schuyler » Sat Jun 09, 2007 9:38 pm

friggin' awesome.

Nicely done, man. :)
Schuyler
Supporter
Supporter
 
Posts: 3420
Joined: Mon Jul 24, 2006 2:42 pm
Location: Boston

Postby Mutzy » Sat Jun 09, 2007 9:51 pm

Verry nice. You given it a test run yet?
ImageImage
Mutzy
 
Posts: 624
Joined: Sun Mar 12, 2006 1:18 pm
Location: Queensland, Australia.

Postby Shrub » Sat Jun 09, 2007 9:54 pm

Nicely made guide and welcome back buddy,

If your lucky Schuyler might try out his new sticky button :wink:
Shrub
Moderator
 
Posts: 11547
Joined: Mon May 23, 2005 5:03 pm
Location: Inactive

Postby Schuyler » Sat Jun 09, 2007 9:57 pm

In fact, looking through the stickies...I'd say this...could...be recommended for a sticky?

Just my opinion, but I vote sticky. Other than the rivets, this is a very accessible DIY project, and I feel like the rivets could be easily substituted.
Schuyler
Supporter
Supporter
 
Posts: 3420
Joined: Mon Jul 24, 2006 2:42 pm
Location: Boston

Postby Schuyler » Sat Jun 09, 2007 9:57 pm

Shrub wrote:Nicely made guide and welcome back buddy,

If your lucky Schuyler might try out his new sticky button :wink:


WHOOP!

And thank you to Unbreakable for posting something so cool so soon after I got that button. ;)
Schuyler
Supporter
Supporter
 
Posts: 3420
Joined: Mon Jul 24, 2006 2:42 pm
Location: Boston

Postby digital_blue » Sun Jun 10, 2007 12:44 am

Great idea, great post!

Shoes: Congrats on making your first sticky. :) I moved this thread here from the PickFu section, as it's tool related. I kinda went back and forth over whether it was more "Lockpicks Manual" or " Lockpicks Automatic/Mechanical". I went with the latter, as it kinda made sense to me.

db
Image
digital_blue
Site Admin
 
Posts: 10048
Joined: Fri Jan 07, 2005 4:16 am
Location: Manitoba

Postby JackNco » Sun Jun 10, 2007 1:18 am

thats pretty sweet man. and good luck on ur exams.
Image
JackNco
 
Posts: 3089
Joined: Sat Apr 15, 2006 1:26 am
Location: Coventry. UK

Postby SemiShady » Sun Jun 10, 2007 5:33 am

looks nice. Whats with the angled handle though?
~SemiShady
SemiShady
 
Posts: 44
Joined: Fri Jun 08, 2007 7:59 am
Location: Madison WI

Postby unbreakable » Mon Jun 11, 2007 8:12 am

Sweet, thanks for the sticky 8)

It works well, although I find it a little heavy. I think I'll make a mini bump hammer next, after thinking about it for a while I don't know why they're always so big, the certainly don't need to be....

The curved bit at the end of the handle is to keep it from going flying out of your hand. :wink:
Image
unbreakable
 
Posts: 1681
Joined: Sat Oct 29, 2005 7:55 am
Location: Nova Scotia, Canada

Postby GutterClown » Mon Jul 23, 2007 8:55 pm

I made a set of bump-hammers, one for the van, one for the workshop.

all I used was exactly "oh.. that much" length of balsa wood, and four layers of nylon board (the stuff your mother uses as a chopping board)

i cut the four pieces, sunk two 1/8th holes on the drill press, counter-sunk some tiny bolts i found in my shed at home from the old model airoplane days, and then used some self-tapping screws to attach it to the wooden handle.

it's very light, easy to handle, has almost no weight behind it when it hits (reduces damage to the keyway) but has almost 100% force transmission, as the nylon absorbs nothing.

they work so well, quite often we use them as opposed to shimming or picking, to get a cylinder out for rekeying.
GutterClown
 
Posts: 47
Joined: Sat Jun 23, 2007 5:00 pm

Re: HOW TO: Homemade Bumping Hammer

Postby jasonthekey » Tue Mar 03, 2009 4:32 am

ive made a simple home made bump hammer that works almost as good as my brockhage. i got a wooden ruler i think a metal one would prolly work even better then i simply screwed a champagne cork to one end. the thing i really like about this hammer is that the cork is soft enough that i dont have to worry about bending/breaking my keys.
jasonthekey
 
Posts: 49
Joined: Fri Feb 27, 2009 11:19 am

Re: HOW TO: Homemade Bumping Hammer

Postby letsburn » Wed Aug 05, 2009 1:02 pm

Thanks thinking of making a hammer soon?
letsburn
 
Posts: 3
Joined: Wed Aug 05, 2009 12:54 pm

Re: HOW TO: Homemade Bumping Hammer

Postby Curleylocky » Thu Sep 03, 2009 1:27 pm

Awesome, thanks for sharing your knowledge with us, surely you are resourceful my friend
<sig removed by admin. Please refer to site rules. Thank you>
Curleylocky
 
Posts: 10
Joined: Thu Sep 03, 2009 12:40 pm

Re: HOW TO: Homemade Bumping Hammer

Postby znewbie » Fri Oct 02, 2009 7:13 am

I have a new concept of hammer bump key.
If I finished this week and if it works, I'll post the principle and photos.
znewbie
 
Posts: 26
Joined: Fri Dec 19, 2008 11:58 pm

Next

Return to Lockpicks - Automatic/Mechanical

Who is online

Users browsing this forum: No registered users and 2 guests