|
When it comes down to it there is nothing better than manual tools for your Lock pick Set, whether they be retail, homebrew, macgyver style. DIY'ers look here.
 by BlackPowderMan » 12 Mar 2007 23:59 by BlackPowderMan » 12 Mar 2007 23:59
Recently I was trying to pick a lock with security pins. I was having a hard time getting the tension right. so I decided what the heck and I decide to make a feather touch tool.

What you will need:
a thin street sweeper bristle or wiper blade insert
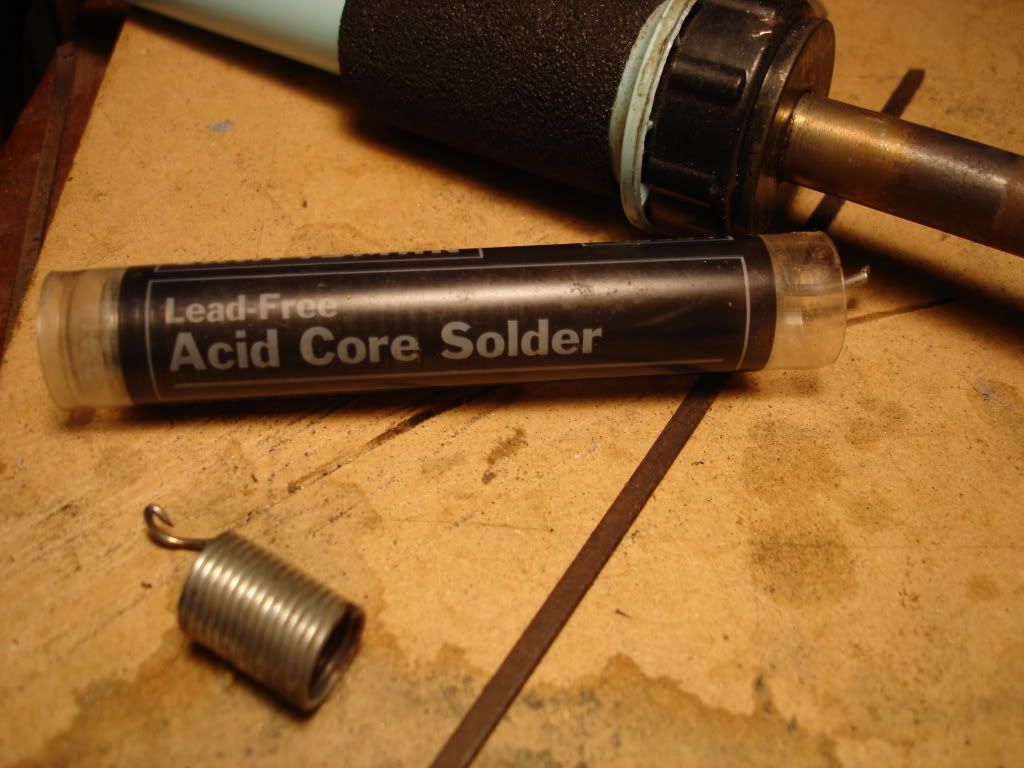
a soldering iron
acid core solder
a tension spring of your choice
sandpaper
a wire cutter
and a pair of pliers
_________________________________________________
step 1:
cut your street sweeper bristle or wiper blade insert to
4 inches and then take that piece and cut a 1 inch section off of it
take the 1 inch section and put a 90° band in the center this will be the tip of the tension tool
__________________
step 2:
now take your sandpaper and rough up 1/8"of metal on tip of the tension tool and the handle
___________________
step 3:
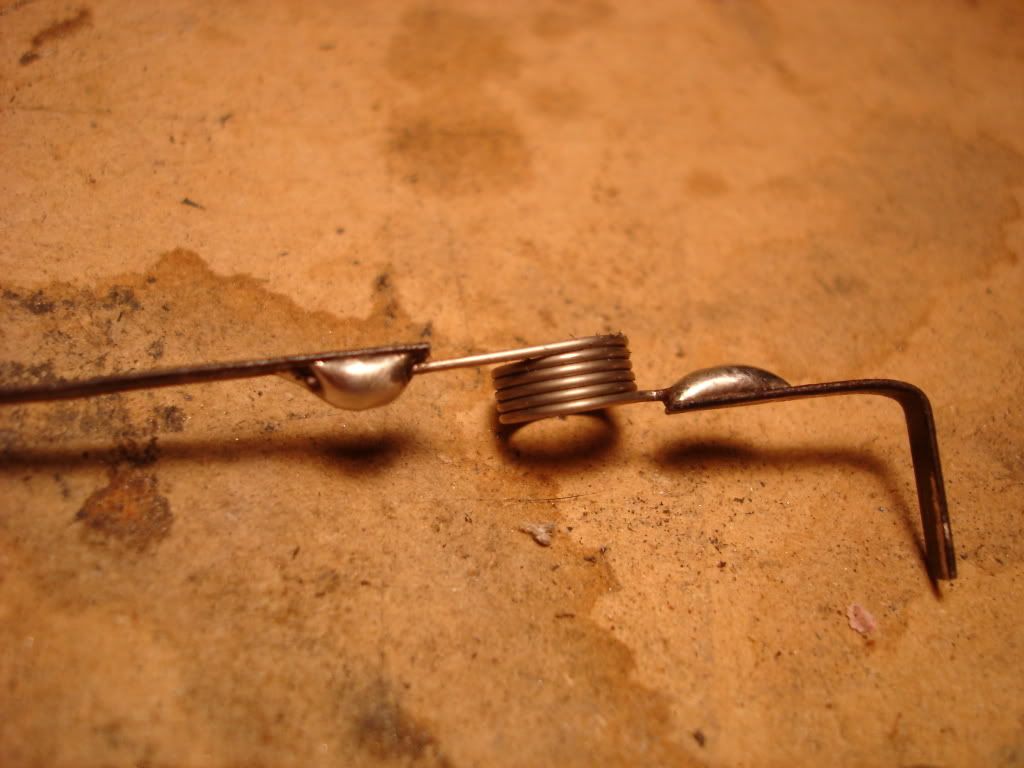
now cut six rings worth off your spring than on both sides straighten out the end of the spring
__________________
step 4:
now solder one end of the spring to the tip of tension tool and the other end of the spring to the handle
__________________
congratulations now you're done enjoy your new home made feather touch tension tool
optionally: if you're using recycled springs like me and you're springs are rusted or corroded you can apply a little bit of silicone spray or WD-40 
-
BlackPowderMan
-
- Posts: 33
- Joined: 18 Feb 2007 9:12
by Eyes_Only » 13 Mar 2007 1:19
Wow, I have to say that this must be one of the most creative DIY pick tool I have ever seen. You did a great job on these.  If a lock is a puzzle, then its key is the complete picture
-
Eyes_Only
- Supporter

-
- Posts: 4111
- Joined: 17 Dec 2003 20:33
by BlackPowderMan » 13 Mar 2007 2:05
WOW you think it's that good ?.
I was just hoping not to get flamed by anyone
if it's really that good it might become a sticky you never know 
-
BlackPowderMan
-
- Posts: 33
- Joined: 18 Feb 2007 9:12
by JackNco » 13 Mar 2007 2:52
Agreed, thats pretty awesome! so come on, did it work on the lock you make it for?
-
JackNco
-
- Posts: 3149
- Joined: 14 Apr 2006 12:26
- Location: Coventry. UK
by nekret » 13 Mar 2007 3:31
Very Nice! I could only think of two things that could improve it:
1. Rotate the handle around the spring 90 degrees so the flat portion is against your finger instead of the edge (but this is a personal preference, some like it the other way around)
2. Laminate the handle and the tension portion (might need thinner stock) so the spring is in the center for better strength.
Other than those two items it definitely looks like a tool I would use... Now I know what I'm doing on spring break! Good luck on the lock you made it for, and by the way, what lock is it?
-
nekret
-
- Posts: 194
- Joined: 25 Sep 2006 16:08
- Location: Vancouver, WA
by Shrub » 13 Mar 2007 7:30
BlackPowderMan wrote:if it's really that good it might become a sticky you never know
Ok then why not lets do that for you,
Well done, a great little twist on an old idea very well done,
Im impressed to the point of knocking one up this afternoon i think,
Well done  Ive edited your title to make it a bit easier to read and also done a slight re-format of the text with the pics so it look's better for you, hope thats ok,
-
Shrub
- Moderator Emeritus
-
- Posts: 11576
- Joined: 23 May 2005 4:03
- Location: uk
by UWSDWF » 13 Mar 2007 7:38
looks cool... things i might do... pretty it up with quick sand and polish.. possibly before assembly... and then heat tube over the solder points and down the handle
 DISCLAIMER:repeating anything written in the above post may result in dismemberment,arrest,drug and/or alcohol use,scars,injury,death, and midget obsession.
-
UWSDWF
- Supporter
-
- Posts: 4786
- Joined: 27 May 2006 13:01
- Location: Toronto, ON. Canada
by Shrub » 13 Mar 2007 7:41
Ok competition then, ill post mine up later 
Ive also had another idea that would make it adjustable........
Put a bolt with two big washers through the spring, a thumbturn on the other end as a nut will allow you to tighten up the botl onto the spring and stop it moving so much, may work may not but its quick and easy to try,
-
Shrub
- Moderator Emeritus
-
- Posts: 11576
- Joined: 23 May 2005 4:03
- Location: uk
by UWSDWF » 13 Mar 2007 8:31
well my reply will take awhile as i am working until thursday and then off to boston untill sunday.... but i'll try something out and post up i'm guessing next monday or tuesday
DISCLAIMER:repeating anything written in the above post may result in dismemberment,arrest,drug and/or alcohol use,scars,injury,death, and midget obsession.
-
UWSDWF
- Supporter
-
- Posts: 4786
- Joined: 27 May 2006 13:01
- Location: Toronto, ON. Canada
by Shrub » 13 Mar 2007 12:22
Ok what a lot of you may not know is that ive got attention problems in that i start things and never finish them only to start somthing else,
I started making one of these this afternoon and then lost interest after 2 mins of looking didnt show up a decent spring lol (told you)
So instead i started messing with wiper insert and came up with these as an alternitive,
I admit they arent perfect and maybe a little rough but with only 5 mins wasted max its no great loss,

-
Shrub
- Moderator Emeritus
-
- Posts: 11576
- Joined: 23 May 2005 4:03
- Location: uk
by JackNco » 13 Mar 2007 14:31
well there shiny ill admit. and the top 2 look like they could be cool. but have you tried them out? any results yet?
-
JackNco
-
- Posts: 3149
- Joined: 14 Apr 2006 12:26
- Location: Coventry. UK
by Eyes_Only » 13 Mar 2007 15:11
Hey BlackPowderMan, where did you buy the solder? I just got back from Fry's Electronics but couldn't find one that said "acid solder". Would it be alright as long as its a lead free solder?
If a lock is a puzzle, then its key is the complete picture
-
Eyes_Only
- Supporter
-
- Posts: 4111
- Joined: 17 Dec 2003 20:33
by Kaotik » 13 Mar 2007 15:20
Very good guide For DIY'ers out their.
Nice clear pics aswell, but I was a bit surprised by the enormouse size of them...all in all, it's good and well presented.
-
Kaotik
- Moderator Emeritus
-
- Posts: 1200
- Joined: 10 Jun 2006 13:38
- Location: Texas, USA
by Libris » 13 Mar 2007 15:29
Is it nessesary to use acid core solder? I tried the regular solder used for electronics, it just refuses to stick on the steel, no matter what. Yes I tried sanding and applying flux.
-
Libris
-
- Posts: 35
- Joined: 9 Feb 2007 8:25
- Location: Klaipeda, Lithuania
by nekret » 13 Mar 2007 15:31
Most electronics stores don't carry this as its not really meant for joining electrical contacts (mainly since acid core solder does *bad* things to circuit boards). Try a stained glass supply place or hobby shops or even jewelry supply. Other than that you could probably get some flux and use that instead, just paint it over the area you want to solder and it'll work, however in my experience electronics solder is never very strong.
-
nekret
-
- Posts: 194
- Joined: 25 Sep 2006 16:08
- Location: Vancouver, WA
Return to Lock Picks
Who is online
Users browsing this forum: No registered users and 32 guests
|


