


While whipping out some experimental tools my Dremel went nuts again. You all know that problem, I suppose. After a certain time, when cutting a lot metal this can be within a few days after unpacking it, the Dremels tend to go nuts and will only run on high or even highest speed when turned, no matter what you set the speed selector to.
The known workaround is to disassemble the Dremel and clean out the metal dust. I am not yet quite sure why this happens or why the maintenance helps in restoring selector functionality, but I am pretty sure that the metal dust is short-circuiting some part of the electrical circuit.
For anyone who did not yet dare to do this, here is a nice picture guide on how to do it. Best thing is, if you do it careful no one can tell your warranty is voided, because on my Dremel there are no seals that have to be broken.
(MODS, I was not sure if this is the appropriate forum for posting this. If we already had the "workbench" / "toolshed" forum that has been talked about in the recent past, it would be a clear decision, but... <hint hint> - so please feel free to move this thread if you see the need to do it.)
What you need:
- Clean work surface
Screwdriver with T15 bit (Torx)
Small flathead driver or the little Dremel wrench
a brush for cleaning the dust off
roughly 15-20mins
First thing: PULL THE PLUG. I almost got a heart attack when I once did this procedure and noticed that the plug was in the machine all the time after finishing.

Remove the plastic ring on the front, remove the two little blue nibs that hold the springs and carbon blocks. Also remove the ring near the power cord, you can bend it open carefully to remove the tip from the housing.
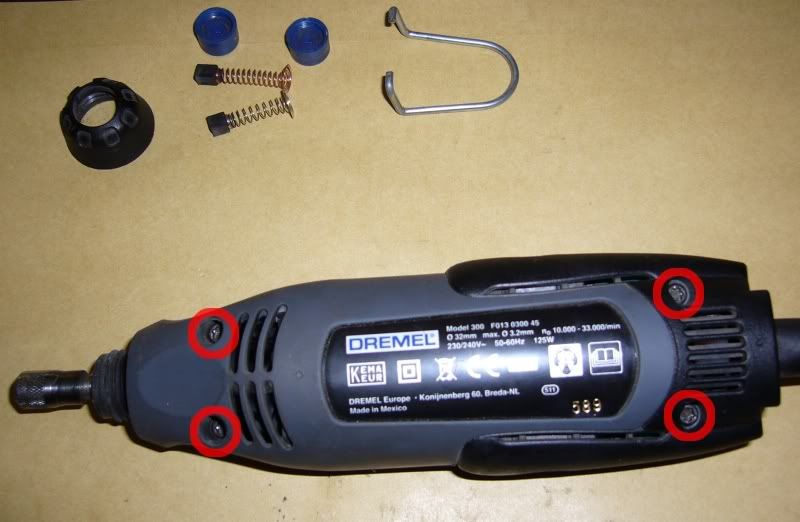
Remove the 4 screws that hold the housing together with the T15 bit. Remove the part of the housing that is opposite of the selector first.
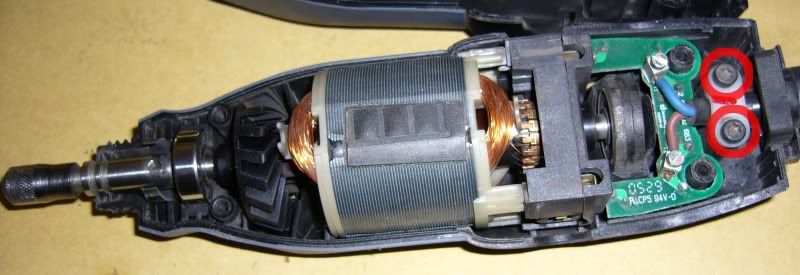
Remove the two screws that hold down the power cord. Be careful after these screws are gone, the connectors that connect the circuit board to the rest of the machine are very thin and wobbly, so it is tricky to do the next steps without bending these pins. You can just turn the machine over and let the stuff inside rest on your workspace, and then carefully wiggle up the the other part of the housing to release it all.
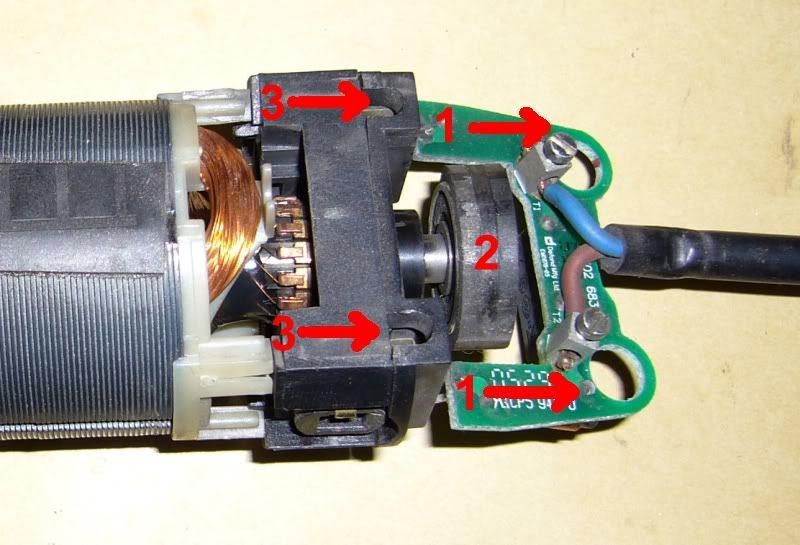
Once everything is out of the housing, grab the circuit board on both sides (points 1) and pull out the pins evenly to separate the board. Then remove the black rubber ring (number 2) and after that remove the part that is numbered 3 in the same fashion as the circuit board, by evenly pushing from both sides, to not bend the pins (there are 4 pins to part number 3).
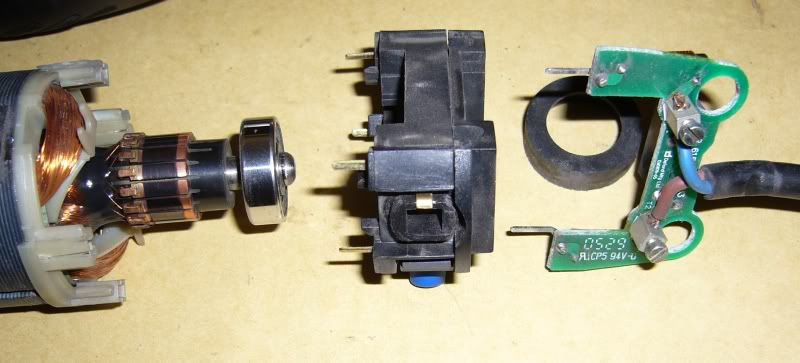
Should look like this when done properly. If you are looking for a cheap excuse to buy a new Dremel anyway, this is a good point to pour a cup of coffee or something like this into the stuff. If you plan on using the device any longer, keep going. You should start the cleaning process by vigorously brushing off the little circuit board. I think this is the main culprit for the problem, but don't you nail me on that.
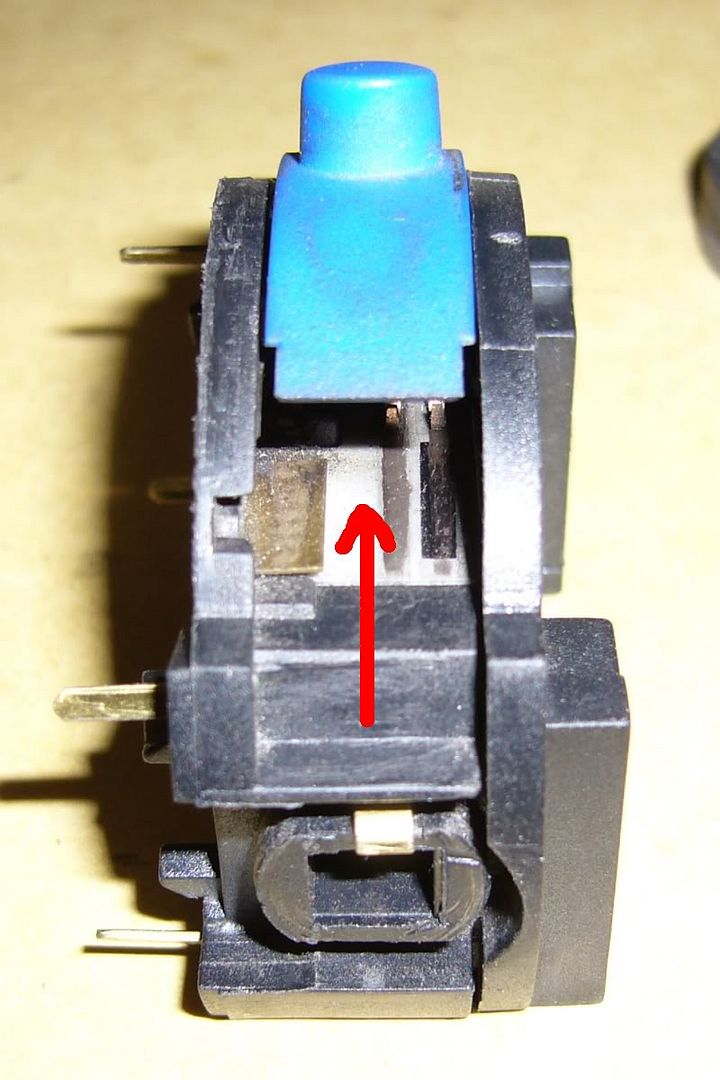
This part is the selector. Clean the surfaces with a brush, then use th brush to remove the dust that is under the blue lip. Only one side is accessible at one time, depending on the selector setting, so make sure you flick the selector all the way to both sides and use the brush to clean from both sides. Merrily ram the brush hairs into the gaps, there is nothing to break. At least not with a brush.

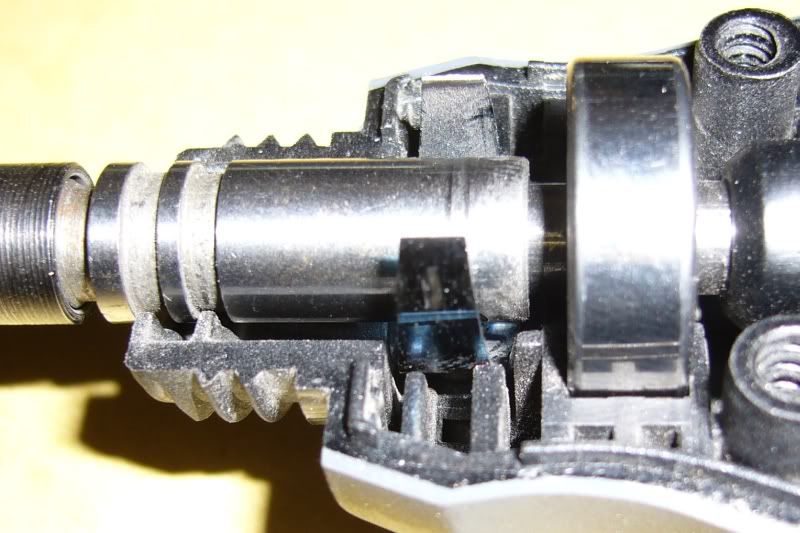
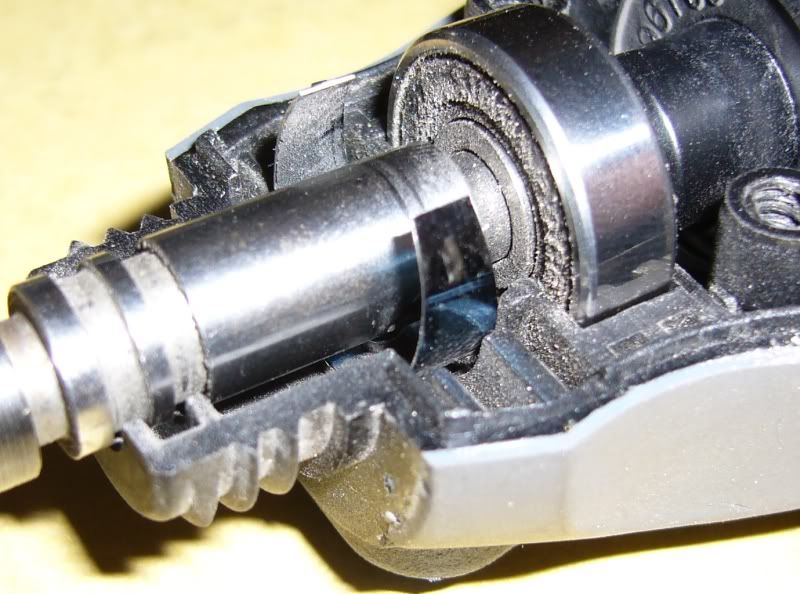
This is the part that slides along the carbon blocks. I honestly have no clue what these little carbon blocks do, why they are needed, etc. But I see copper, I know that carbon can be conductive, so I suppose a good brushing off can't hurt.
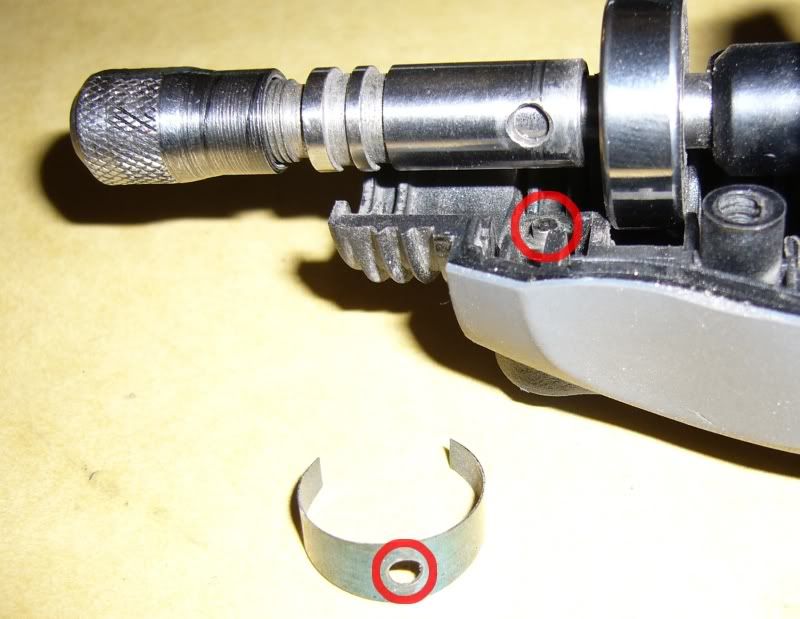
Take a close look at the little nub in the circle. This thing is pushed inwards when you push the blue locking button on the outside of the housing (for changing the tool bits). Take the little springy round thing, and put it into the gap of the housing so that the hole of the springy thingy lines up with nub.
Now, reassemble the machinery. Align all the pins properly, there is no need for force, it just goes together smoothly. First, put the selector piece with the 4 pins on, then put the rubber ring back, then the sircuit board into the selector part. Now insert the machinery back into the housing carefully, always checking back if everything is aligned properly into the housing cutouts.
If you think you got it, look and check if the front end looks like pictured above. Hold the device, push one half of the case and the insides of the machine together by holding it, and push the lock button, spin the axle. Does it lock properly? Fine, sound good so far. Now, rotate the axle. Hear any funny sounds? if you wiggle the insided back and forth a little, often something is a bit stuck and then gives way and falls into place for the last half millimeter or so. Spinning the axle must be absolutely noiseless and smooth. You can also lift the machine and look under it, to see if the selector know looks properly aligned. Once you are satisfied with everything (lock bolt, smooth running, etc.) clip in the cable thingy and use the white bridge along with the two T15 screws to secure the cable back into place. Then put the other part of the cover on, screw the 4 screws back in. Before tightening them properly, insert the carbon blocks with the springs. Now, tighten the outside screws, then secure the carbon things with the blue caps you got. Put the clip back into the place next to the cable and put the front pastic ring back on.
Basically just the same in reverse.
Now, one last check. Rotate axle. Smooth? Noise? Fine. Lock bolt? Works. Nice. Turn on machine.
NOTHING HAPPENS!
Right, you did everything correctly. Find the plug and put it into the power socker. Thanks for following my advice to remove it. Again, turn on machine. Is it working. And is it working on the SELECTED speed? Well, it should, and if it does you did it.
If it is still speeding like a bat from hell, my solution is rinse and repeat. It always worked for me.