Today we are going to take apart a Mortise Euro cylinder lock.
For this we are going to need
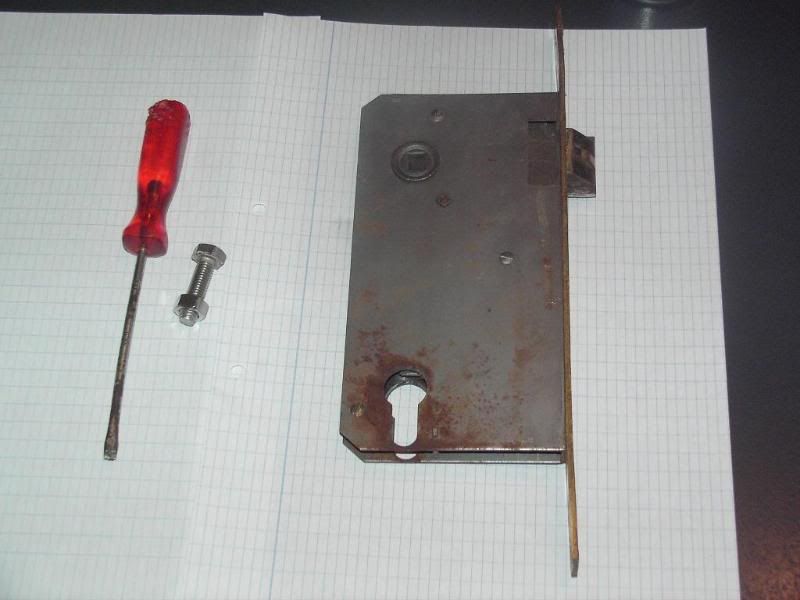
A lock (Meco in this case)
A screwdriver
A bolt , washer and nut. Usually a M8
For this occasion , I've taken a old Meco lock. As some of you will know , Meco has been out of business for about 20 years. There are several reasons I've chosen for this one.
Its very basic , there are no special parts in it , just what it needs. If it had more parts , it would have been more confusing
Most locks that are produced now , can't be unscrewed. They are usually riveted , or even welded.
I got this lock from the scrap metal container at work. This lock was replaced because the owner wanted to install a security garment on the cylinder. This lock doesn't have the holes necessary to install one. Other than that the lock works perfectly.
Before we take it apart , some more basic info on Mortise cylinder locks.
If you are in need of a new lock , and want to get it from the hardware store , there are several things you need to know about your lock. You wouldn't be the first to come home with the wrong lock.
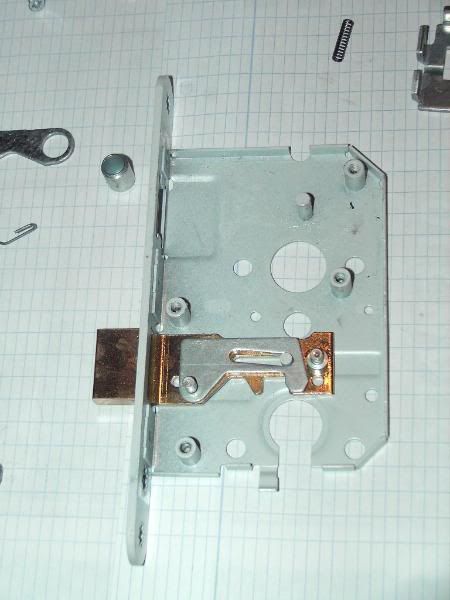
The most important thing to know is the locks Backset. Its show in the picture as the green line. This is the distance from the center of the cylinder hole or door handle spindle to the face plate. This goes from 20mm to around 90mm in my area. With the exception of some KFV locks on 24mm , locks usually step in 5mm. Most common in my area is 55mm,
The next important thing is the Center distance. Its shown in the picture as the red line. This is the distance from the center of the cylinder hole to the center of the door handle spindle hole. This depends on the country the lock was produced in. Holland uses 55mm , France 70 , Germany 72 and 92 , Italy uses 85 and Belgium uses 110mm.
There is a reason why the backset is more important than center distance. Sometimes , a lock is no longer made and no locks can be found with a matching center distance and backset. Its easier to use another lock with the same backset and drill a new hole for the door handle , than it would be to use a lock with the same center distance and drill new holes in the door for the door handle and the cylinder.
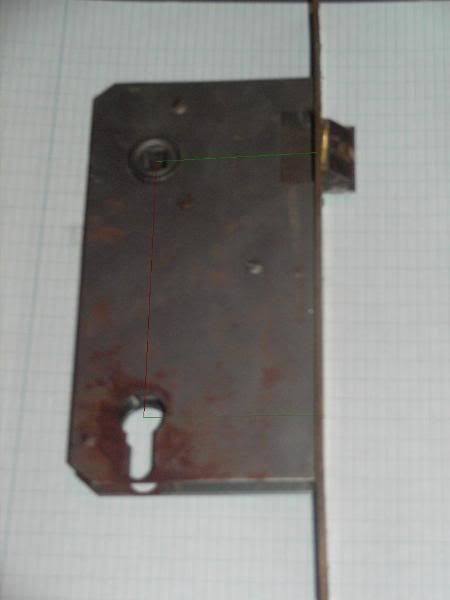
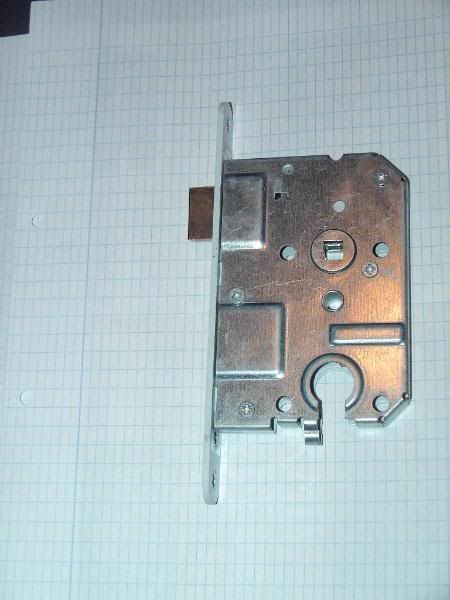
Also very important is if the lock is Left or Right. The best way to know is to look at it from the top with the latch away from you. The angled side of the latch shows this is a DIN Right lock. Note that some countries don't follow the DIN rules. In Belgium , this would be considered a Left lock.
Other important measurements include the with and length of the face plate and depth of the lock. But this is only important for metal doors.
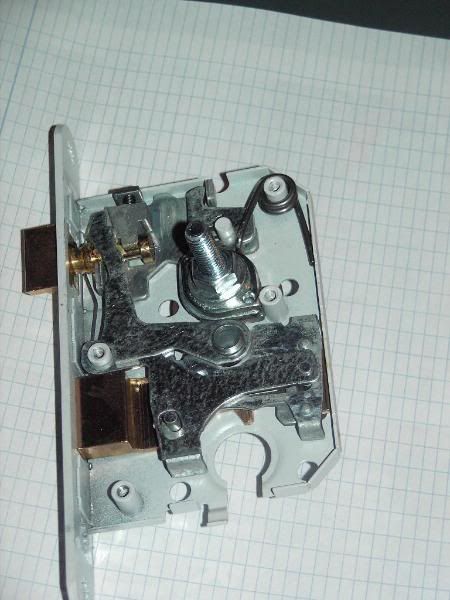
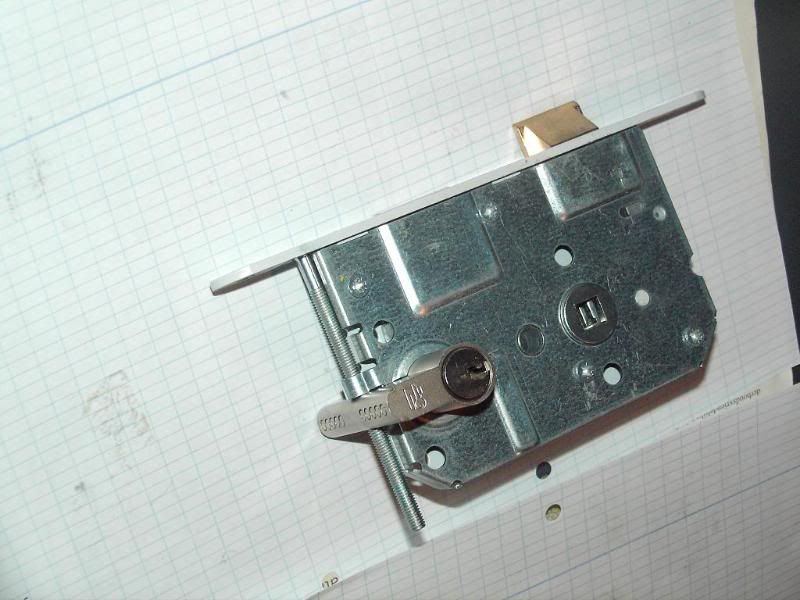
Before we open the lock , here's a little trick to prevent part from flying around everywhere. An 8mm bolt is run from the back of the lock trough the spindle hole and attached with a nut at the front. A lot of parts for the latch are spring loaded. When the lock case cover is removed , these parts will fly out of the lock. The bolt prevent that from happening. It also makes it easier to reinstall everything.

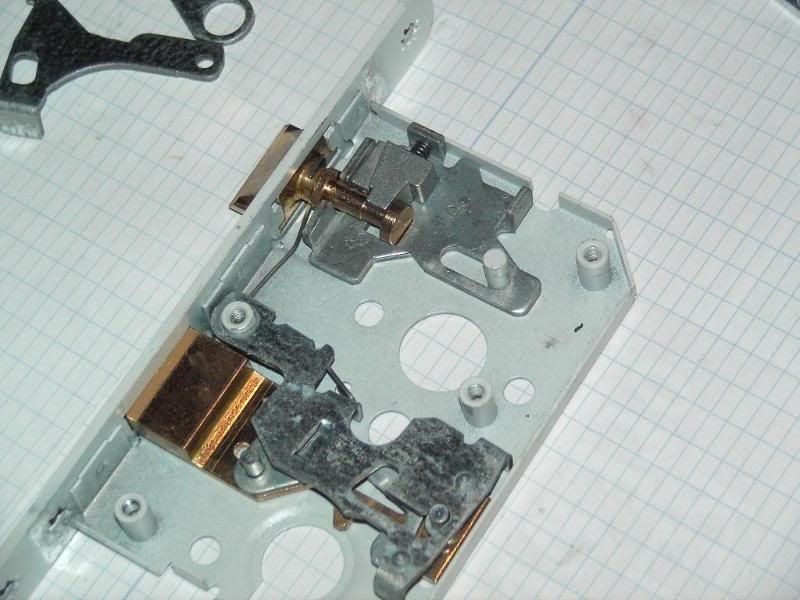
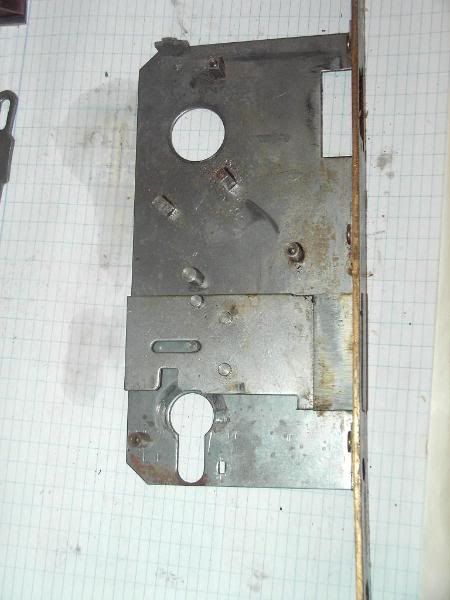
Here are the internals of the lock. Only the cover has been removed.

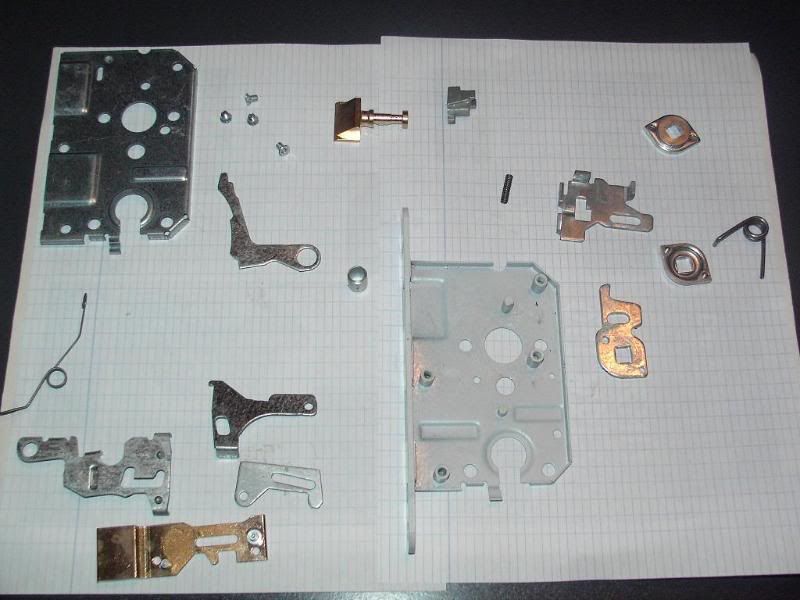
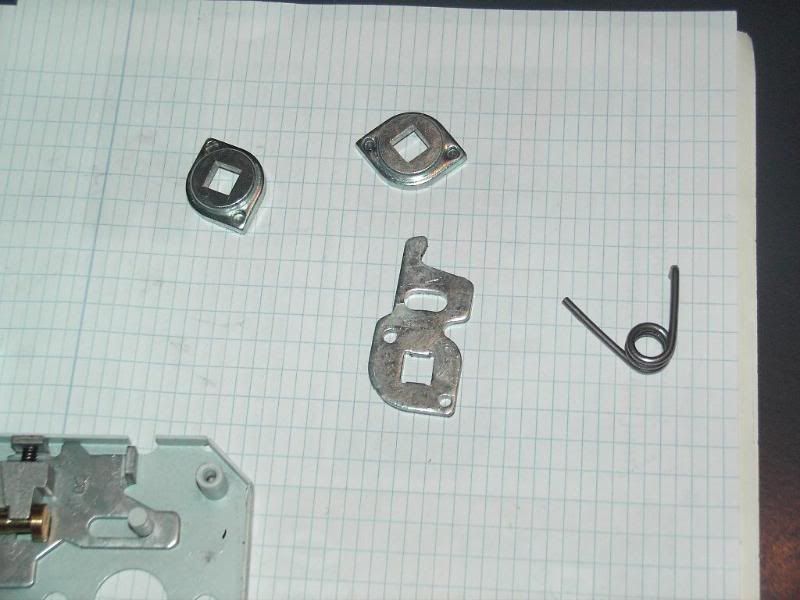
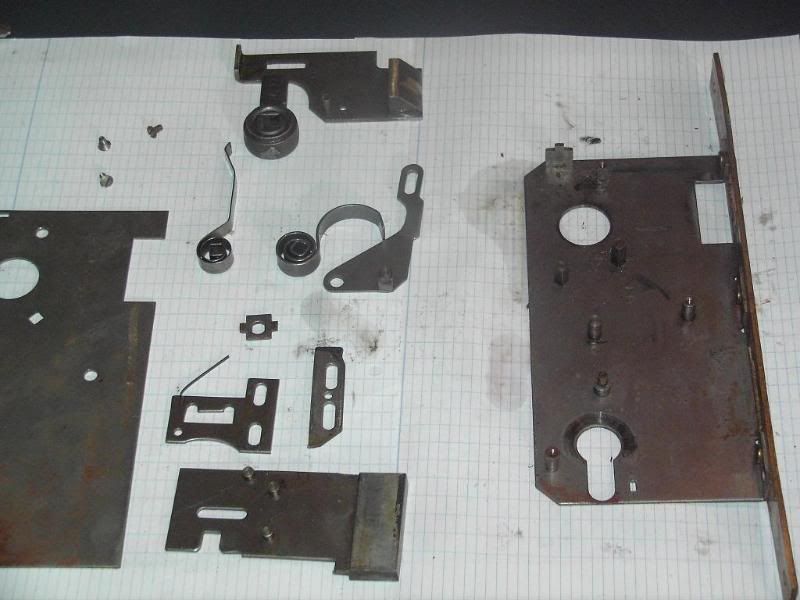
And these are all the parts disassembled. In a modern lock , there will be a lot more parts. Some features like reversible latch and double throw deadbolt add a quite few parts.
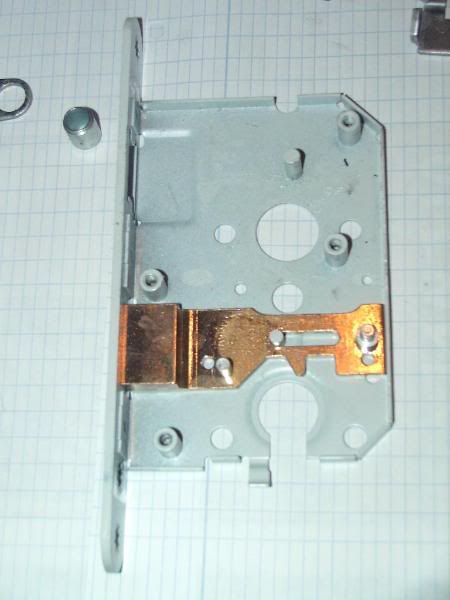
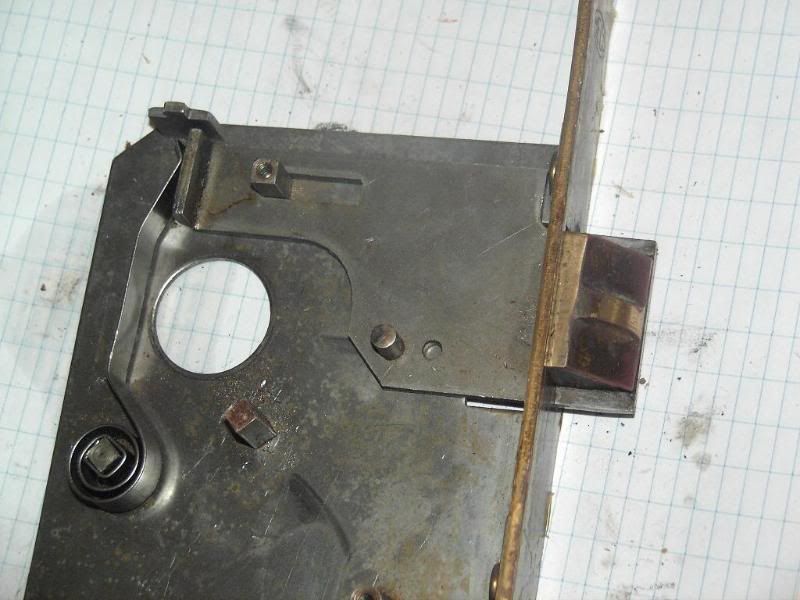
In this pic the deadbolt is reinstalled. Here it is in the unlocked position.
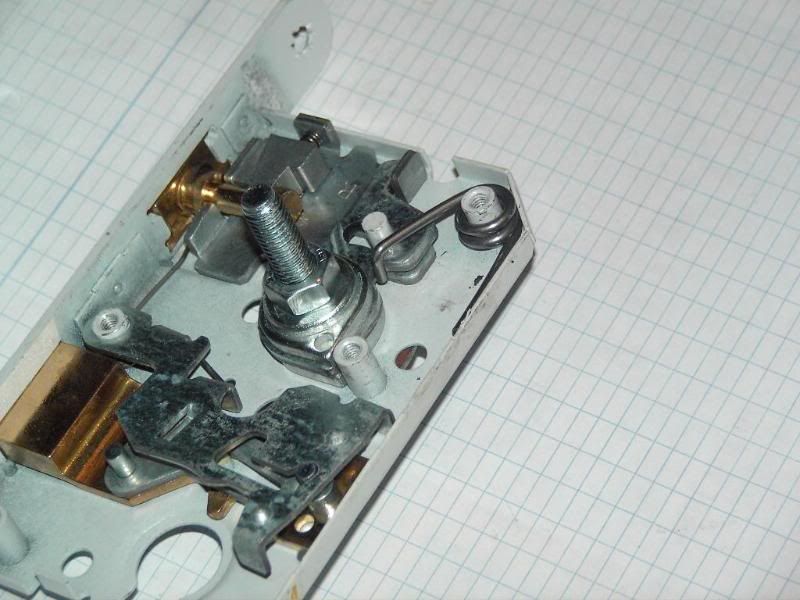
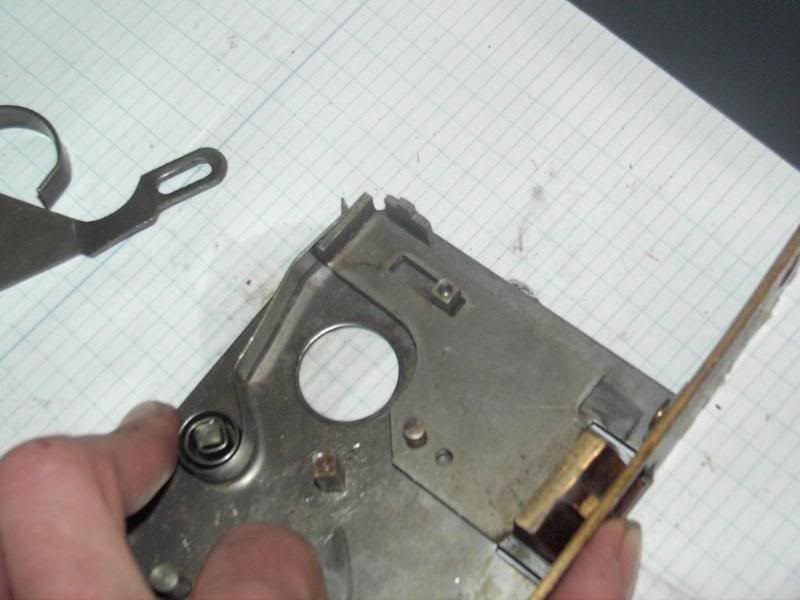
Here I've installed a Euro cylinder so you can see how the follower locks the deadbolt. Also , note the little part on the screw. This part is often lost when a lock is taken apart , or it isn't reinstalled properly.

The next part is basically the same as a lever in a lever lock. Its lifted by the follower of the cylinder. It locks the deadbolt in either the open or locked position.


Thats all the parts involved in the deadbolt.
Now we move on to the latch.
This is the latch and its spring.
The latch holds the door shut. It is pushed in by the door frame when the door is closed. It can also be pushed in by hand
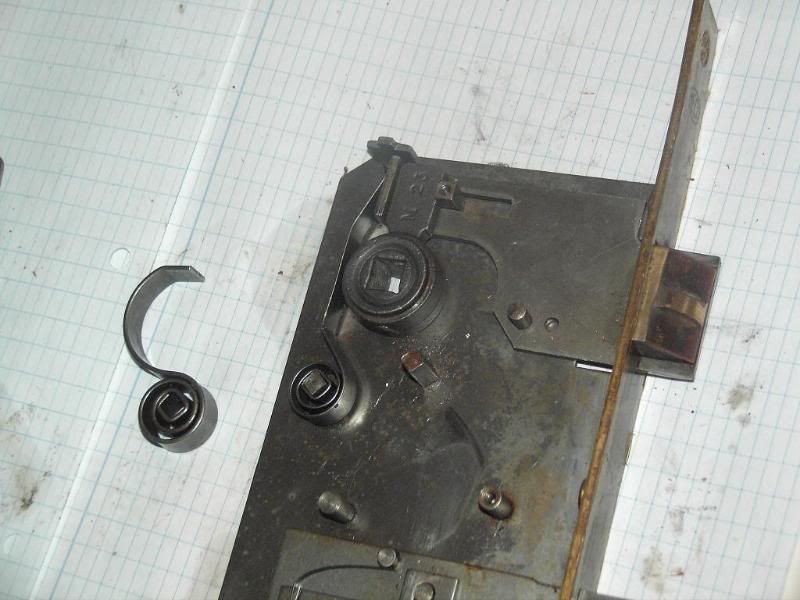
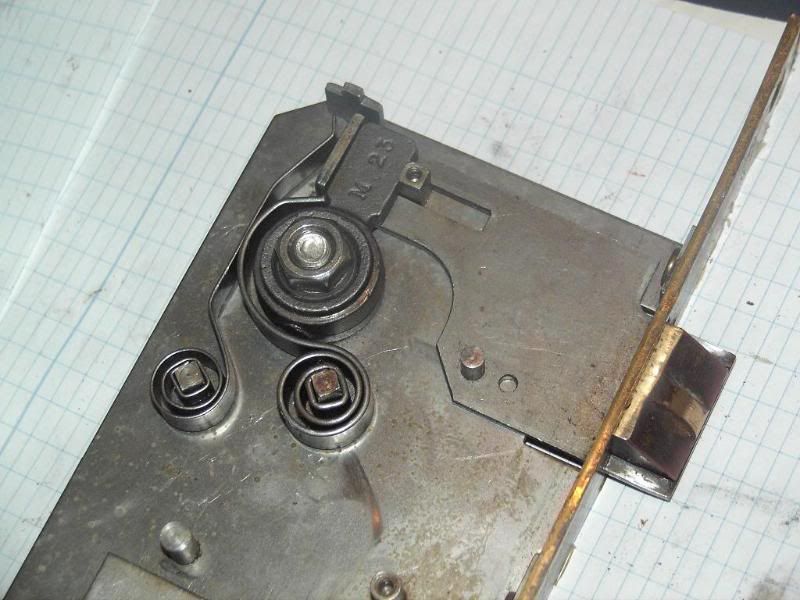
The next part is the spindle square and its spring. In the first pic I've only installed the spindle square itself. Then I've installed the spring after I placed the bolt and nut again. This makes it much easier to put the lock together again.
The last 2 part are to open the latch with the cylinder. Its basically a lever that operates the latch and
a guide piece on top of the deadbolt lever.
The follower of the cylinder pushes the guide piece up and lets the lever push the latch inward.


Thats pretty much all there is to it. Do keep in mind that this lock is VERY basic. I was surprised at the low number of parts in it. Usually there are a lot more. My girlfriend could even put this thing back together. (Except for the spindle square spring).
I hope you've all learned something here.