


With that rant over here’s the guide.
I decided to write this guide to help a newbie of lock picking take apart a cylinder, re-pin it, and hopefully put it back together. This is one of the fundamental starting blocks, and one that you will know well by the time you succeed in picking your first lock.
Well anyway! After 600+ posts I think I’ve sponged enough off this site, and it’s time to put something back. Without further delay I give you my guide to re-pinning a cylinder lock.
Tools:
You will not require many tools for this task, and should you need to purchase any of the tools they will be very cheap.
You will need:
• A lock (obvious I know)
• A pair of tweezers
• A plug follower
• A cylinder shim (if you don’t have the key for the lock)
• Preferably a key (this saves time instead of shimming it in the first place)
• A key blank for easy shimming, or a lock pick
• Somewhere clear of mess to place the components of the lock
• A pick, or tension wrench to help secure the top pins until the plug follower is inserted
• Preferably a small vice, not obligatory, but will help holding the lock if you need to shim it open.
• Some turpentine, or kerosene to clean up the pins if they are dirty
• A clean cloth (for the above reason)
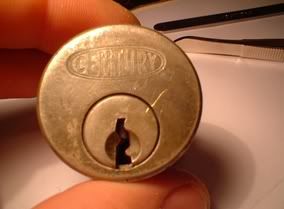
The lock is very straightforward, but if it’s your first time doing it you might prefer to use a shiny clean one, so you don’t have to worry about other things such as sticky pins.
A pair of tweezers is a "must have", and I can’t stress how much you need them. A simple pair will do you fine, a cosmetic pair are the ones I use because they are cheap, and work well enough.
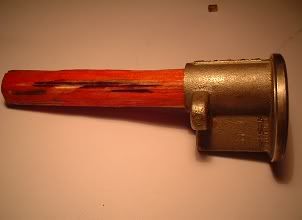
A plug follower, now this is another very useful tool that will become your friend fast should you wish to re-pin regularly. You can buy a set, or alternatively you can make your own. Buying them is straight forward, and involves no explanation, but when you make them things start to become interesting, and you will have a variety of objects to use. Essentially it must be the same size as the plug of the lock, and round. Some improvised plug-followers I have made include:
• A piece of wood carved into shape
• A crayon wrapped in electrical tape (just for you Chrispy
• A toilet roll tube rolled into shape, and taped to hold the shape
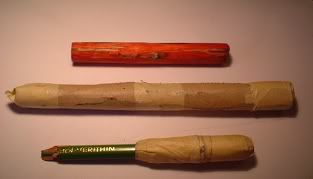
These may seem crude, but work fine and are cheap to make. I would recommend the wooden one because it will hold its shape, and it looks cooler than the others – sorry Chrispy, your crayon-wrapped-in-electrical-tape method just doesn’t stand up to mine
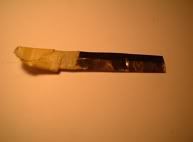
A cylinder shim, now this is generaly easy to obtain. You can buy a set of them, or alternatively you can make them. They can be made out of a can of fizzy drink, and to do this you need to cut a strip just about big enough to keep the top pins in place, yet small enough to be able to jiggle it around in the lock when you’re drawing the key out or lifting the pins with a pick. Please note that shims made from a fizzy drink can, will not be very thin, and won’t work on all locks.
The answer to a thinner shim is not difficult at all, indeed very easy if you are able to get the good favour of someone who works at a local shop. You know the little white strips of plastic you can find on the cases of DVDs or CDs? Well if you cut them open you will be left with 2 pieces of thin metal which are perfect for shimming a cylinder. The one I use was made from a DVD security tag, but I used masking tape on it as a handle after I cut my thumb using it.
The other tools do not need to be discussed, as they are fairly well known, and require no real discussion I feel.
Right with the tools discussed, on to safety!
• A first aid kit is handy for minor cuts you may get as a result of this process, but it will be limited to small cuts so some band-aid will be fine along with some antiseptic spray to keep out infection. Furthermore if you are into aromatherapy or essential oils, then you might want to buy a small tube of Lavender oil to clean up cuts nicely… I’ll stop now before I go into spiritual healing
• Goggles can be used to avoid springs and the like from perhaps flying in your eyes, this is not entirely necessary, but bares considering
• Common sense… if what you are doing seems to have potential to cause injury then don’t do it unprotected.
Finally with all that malarkey out of the way let’s get down to re-pinning a lock!
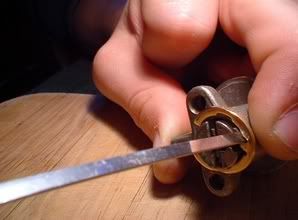
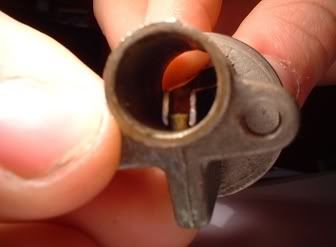
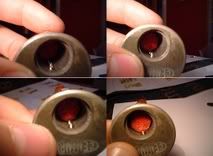
Before you are able to remove the plug from the lock you first need to remove a small circle-like piece of metal that keeps it in place. Anything small enough to fit in and lift it up is fine, there are several tools you can buy, but a tension wrench works well I find.
Once this ring is removed you now have to unlock the cylinder by picking it, shimming it, or simply using the key. Since this isn’t a guide to picking locks, and the method with key is simple I’ll focus on shimming first.
I have already discussed what a shim looks like and how one can be obtained, so this section will discuss the process of shimming the lock.
The easiest way to shim open a lock is to get a key-blank from ALMOST ANY hardware shop. The shim aims to separate the top and bottom pins at the sheer line allowing the plug to rotate and ultimately be pulled out. If the idea of separating the top and bottom pins makes no sense then likely you will do well to read the MIT guide before you carry on. It’s not completely necessary but you may as well learn to pick a lock at the same time as taking one apart.
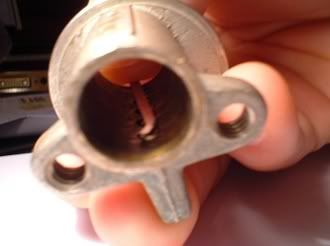
Insert the shim into the back of the lock (can’t do it from the front) and push gently forwards. Slowly pull the key blank out of the lock and constantly push forwards. Eventually the shim will separate all the sets of pins and you will be able to turn the plug easily with your fingers. When you get to this stage, congratulations! – You are ready to move to the next stage. If you don’t have shims then you need to individually lift the pins to the right height with a hook pick – lift them up slowly until the shim is able to move forwards a bit, and keep working until you’re done. I recommend using a vice if you are shimming using picks.
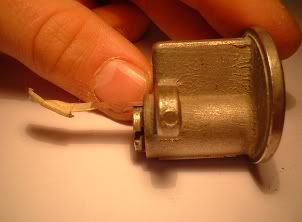
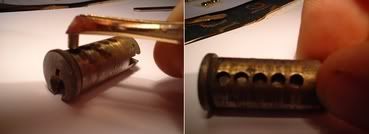
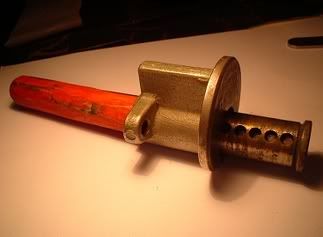
So you have used some pretty nifty skills so far, and the last one to get the lock open is the easiest. Turn the plug about 20 degrees and push it SLOWLY out of the lock housing, make sure you cover up the other hole on the lock so the springs and pins don’t fly anywhere. Once the plug is completely out, tip the cylinder slightly, and let the springs and pins fall out onto your *tidy* workspace.
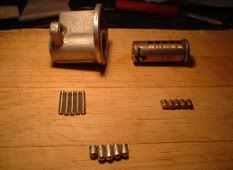
When you take apart the lock you should be left with: 5 top pins, 5 bottom pins, the plug, and the lock housing.
The next process only applies if you are changing the top pins, so if you only wish to change the order of the pins skip this section
Put the springs into the holes, and pick up a top pin with your tweezers. Now you need some practice to get this right, so keep trying – you are aiming to place the top pin on a spring, with your tweezers, and press it down with wither you pick, or your tension wrench.
Once you’ve done this insert your pick and push down the pin with your pick/tension wrench
Finally grab your nifty plug-follower and put it to action! Slide it over the pin, and it will hold the pin down. Now onto the next pins you want to place
Basically follow the last step for the next pin, then the next pin, until you have put them all in place.
So after you cover all the pins in you lock with the plug-follower slide it all the way through.

Congratulations, you have now done the business with the top pins. Time to do the bottom pins!
Take you tweezers and place all the bottom pins in the plug. Yes the order you place them is important!
Now to put the plug back into your lock, you’ve got an easy job left.
Take the plug and turn it about 20 degrees like you did to take it out, and put it against the plug follower. Slowly push the plug follower out with your plug, and keep pushing until the plug follower falls out the back.
Turn the plug back to the neutral position, and you should hear the pins click as they fall back into place. Well done indeed, because if you’re still reading this far, and know what I’m talking about then I guess you’ve been successful. Well done!
Thank you for reading my guide and I hope that you picked something useful up along the way. I tried to make this as fun as possible, and if I help some newbie’s settle into this hobby more easily, then all the better!
Illusion.
