Lock Picking 101 Forum
A community dedicated to the fun and ethical hobby of lock picking.
       

Lock Picking 101 Home
Login
Profile
Members
Forum Rules
Frequent Forum Questions
SEARCH
View New Posts
View Active Topics


Live Chat on Discord
LP101 Forum Chat
Keypicking Forum Chat
Reddit r/lockpicking Chat


Learn How to Pick Locks
FAQs & General Questions
Got Beginner Questions?
Pick-Fu [Intermediate Level]


Ask a Locksmith
This Old Lock
This Old Safe
What Lock Should I Buy?


Hardware
Locks
Lock Patents
Lock Picks
Lock Bumping
Lock Impressioning
Lock Pick Guns, Snappers
European Locks & Picks
The Machine Shop
The Open Source Lock
Handcuffs


Member Spotlight
Member Introductions
Member Lock Collections
Member Social Media


Off Topic
General Chatter
Other Puzzles


Locksmith Business Info
Training & Licensing
Running a Business
Keyways & Key Blanks
Key Machines
Master Keyed Systems
Closers and Crash Bars
Life Safety Compliance
Electronic Locks & Access
Locksmith Supplies
Locksmith Lounge


Buy Sell Trade
Buy - Sell - Trade
It came from Ebay!


Advanced Topics
Membership Information
Special Access Required:
High Security Locks
Vending Locks
Advanced Lock Pick Tools
Bypass Techniques
Safes & Safe Locks
Automotive Entry & Tools
Advanced Buy/Sell/Trade


Locksport Groups
Locksport Local
Chapter President's Office
Locksport Board Room
 

master no.22 disassemble

Picked all the easy locks and want to step up your game? Further your lock picking techniques, exchange pro tips, videos, lessons, and develop your skills here.

master no.22 disassemble

Postby subnoizchild024 » 15 Jan 2007 14:51

i was going to take this lock apart just for my own curiosity, but i decided id take pictures and share it will all of u guys.

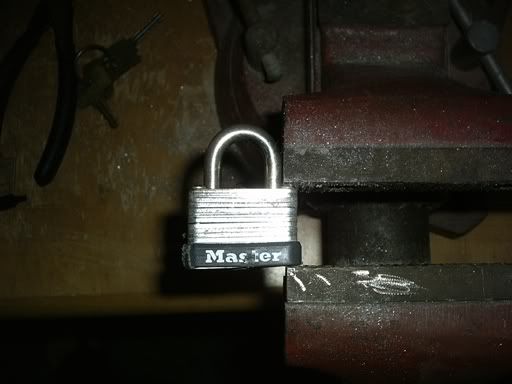
this is the first time ive made a guide so let me get some feedback on it.

master no. 22

Image


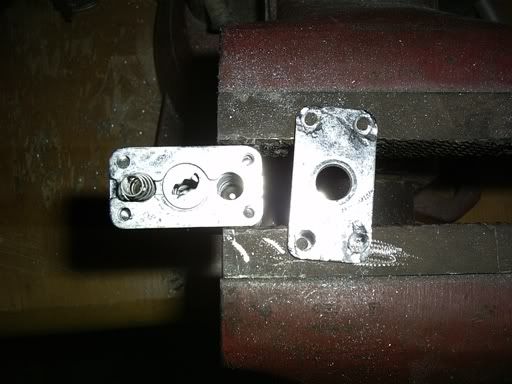
1st step: use a drimel tool and drimel down all four of the dimples

Image

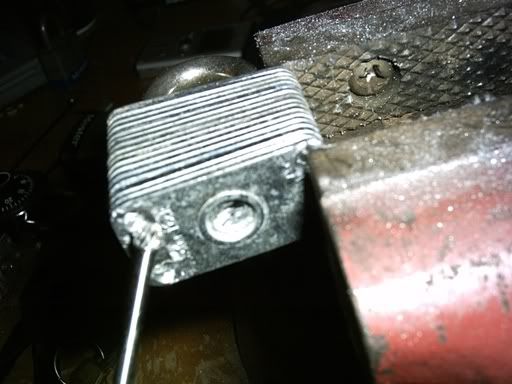
All the dimples drimeled down:

Image

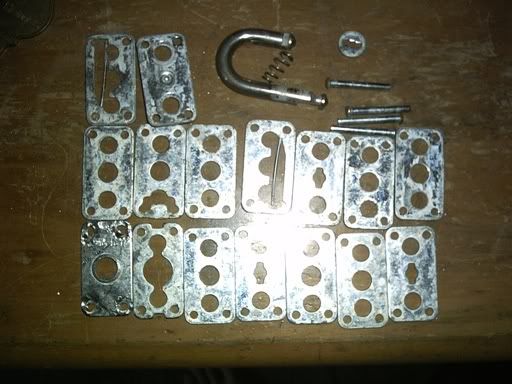
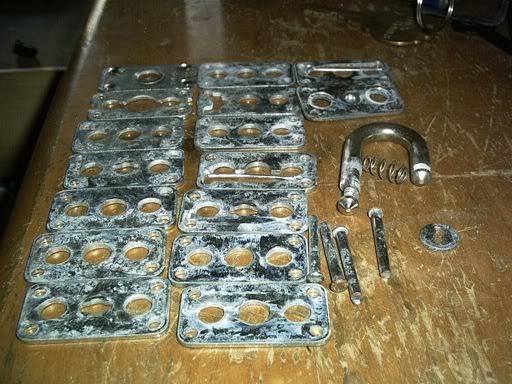
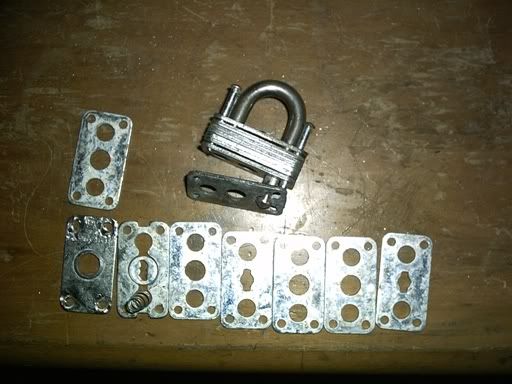
Step 2: start pulling the plates off. remove the spring and disk from 2nd plate.

Image

the 9th plate is what holds the shackle from coming out of the lock when it is open, so u have to pull the pins out some to get the 9th plate at the right angle to get it off.

Image

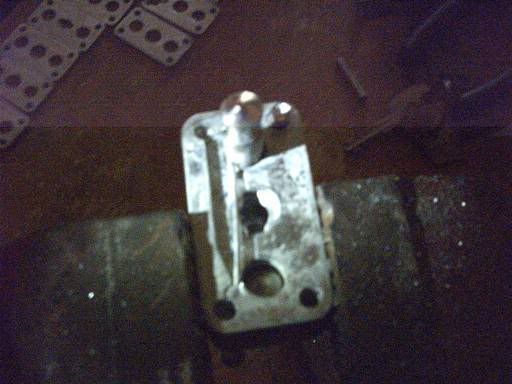
A few plates later ull get to the first lokcing mechanism. it is just a wire that gets pushed into a grove cut in the shakle. to get this plate off just pull the little wire thing back and lift.

Image

Then on the penultimate plate u will find the 2nd and last locking mechanism. just pull the wire back and lift.
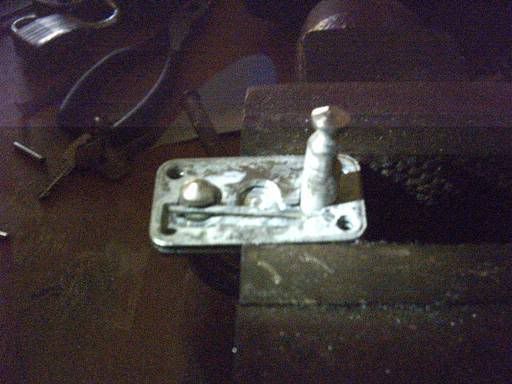
Image

And there u have it

Image

Image
"KEY!! Dude I am the Key"
subnoizchild024
 
Posts: 24
Joined: 24 Oct 2006 14:21
Location: Oceanside, California (the best place on Earth)

Postby UWSDWF » 15 Jan 2007 15:05

that poor cheap warded padlock never had a chance against a big meanie with a vice and a dremel. :lol:
Image
DISCLAIMER:repeating anything written in the above post may result in dismemberment,arrest,drug and/or alcohol use,scars,injury,death, and midget obsession.
UWSDWF
Supporter
Supporter
 
Posts: 4786
Joined: 27 May 2006 13:01
Location: Toronto, ON. Canada

Postby JackNco » 15 Jan 2007 20:29

Very nice, ive been attacking a master No3 with a hand file to achieve the same sort of thing. ill post pics of that up when ive got the little sod open.

Nice job BTW

John
Image
JackNco
 
Posts: 3149
Joined: 14 Apr 2006 12:26
Location: Coventry. UK

caliper

Postby raimundo » 16 Jan 2007 14:08

if you have a caliper, check the thickness of the lamina which have the spings attached and then check the thickness of the lamina which are used only for wards, on some of these locks the plates which are fitted with the springs are wider, in some cases this is even visible, and can help if you are outside the lock and want to know how deep the locking plate is inside of it. also, would have been nice to know how many lamina are between the two plates with the locking springs, this is the dimension that you need to make a double t pick for these locks, some of them have two lamina between the locking plates, and some have three so a set of doublecrossed t picks would come with two dimensions between the crossbars of the doublecrossed t
Your project is not done until you have used the data from the lamina width and etc to make a simple pass key pick.
raimundo
 
Posts: 7130
Joined: 21 Apr 2004 9:02
Location: Minnneapolis

Postby subnoizchild024 » 16 Jan 2007 22:32

yea thats true. i do have a caliper so i will meausre out the laminas and let u know the what i find out. In the arieal view of the lock laid out all apart, if u go from left to right start from bottom and go up thats the order i pulled them off in, so u can see there were 3 plates in between the locking springs

-Andrew
"KEY!! Dude I am the Key"
subnoizchild024
 
Posts: 24
Joined: 24 Oct 2006 14:21
Location: Oceanside, California (the best place on Earth)

to make a pick

Postby raimundo » 17 Jan 2007 13:16

to make a pick, you will need a flat file, called a warding file, you will want to make a double T pick, with two crossbars and there should be room to pass the three lamina between the crossbars, there is no need for a centering point on the tip, just the crossbars, and the arms of the crossbars, should not be thicker than the lamina that had the sping in it.
I know that there are other locks that use only two lamina between the pieces with the locking springs.
raimundo
 
Posts: 7130
Joined: 21 Apr 2004 9:02
Location: Minnneapolis

masterlock 22

Postby little_john » 29 Jan 2007 19:14

i made 2 t style picks out of hacksaw blades and taped them together(double thick) because it seemed like it wasnt thick enough
little_john
 
Posts: 9
Joined: 23 Dec 2006 7:03

22

Postby little_john » 29 Jan 2007 19:16

actually it was a double t
little_john
 
Posts: 9
Joined: 23 Dec 2006 7:03


Return to Pick-Fu [Intermediate Skill Level]

Who is online

Users browsing this forum: No registered users and 5 guests