Before grinding on the step in the door jamb, look closely at how tight the gap is on the outside of the bottom of the door. Depending how much it is binding, removing that material may cause it to bind in another place or if the gap at the bottom of the door is tight (looks that way in one picture) it could start to rub.
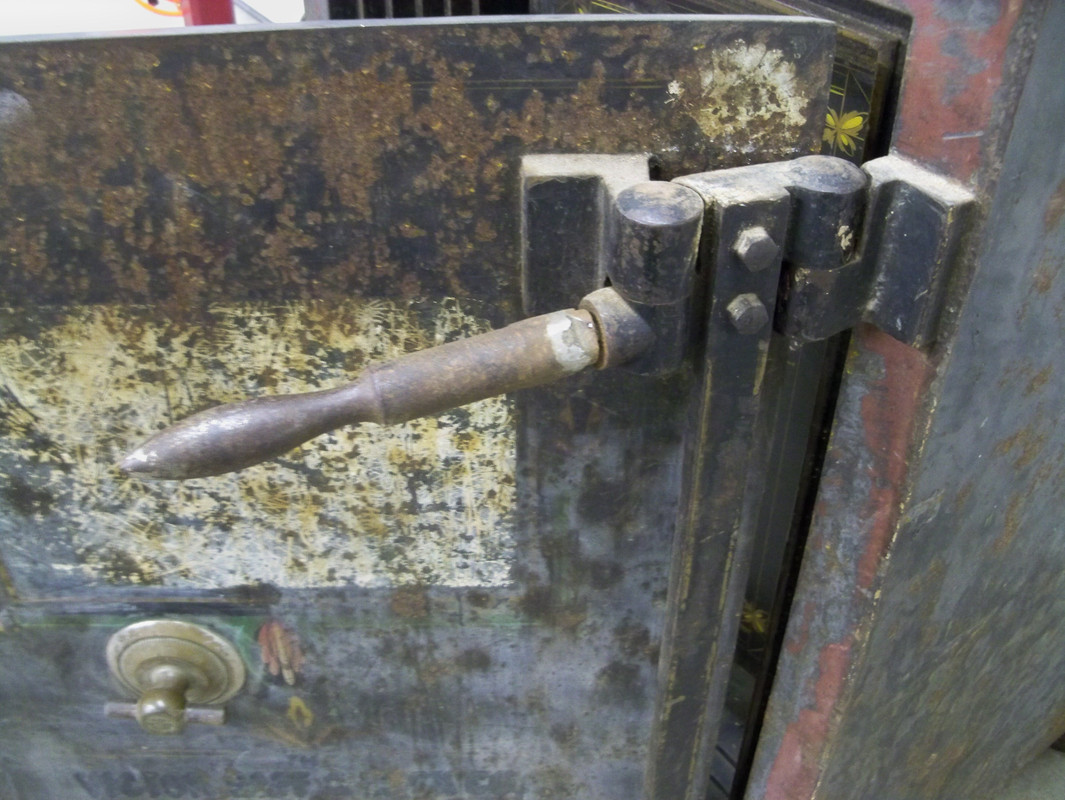
Have you tried lifting the door on the hinge pins? If it moves I might try slipping in some temporary shim material on the pin to get the door to close properly. Once that is accomplished, I would close the door shimming it in that position on the bottom and on the right side above the bottom hinge making sure the door is secure The door part of the bottom hinge looks like it would then come off and you can inspect for wear at the hinge pin and also remove that moving part that is in the safe body side of the hinge. That is a good point, maybe shimming could be done there. That is the way it looks in Gordon's pictures. I am curious how that moving piece is supported in there.
Something one has to consider is whether there was any adjustment made at the factory for door fitting or whether the hinge parts were hand fitted to each safe which is usually the case. Thus all the parts of the safe having matching numbers. Shimming just the bottom hinge would then have it carrying all the weight of the door, but it may have been that way from the factory. The top hinge seems to be a little different so some detailed investigation is in order as it is hard to see everything or anticipate problems as a keyboard warrior.
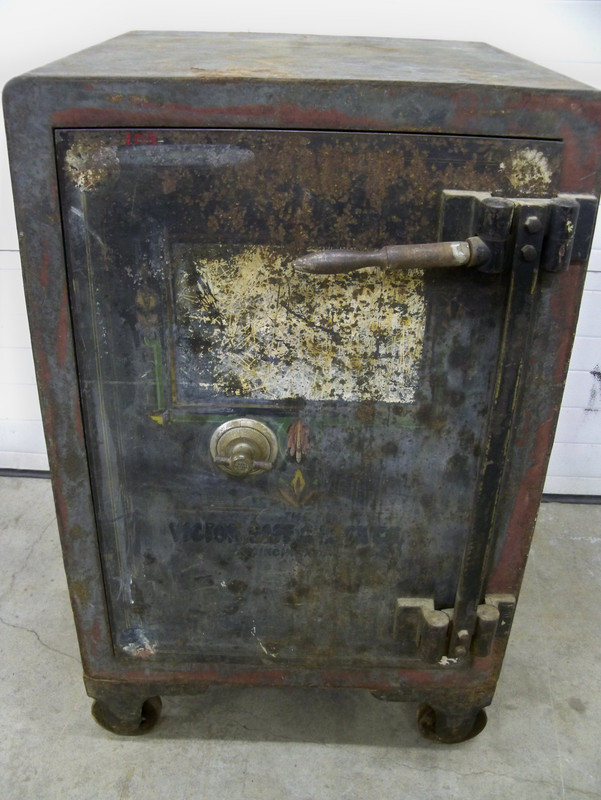
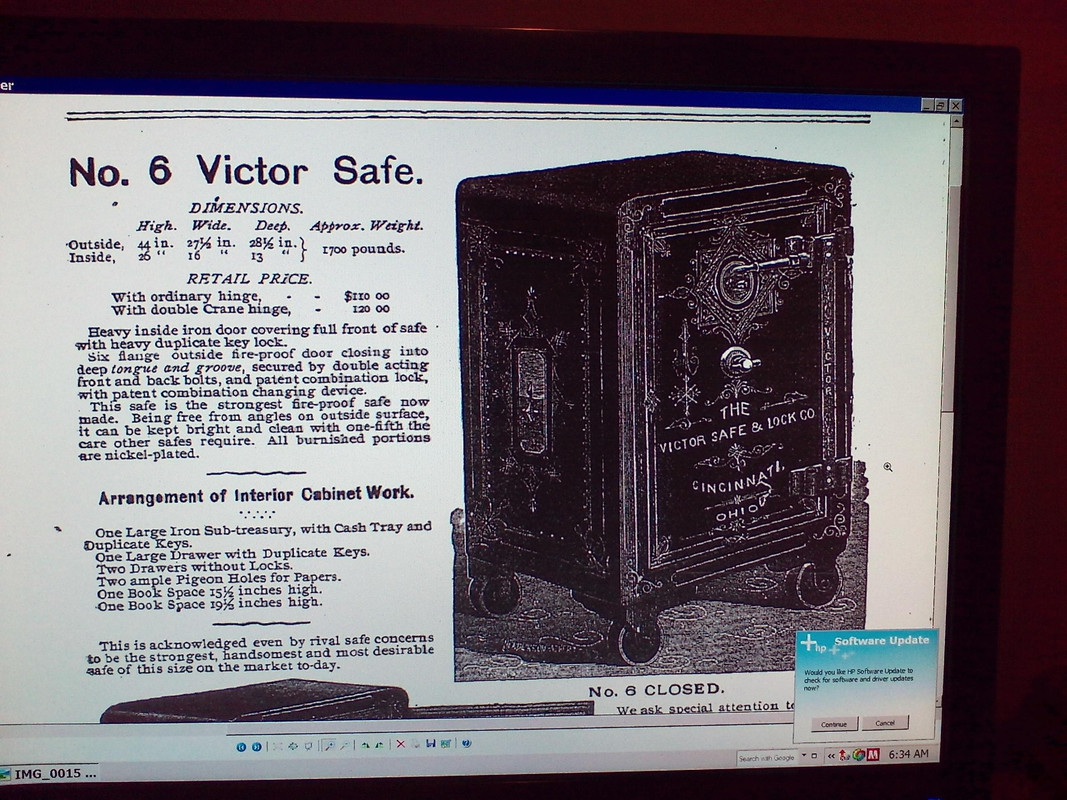
On a different note, I find this approach that Hall's took to imitate a crane hinge not the greatest design. I have a #6 Victor safe with the $10 optional crane hinge. It is better in the sense that it doesn't have hidden internal moving parts. It doesn't have a pressure bar. This is not the answer either in my opinion as the door is somewhat cumbersome to operate. Both designs are high on the cool factor chart though!