|
Forgot how to dial the combination on that old safe? Think you got the right numbers but the handle is stuck? What safe should you buy? Ask your safe questions here!
Forum rules
You are posting this in This Old Safe, a public area of the forum.
Safe manipulation discussion is allowed, but safe drilling or other destructive entry is only allowed in the Advanced - Safes and Safe Locks area.
If you are a guest of the forum and have a safe you need to open, but you do not have the combination, we cannot tell you how or where to drill it.
 by GWiens2001 » 15 Jan 2015 7:55 by GWiens2001 » 15 Jan 2015 7:55
Have to admit, am quite impressed. Squelchtone, have to say that you passed the test with flying colors.  You truly are master of Google-Fu. This grasshopper learn much from you.  Well, got all the leaves, detritus, and loose rust out of the safe. Had to lube the hinges a little to get the door swinging better. Definitely have to get the door off to work on the boltwork. Getting the door off was not as hard as I expected.   All I had to do was spray some lube on the hinge pins and slowly swing the door open and closed about five or six times to get it swinging freely, then POP! 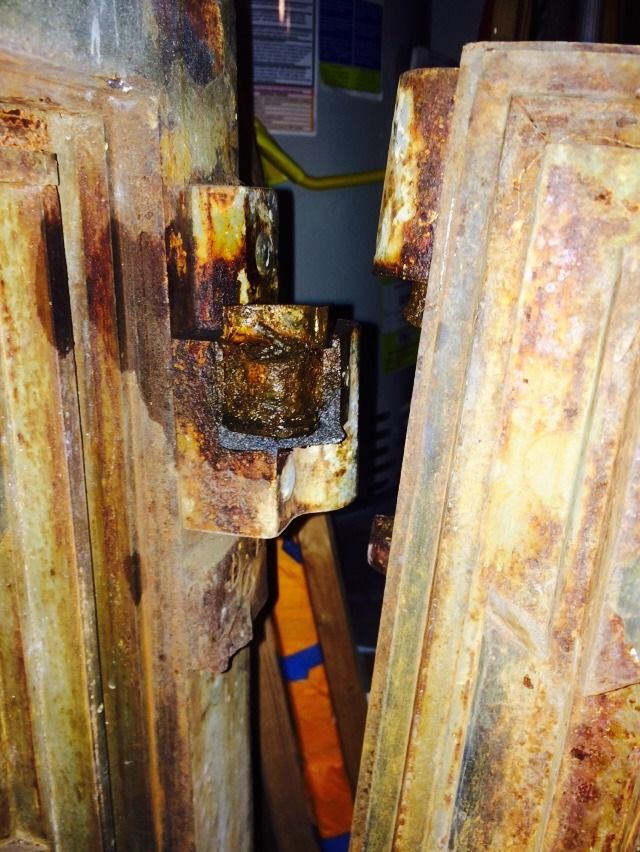  %#@)*$)@&#_%&@#%))#$*@  Very quickly put my floor jack under the sagging edge of the door and then started bringing around wood to support it and keep it from tipping outward, forward or backward. Carefully kept using the jack to lift the door until it cleared the lower hinge pin. Then carefully adjusted the wood supports to lower it down onto the inside of the door onto the wood. Then used the floor jack to lift the wood and maneuver the door to the side of the safe. Put down to large blocks , lowered the lower edge of the blocks, then used the jack to lift the upper end of the door as high as the jack would go. Then used long 2x4's (long pieces of wood) to lever the top edge of the door up vertically, then to a slight tip inwards, allowing it to rest on the side of the safe. And there was no way I could have lifted even one edge of the safe door upward without the jack or levers. Can now EASILY believe that the safe door is the 600 pounds estimated. Sorry, no pictures of the process of removing the door or moving it into place. Was more worried for my safety in an emergency door removal.  Now will have to find a hinge or have one made.  Any suggestions on where I can get a hinge or have one made? From the start, have known there would be hiccups with this project. And never once thought this safe could be sold for a profit. This is a challenge for me, and am planning to continue freeing up the boltwork and getting it working again. But at least the door is off the hinges! Will continue with my original plans, which is to spend the next week or two spraying the bolts and fasteners with rust penetrant before trying to remove them. Gordon Just when you finally think you have learned it all, that is when you learn that you don't know anything yet.
-

GWiens2001
- Site Admin
-
- Posts: 7659
- Joined: 3 Sep 2012 16:24
- Location: Arizona, United States
by femurat » 15 Jan 2015 8:03
You ran a big risk man! Who would have tough a hinge could break? This project looks fun, but a very long one. I'm sure you'll enjoy it thoroughly! Cheers 
-

femurat
- Site Admin
-
- Posts: 3770
- Joined: 22 Sep 2008 9:06
- Location: Italy
by GWiens2001 » 15 Jan 2015 8:17
Expected this to be a year-long project from the start. (Not including waiting 10 months to get it here). Can't really expect there to be no problems in a job like this. Was planning spraying rust penetrant for a week or two before trying to remove any parts at all.
Gordon
Just when you finally think you have learned it all, that is when you learn that you don't know anything yet.
-
GWiens2001
- Site Admin
-
- Posts: 7659
- Joined: 3 Sep 2012 16:24
- Location: Arizona, United States
by Doogs » 18 Jan 2015 21:21
Looks like you have a bit of work ahead of you Gordon. You're far more motivated than I am I can see that. Can't wait to see the progress so I'm gonna be following this thread with enthusiasm.
-
Doogs
-
- Posts: 13
- Joined: 21 Oct 2014 22:36
by blue60 » 18 Jan 2015 23:31
Gordon depending on the size of the part you need (and material) if you get me drawings I will take a crack at making you a hinge 
-

blue60
- Moderator
-
- Posts: 385
- Joined: 4 Jan 2014 18:59
- Location: Toronto, Ontario, Canada
-
by GWiens2001 » 27 Jan 2015 20:42
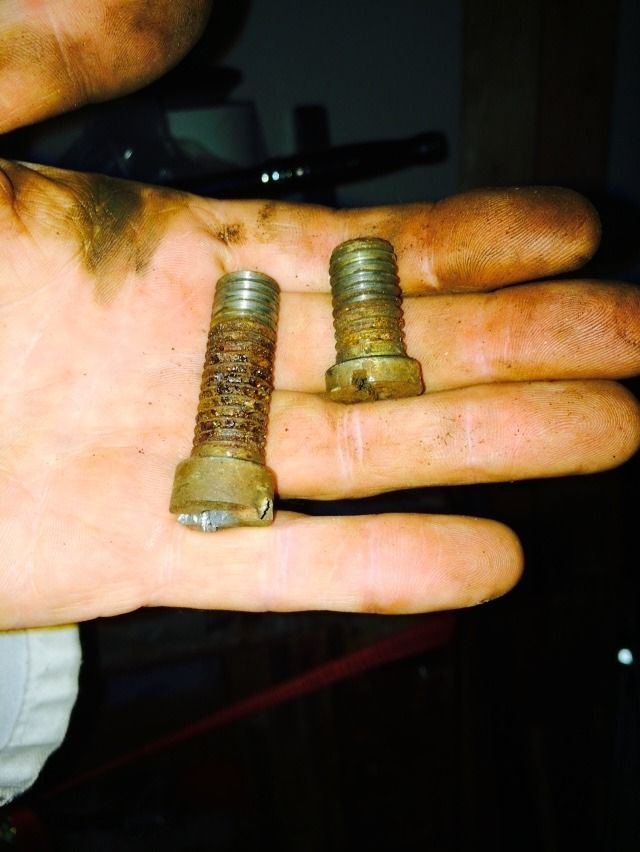
Update for Hall Safe Project NOTE: Please keep in mind that my terminology and techniques are likely in need of improvement. This is my first big safe project, and am not any kind of expert on safes. If you have corrections, suggestions or advise, please feel free to post them. Have a lot to learn, and welcome input. It's been just over two weeks now, and there has been significant progress made. Far more than expected. After three or four days of brushing on rust penetrant (bought a gallon can of the stuff), was able to easily remove the four screws that hold on the back cover of the door. 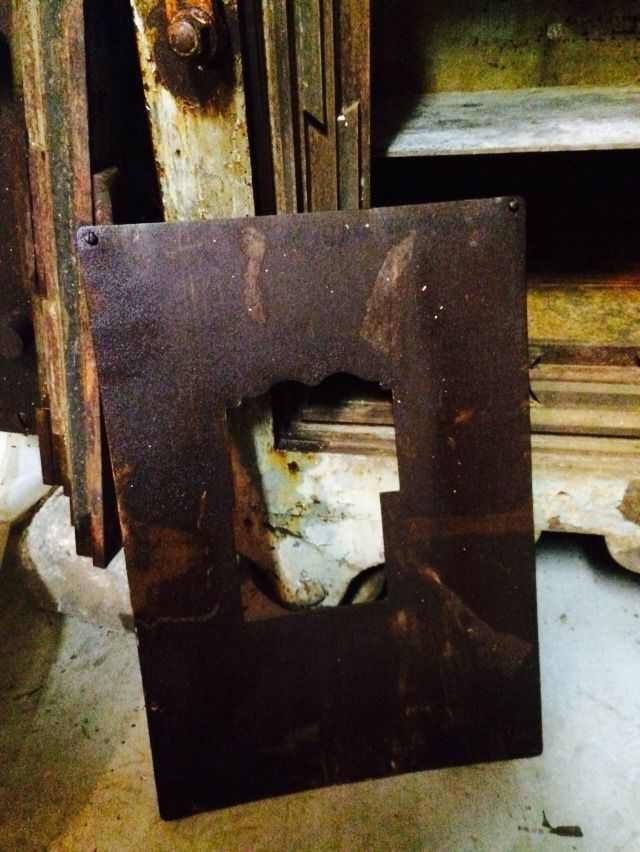 Now the bolt carriers, locking bolts, linkages and so forth can be seen. It is easy to see that the rust penetrant will be getting some heavy usage. At the top and bottom of the open area in the center of the door, you can see a square block (top one is bevelled) that each of the side bolts fit into. That is what keeps the inner end of the locking bolts aligned. The hole goes all the way through that block, and both bolts are drawn in to the center of that block when the safe is unlocked. 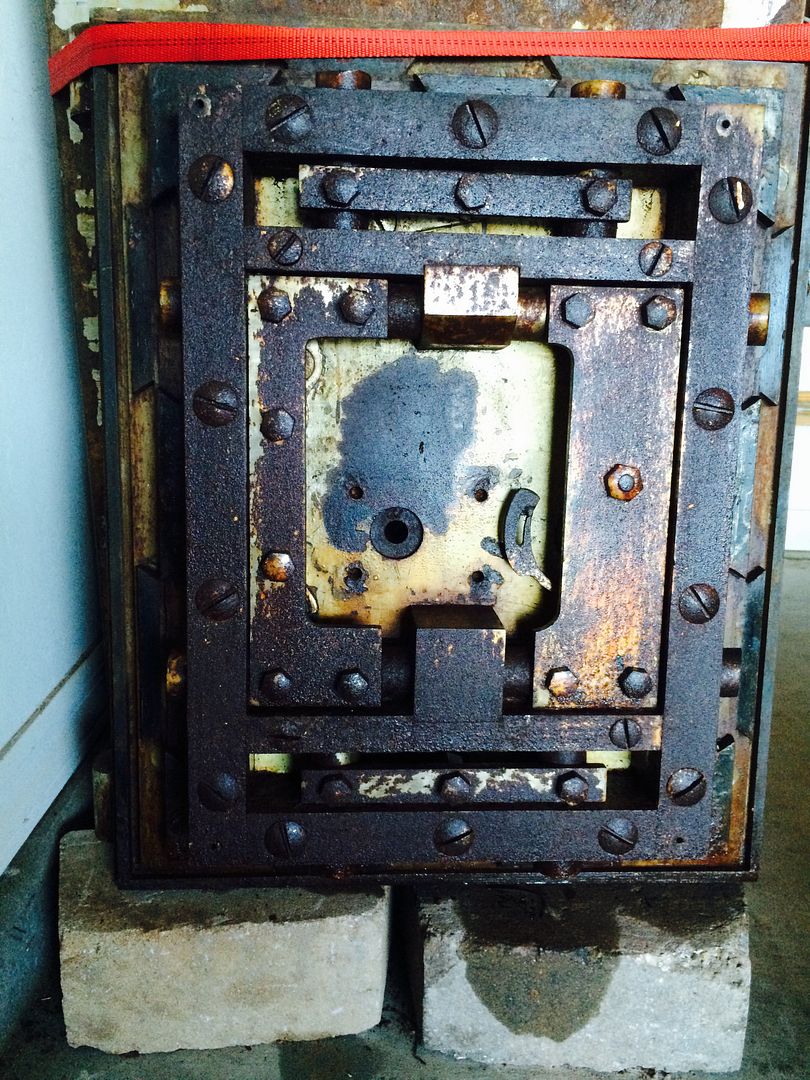 There are 'screws' that hold the framework the bolts ride inside, if screws is the correct term. These 'screws' are like a slotted screwdriver, except the larger ones are 1 1/8" (2,86 cm) across. 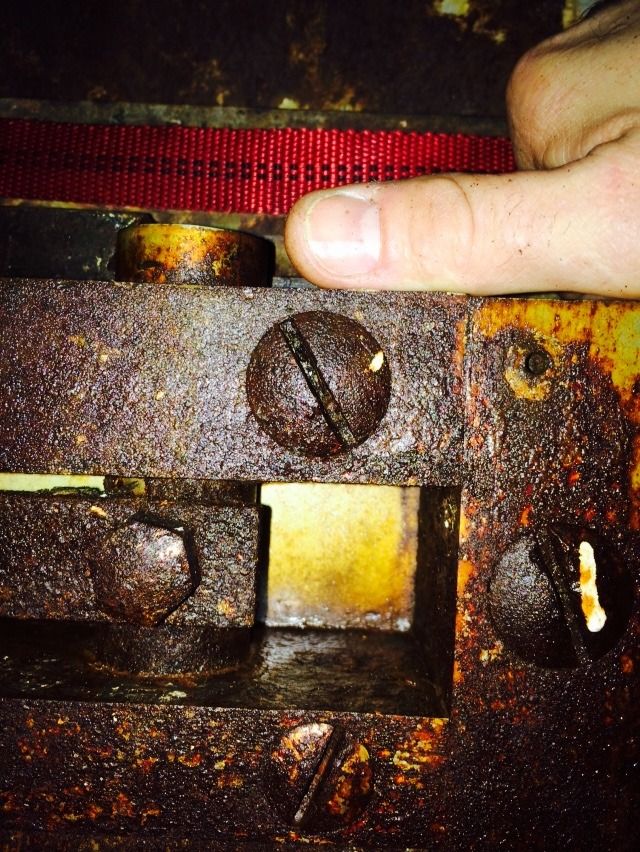 The bolt carriers (large heavy plates that the locking bolts are attached to) use bolts that have 3/4" (19mm) heads on them. There are two in each of the side locking bolts, and one in each of the top and bottom locking bolts. 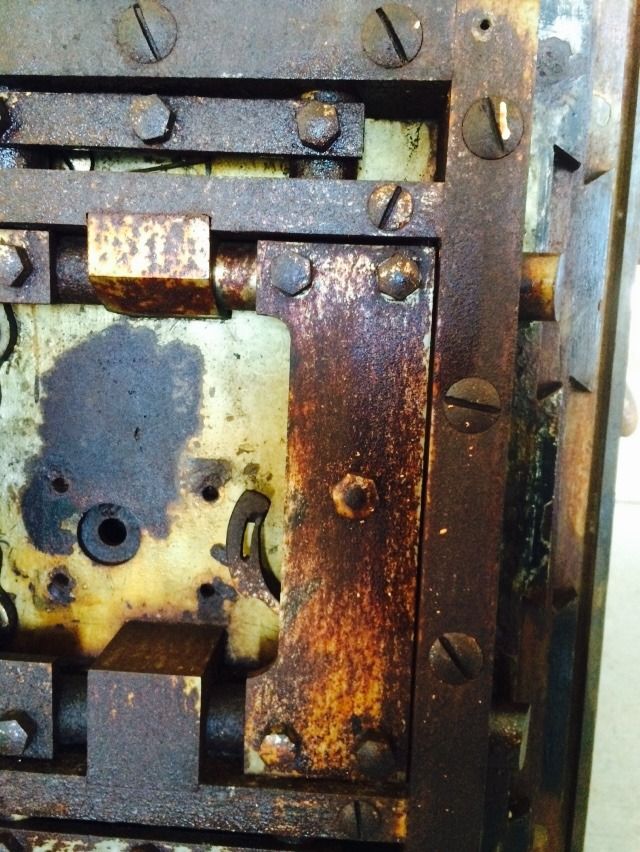 Another couple days of putting on rust penetrant, and finally decided to try removing the (screw type) bolts from the locking bolt carriers. The side locking bolt carriers, as stated before, have two (screw type) bolts. The outer one is short, while the inner one is longer, with a non-threaded section past the threaded section. The shorter bolt only holds the carrier to the locking bolt. The longer one holds the carrier to the locking bolt, but the unthreaded portion goes further through and fits into a slot in the linkage. That is how the carriers are moved when the handle is turned. Top right 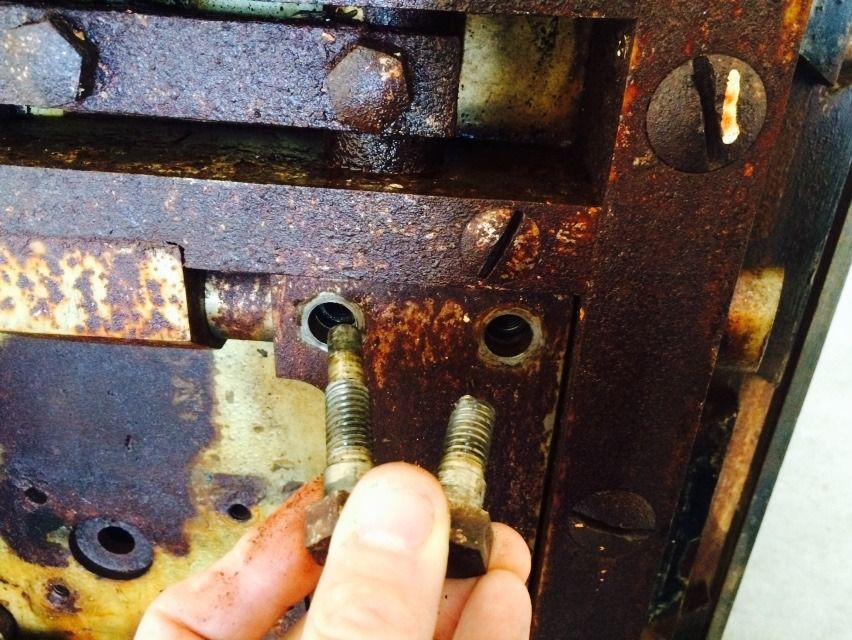 Bottom right 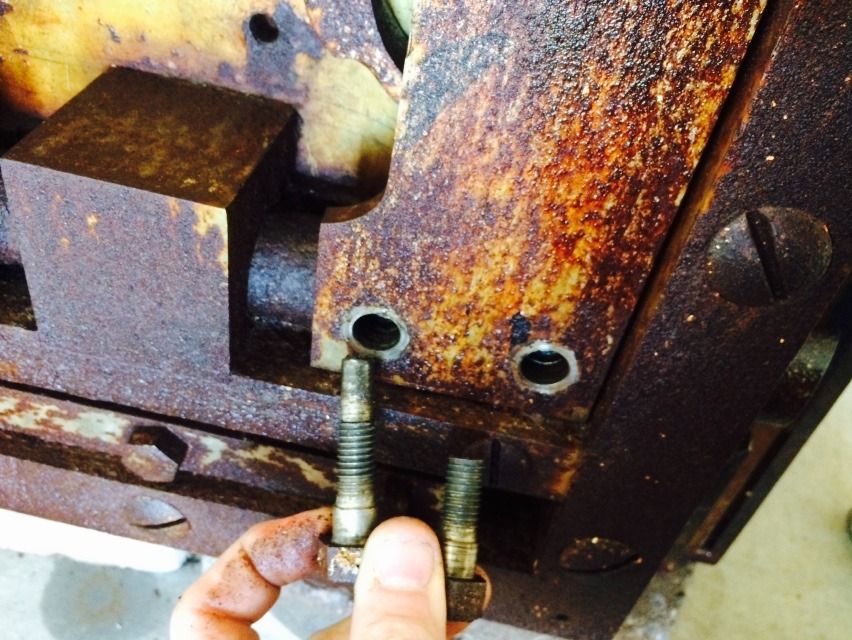 Removing the right bolt carrier 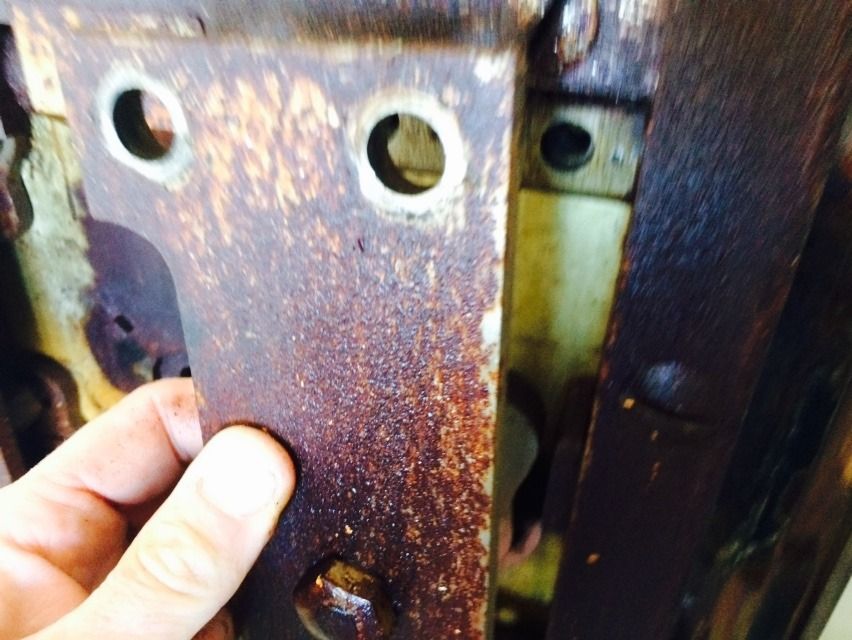 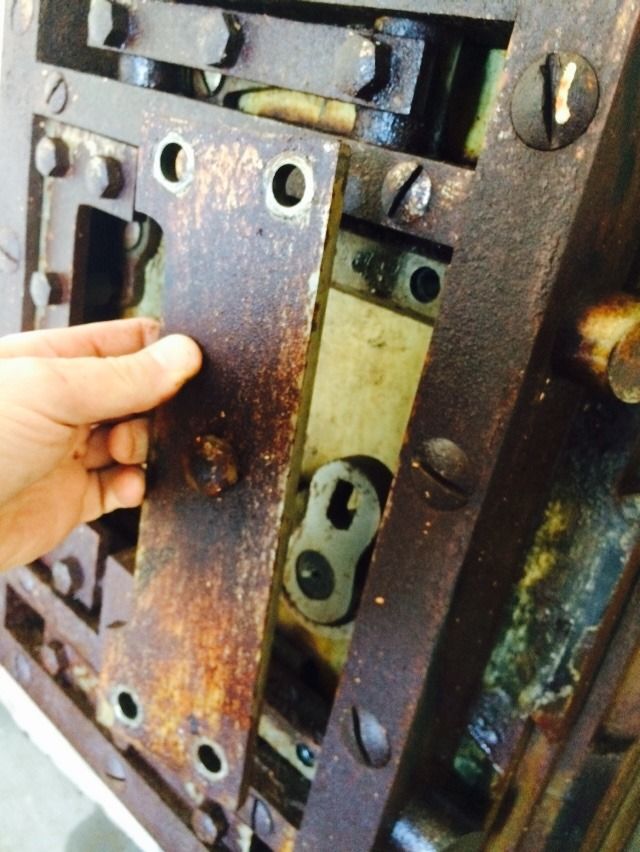 Note the center (screw type) 'bolt' is left in place in the carrier. It is not needed to be removed for disassembly, as all it does is fit into the slot for the linkage. 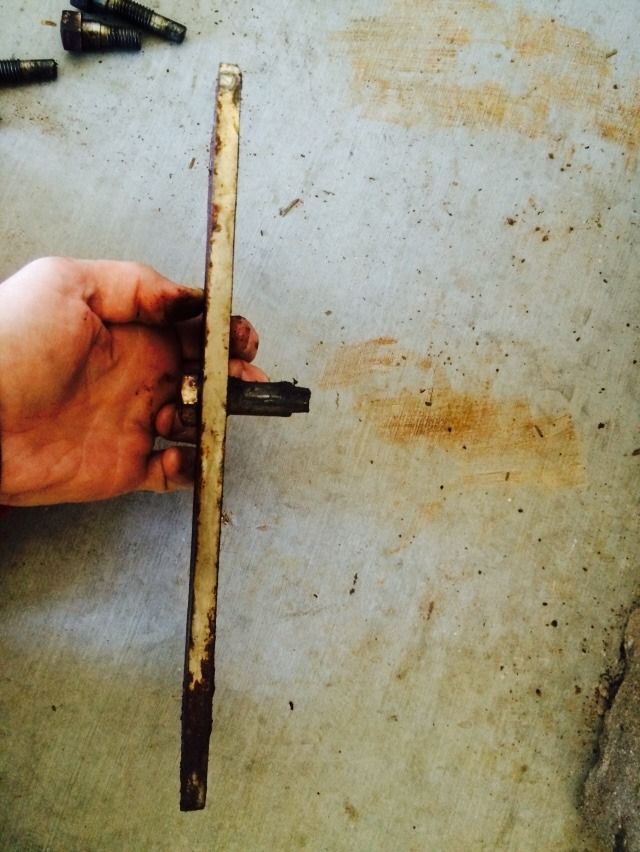 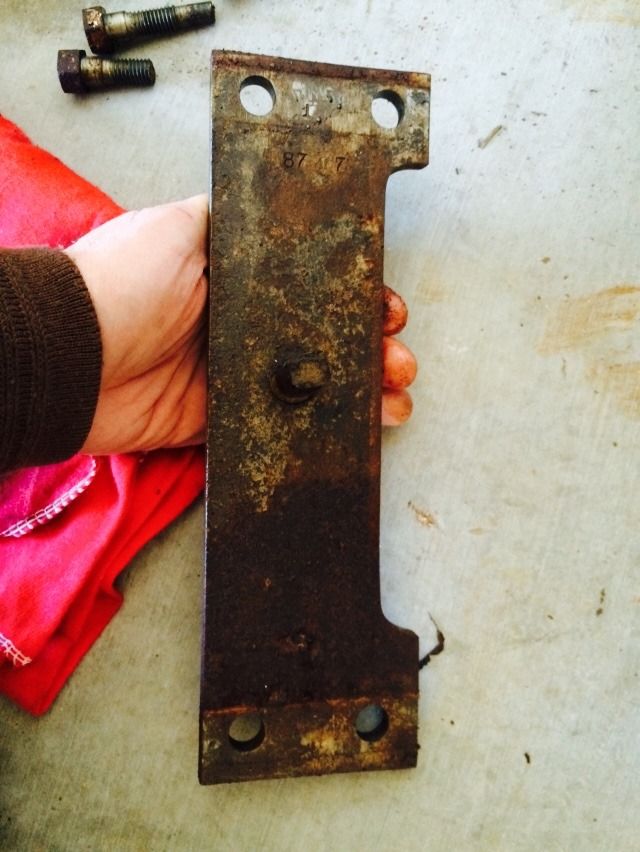 Here is the cam on the inside of the door that the handle turns. 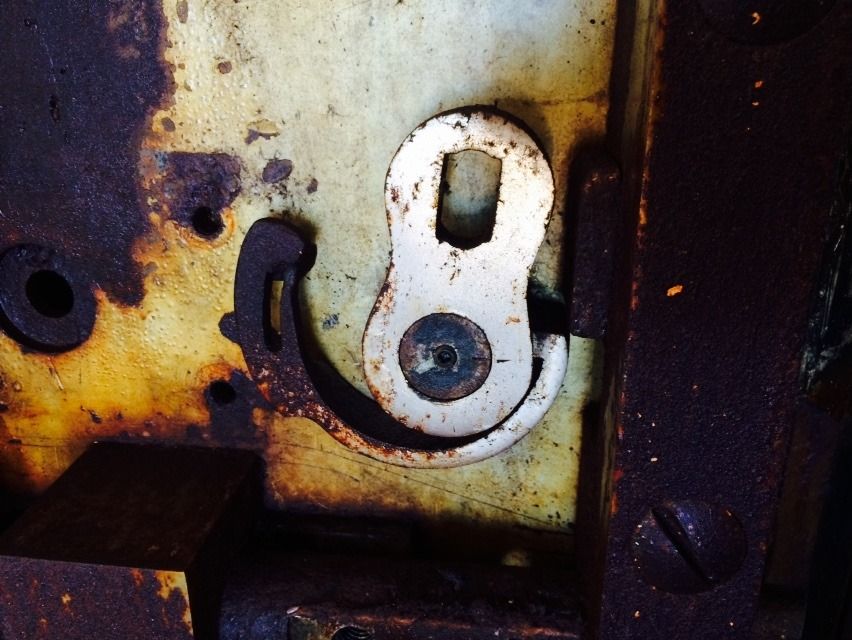 The side of that circular piece that is closest to the spindle hole has a cutout for the safe lock bolt. That is what keeps the handle from being turned if the safe lock has not been opened. Each of the locking bolts have a four digit number (matched to serial number of the safe, I think) and dot(s). The dots show the location of the bolt. They are numbered (*), (**), (***) and (****). The short locking bolts are for the top and bottom of the door, the longer ones are for the sides of the door. Right side of door, upper bolt. 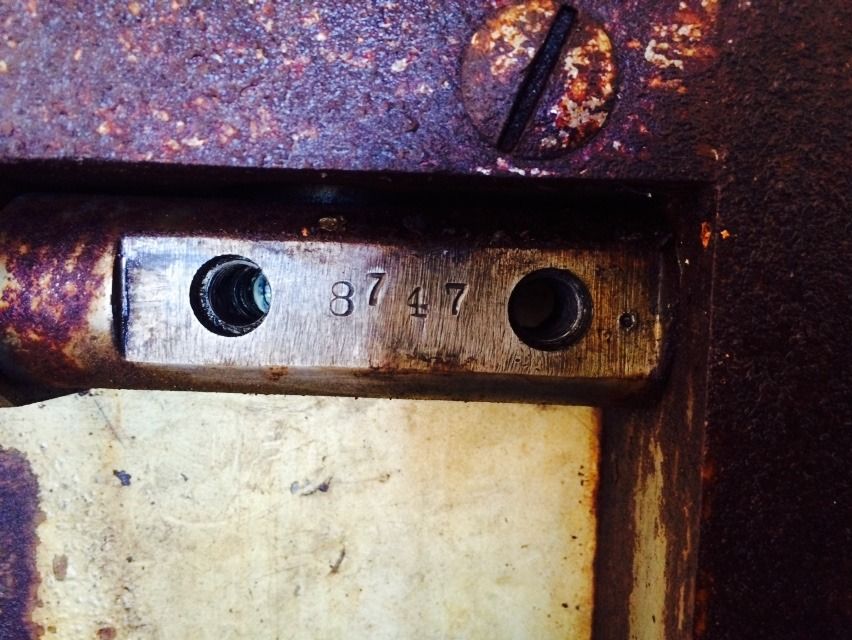 Right side of door, lower bolt.  Left side of door, upper bolt has three dots, left side of door has four dots. For the top and bottom bolts, one dot is top right, two dots is top left, three is bottom right and four is bottom left. Left and right is as viewed from the inside side of the door. Getting the locking bolts out. This is a chore, especially with the lower bolts that were heavily rusted. In the next couple of pictures, you will see pictures that were posed, using the bolts that originally held the bolt carriers to the locking bolt. This would be a bad idea if someone actually did it. I used grade 8 bolts of the proper diameter and thread pitch. But used the original bolts for the pictures. First, spend a few days (about a week for me) adding rust penetrant to every moving part, and especially on the locking bolts. Then put a grade 8 bolt in one of the bolt holes and tap (yes, TAP) it outwards, then inwards, switching back and forth, adding more rust penetrant frequently. 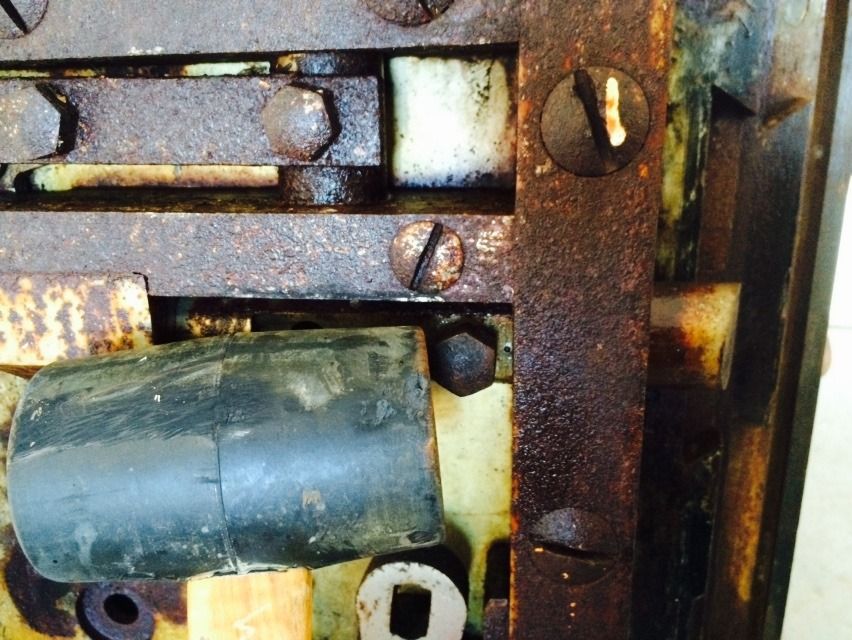 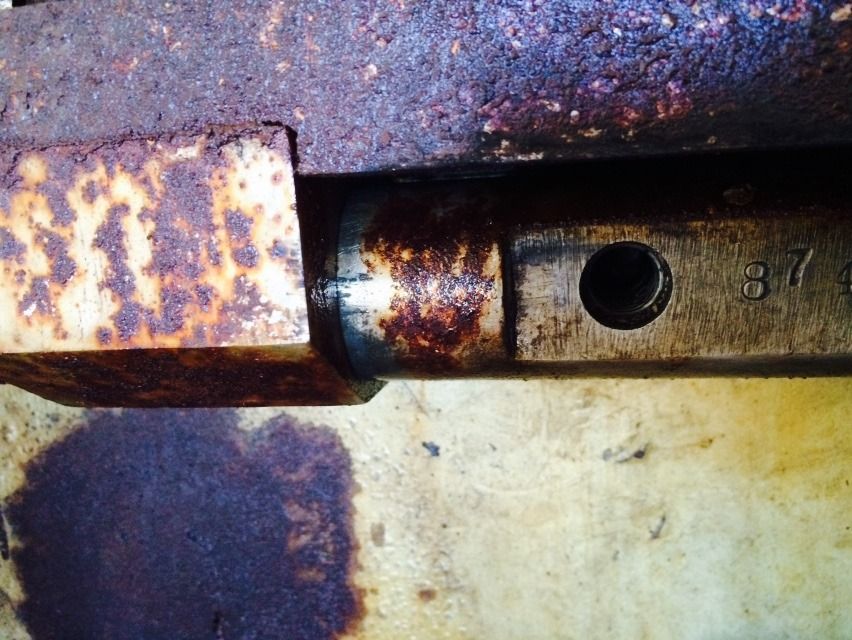 Once it is moving, you can also start rotating the locking bolt as well as moving it in and out. 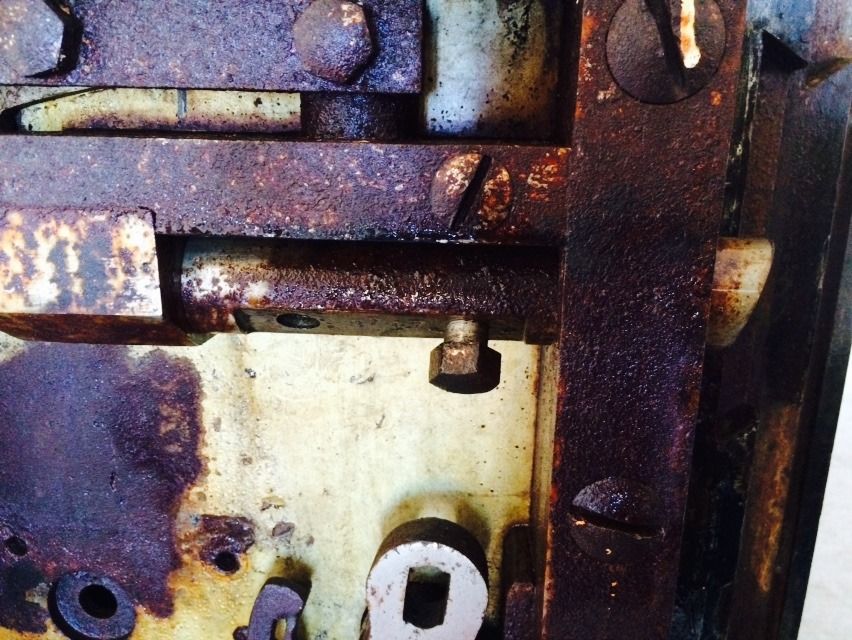 Eventually, the bolt will start moving freely and come out! 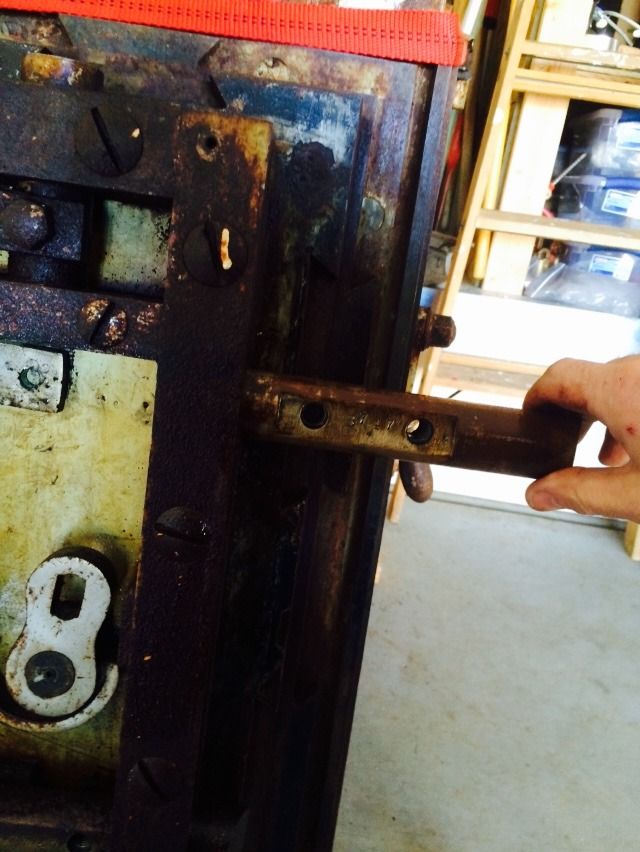 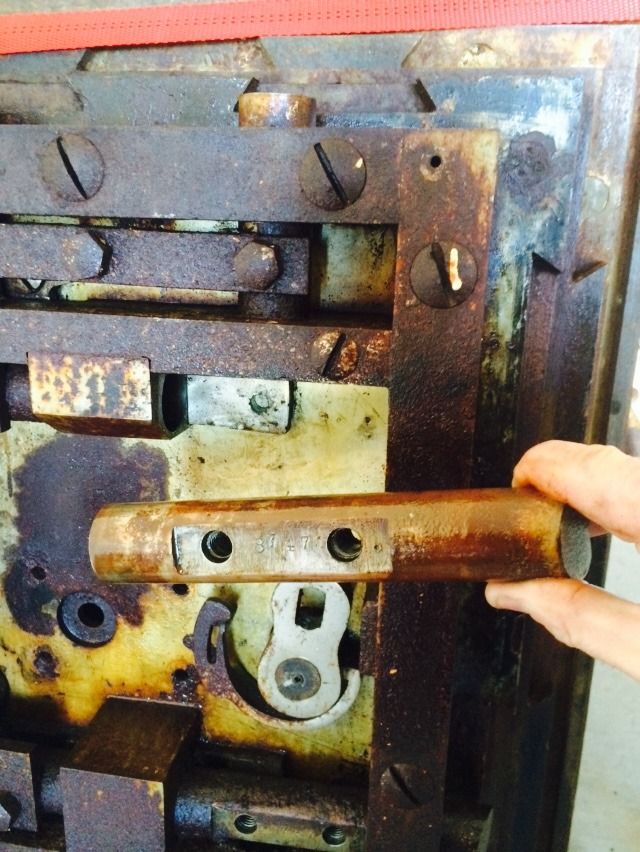 Sometimes the rust is very very thick, so emery cloth used with rust penetrant can help.  So the project to date... 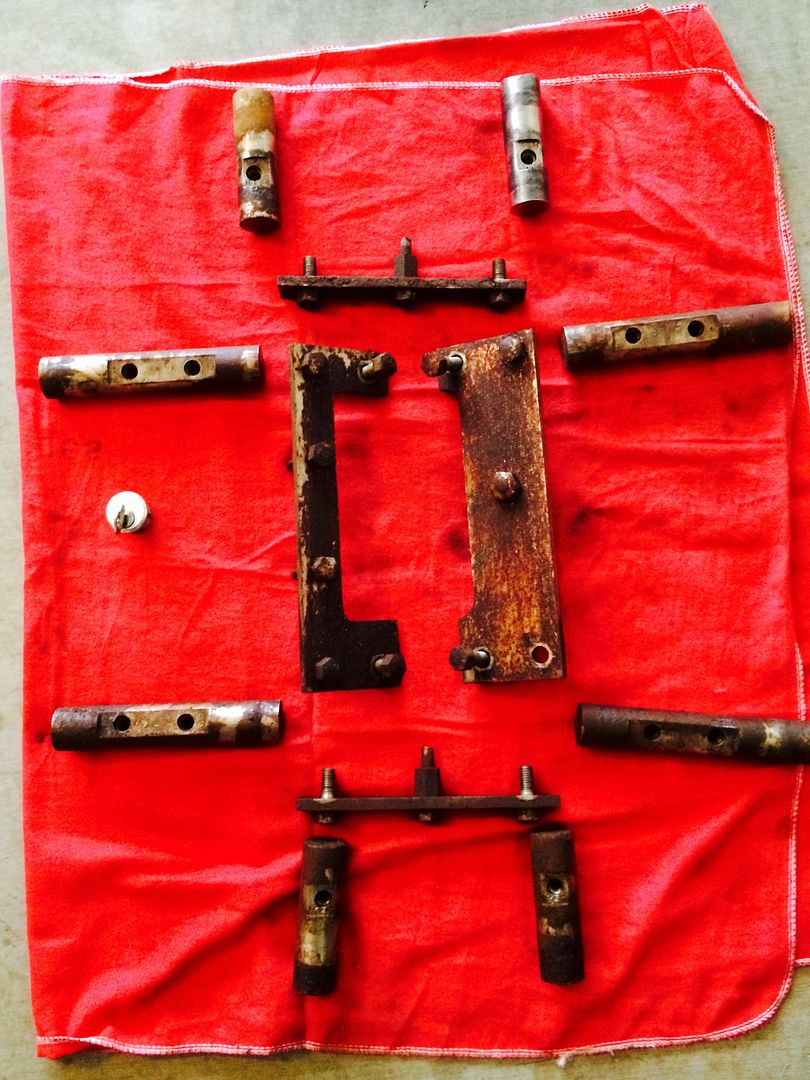 That small silver circle on the center left in the above picture? That is a standard mortise cylinder with a key, put into the picture for scale. The locking bolt on the top right has been run through a wire wheel to remove the heavy rust in this picture. As of this morning, both of the top locking bolts and both of the bottom bolts have had that process done. Hope to get the other four locking bolts wire-wheeled tomorrow. And the inside of the door with the locking bolts and bolt carriers removed, alllowing you to see the linkage: 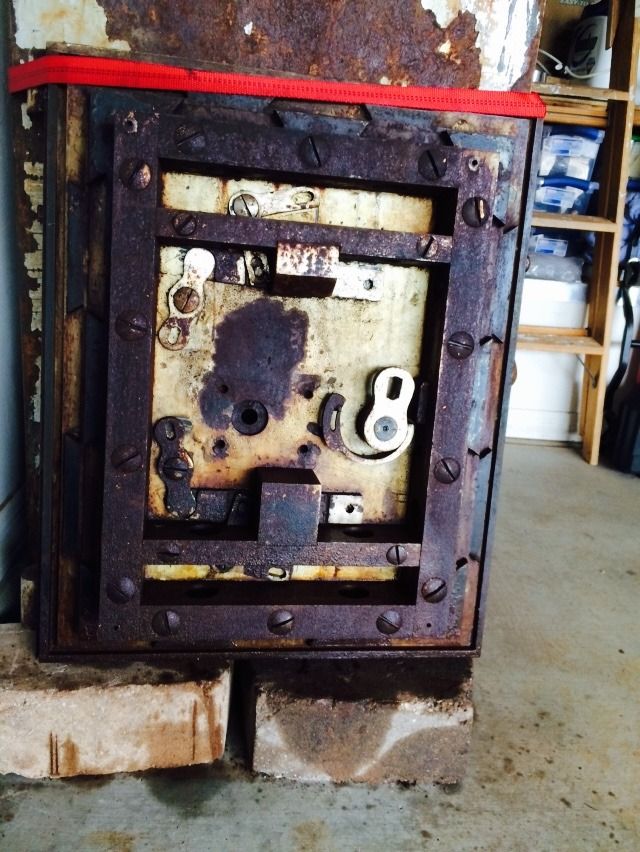 Next update will show better pictures of the linkage. Just no time to add those photos right now. Just when you finally think you have learned it all, that is when you learn that you don't know anything yet.
-
GWiens2001
- Site Admin
-
- Posts: 7659
- Joined: 3 Sep 2012 16:24
- Location: Arizona, United States
by billdeserthills » 27 Jan 2015 21:41
What beautiful precision, too bad you can't chuck up those round parts in the lathe
-
billdeserthills
-
- Posts: 3871
- Joined: 19 Mar 2014 21:11
- Location: Arizona
by GWiens2001 » 29 Jan 2015 17:24
Now for the promised linkage pictures. Where my thumb is, the linkage is all the way outward, and in the lower section, the linkage is all the way down. This is the locked position. 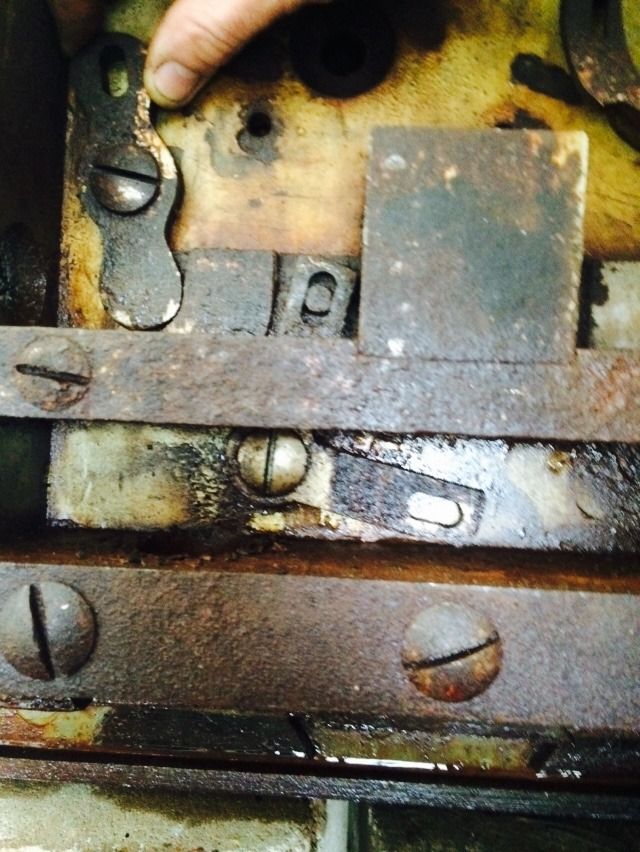 And moved inward, through pivots and lever action, the lower section raises. So this is unlocked. 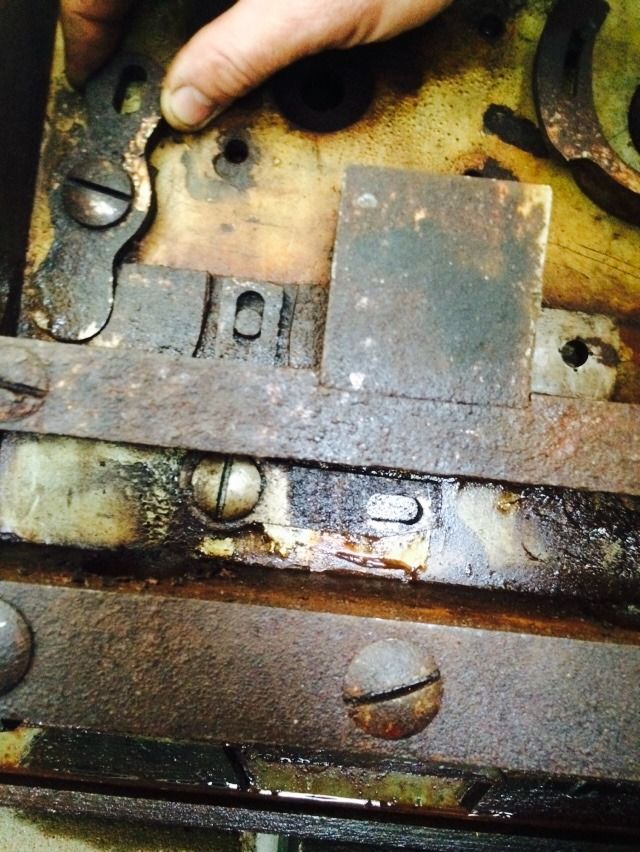 Upper linkage, locked position. 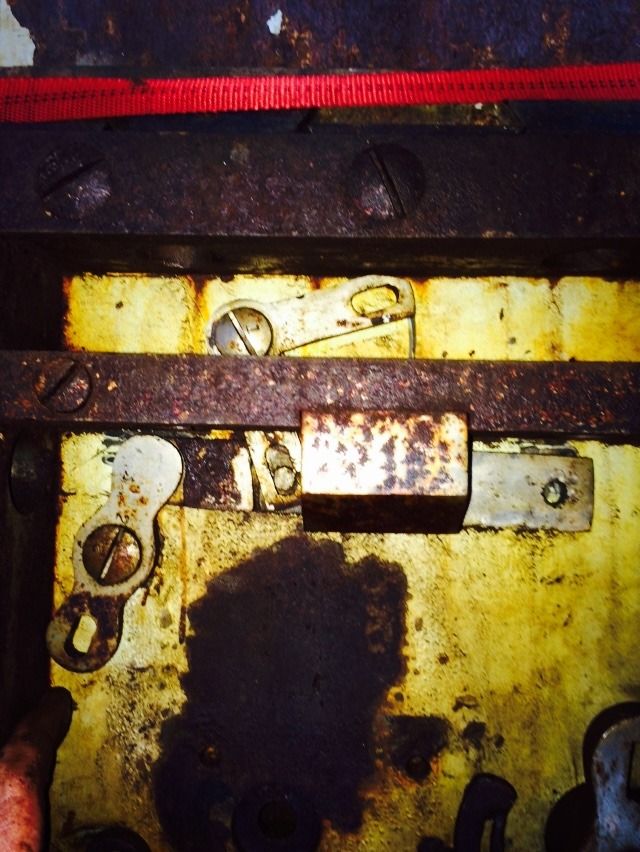 Upper linkage, unlocked position. 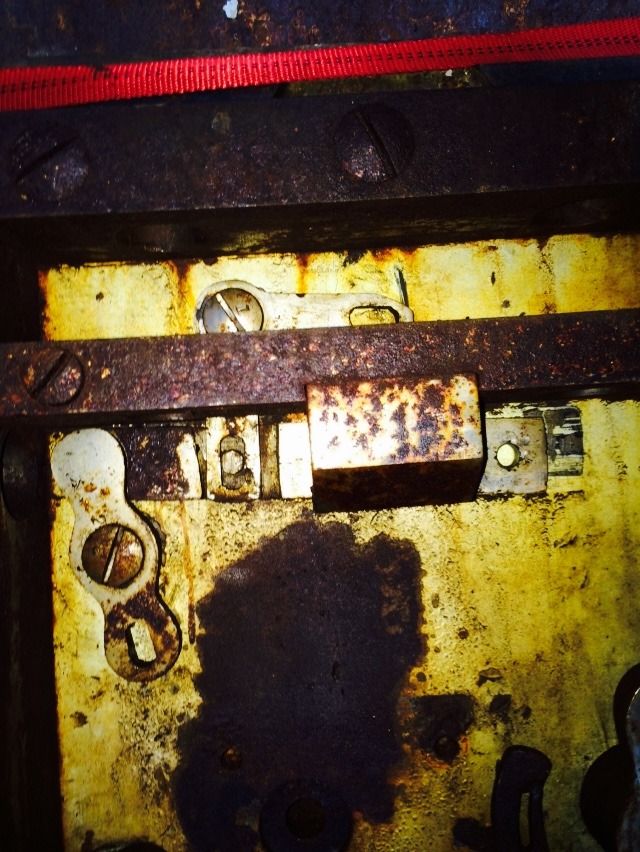 This is the cam on the back of the handle shaft. The hole at the top holds the peg from the right bolt carrier. 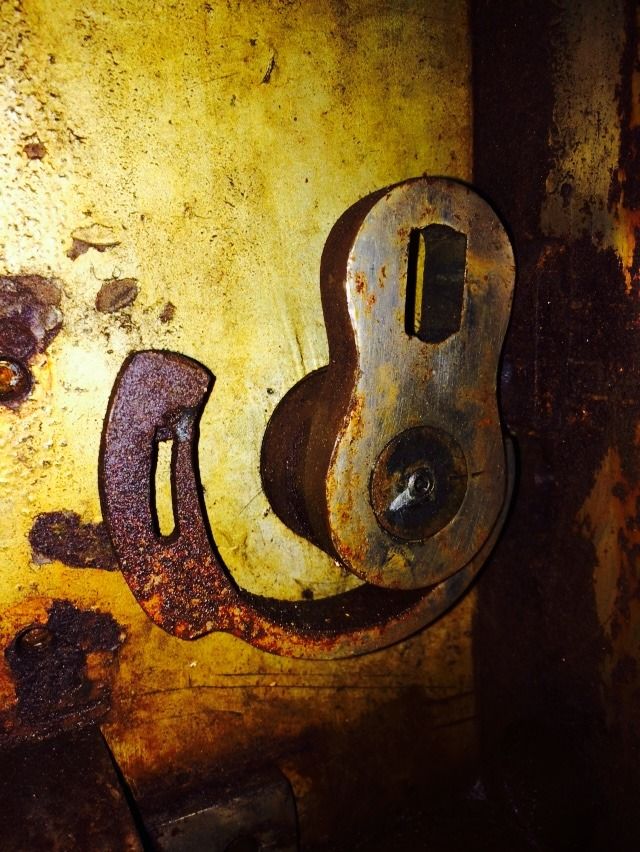 Back to the lower linkage. If you look at the right side of the linkage, there is a hole in it. 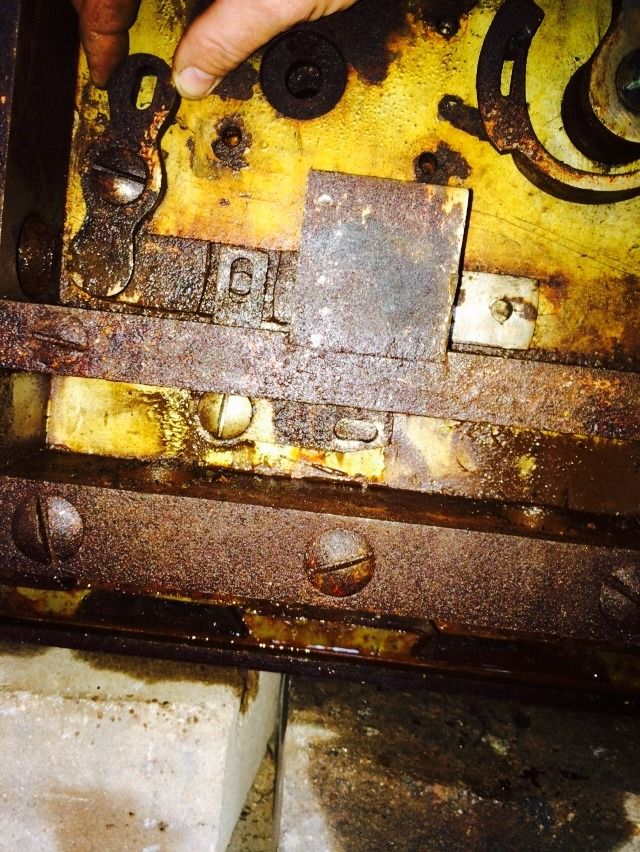 Both the top and bottom have that hole in the right side of the linkage. Remember the mismatched (screw type) bolts that hold the bolt carrier to the locking bolts? The longer bolt with no threads at the end goes through the bolt carrier, through the locking bolt, and into this hole. So when the handle is turned, the cam directly moves the right bolt carrier. The bolts (one on the top linkage and one on the bottom linkage) then move the linkage, which in turn moves the left, top, and right bolt carriers. Simple, efficient, solid and pretty darn rugged. The slow parts of work today allowed me to do some parts cleaning and straightening. Started with the bolt carriers. Used a wire wheel and/or a zip disc on an angle grinder to take off the heavy rust. Even found more detail than I expected. Here are the two side bolt carriers, one of which has been cleaned off. The one that is cleaned off goes on the left side of the safe. These are upside-down so you can see the detail of the dots and numbers on the cleaned one. 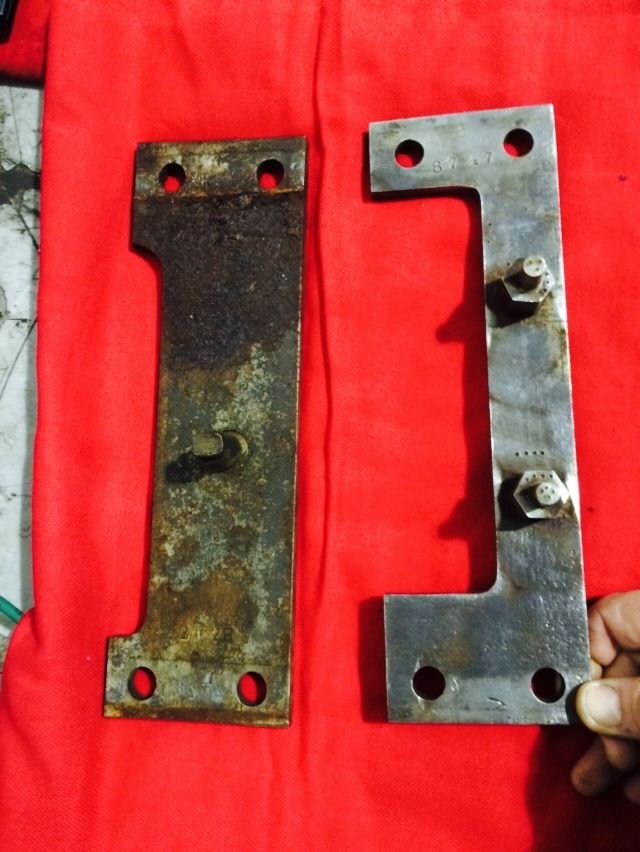 Remember the dots on the locking bolts? Well it is easy to tell what bolt goes where on the carriers! 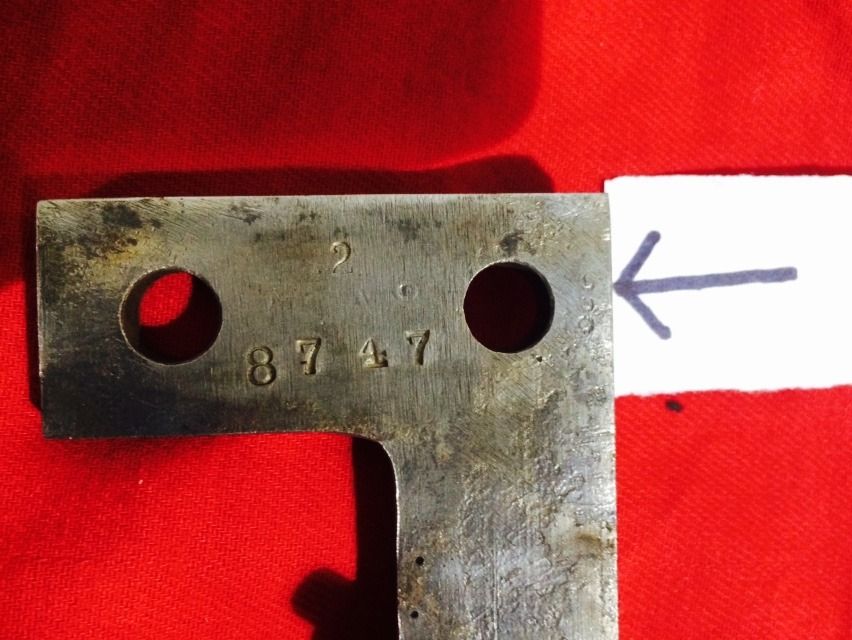 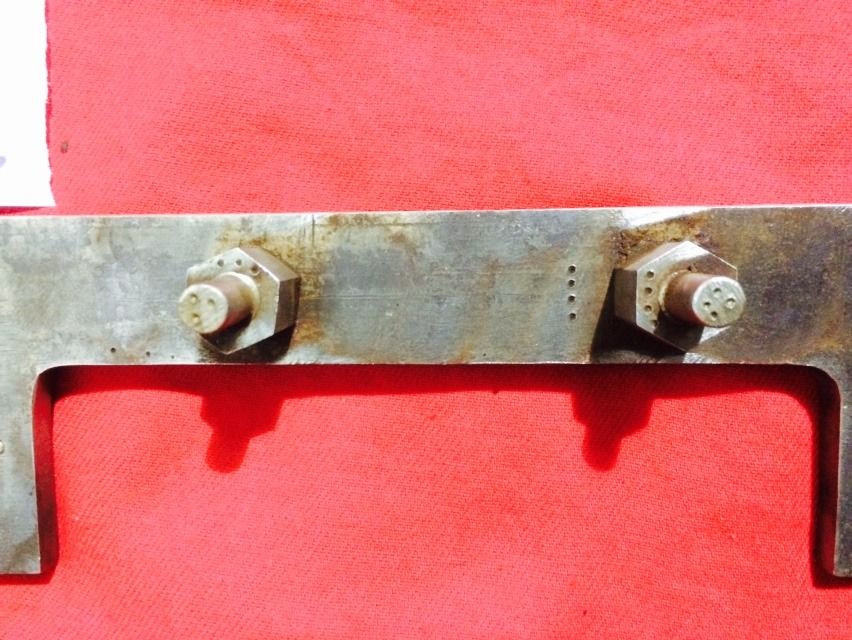 Looking at the side, and under some areas of the rust, it looks that these carriers were plated with a shiny metal. Chrome? Maybe once I have everything working (and a hinge made), maybe will send out the carriers and linkage to have them chromed. Will have to think about it. 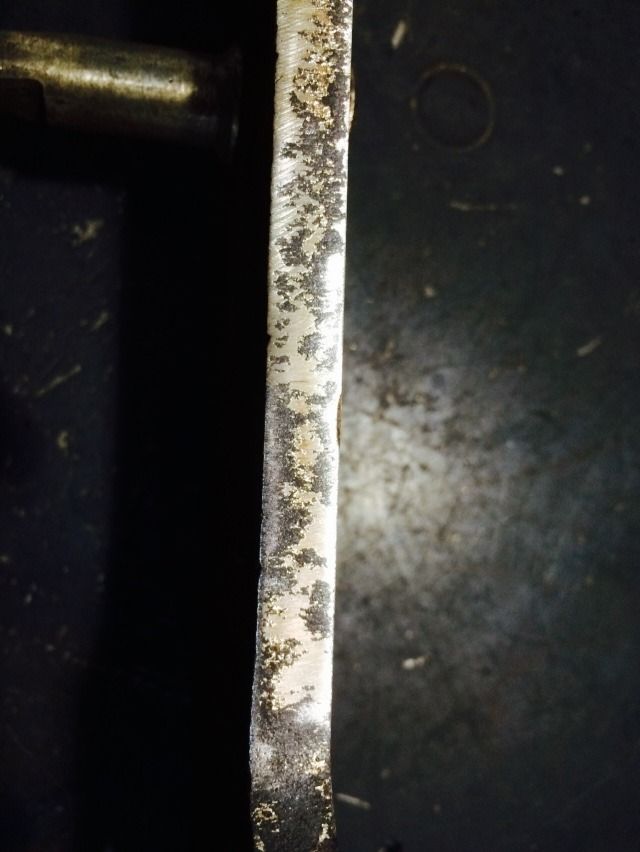 Next, decided it was time to get the rust off the door back cover. Started with a wire brush. Also note that the back cover is bent. We will deal with that shortly. 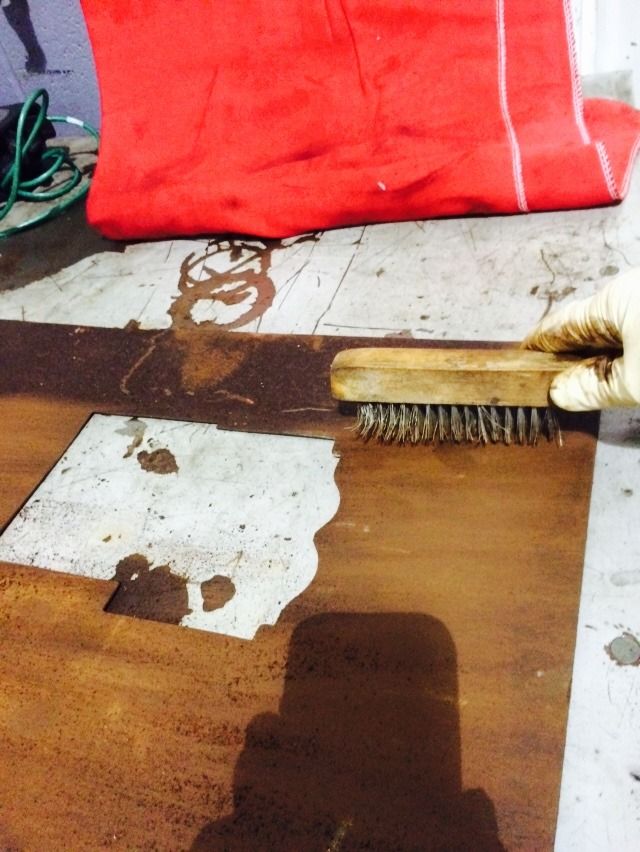 A little work with a brillo-type zip disc, and it is nice and clean. 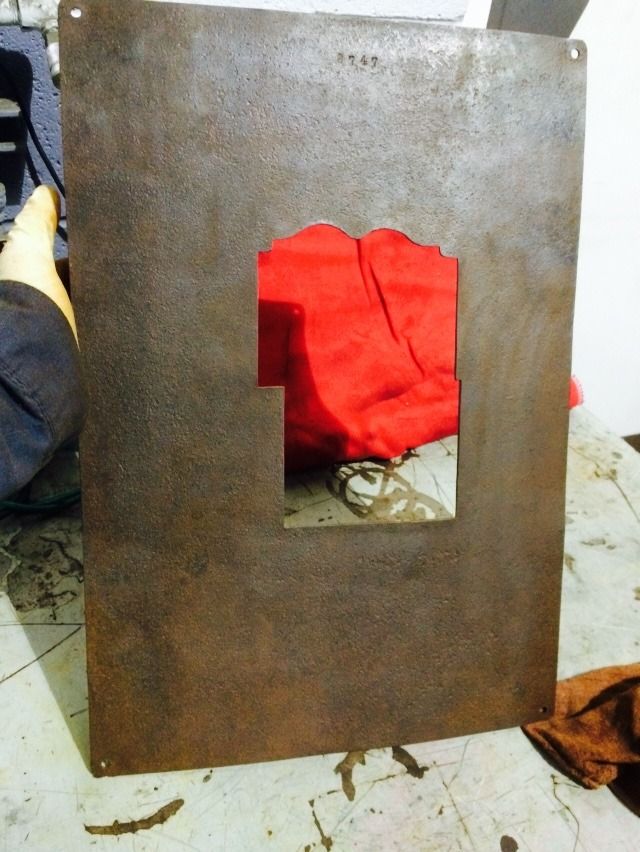 The bend is, for the most part, a gentle curve in the metal from side to side. Do not want to hammer the cover as it will leave small dents all over the cover. Also don't want to use any tools that may crease the steel, although it is .071" (1.81mm) thick. It will take some force, but want to gently straighten it to make it look nice and flat. Started with 1/2" (12.7mm) steel rod and .354" (9mm) thick flat steel stock, and set it on the floor like so: 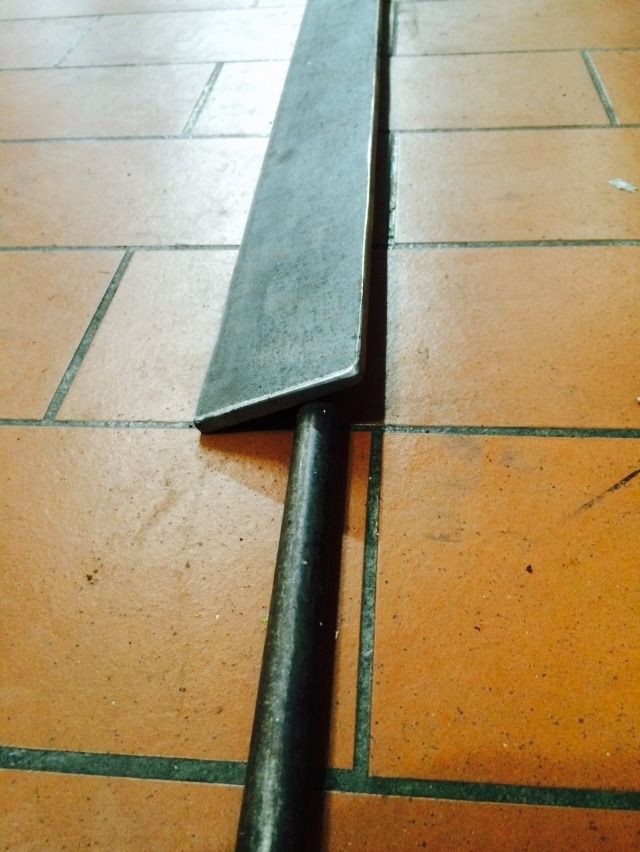 You can see some of the bend in the cover - had already removed about half of the curve before remembering that some pictures should be taken.  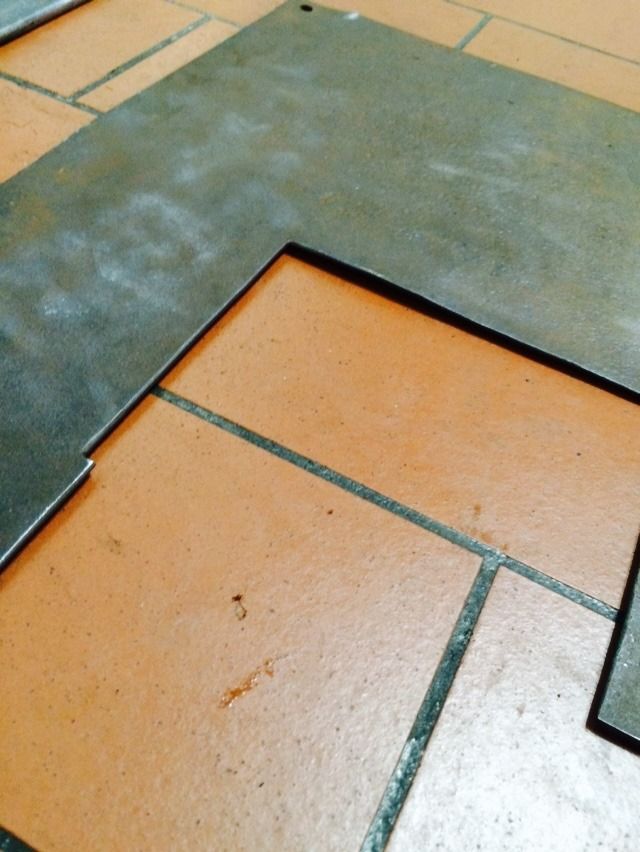 Place the cover on the metal stock... 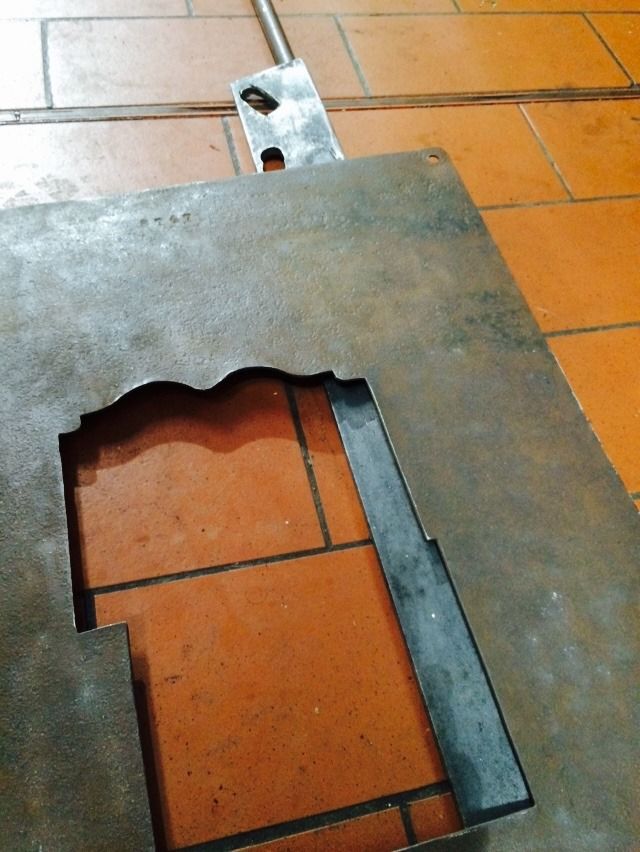 And gently step with your heel on the area of the cover you wish to bend. 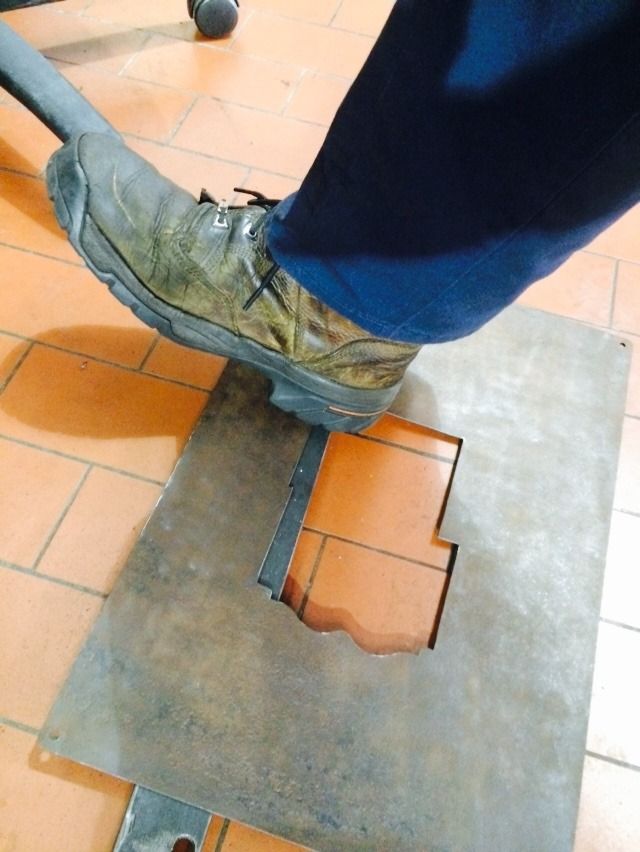 Shift the metal and repeat as needed, placing the cover flat on the floor from time to time in order to check your progress. 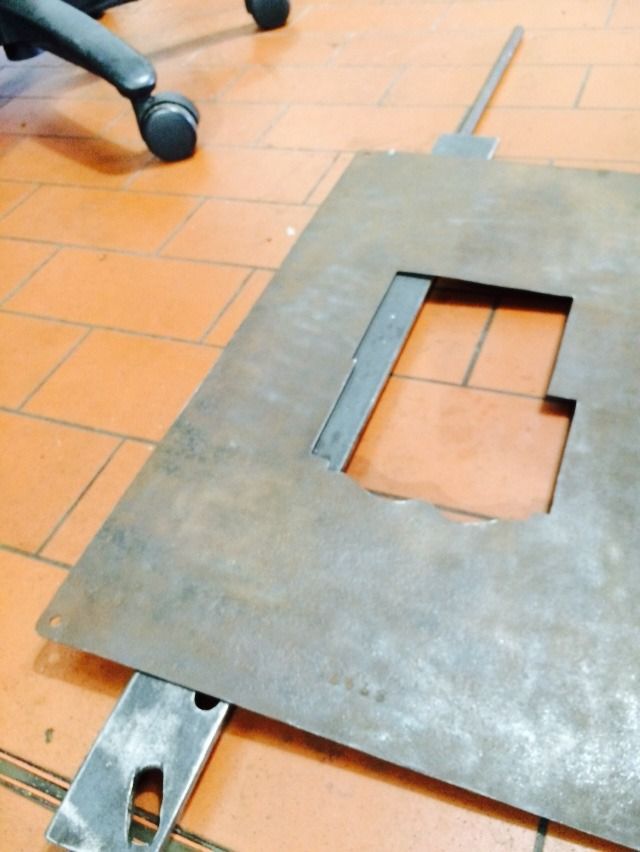 Until...  Nice and flat! No raised areas now. (The shadow makes it look raised in one area, but it is flat.) Still need to free up the outside handle that operates the boltwork - it is still frozen in place. (Guess I should specify that it is rusted in place). But that should be fairly easy compared to what has already been done. Hardest part job will likely be safely turning that door around. Maybe it is time to start removing that hinge and get it sent out to be copied. And hinge pins made. This project is going a lot faster than I expected. A few 'screws' and the linkage will be out of the door. Remove the handle, and apply some rubber cement to the bores where the locking bolts fit to protect the bores, then a few hours with a sandblaster would have the remaining remnants of rust off of and out of the safe. Light body putty from an auto body shop to smooth out the outside of the safe body where there is minor pitting from the rust, some sanding and primer, and it would be ready to paint. But those will all take time, especially the hinge. Some of you expert safe techs, especially those experienced in these old safes, what kind of plating would have been most likely to be found on the bolt carriers, linkages, and so forth? Considering if I want to send them out to be plated appropriately. Will get this safe assembled and working first, then possibly send out the parts for plating while doing the sandblasting, prep work, primer and paint work. Considering possible cost for the hinge, the timeframe for completion of this project is still likely to be a year. (Mostly due to cost). Maybe some of you may have suggestions for locating hinges or preferred people to make one. Thanks for following along as I fumble my way through this project. It is fun so far! Gordon Just when you finally think you have learned it all, that is when you learn that you don't know anything yet.
-
GWiens2001
- Site Admin
-
- Posts: 7659
- Joined: 3 Sep 2012 16:24
- Location: Arizona, United States
by YouLuckyFox » 29 Jan 2015 23:38
So cool, Gordon. Thank you for taking the time to document this. I haven't really learned much about safes, yet and I am learning quite a bit as I watch you restore this safe!
-
YouLuckyFox
-
- Posts: 630
- Joined: 10 Aug 2012 19:25
by GWiens2001 » 31 Jan 2015 21:52
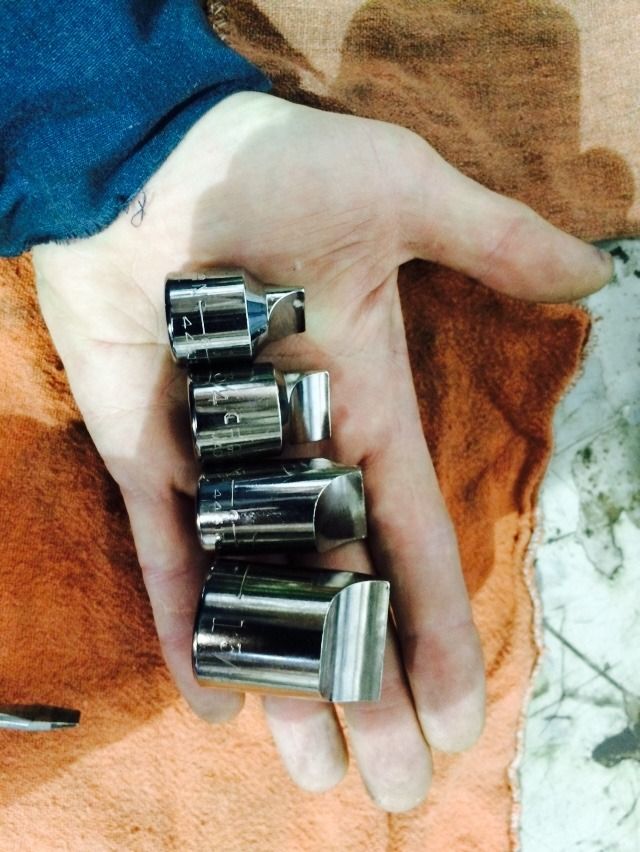
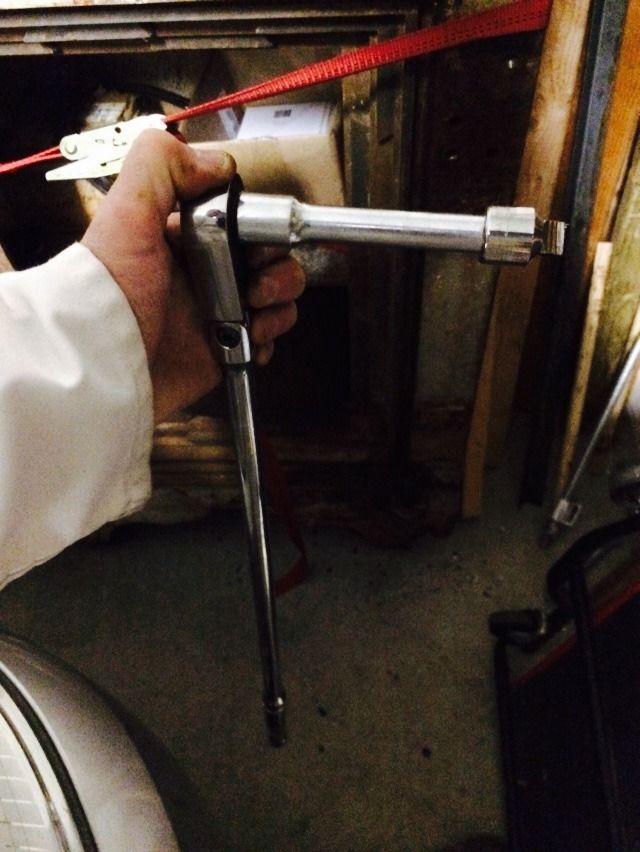
Had a few hours this morning, so decided to tackle the one moving part remaining on this safe that was not moving. That is the handle on the front of the door that moves the boltwork inside the safe. Placed paper towels around the handle so it stands out against the door. For these next few pictures, the door is actually flat on the ground. (Well, on four 1 inch diameter (2.54 cm) wood dowels). This allowed me to roll the door away from the wall and get some working space, and made it easier to lever it high enough to get a floor jack under it when it was time to lift it back upright.  For weeks now, have been rust penetrant on this handle from both the inside and outside of the door. Yet it was still tightly frozen in place. Most of the work was done with a large rubber mallet, like so... 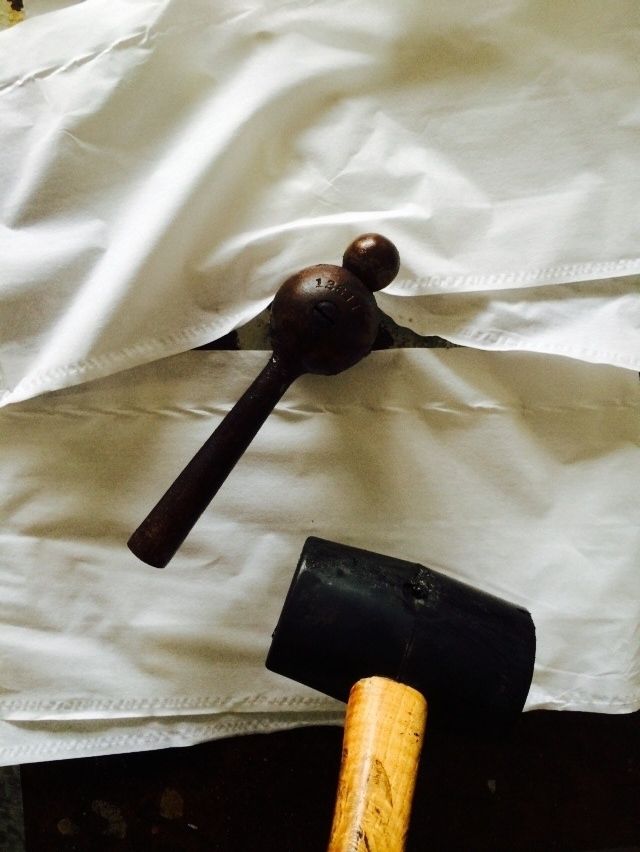 But to get it started, don't have a picture of when I was doing it, but took a pipe wrench that had the teeth ground/filed off, and leather lining it where the teeth of the pipe wrench used to be, and used to to hold the center round part of the handle, with the small knob side of the handle in the angle of the wrench. Then used the rubber mallet to firmly strike the handle of the pipe wrench. Put a small pencil mark on where the safe handle met the door so could tell when it started to move. It took about twenty minutes before it even started to move. But once it started, was able to just use the mallot and frequent reapplications of rust penetrant, to keep working the handle back and forth. Almost two hours of banging away gently on the handle back and forth, and the handle would finally move back and forth freely by hand. Great stress reliever!  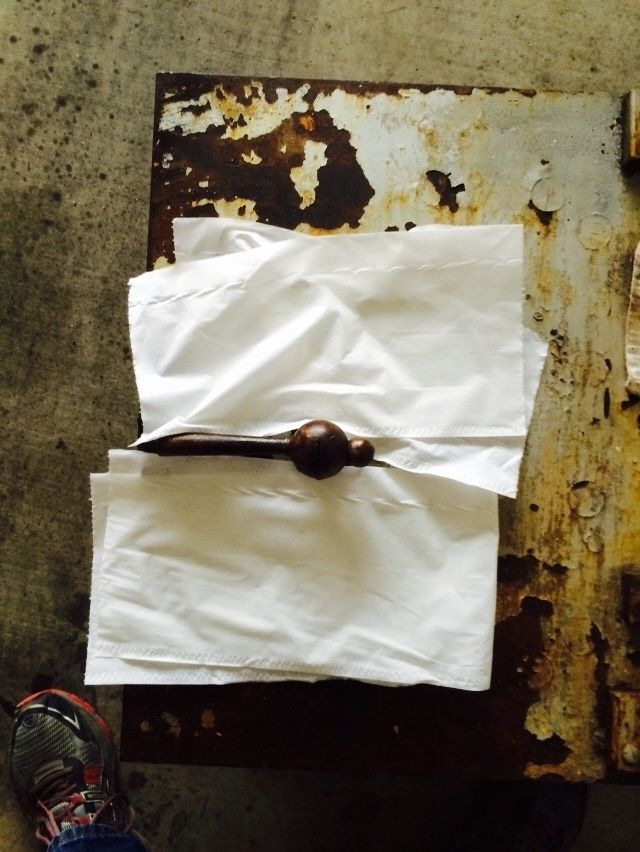 OK, so now got it back upright and strapped against the side of the safe. Don't have any drag link sockets. (Yet, ordered a full set today). They are extra-extra-extra large flat screwdriver sockets. The set I ordered had four sizes from 5/8" (1.58 cm) to 1 3/16" (3.02 cm) across. This safe has some very large 'screws'. 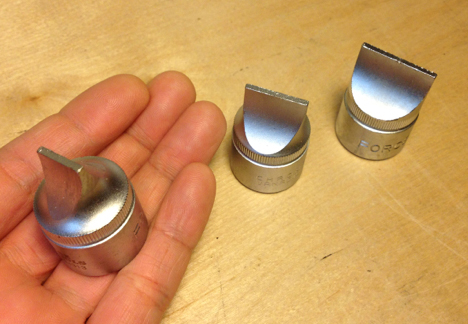 Once they arrive, will be taking off the hinges so can get one made, and will remove the framework that holds the locking bolts. Once that framework is off, can remove the linkage parts to properly deal with them to remove rust and probably get them re-plated. But now that all the moving parts are removed and cleaned of enough rust to test them, gotta put it together and see it work, right? The bolt carrier is at the center, and am installing the top right locking bolt in from the right. 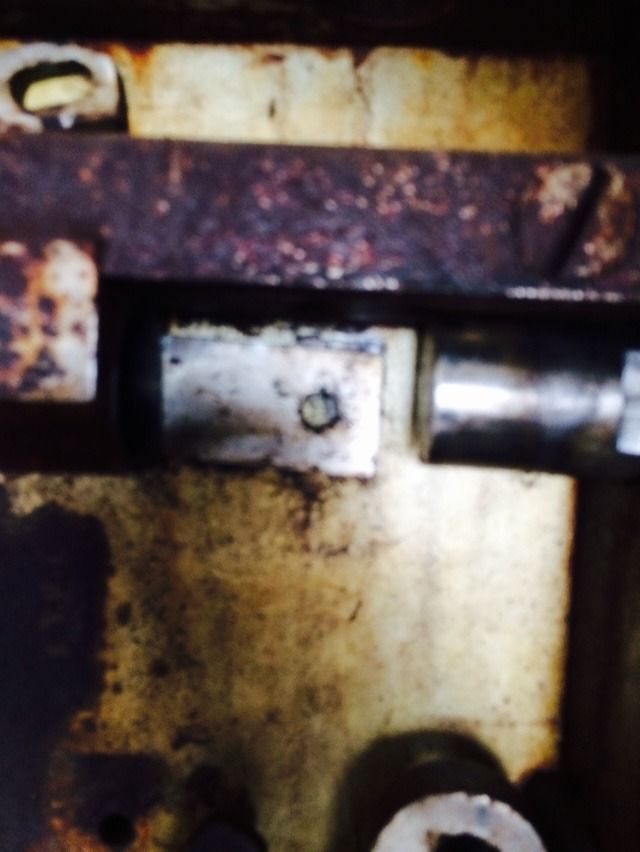 Line up the locking bolt with the carrier 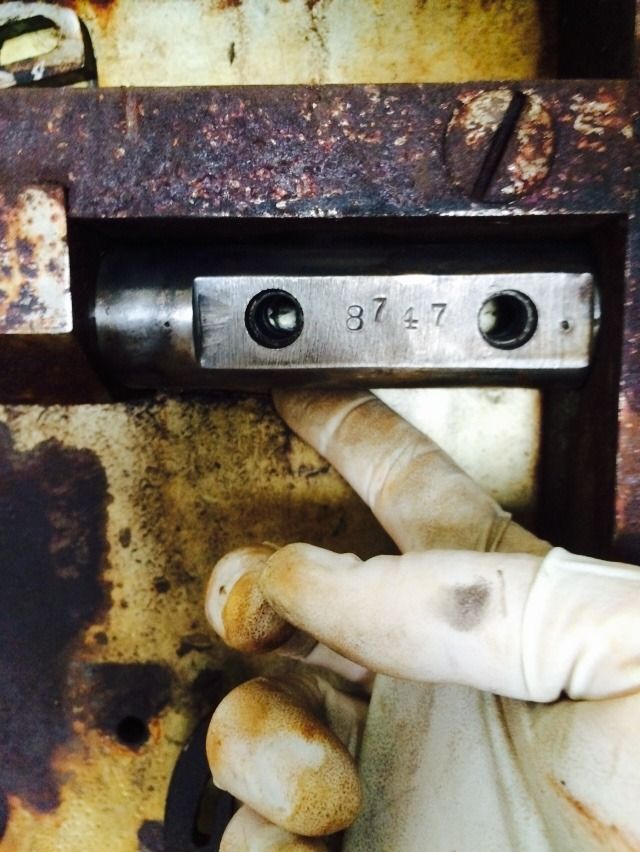 Remember, there are two different bolts on the right side of the door. This one goes through the bolt carrier, the bolt, and the smooth part fits into the hole in the linkage we just lined up. 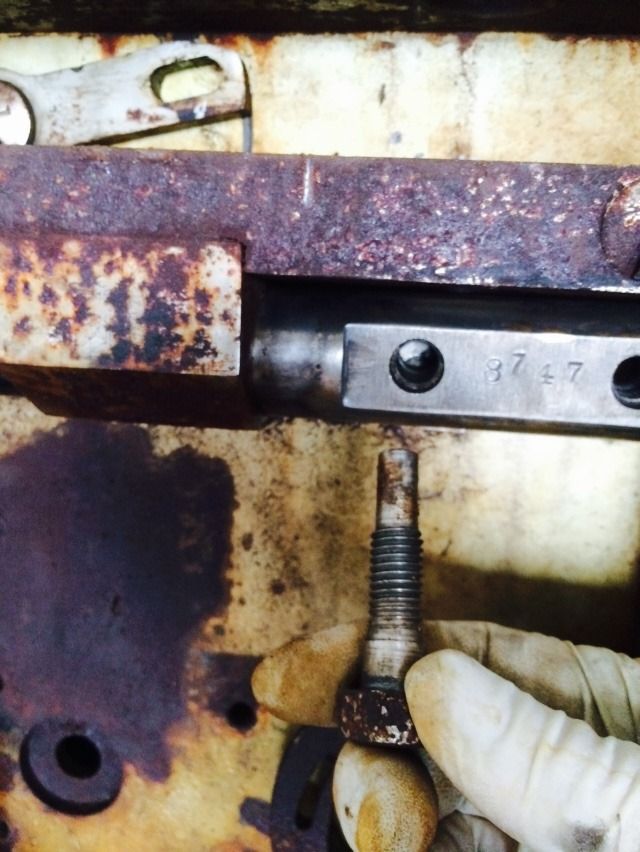 Then the other (screw type) bolts used to hold in the locking bolts to the bolt carriers are all the same. 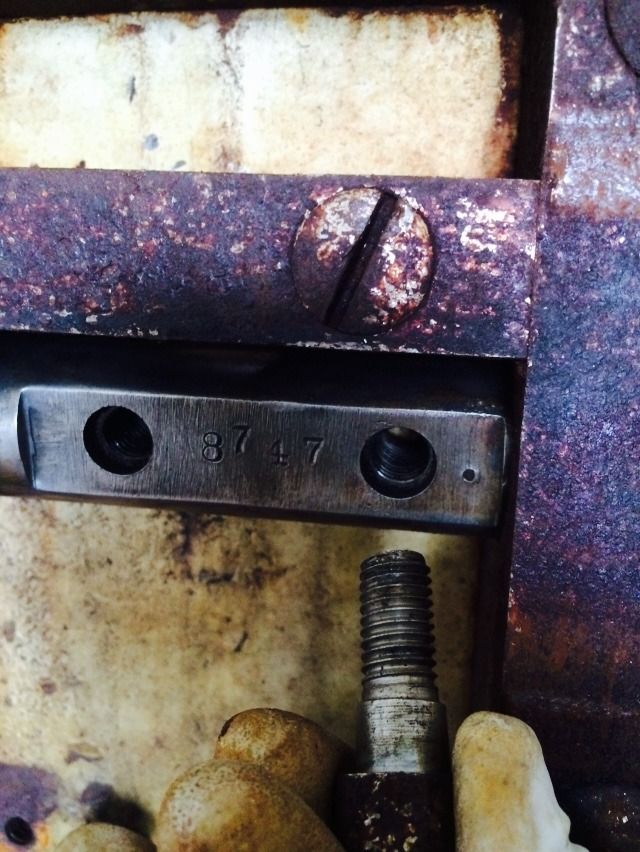 Put the right bolt carrier in place, being sure the guide post fits into the hole in the handle cam. Then install the bolts, putting the correct bolt in the correct place. 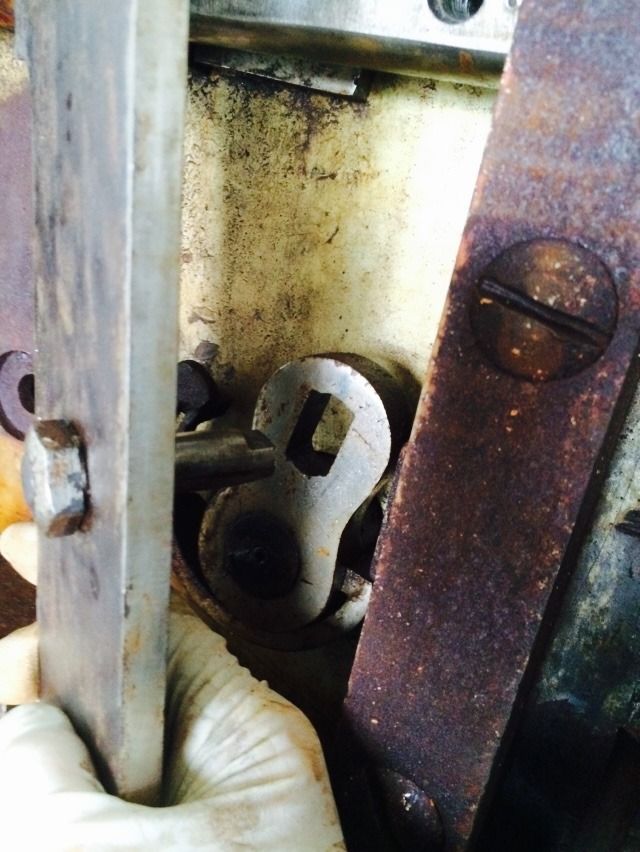 Now install the left bolt carrier, fitting the upper and lower guide posts into the upper and lower linkage. 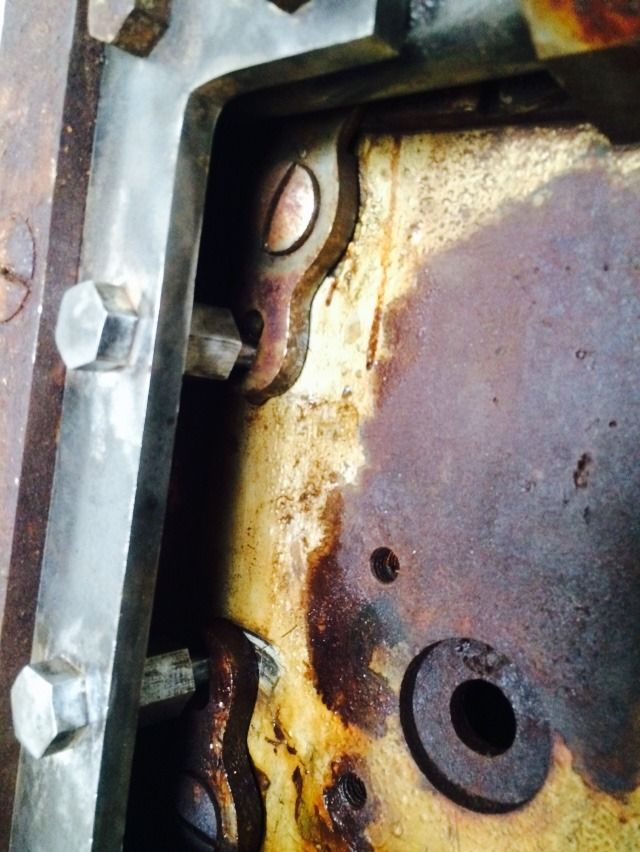 Locked - notice that the linkage where the upper bolts and upper bolt carrier is now all the way up.  And unlocked. Linkage down. 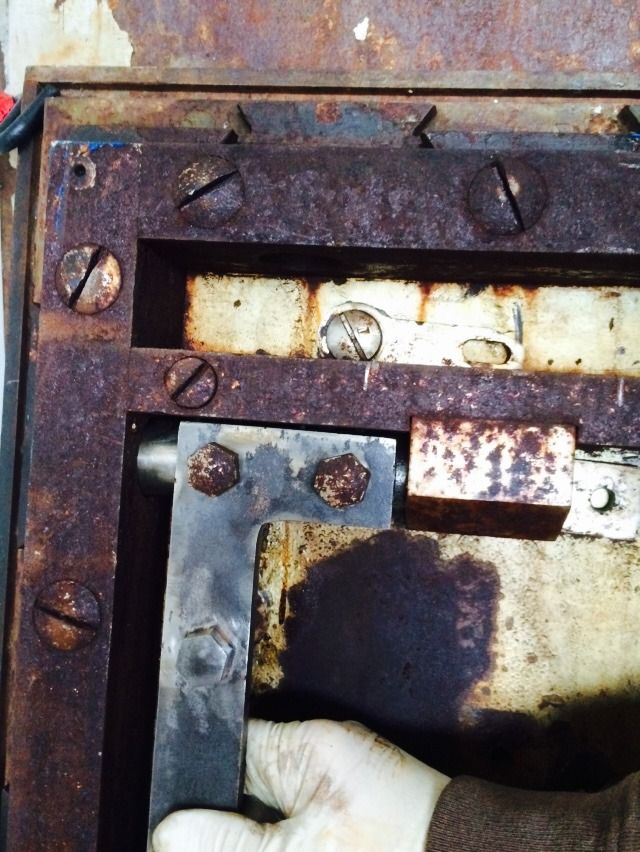 Upper bolts and bolt carrier in place, forgot to take a picture with the lower bolt carrier and bolts in place, but will rectify that soon. Locked position. 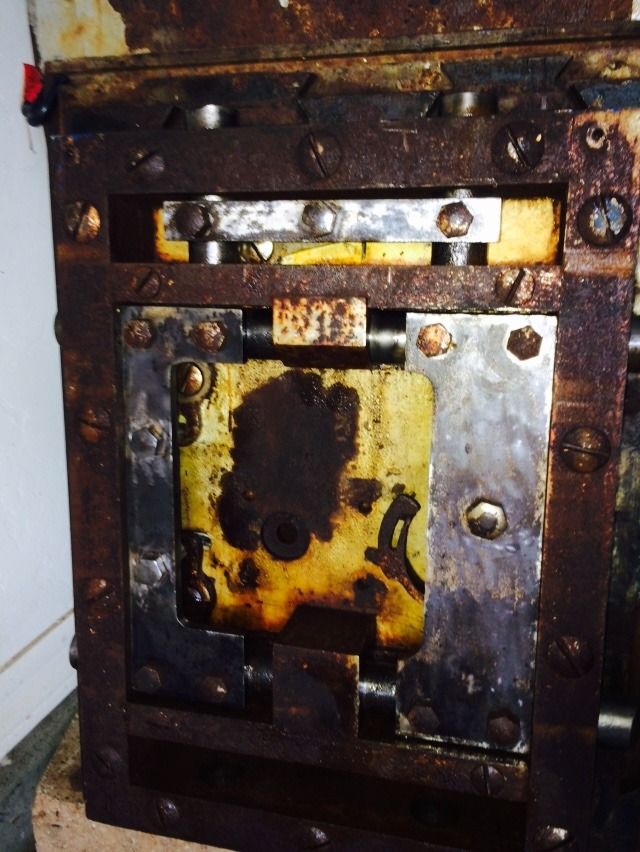 And unlocked. 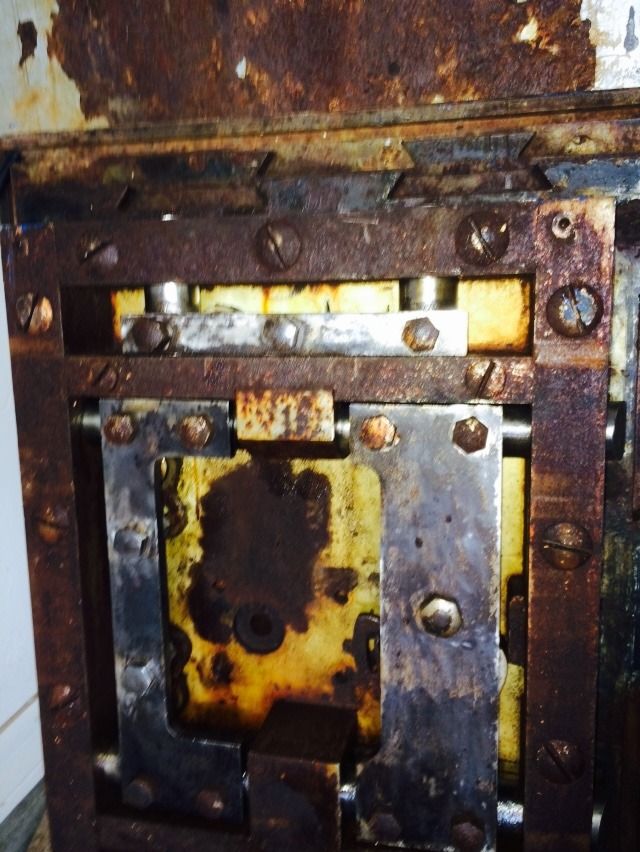 If that broken hinge were not broken, I'd put the door back in place and put the safe lock in place just to see it as a fully functioning safe. But that will have to wait. At least now we know that it can be a fully functioning safe once that hinge is repaired. Still need to take it all apart again once the drag link sockets arrive. Then will remove all the parts again, and clean the parts I could not disassemble before. That will be the next step. Have already designed a kind of wood and metal gantry crane that can lift the door safely and allow me to rotate the door, which will make installation easier. That's all for now. Tips? Comments? Suggestions? Gordon Just when you finally think you have learned it all, that is when you learn that you don't know anything yet.
-
GWiens2001
- Site Admin
-
- Posts: 7659
- Joined: 3 Sep 2012 16:24
- Location: Arizona, United States
by averagejoe » 1 Feb 2015 10:44
Holy smokes Gordon! I really need to check this thread more often That is going great. If the pieces were plated it would have been with nickle instead of chrome. Back then it is what they used. Too bad about not having the time lock for it though. Given the date of the safe it could easily run a grand or more itself and be ungodly rare, possibly unique.
-

averagejoe
-
- Posts: 490
- Joined: 17 Jul 2011 6:12
- Location: Canada
by GWiens2001 » 8 Feb 2015 21:45
Just when you finally think you have learned it all, that is when you learn that you don't know anything yet.
-
GWiens2001
- Site Admin
-
- Posts: 7659
- Joined: 3 Sep 2012 16:24
- Location: Arizona, United States
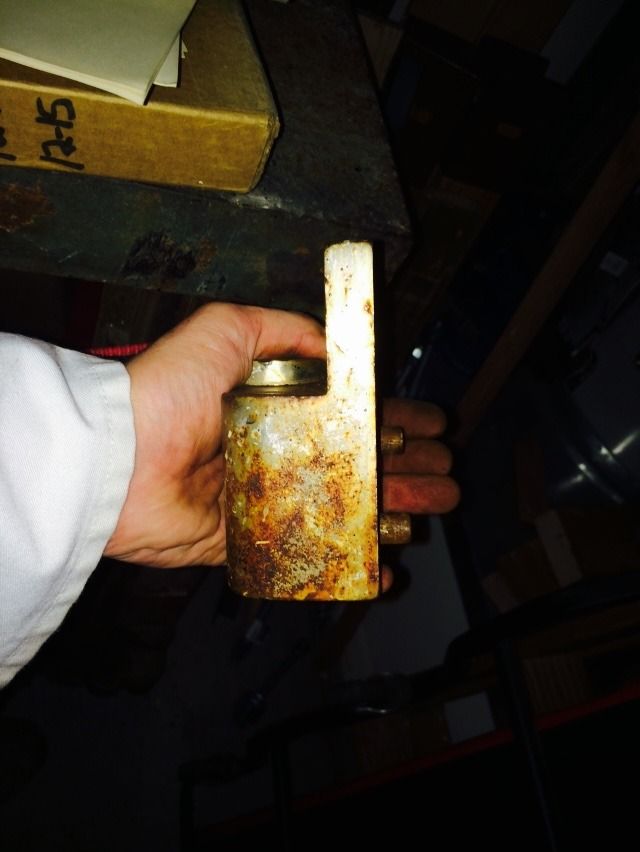
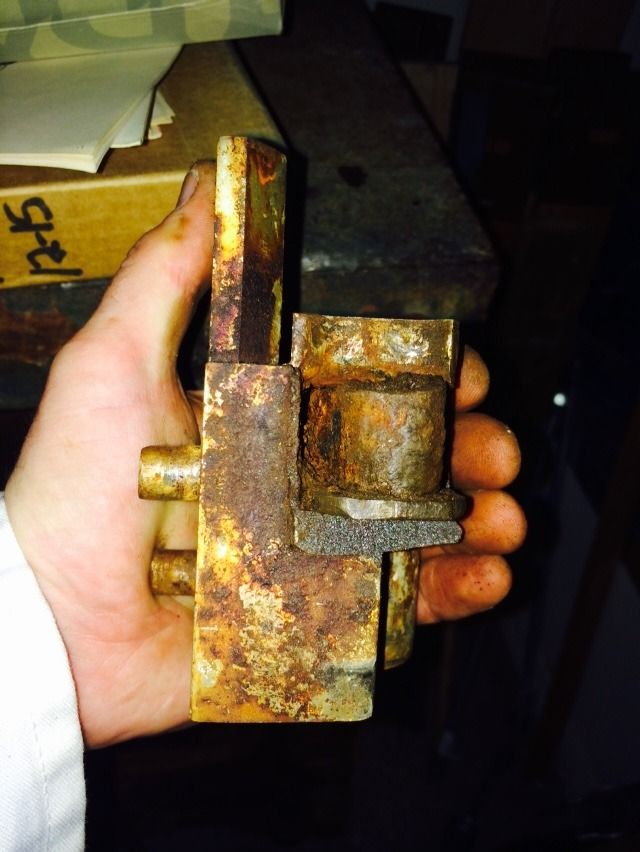
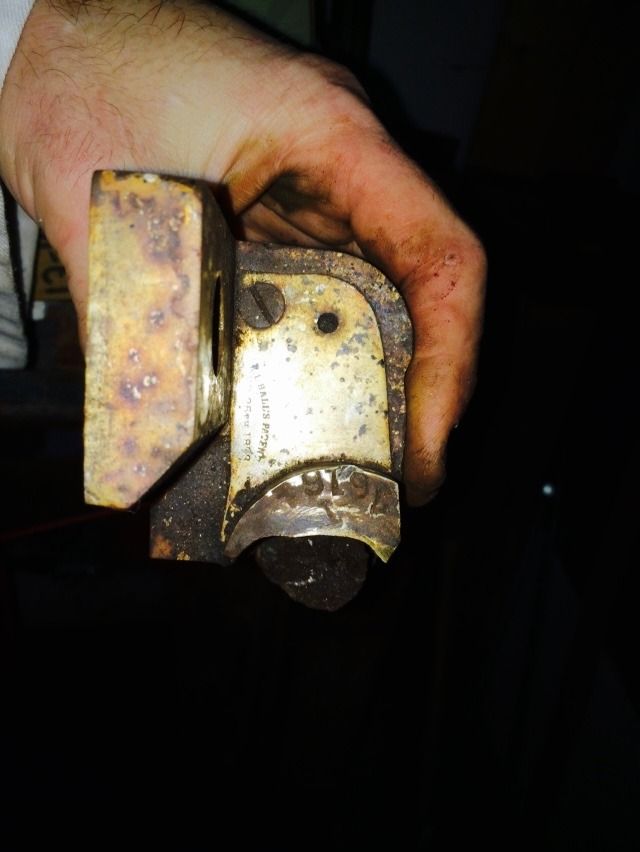
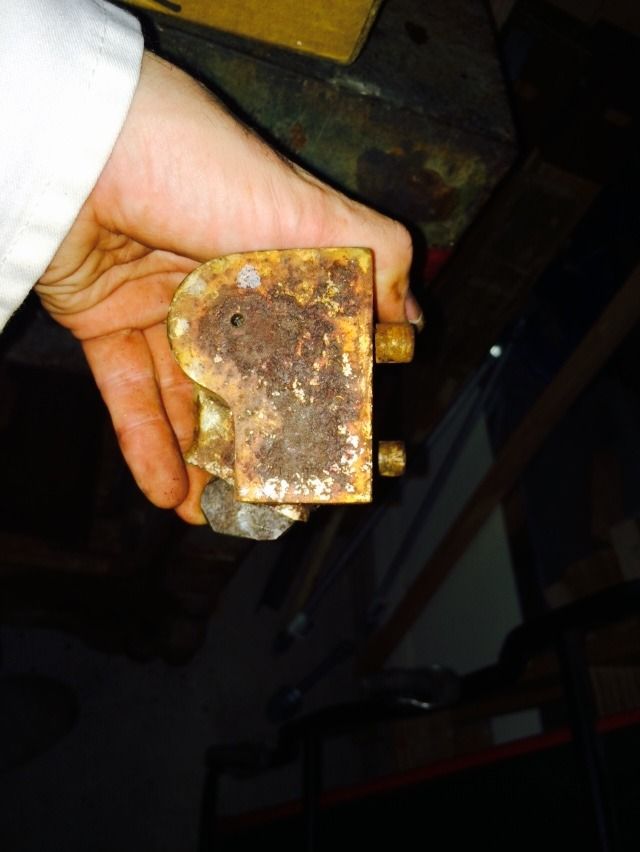
by GWiens2001 » 11 Feb 2015 0:18
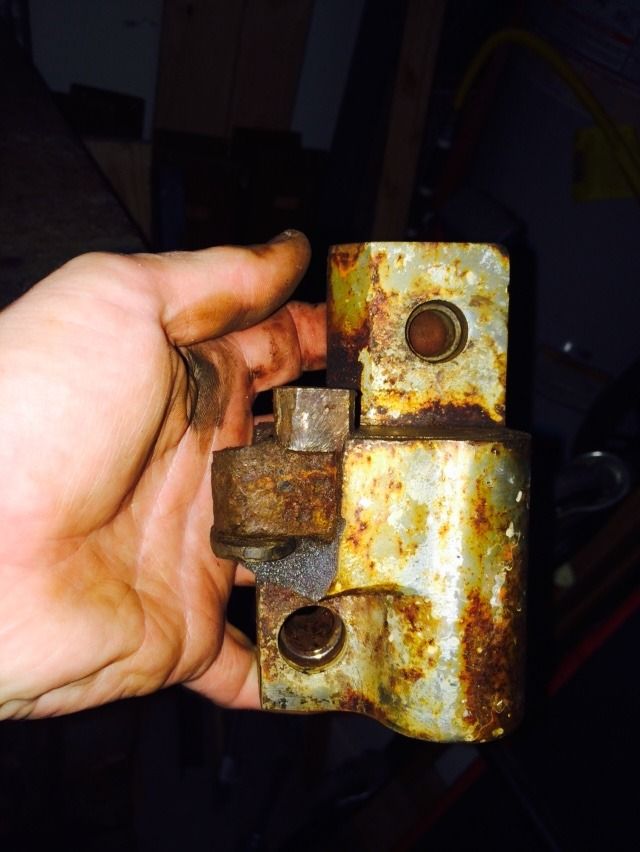
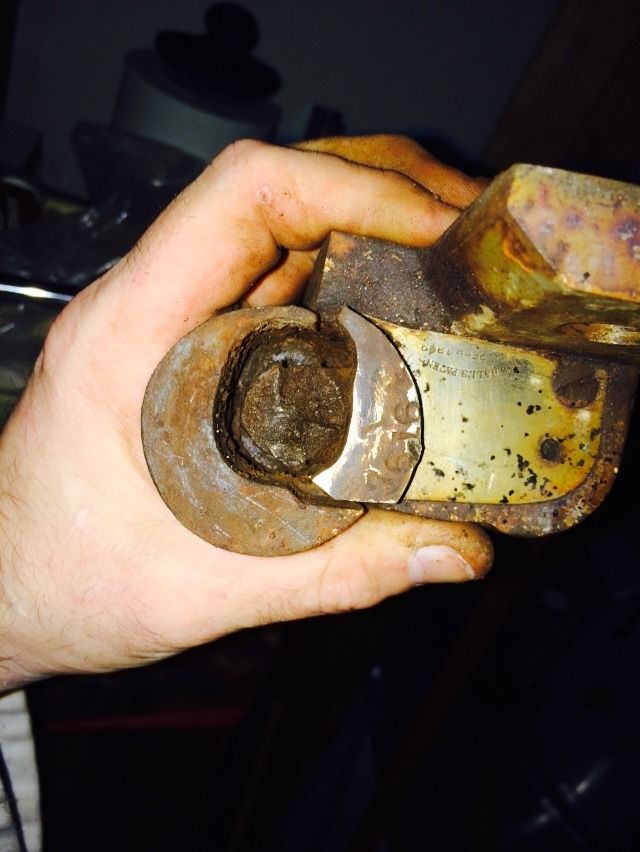
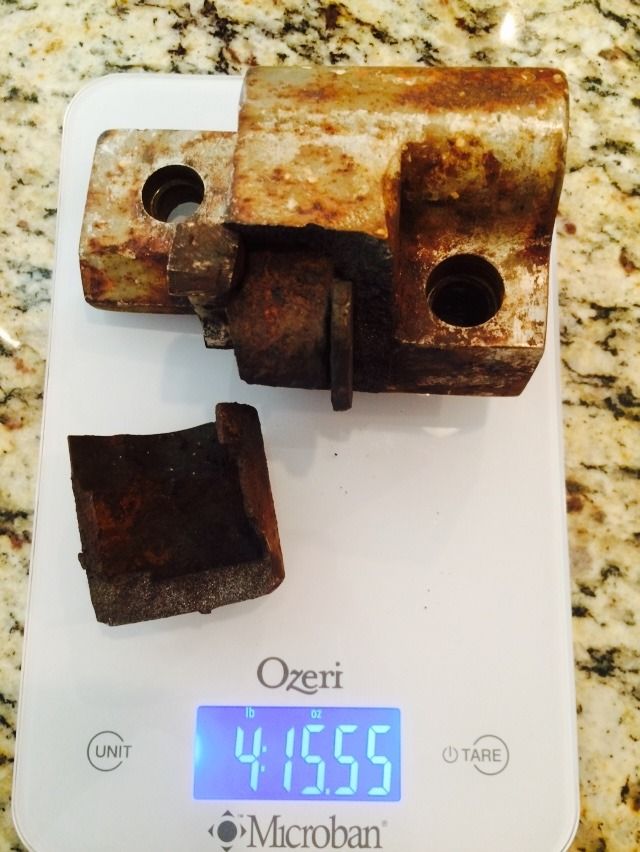
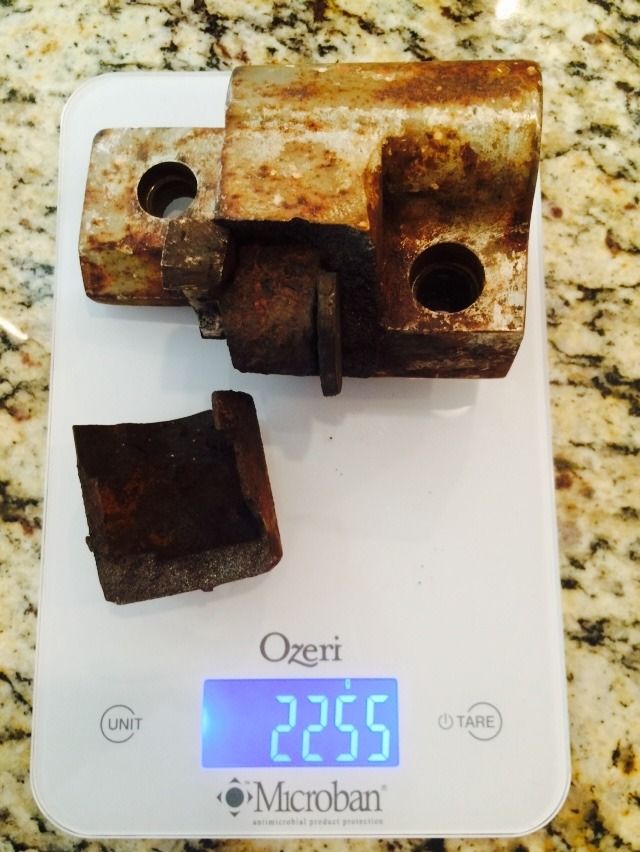
Had an hour available to work on the hinge today - getting it apart and cleaned up. Not done, but made good headway. First, the broken hinge has spent the last two days soaking in CLR (a product for dissolving Calcium, Lime and Rust, hence the name). Then used a soft toothbrush to take off anything loose. The fluid starts as a clear amber color. Not quite that color now. 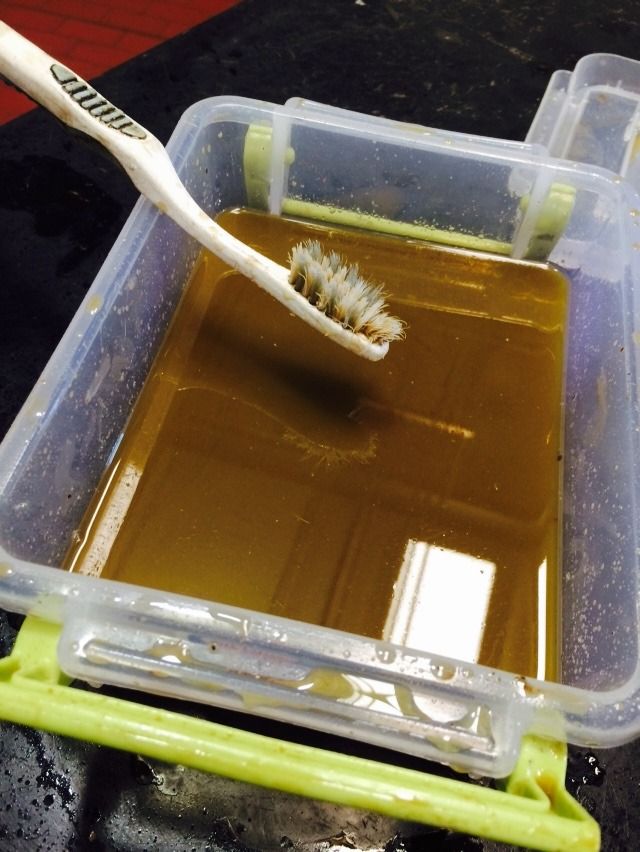 A couple of pictures of the broken hinge before the CLR and toothbrush treatment just to remind you… 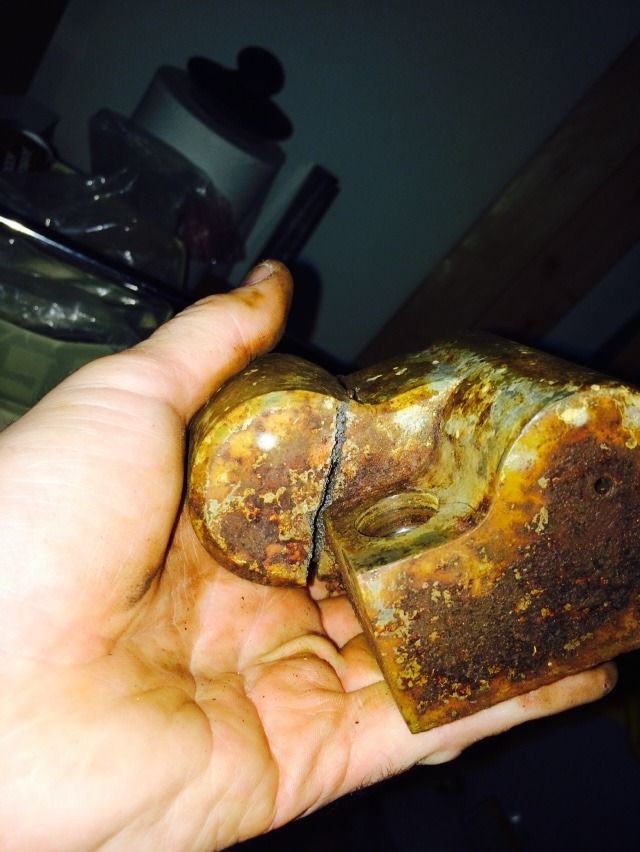  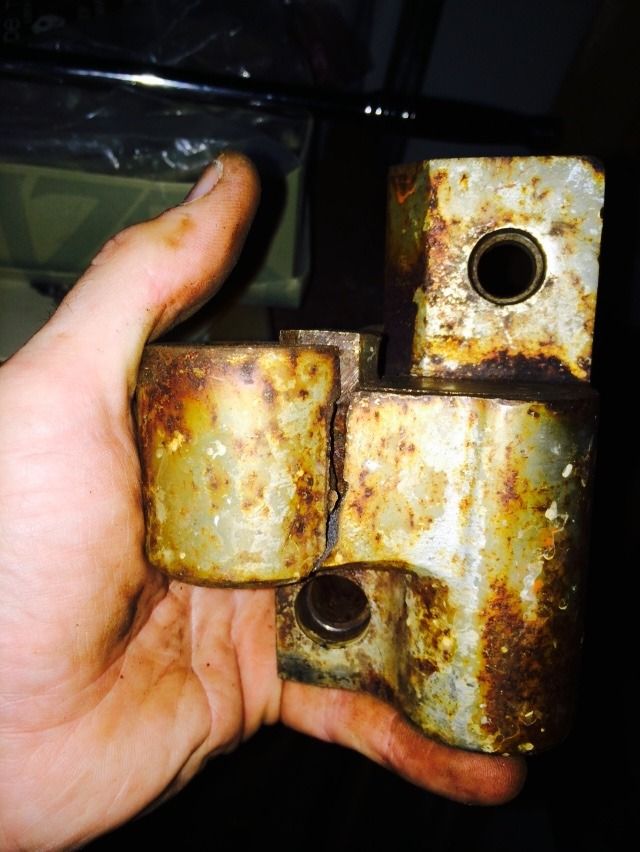 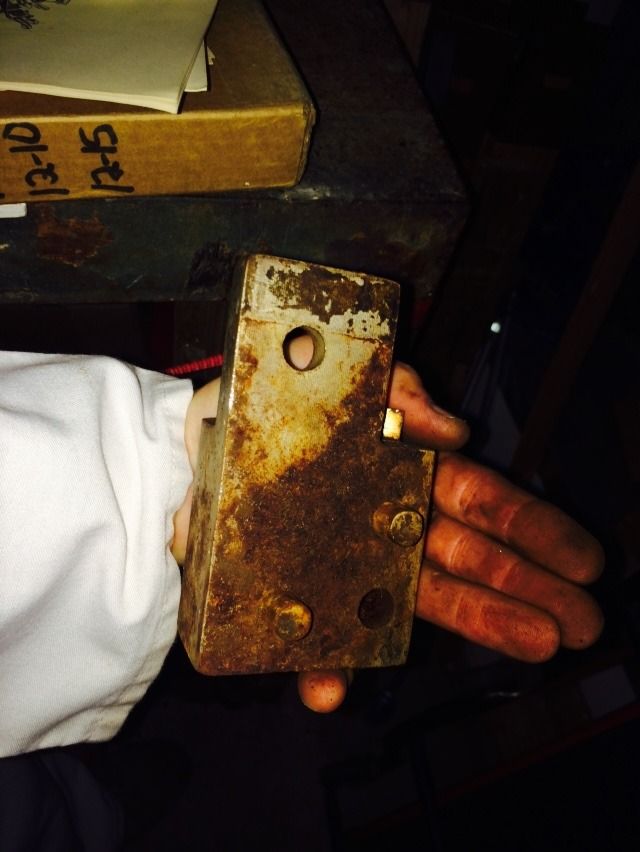 And after the treatment… 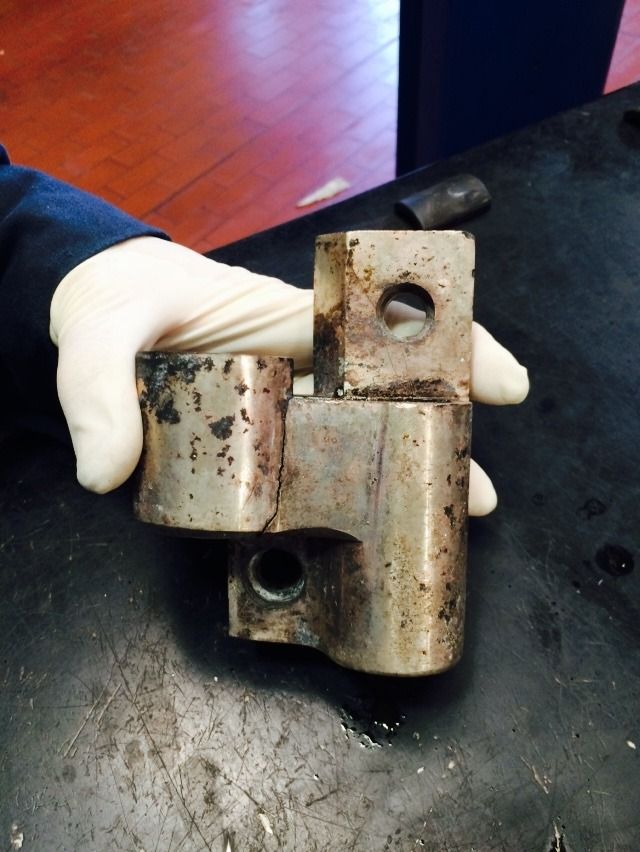 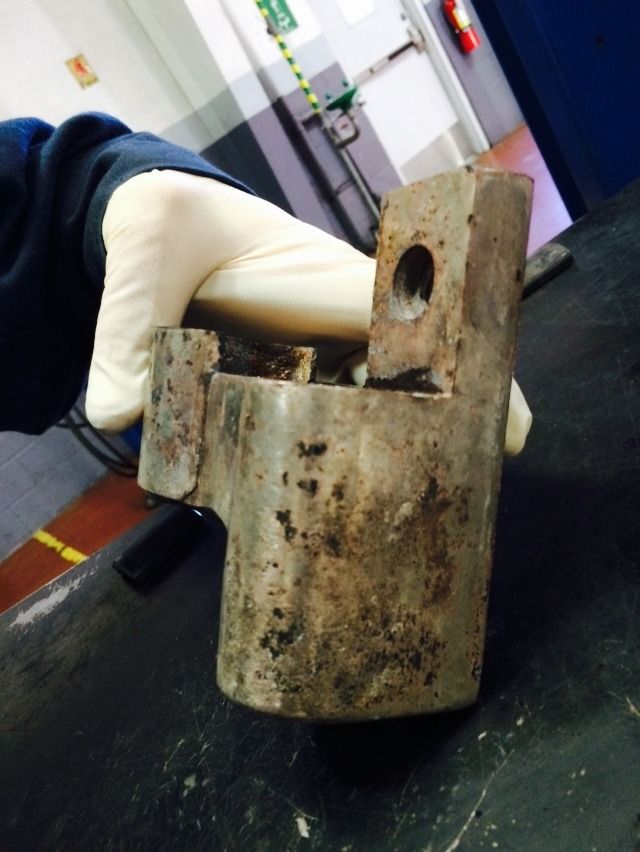 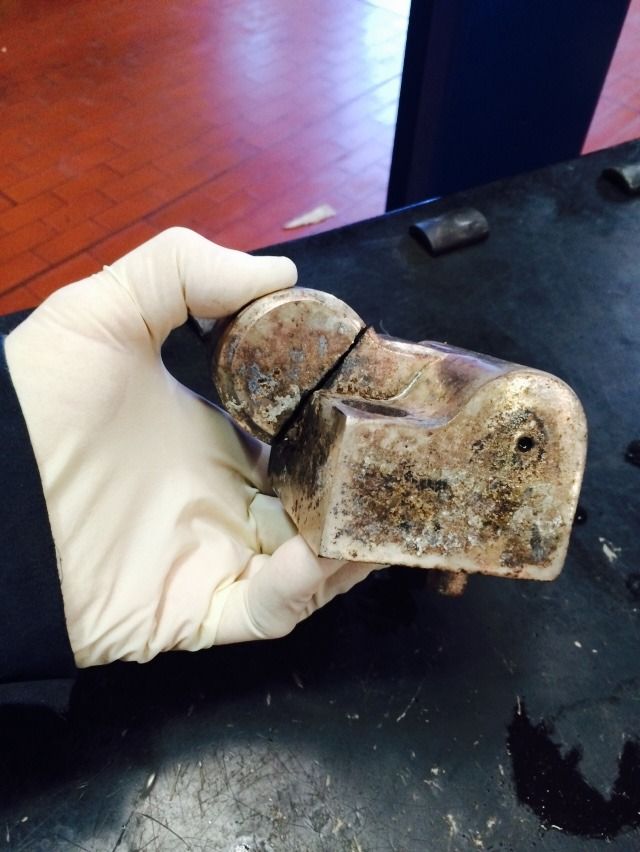 Even found yet another number stamped on the inside of the hinge… 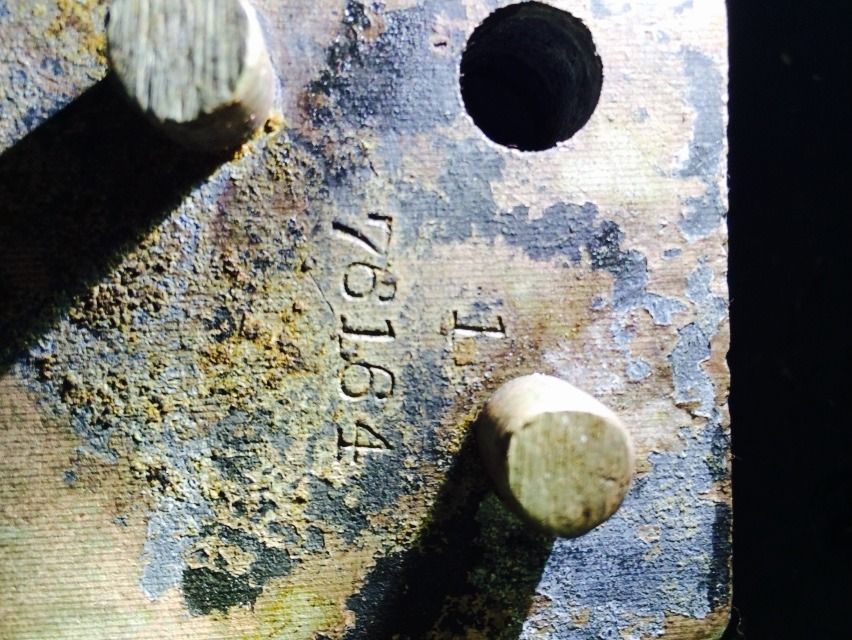 The CLR removed the crummy paint used by whoever repainted the safe in bygone years, revealing that the hinge was nickel plated. Considering how it looks, think I’m gonna have to remove the bottom hinge, and the hinges from the door and get them plated, too. They look pretty good. Used an impact driver to remove the screw from the top of the hinge plate, then tapped the hinge plate with practically no effort. 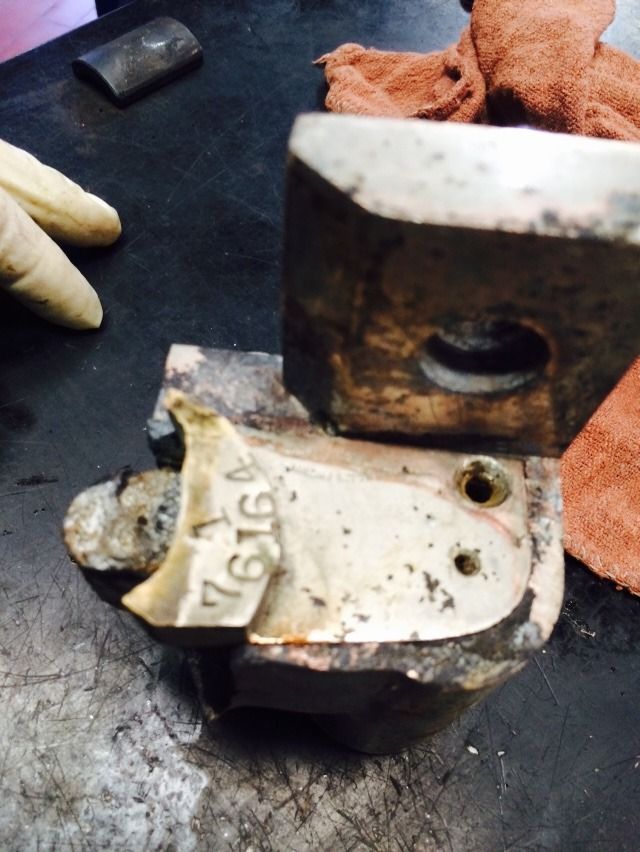 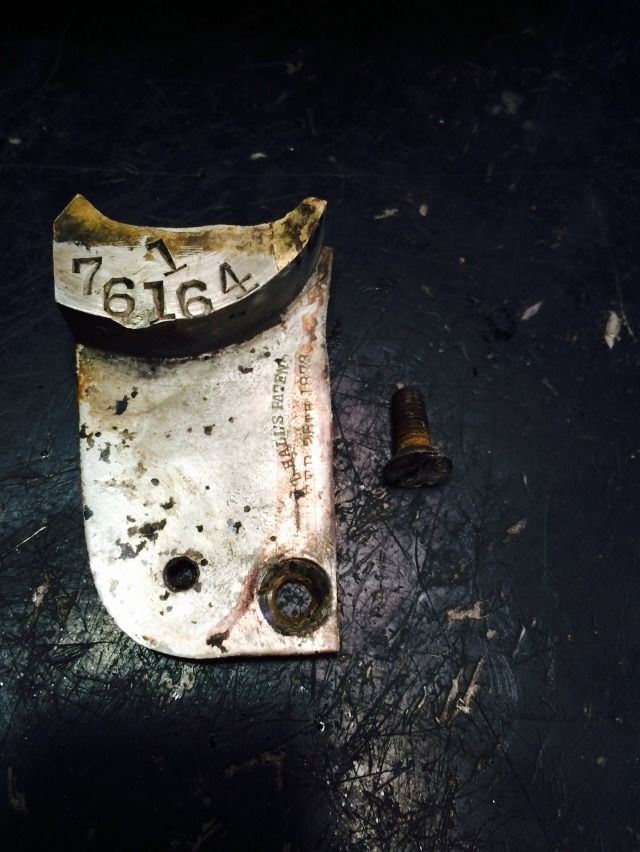 There is also a small metal piece that sits at the bottom of the hinge pin. Think it is for adjusting height of the door, but not sure. Hopefully one of our safe experts can chime in. 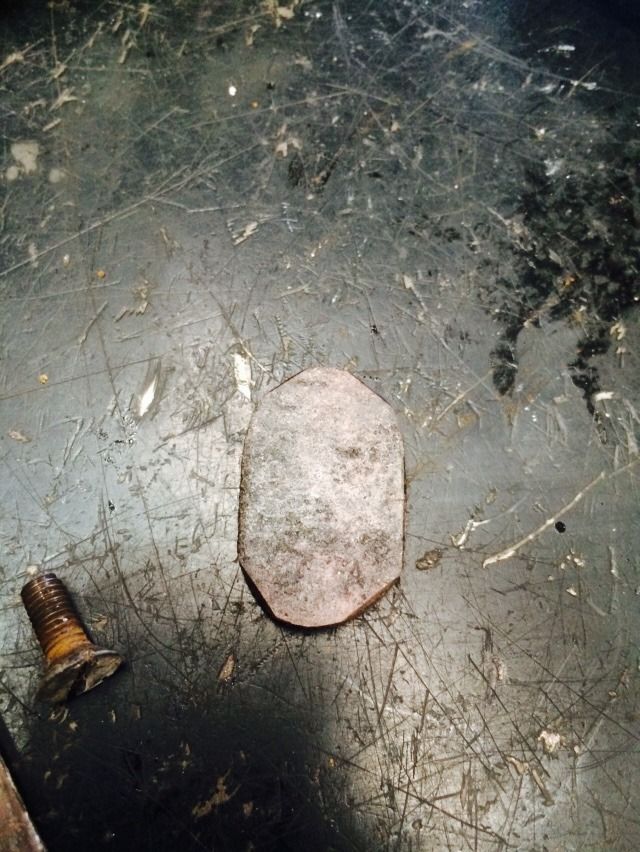 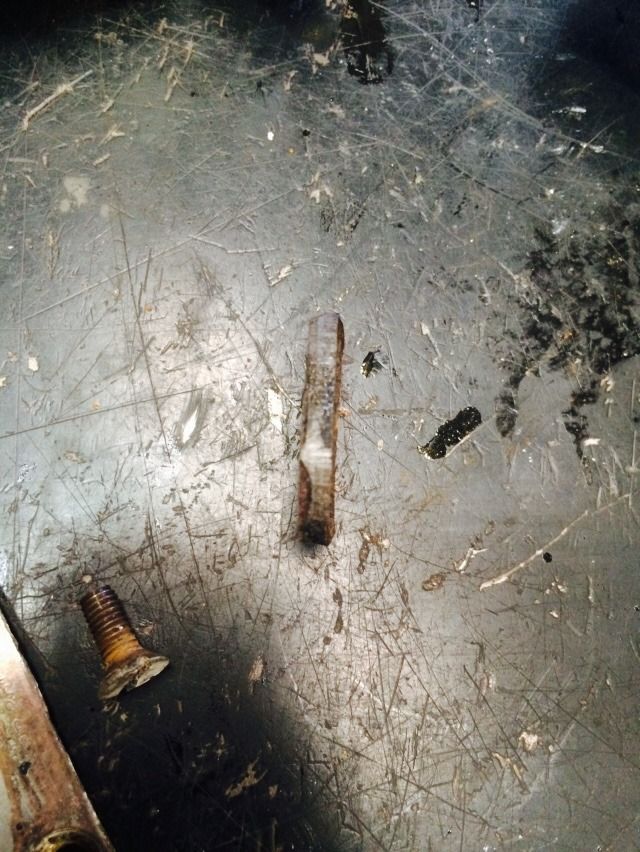 Here is where it went… 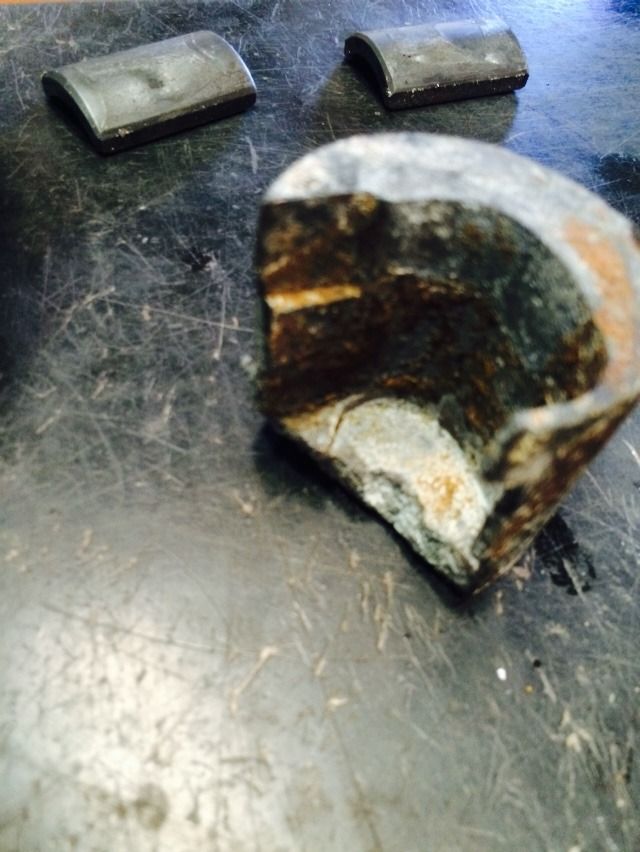 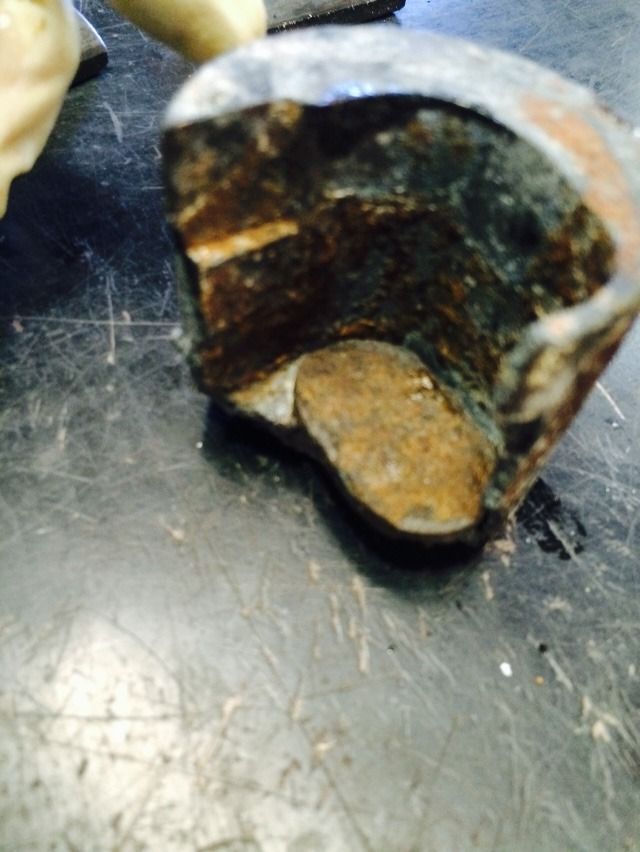 Sprayed brake clean to wash off some of the gook that had formed from soaking rusty metal and vitrified grease (vitrified to extreme hardness!) so could see what was around the hinge pin. 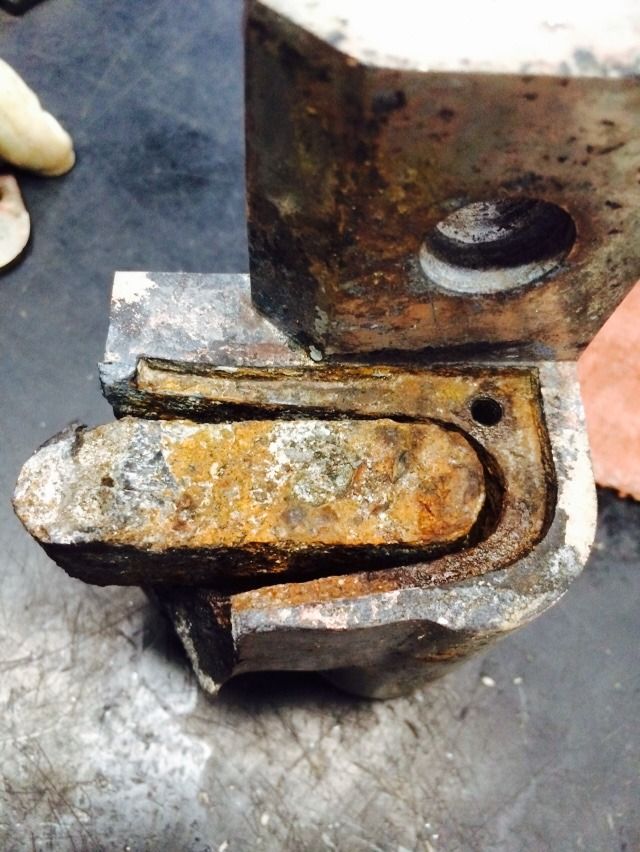 A healthy spray of Honda Rust Penetrant Spray (Yes, Honda has Rust Penetrant Spray), which not only helps get through rust, but is actually also a lubricant). Then it was time to start tapping with a brass hammer. 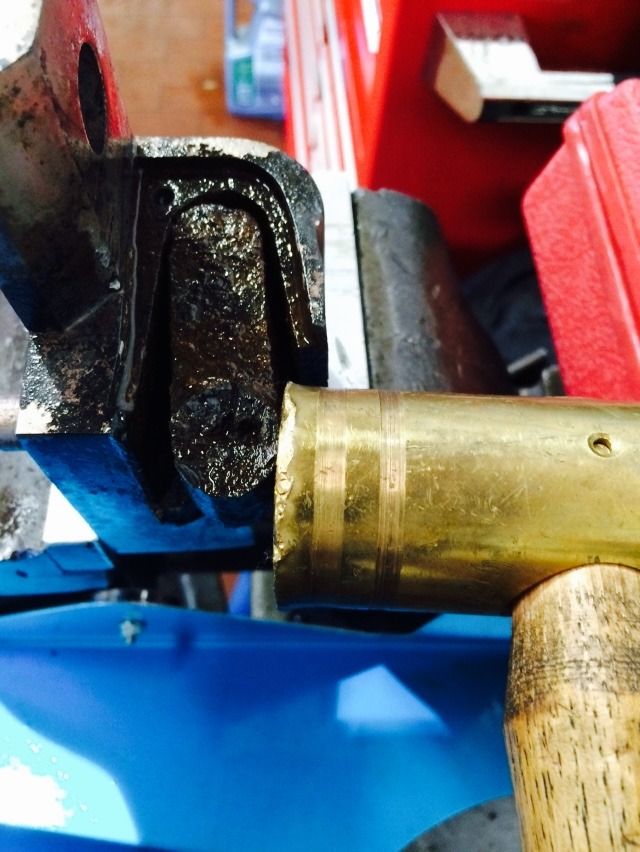 Frequent reapplication of the spray, and tapping back and forth on the hinge as it became more and more free to move, using a right angle pick (think dental pick, not lock pick) to assist in digging out loose rust and hard chunks of vitrified grease (Maybe after all this time, it would qualify as ‘petrified’ grease. Almost as hard as the iron. Seriously). 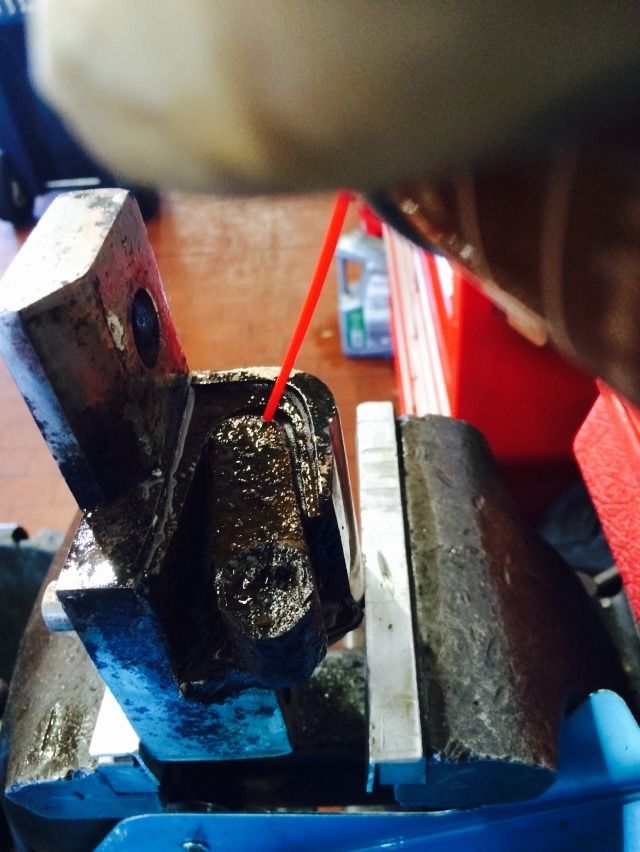 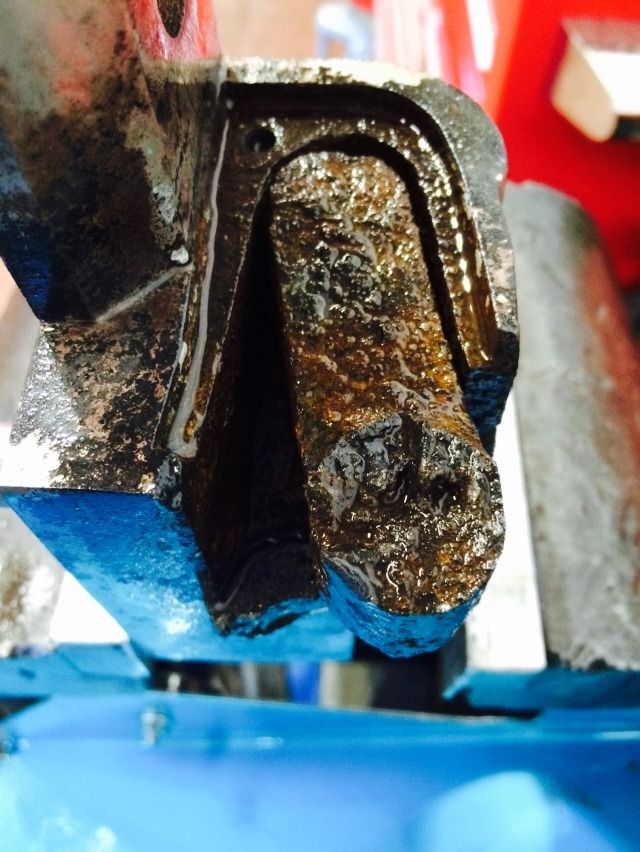 Repeat the last three pictures about twenty times, then flip the pictures over as I flipped it in the vice, and repeat another twenty or so times as I changed the angle of tapping to be moving still to the side, but also very slightly downward. Finally, the hinge pin was free from the prison of the hinge. 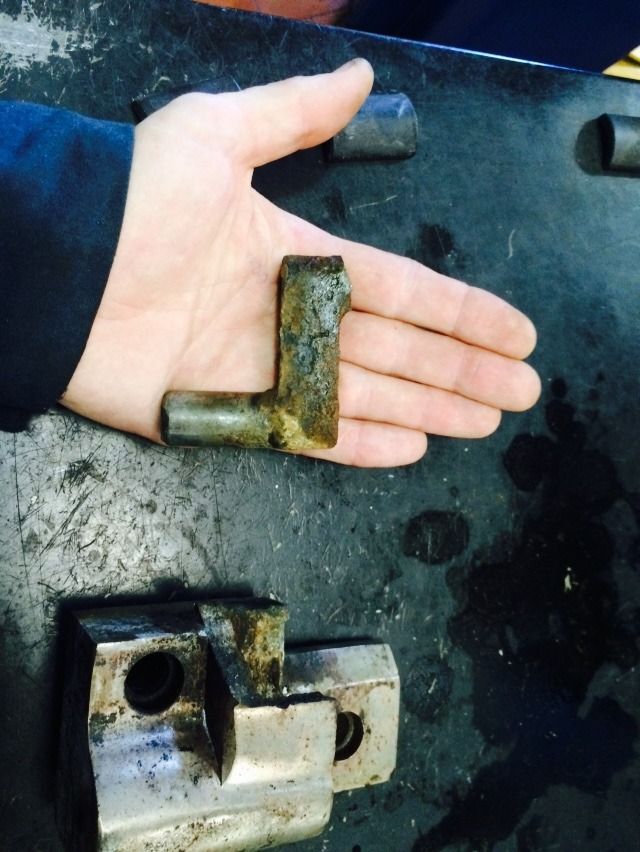 And the hinge… 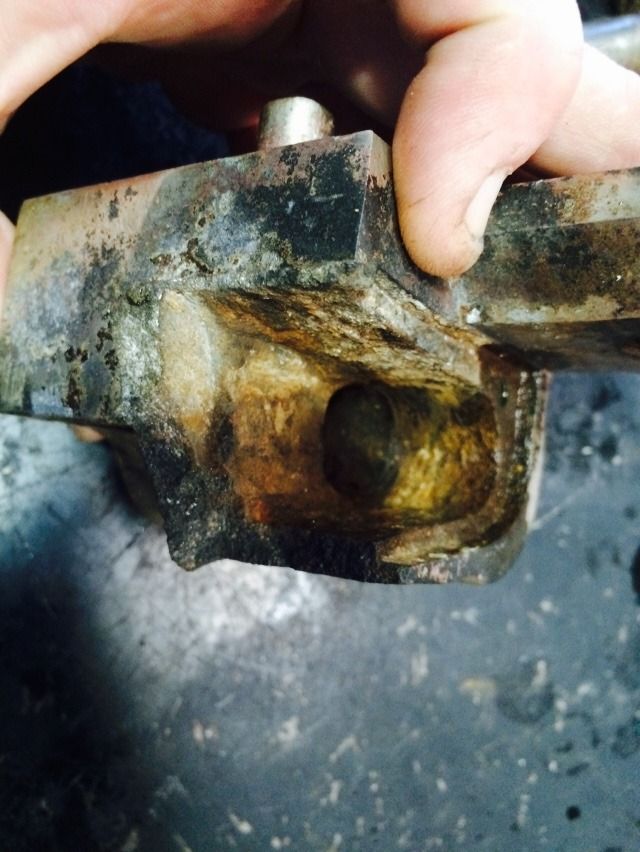 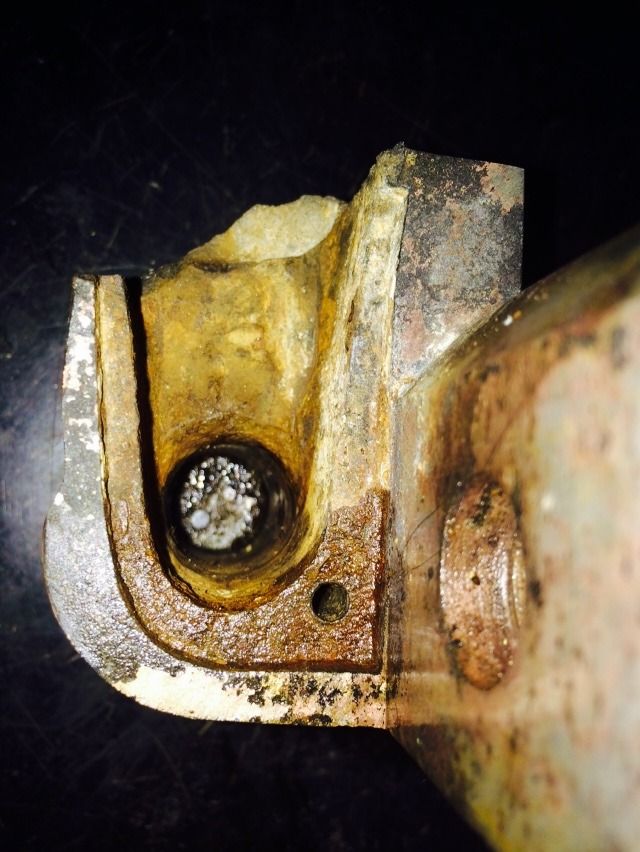 Back to that hinge pin. 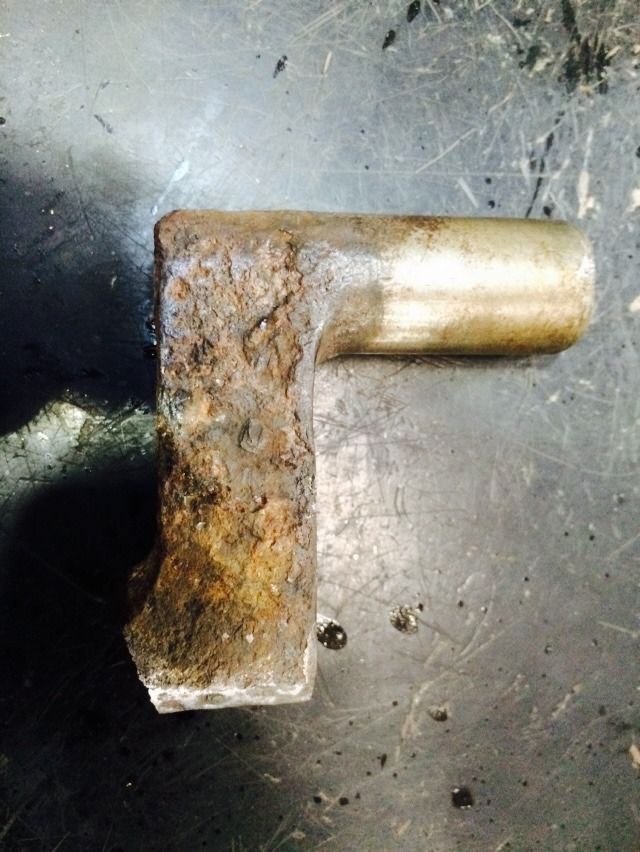 That rust you see in the above picture? It is not rust. That is vitrified grease. Seriously. And it is almost as hard as the iron. Tried a steel toothbrush that I use to clean parts and scrubbed, thinking it was rust. And scrubbed. Then scrubbed some more. Still had hardly scratched the vitrified grease. Finally got out the brillo zip disc on my angle grinder. At least I could get down to metal, but it still took over a minute a side even with the brillo zip disc! 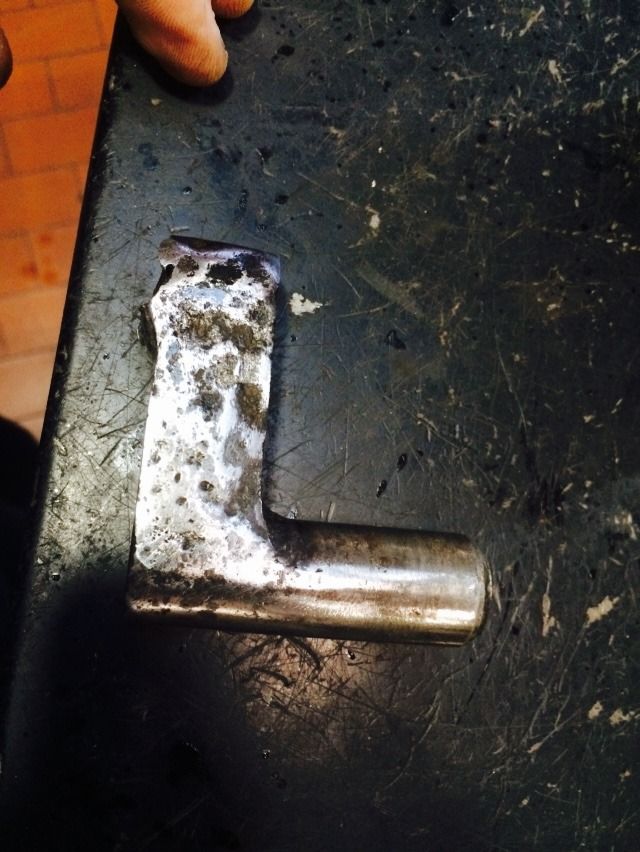 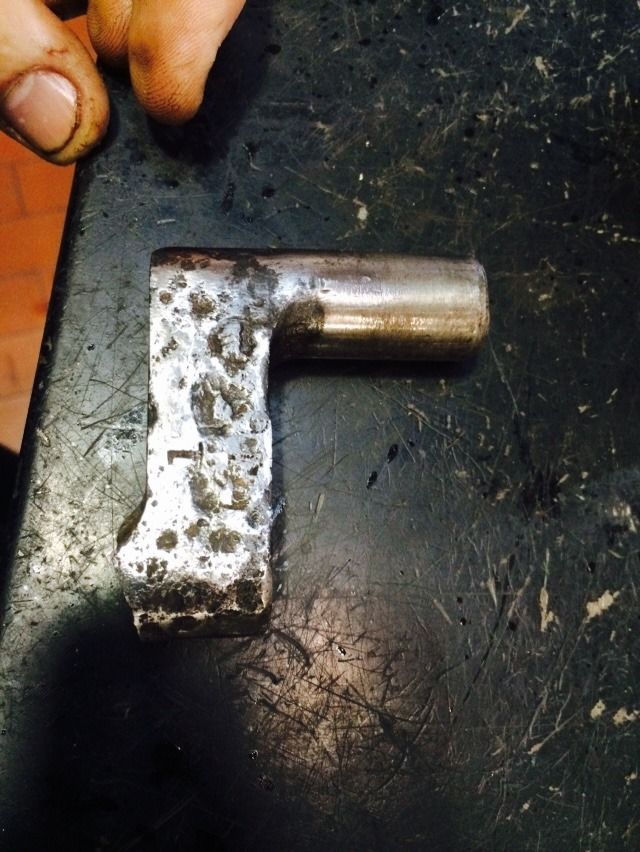 Yes, the hinge pin is broken, as stated above. The hinge pin should have another straight ‘dowel’ segment pointing in the other direction. Will need to remove the hinge pin from the lower hinge so it can be copied, as don’t recall seeing these for sale at the Home Depot. But intend to take the rest of the hinges off the safe anyway now that I see how it looks with the nickel plating, even in as poor a condition as it is. Gonna have to have those hinges plated, too. According to the patent information, the hinge/hinge pin design is ‘an improvement in safe hinge design’. It looks to me as if it is intended to allow the weight to be spread over a larger section of the lower hinge rather than having all the weight on the tiny part below the upper hinge section. It also allows the hinge pin long section to pivot, giving greater range of movement than a straight hinge pin. Next, I gotta get the vitrified grease out of the hinge so accurate measurements can be taken for making a new hinge. That is gonna take some work. Since I (finally) figured out that it is vitrified grease and not rust in that part of the hinge, have the hinge soaking in brake clean overnight. OK, you are caught up for another day. As always, open for ideas and suggestions. Gordon Just when you finally think you have learned it all, that is when you learn that you don't know anything yet.
-
GWiens2001
- Site Admin
-
- Posts: 7659
- Joined: 3 Sep 2012 16:24
- Location: Arizona, United States
by deralian » 11 Feb 2015 9:48
Other than that hing pin it looks like everything is cleaning up rather well. Good job, lots of hard work. You have a machine shop that is going to make some new pieces?
-
deralian
-
- Posts: 64
- Joined: 15 Dec 2014 12:49
- Location: Arizona
by GWiens2001 » 11 Feb 2015 10:41
A couple of possibilities, but nothing definite. When I get the other hinges off, will check more thoroughly into who can and will do it. The lower hinge and hinge pin are intact, so that may help whoever makes a new one.
Gordon
Just when you finally think you have learned it all, that is when you learn that you don't know anything yet.
-
GWiens2001
- Site Admin
-
- Posts: 7659
- Joined: 3 Sep 2012 16:24
- Location: Arizona, United States
Return to This Old Safe
Who is online
Users browsing this forum: No registered users and 8 guests
|