Okay so this will be a quick guide providing insight into these locks; their function and their components. Since these locks are very simple I don’t think there is need for a long guide, so I’ll keep it short and sweet.
Principle:
A wafer tumbler differs to a pin tumbler by the measures that are implemented to stop the lock from being opened without a key.
A pin tumbler uses 5, or 6 pairs of pins which separate at the sheer line, only the correct key can lift them to the right height.
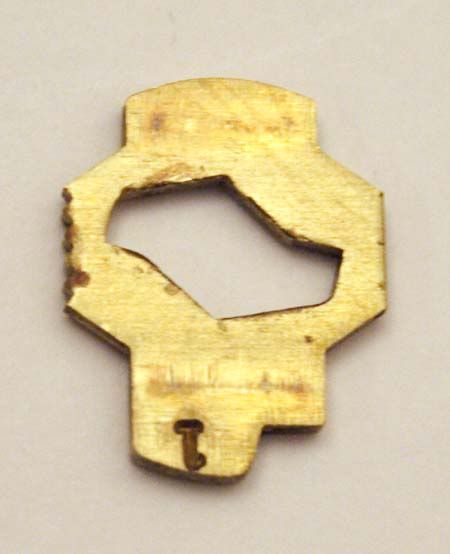
A wafer tumbler however uses a system by which flat pieces of metal named “wafers†must be pushed to the correct position whereby they become flush with the plug and therefore can rotate.
The 2 locks share the similarity that the plug is obstructed from movement by obstacles, and that these obstacles must be overcome by applying a precise lifting height by each key.
Tools:
There really is no need for anything fancy to take these locks apart, but there are some that are useful.
You will need:
• A lock
• A pair of tweezers (not 100% needed, but if you have big hands then it becomes fiddly without)
• A key (will make the easy process even simpler)
• A pick and tension wrench (if you don’t have the key)
• Some turpentine, or kerosene to clean up the wafers if they are dirty
• A clean cloth (for the above reason)
Safety:
• A first aid kit is handy for minor cuts you may get as a result of this process, but it will be limited to small cuts so some band-aid will be fine along with some antiseptic spray to keep out infection. Furthermore if you are into aromatherapy or essential oils, then you might want to buy a small tube of Lavender oil to clean up cuts nicely… I’ll stop now before I go into spiritual healing
• Goggles can be used to avoid springs and the like from perhaps flying in your eyes, this is not entirely necessary, but is worth considering
• Common sense… if what you are doing seems to have potential to cause injury then don’t do it unprotected.
Finally with all that malarkey out of the way let’s get down to re-pinning a wafer lock!
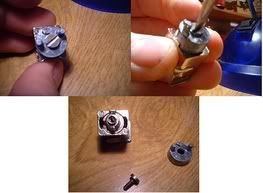
Depending upon which type of wafer lock you have this may involve different things. The plug of my wafer lock was secured by the cam at the back of the lock fastened by a screw. I removed the screw with a flat-head screw-driver, and pulled the cam off.
The device used to retain the plug may differ, but essentially it will be a similar process.
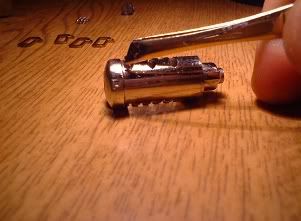
When you have removed the retaining “device†you must either simply insert the key and turn it, but if like myself you “don’t have/can’t find†the key simply apply tension and gently rake the wafers with a ball pick, or half-diamond. Once you have managed to open the lock one way or another follow the same procedure for pin-tumblers of turning the plug 20 degrees or so and pull it slowly out of the lock body. If you dont have the key and have picked the lock open you can just insert a tension wrench or similar before pulling the plug out, when you pull the plug out the wafers will not spring up.
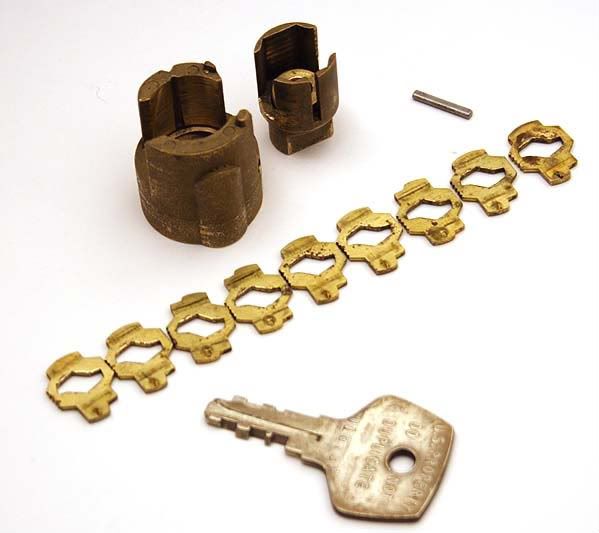
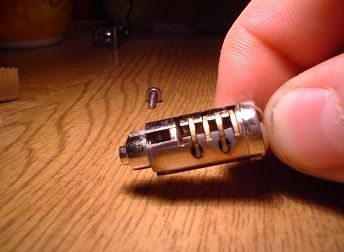
Okay, once you have removed the plug from a lock you will be left with:
• A number of wafers,
• A corresponding number of springs,
• The plug
• The lock housing
• The retaining “deviceâ€
I was left with 4 wafers, 4 springs, the plug and the lock housing.

You can see the wafers made of brass and the springs now – just don’t lose any and putting it back together should be dead-easy.
Putting it back together:
Insert the springs into the corresponding holes drilled in the plug, being careful not to force them, or they may ping out – this will have you cursing and looking for tiny springs, not advised!
Insert the wafers back into their slots and leave them just sitting there.
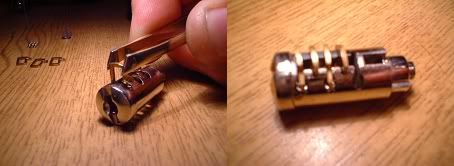
When you have placed all the wafers in the plug, insert the key into the plug and slide it back into the lock housing.
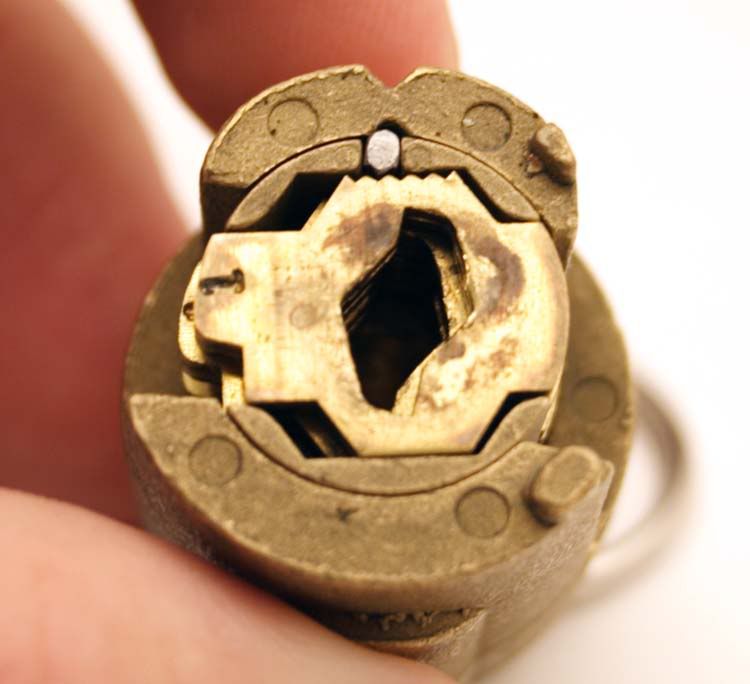
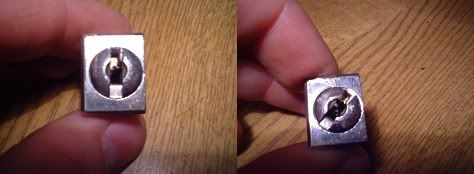
If you do not have a key for what ever reason then you need to use your tension wrench and push the wafers down so they are flat – because of the small differences in pin heights it will merely be a case of playing around with it until it is good enough. You are aiming for something like this:
Slide the plug back into the lock housing and turn it back to its neutral position.
There it is – You now know the basics of a wafer lock and how to take them apart and put them back together again. A simple process that should give minimal problems.
Thanks for reading
Illusion.