


Taking it apart
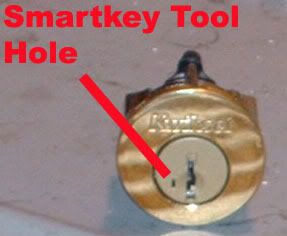
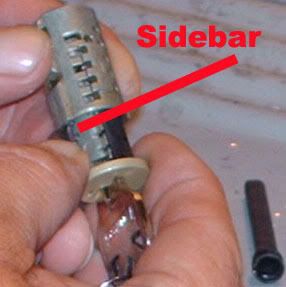
This photo above just shows the tool hole that is used to rekey the lock. I'll talk about it more when we get to how it works.

To take it apart start by removing the large clip on the back of the cylinder, needle nose pliers work well.
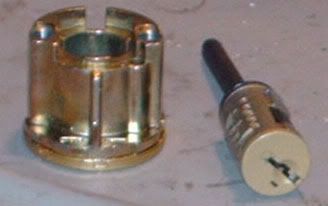
After removing the clip slide the pieces apart and you will have 2 pieces plus the clip.
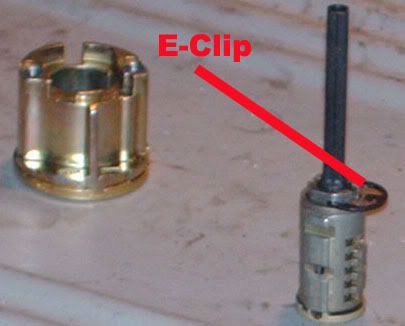
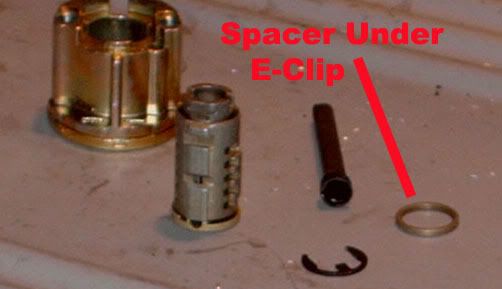
Then remove the e-clip on the back of the plug and the other parts will come off.
Insert the working key and then slide the plug out. Notice that I have my thumb on the sidebar to keep it from falling out. As you slide the plug out you will have a ball bearing fall out of the bottom of the lock so do this in a bag or over a small box. The bearing is only to make drilling more difficult. It serves no other purpose. There is also a spring above this bearing but it seems to stay in the lock.
If you don't hold the sidebar you will have parts falling all over the place.
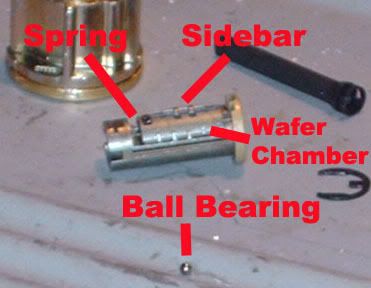
This is the plug after being removed, there is nothing holding the sidebar and wafer chamber except their own weight and the small spring shown in the picture. I'm referring to this as the wafer chamber, this may not be the correct name so if someone knows the correct name jump right in. The bearing is the one out of the bottom of the plug.
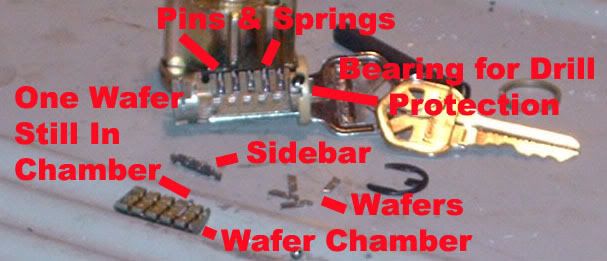
When you remove the wafer chamber you will have lots of parts that will fall out. Do this slowly and in a bag or over a box. The bearing in this photo will not fall out of the lock.
How It Works

All of the pins and all of the wafers are identical. The lip on the pins engage the wafers and when the key is inserted the lip raises the wafer to the correct position so the sidebar can drop into the groove and allow the plug to turn.
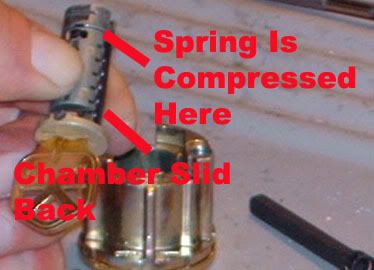
In the above photo I'm sliding the wafer chamber back. This is the same thing that the rekey tool does when it is inserted into the Smartkey tool hole, see the first photo. When the chamber is slid back in this position it pushes the wafers between the pins and disengages them. The spring behind the wafer chamber is compressed. This chamber will not move in the locked position because of the design of the lock.
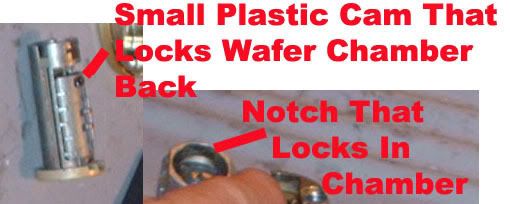
When the plug is turned to the correct position the small plastic cam locks into the notch and holds the chamber back. This allows you to remove the old key and insert the new one. When you return the new key to the locked position the cam slides out of the notch and the chamber slides back to it's forward position. This locks the pins and wafers in a new position, locking the wafers at the correct height, allowing the side bar to drop.
Rekeying Without The Working Key
When you have the lock down to this position (Before you remove the e-clip) you can turn it to the bottom and see the wafers protruding. At this point you can sight read the wafers and cut a key.
If for some reason you don't have the ability to do this or capability to cut to code then read on.

If you don't have the working key you can make a comb pick that will release the sidebar. You can make this out of anything, hacksaw blade, key blank, etc... This one is made from a SC9 key blank. The length of the combs should work if they are between .0130 to .139.
Use a tension wrench on the keyway for this method. You want it to enter the bottom of the plug with the comb pick. The bottom is where the wafers are protruding. You need to push them even with the plug on the top side. Once you have them even the plug will turn as if you got a false set on a spool pin. When this happens the comb pick is keeping the plug from turning. Just keep tension on the plug while removing the comb. Then the plug will turn. Turn it exactly 90 degrees and insert the new key. Return it to the locked position and you now have a working key.
