|
When it comes down to it there is nothing better than manual tools for your Lock pick Set, whether they be retail, homebrew, macgyver style. DIY'ers look here.
 by sawtenor » 30 Oct 2005 13:48 by sawtenor » 30 Oct 2005 13:48
So far, the picks I've made were, for the biggest part, fairly simple to make. Now, I'd like to turn on on more complicated picks to make like the HPC computer picks or falle-safe. That's why I'm seeking for a (good) technique to print a template on my blade and I don't know very much about general DIY.
-
sawtenor
-
- Posts: 35
- Joined: 17 Apr 2005 8:06
- Location: Montreal
by sawtenor » 30 Oct 2005 13:51
BTW, I use black hacksaw blades
P.S. No edit button?
-
sawtenor
-
- Posts: 35
- Joined: 17 Apr 2005 8:06
- Location: Montreal
by illusion » 30 Oct 2005 14:01
If you print off the templates off your computer, and stick them to your hacksaw blade you can spray the entire blade with spray-paint. Once you've done this remove the paper you stuck on to begin with and you now have printed a template onto your hacksaw blade.
-
illusion
-
- Posts: 4567
- Joined: 2 Sep 2005 13:47
by Shrub » 30 Oct 2005 17:30
If you do that use a high temp paintso it doesnt get burned off,
What i have always doen is too spray glue the paper template on the blade, accuritley cut the paper out first, i must add though that i can cut a pick out without it getting the blade hot or needing to quench it so i guess to do it this way you need quite a lot of metal work experiance,
If you are useing painted blades you could glue the template on the blade and with a sharp scriber and metal ruler mark around the straight edges and carefully mark the curves free hand, your aim is to mark through the paint leaving a bare metal line.
You could do any of the above and when close to the finished shape remove the paper and just finsh the pick by eye, use a card template to keep offering it upto the work to check your not going too deep, this will allow you to have smooth edges too the line instead of a ground edge you then have to clean up which could take you below size.
-
Shrub
- Moderator Emeritus
-
- Posts: 11576
- Joined: 23 May 2005 4:03
- Location: uk
by rayman452 » 30 Oct 2005 17:54
I use an awl and scratch it in, or sometimse a permenant marker...but that takes much longer. I like the paint idea though.
Dudley Cracking Team Initiator And Leader
ke ke, now Im special...
-
rayman452
-
- Posts: 439
- Joined: 28 Jan 2005 11:00
- Location: Canada, EH?!?!
by Gordon Airporte » 30 Oct 2005 21:36
I've had reasonable luck cutting out the template with a very wide border, gluing it on, and just cutting the paper too. You can peel it off once you get down to the fine work, but have another printout handy to check against if it's something really tweaky like a computer pick. The limitations are that you have to cut slow enough that you don't need to quench, and it's best to have your cutting tool turning in to the paper so it doesn't pull off.
-
Gordon Airporte
-
- Posts: 814
- Joined: 15 Sep 2005 13:22
by Chrispy » 31 Oct 2005 0:07
Yeah, I used to scratch it out onto the blade.

Some things may be pick proof, but everything can be bypassed....
-
Chrispy
-
- Posts: 3569
- Joined: 24 Mar 2005 15:49
- Location: GC, QLD
-
by wsbpress » 31 Oct 2005 19:45
I have some adhesive backed inkjet paper that I use for this. Just print it out, cut it out with a hobby knife, and stick it on the metal. It works pretty good but the paper starts to deteriorate when you are quenching, though I think it holds up good enough.
-
wsbpress
-
- Posts: 94
- Joined: 7 Jun 2005 21:21
- Location: SLC, UT
-
by silent » 1 Nov 2005 8:30
marker, big felt tip, get a few colors so ou can mark areas where you need to be more careful such as narrow parts as a little reminder
nothn a 9 cant fix.
-
silent
-
- Posts: 303
- Joined: 9 Jan 2004 17:38
- Location: St.louis
by mouse » 1 Nov 2005 12:52
If you have a dremel, first mark out your design with a marker pen then use a cutting disk or engraving bit and lightly outline the design with little dots\dashes.
[URL=http://www.btinternet.com/~the_mouse/mouse/pages/sigs/sigs.htm] 
 [/URL]
^click for sigs^
-
mouse
-
- Posts: 56
- Joined: 1 Nov 2005 6:05
- Location: UK
by Kodiak » 1 Nov 2005 22:06
You might try using lay-out die rather than spray paint. You can get it anywhere they sell machining tools. I don't know if it's sold at home improvement stores or not, but you could call and find out. The die won't burn off when grinding. But the felt tip marker trick works well if you will only be laying out a small area.
-
Kodiak
-
- Posts: 42
- Joined: 2 Aug 2005 23:09
- Location: Ohio
by rayman452 » 1 Nov 2005 22:46
careful with marker though, even the permant markers I find tend to wash off while quenching.
Dudley Cracking Team Initiator And Leader
ke ke, now Im special...
-
rayman452
-
- Posts: 439
- Joined: 28 Jan 2005 11:00
- Location: Canada, EH?!?!
by Peter Martin » 29 Nov 2006 11:52
I had to revive this old post because I made an attempt to grind HPC Computer Pick copies last night. And I was sitting around the kitchen table staring at the paper template, wondering: How the heck do I transfer the pattern? (** I knew that there were answers somehwere on LP101, but didn't have a computer available... and I really wanted to try to get at least one pick done.)
I thought of cutting the shape and using glue or adhesive onto the metal, but the thought of cutting my template with scissors or an Exacto knife seemed rather "inaccurate", and it wouldn't hold up to heat and quench.
Same with cutting out the shape and scribing around it. I'm just not that confident scissors would give an accurate pattern.
I settled on using layout ink (Dyken Blue) on the metal stock. I simply laid the paper over the metal. Then I took my scriber and using a "press and spin" motion I carefully pushed in a series of dots along the paper outline. This created a corresponding series of dots on the metal underneath that I could now connect freehand. The more dots, the more accurate your outline.
It took about 5 minutes to do this, working slowly and carefully not to move the paper template.
-
Peter Martin
-
- Posts: 396
- Joined: 1 Aug 2004 0:14
- Location: SD
by parapilot » 29 Nov 2006 12:09
Peter Martin wrote:I thought of cutting the shape and using glue or adhesive onto the metal, but the thought of cutting my template with scissors or an Exacto knife seemed rather "inaccurate", and it wouldn't hold up to heat and quench.
I just roughly cut the pick out into a square and stick the lot onto the metal. That way the shape of the pick is intact. With the HPC picks if you cut them exact you could stick it on slightly bent or distort the shape. The grinder takes care of the excess paper. Use a strong glue, even super glue, it will clean up easy when polishing. I made a full HPC set no problems using this, even with quenching.
J
-
parapilot
-
- Posts: 599
- Joined: 30 Mar 2006 15:50
- Location: Wirral, UK
by Peter Martin » 29 Nov 2006 12:27
I knew there were easier answers. And I had superglue just sitting there in the junk drawer!
However, on a positive note, I can re-use my paper templates--not that it matters.
Here's my first attempt. My method seemed to give accurate results, but I will conceed, the less labor intensive (and simpler) methods might work better.
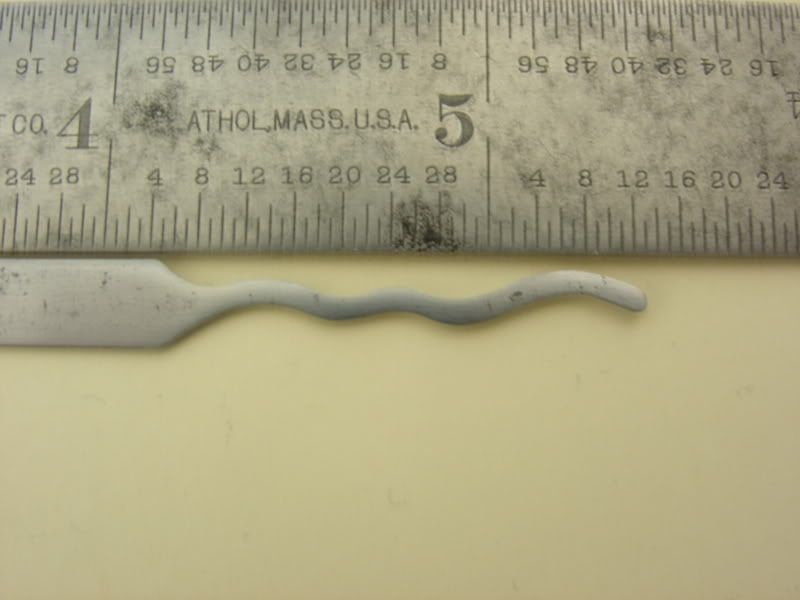
P.S. the metal stock has some rust pitting and defects--that's the black dots/areas. But it was good enough for a trial run.
-
Peter Martin
-
- Posts: 396
- Joined: 1 Aug 2004 0:14
- Location: SD
Return to Lock Picks
Who is online
Users browsing this forum: Google [Bot] and 27 guests
|