OK guys... here goes...
I got lucky and found about 15 street sweeper bristles in my 2 mile walk around the community on Saturday. Some of them are rusted, others pitted. I'd say there were about 4 of them that were nice and bright, what I did was use to of them to make what you see below. I might have been able to make them from one, but this was my first time making a pick, ever and it's a shot in the dark.
I'd like to preface my comments with this: the street sweepers here might use different bristles than elsewhere. Why is that important?
Well, because below you are probably looking at four hours of work... one spent using machinery on and off. What I used:
-A KMG1 knifemaker's belt grinder with three stepped pullys to give it a low/med/fast speed. High quality Cubitron 2x72" belts were used... these are the type used by pro knifemakers.
-An angle grinder, briefly, to cut the stock up. (a dremel cut off wheel would have been just as easy, but I had only 5 minutes to shore up the stock, cut it and bend it and the dremel had a different tool in it. the grinder was ready to go, plugged in)
-A 4" bench mounted vice.
- A plumbing wrench with flat faced jaws ready to go. Other pliers would have been fine.
-Round Dremel carbide bit, small fine sanding drum and buffing wheels.
-Emery (relatively coarse) buffing compound and white jeweler's rouge.
- low end swedish needle file set
- 220, 340(iirc) and 600 grit sanding paper.
Steps:
(Preface! i've worked with steel before and was very conscious of the temper. This stock was fully tempered already. I work with power tools ungloved, with my fingers close to the cut. The general feeling with knifemakers is that you don't want to heat the stock past "OUCH" temperature with your bare skin. When it got hot, I dunked it in water... never got a blister, so it never heated enough to destroy the temper except initially...)
1) bent steel according to directions from Raimundo's guide.
2) cut off extra stock w/angle grinder to fit what i thought would be an OK size for the picks. Angle grinder discolored the metal a little on the area where I cut.
3) rounded edges of future tension wrench end w/belt grinder. Ground... using rough grit... the discolation + a little more. this was done in probably 2 seconds... ziiip, ziip. Coarse doesn't build much heat. No worry about the temper (more below)
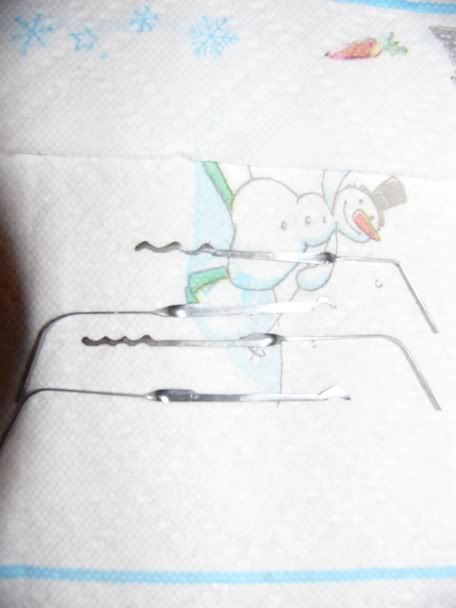
4) used carbide bit in dremel to make rough cuts. As seen, the Southord pick was what I compared the spacing between the humps and depth of valleys to. In retrospect, it was my first time, I screwed it up a little... but... compared to the pin distances in a kwikset lock (my only reference) the peaks were generally in the middle. Good enough, I guess.
5) Drum sander to semi round out edges and slightly deepen curves.
(again, frequent dunking in water to avoid heat buildup).
6) Needle files to round out more...
7) After this, I basically went through the sand paper for a ... while. I watched a couple movies while smoothing out the edges.

Then I used the buffing compounds and the dremel to polish. Temper was not an issue here.
The reason why I said that temper wasn't affected is because even the needle files towards step 6 had a tough time biting into the steel. Man, it was a real pain in the rear. Even the sandpaper was DESTROYED by this steel.
Bottom line: Raimundo is KING among men because he does these by hand in the time he does. I don't have a set of his yet, but I will get them just to have a set made by the master. I'm telling you, I used power tools VERY gently and by the end of the weekend I was so very, very glad to be done with this set. This isn't even to mention that he came up with the design and produced the guide... I bow.
in any event, two quick snaps before I'm off:
(again, the southord "m" or "w" rake was used to approximate peak height/valley depth and... er... wavelength... distance between two peaks


(rounding is shown a little better because of the lighting)
cheers... and thanks especially to Raimundo for the innovation, information and inspiration.
(i'd also like to add... bristle steel *completely* blows windshield wiper stiffener steel out of the water. Way higher quality, much better strength and springyness) 8]
cheers


