Lock Picking 101 Forum
A community dedicated to the fun and ethical hobby of lock picking.
       

Lock Picking 101 Home
Login
Profile
Members
Forum Rules
Frequent Forum Questions
SEARCH
View New Posts
View Active Topics


Live Chat on Discord
LP101 Forum Chat
Keypicking Forum Chat
Reddit r/lockpicking Chat


Learn How to Pick Locks
FAQs & General Questions
Got Beginner Questions?
Pick-Fu [Intermediate Level]


Ask a Locksmith
This Old Lock
This Old Safe
What Lock Should I Buy?


Hardware
Locks
Lock Patents
Lock Picks
Lock Bumping
Lock Impressioning
Lock Pick Guns, Snappers
European Locks & Picks
The Machine Shop
The Open Source Lock
Handcuffs


Member Spotlight
Member Introductions
Member Lock Collections
Member Social Media


Off Topic
General Chatter
Other Puzzles


Locksmith Business Info
Training & Licensing
Running a Business
Keyways & Key Blanks
Key Machines
Master Keyed Systems
Closers and Crash Bars
Life Safety Compliance
Electronic Locks & Access
Locksmith Supplies
Locksmith Lounge


Buy Sell Trade
Buy - Sell - Trade
It came from Ebay!


Advanced Topics
Membership Information
Special Access Required:
High Security Locks
Vending Locks
Advanced Lock Pick Tools
Bypass Techniques
Safes & Safe Locks
Automotive Entry & Tools
Advanced Buy/Sell/Trade


Locksport Groups
Locksport Local
Chapter President's Office
Locksport Board Room
 

LP101_NAG (How-to des/re-assemble a lock)

Information about locks themselves. Questions, tips and lock diagram information should be posted here.

LP101_NAG (How-to des/re-assemble a lock)

Postby Wrenchman » 29 Aug 2006 10:17

Newbie Assistants Guide

I made a video, that shows how to change the top pins and the springs, hey I just felt like sharing

The steps below should be followed, for best result!

#1)Pick the lock

#2)Turn the plug 180 degrees.

#3)Attach the hair-clip-tool, put it in sideways, and then slide it on

#4)Secure the plug with your thumb and then remove the retainer pin

#5)Gently let the plug come out, by holding the lock downwards, securing the plug with your index finger.

#6)Put the lock in your left hand between your thumb and your index-finger, to cover the hole in the middle

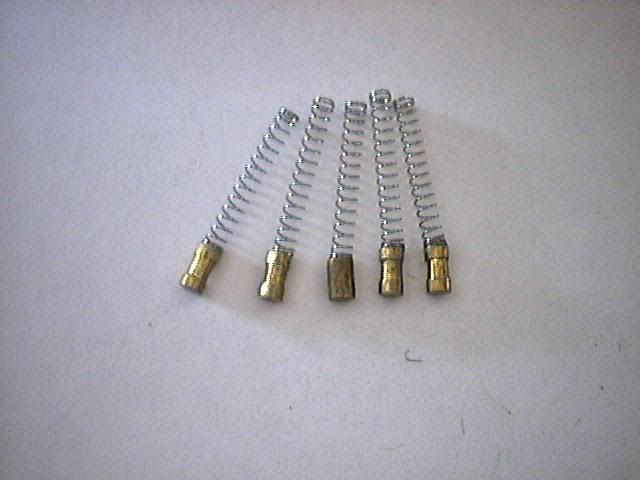
#7)With your right thumb cover the hole in the front, then move the hair-clip-tool to the side with your right index-finger.

#8)Let the pins and the springs fall out on a piece of cloth.

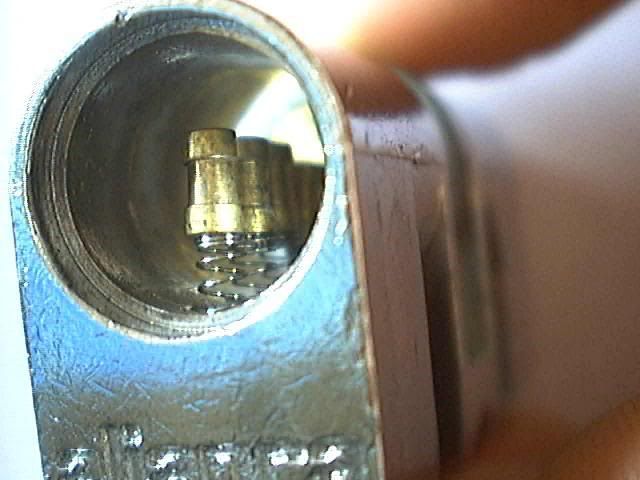
#9)Check all the parts in the lock, for any damage. (Now would also be a good time to Flush / Clean the lock)

#10)Take each spring with a pair of tweezers, and put them back into the lock, starting with pin-hole # 4
(assuming that the lock has a total of 4 pin-holes)

#11)Take each top pin with a pair of tweezers, and put them back into the lock, starting with pin-hole # 4.
(assuming that the lock has a total of 4 pin-holes)

#12)While holding the lock level, put the hair-clip-tool back into the lock, put it in sideways on top of the top pins without actually touching the top pins, then, push the hair-clip-tool down on the top pins, equally, do not let the hair-clip-tool twist, supporting the hair-clip-tool both in the front and in the back, keeping an eye inside the lock at all times, watching that
the hair-clip-tool and the top pins stay aligned, then with your eyes inside the lock, slide the hair-clip-tool back onto the housing

#13)Gently, with the bottom pins upwards, put the plug back into the lock, then, securing the plug with your thumb, put the retainer pin back on

#14)Slide the hair-clip-tool off to one side, and then pull it out

#15)Turn the plug until it locks

I do sound a little funny, but you will get over it... after about 6 min. :?
http://video.google.com/videosearch?q=wrenchman

I hope you liked my guide

:D

Wrenchman
Before you pick a lock:
The first thing that you should do is check to make sure that
the lock is your's and secondly make sure its not in use.
Wrenchman
 
Posts: 588
Joined: 11 Sep 2005 19:04
Location: Brazil

Postby Schuyler » 29 Aug 2006 10:24

Dig it, man.

I love the use of the hair-clip tool. And you sound fine :)
Schuyler
Supporter
Supporter
 
Posts: 3448
Joined: 24 Jul 2006 1:42
Location: Boston

Postby unbreakable » 29 Aug 2006 13:41

MAZOLA MAZOLA MAZOLA MAZOLA MAZOLA MAZOLA MAZOLA

:lol::lol::lol::lol:

I love it dude, the video has great instruction, and you sound fine.

And I especially love the subtle backdrop of MAZOLA!!

Brazillian Mazola at that!!

You should add that a drop of Mazola helps the locks function smoothly!


Well done!!
Image
unbreakable
 
Posts: 1682
Joined: 28 Oct 2005 18:55
Location: Nova Scotia, Canada

Postby Shrub » 29 Aug 2006 16:38

Wow, how did you manage to get Michael Jackson to do the voice over?


J/k :lol:
Shrub
Moderator Emeritus
 
Posts: 11576
Joined: 23 May 2005 4:03
Location: uk

Postby mrdan » 29 Aug 2006 22:38

Shrub wrote:Wow, how did you manage to get Michael Jackson to do the voice over?


J/k :lol:

:lol:
mrdan
 
Posts: 356
Joined: 5 Aug 2006 1:34
Location: Dallas, TX

Postby Wrenchman » 30 Aug 2006 16:22

Hee-hee,
You know Im bad, Im bad-come on, you know it
And the whole world has to answer right now
Just to tell you once again,
Whos bad . . . 8)

I guess there is some resemblance, white skin, light voice, loves children :wink:

On a more serious level, I am going to try and re-record it,(this time with bass) cuz I think it is a little bit shaky, also look out for the 2. upcoming video, which is a bit more advanced

BTW did any body try, I bet someone had a "pins and springs all over the floor" first time accident, just like I had.
Before you pick a lock:
The first thing that you should do is check to make sure that
the lock is your's and secondly make sure its not in use.
Wrenchman
 
Posts: 588
Joined: 11 Sep 2005 19:04
Location: Brazil

Postby Wrenchman » 21 Sep 2006 13:14

Here is a small update, I decided not to make another video, since pictures will do fine.

Question:
What if the springs stick out of the hole, meaning that the top pins can´t stay in place?

Answer:
Glue the springs and the top pins together!

Image

Image

Image

I told ya it was gonna be advanced :)

:D

Wrenchman
Before you pick a lock:
The first thing that you should do is check to make sure that
the lock is your's and secondly make sure its not in use.
Wrenchman
 
Posts: 588
Joined: 11 Sep 2005 19:04
Location: Brazil

reassembly

Postby greyman » 21 Sep 2006 17:00

Wrenchman, there's another way that does not involve glue - but it's even more advanced :wink:
You need a front-insertion clip to compress the drivers and springs and keep them in their chambers until you slip the plug back in. There's a few threads on this if you look around.
Image
greyman
 
Posts: 1026
Joined: 21 Mar 2005 16:43
Location: NSW, Australia

Postby Shrub » 21 Sep 2006 18:01

Well Wrenchman wrote one of them so i guess he does know about the clip :lol:
Shrub
Moderator Emeritus
 
Posts: 11576
Joined: 23 May 2005 4:03
Location: uk

Postby Schuyler » 21 Sep 2006 20:10

Hehe, I love it, Wrenchman :P You're a hoot.
Schuyler
Supporter
Supporter
 
Posts: 3448
Joined: 24 Jul 2006 1:42
Location: Boston

Postby illusion » 22 Sep 2006 4:46

Hahaha!

If the springs and top pins are proving fiddly, glue 'em! :P

On a serious note, that would work OK untill they become seperated, and I would imagine this would lead to bits of glue flakes in the lock.
illusion
 
Posts: 4567
Joined: 2 Sep 2005 13:47

Postby cL4y » 22 Sep 2006 7:42

I agree with Illusion,

Hahahaha!

I love the video,and your voice,UHHH man i was laughing for ages.


Apart from the funnyness of this thread,id like to comment on a good guide,you should make one with pictures (for this site) and it would help alot of people with re-pinning.
Image
cL4y
 
Posts: 277
Joined: 22 Apr 2006 9:04


Return to Locks

Who is online

Users browsing this forum: No registered users and 4 guests