|
When it comes down to it there is nothing better than manual tools for your Lock pick Set, whether they be retail, homebrew, macgyver style. DIY'ers look here.
 by Spossum » 8 Sep 2006 11:17 by Spossum » 8 Sep 2006 11:17
I have scored some bristles. They are in very good, nearly new condition. I am concerned they may not be the right type though. They have a blueish tint, possibly tempered? They are quite springy, and I think they will have to be heated to bend them. If I heat them, should I quench them? I may just make straight picks from them, but I was going to attempt to make the infamous "Bogata Picks" but not sure how to bend them.
I have not tried anything yet in fear of ruining them and I am not sure if I can get anymore. I am going to attempt to post a photo of them and if anyone has any advice on the best way for me to handle them I appreciate it. Thanks
-
Spossum
-
- Posts: 92
- Joined: 12 Aug 2006 8:41
- Location: Kansas USA
by Spossum » 8 Sep 2006 11:21
Well, I guess my first attempt to post a photo was a flop, but I think you can cut and paste that link to see it if anyone is interested, or maybe a moderator or someone can just fix it for me? (please)
-
Spossum
-
- Posts: 92
- Joined: 12 Aug 2006 8:41
- Location: Kansas USA
by Shrub » 8 Sep 2006 11:21
Done 
-
Shrub
- Moderator Emeritus
-
- Posts: 11576
- Joined: 23 May 2005 4:03
- Location: uk
by raimundo » 9 Sep 2006 9:08
You can bend them easily with no heat, they are tempered, that means heat treated to make them stiff and springy. these should work excellent. however, sometimes tempering can have gone badly so if you do snap off a bristle by cold bending, I usually cold bend the same bristle an inch further down, and it either snaps off or bends as it should. if it snaps off, snap it again an inch further until you come to the end of the part that is maltempered. Often you can find it on the same bristle, as the defect is only a section of the metal. I recommend that you go ahead and cut two pieces about 3 to 4 inches long, file one end to round on each of them, this will be the tensor end, and filing it to round will prevent its sharp edges from getting at your fingers as you finish makeing a pick. put the two rounded ends together and clamp tight in a vise grip plier, then bend them both together, there are two ways to bend them, one is the one plier method and works on really good steel, the other is used when the steel is somewhat likely to crack in the bending. for the two plier method, you use the vise grip as before, clamped tight, so that the ends remain together during bending and another plier, I use a smooth jawed needle nose with flat jaw close to the axis. this allows both hands to direct the bending away from the edge of the clamped on plier, you are controlling the bend from both ends of it, whereas just bending it over at the edge of the single plier makes it try to bend very sharply at the point, and this can cause the inner (smaller radius) bend to crack (listen for this when bending, if you hear it , a fracture has started, it may be small and hard to spot, but it makes further work on that piece useless, as it will eventually break. In the two plier method, you are going for bend with a longer radius, not a sharp angle, and keeping the tensor ends together in the vise grip while letting the smooth jaw non locking plier allow some slippage through the jaw to accomodate the longer radius of the outer piece..
after that, bind the two pieces together with wire, (i simply use ballpoint springs slipped over both ends, one of them going over the tensor bend,
again, I use a vise grip plier clamped about and inch and a half from the bend, and a smooth jaw plier about 3/8ths of an inch from that plier, to make the 90 degree twist. if you put the two pliers two close together, you will creat a shearing force and break them off, but with a little space to accomodate the twist, you can turn the metal cold to 90 degrees, as you make the twist, the two ballpoint springs will keep the pieces from splaying out in a way that will not be conducive to pairing that is intended to result from bending together in one operation. when this is done, you decide on how much shaft you want on the pick and then cut the picktip ends to equal length, after that just cut the tips on and waste out the material along the shaft. finish shaping with 220 grit black metal cutting sand paper rolled around a paint stirring stick and held on both ends with rubber bands, 220 grit is part of the final shaping, rounding the edges, getting out the file marks, then finish with finer grit sand papers each grit reduces the marks of the previous grit until its smooth. or you can just work it on the 220 grit in the same spot until the 220 becomes finer grit.
(grit breaks down to smaller pieces as its used) but you will eventually have to go to a finish sand of much finer grit, as the 220 will never completely stop making the heavy scratch. just remember, 220 and 320 grit are still shaping the pick, so using them must be planned that way.
you can use chopsticks and other shapes of wood, (bamboo chopsticks wont break, the cheap pulpwood sticks are useless.) the chopstick offers a variety of diameters and some of them have square handles that can be used for their small flat sides or for their 90 degree edges to get into places in the pick tip.
-
raimundo
-
- Posts: 7130
- Joined: 21 Apr 2004 9:02
- Location: Minnneapolis
by Spossum » 9 Sep 2006 21:56
Thankyou very much, I was not expecting to get advice from the expert himself. Actually, now I am nervous that you might see the results of my attempts but hopefully I will make you proud. I will get busy on this tomorrow morning, don't know how much I will get done though as football season starts. Thanks again, Mr. Raimundo, I will post a picture of my pick as soon as I make it.
-
Spossum
-
- Posts: 92
- Joined: 12 Aug 2006 8:41
- Location: Kansas USA
by cL4y » 10 Sep 2006 1:42
Spossum wrote:Thankyou very much, I was not expecting to get advice from the expert himself"........................."Thanks again, Mr. Raimundo.
I wish i got that respect 
-
cL4y
-
- Posts: 277
- Joined: 22 Apr 2006 9:04
by raimundo » 10 Sep 2006 10:17
I'll share it with you, here, you can have half.
-
raimundo
-
- Posts: 7130
- Joined: 21 Apr 2004 9:02
- Location: Minnneapolis
by Spossum » 10 Sep 2006 18:19
I have pinted out and read the instructions "The Master" Raimundo replied to my post 10 times now. These instructions add details and helpful hints that I have found in no other post on this sight. I think they should be added to the other tutorials as an ammendment or something. I personally would be glad to copy and paste his words, giving him credit of course, to other threads with his diagrams and advice on making these picks, if he gave me permission. Or is there a way for a moderator or something to do this. I also have been experimenting with these bristles and will post results soon.
-
Spossum
-
- Posts: 92
- Joined: 12 Aug 2006 8:41
- Location: Kansas USA
by raimundo » 11 Sep 2006 8:54
I guess the site has a cop a right on what gets used where, but as for me, if i put it out on the site, then do what you like, but if ya change it, don't put my name on it.
-
raimundo
-
- Posts: 7130
- Joined: 21 Apr 2004 9:02
- Location: Minnneapolis
by Spossum » 14 Sep 2006 3:41
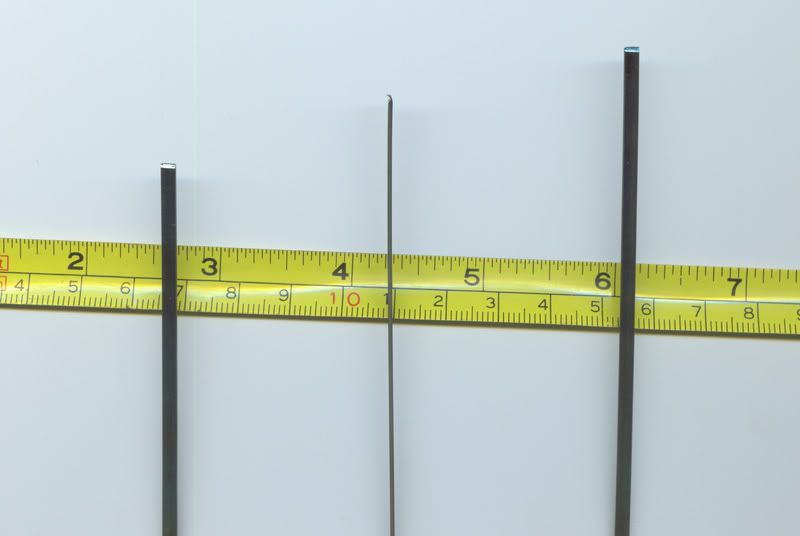
My first attempt at the Bogata picks. The bristles bent beautifully just as Raimundo said. I think they were plenty strong enough to bend one at a time but bending them together also makes a nicely matched pair of picks. I was not prepared with the proper tools. I didn't have a chainsaw file. The only sandpaper I could find in my garage was 100 grit. I decided to try anyway with my dremel, even though I know it isn't recommended. I used it on the slowest speed and it worked OK, I think. I made some mistakes. I made the shaft part too long, so it is hard to use as a tension wrench. I also must not have my valleys and peaks spaced right. Or maybe I just don't have the technique down yet to properly use them, because I have been unable to pick a lock with them in my first few attempts. Even locks I have previously been able to pick with a simple hook style pick I made from a hacksaw blade. I also can clearly see I need to sand a lot more. Already I can tell they slide in and out of the locks very smoothly. I now own a 1/4 inch and 5/8 inch chainsaw file, and a nice selection of sandpaper so I am hoping my next attempt will go better. Even though the closer I got the uglier they looked, I zoomed way in on the tips so you all could see them.
http://s85.photobucket.com/albums/k41/Spossum/?action=view¤t=bogata1.jpg&refPage=&imgAnch=imgAnch1
-
Spossum
-
- Posts: 92
- Joined: 12 Aug 2006 8:41
- Location: Kansas USA
by Spossum » 14 Sep 2006 16:35
OK, I guess I shouldn't make posts at 2:40 am. I have some corrections to make. I didn't make the shaft too long, it is the handle. That is easy enough to correct. I can cut it off or bend it a little more to make it easier to reach. Also, my chainsaw files I bought are 1/8" and 5/32". And my picture didn't post. You can click on the URL and see it if anybody cares or I will try again here.
-
Spossum
-
- Posts: 92
- Joined: 12 Aug 2006 8:41
- Location: Kansas USA
by Kaotik » 15 Sep 2006 20:58
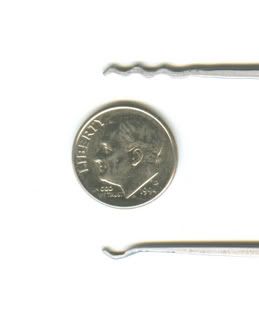
They look like they could work. The bottom one reminds me of a hook shaped dental pick...LoL and it seems to have some flat spots in it, but overall for your first attempt they look pretty good.
Good job. 
-
Kaotik
- Moderator Emeritus
-
- Posts: 1200
- Joined: 10 Jun 2006 13:38
- Location: Texas, USA
by Spossum » 17 Sep 2006 10:30
Thanks for the kind words Kaotik, but I am afraid I wasn't even close. Raimundo was kind enough to send me a photograph of his picks in the different stages of creation. He has also given me permission to post it, and he may comment about it. I have obtained some more bristles and will begin work on them as now I am not afraid of running out. Thanks again Raimundo, this was very helpful.

-
Spossum
-
- Posts: 92
- Joined: 12 Aug 2006 8:41
- Location: Kansas USA
by unbreakable » 17 Sep 2006 12:53
OOhhh, thats a helpful picture. THanks to both of you!
-
unbreakable
-
- Posts: 1682
- Joined: 28 Oct 2005 18:55
- Location: Nova Scotia, Canada
by raimundo » 18 Sep 2006 11:47
from the top down,
1. cut two pieces about 3 to 4 inches in length, round off one end with a file on each piece, so that you will not have sharp things to cut into fingers. put these ends into a baby vise grip pliers end on, so that the depth of the jaw is the measurement for the the length in the jaw, the rounded ends are inside the jaw, the two parts are then gripped by another smooth jaw plier (allowing for slippage on of the wider radius to be all from the smooth jaw and the locking pliers keeps the ends together, bend the metal about 75 degrees, ( 90 degrees may be too much for some metal which will break, but by controlling the bend from both ends with pliers, you should be able to make them without much trouble.
2. put a ballpoint spring on the metal to hold the two ends you just bent together, be sure the smaller diameter is inside the larger one, you are making a matched pair. let the spring come around the bend. then clamp the locking plier hard keeping the two pieces aligned, about an inch or a bit more along the metal from the bend, use a smooth jaw plier to grip about a quarter inch or a bit more from the locking plier, giveing a length to apply the twist on, then put another ballpoint pen spring on the excess length of the metal to prevent splaying as you apply the twist. make the 90 degree twist cold, listen to the metal as you do this, any fracture will be caused by having the pliers too close together, and you can here it if it happens and you are listening for it. (throw out the metal if you hear and later inspect and find the beginning of a fracture, metal that has started to fracture is also weakend to almost fracture through the rest of the area. so don't waste more work if the twist fails, start over)
3. at the top of the photo, the two ends are cut to define the length of the pair you are making, and this work is done with a file and both pieces are cut together,
4 second set from the top of the photo is the first cut of the pick tip shape, a 1/4 inch chainsaw sharpening file is use, if you havent used a file much before, you should probably mark a center cut with the edge of a triangular file to guide the chainsaw file until it makes a groove of its own to follow. This is the last step where you will be working both pieces together, do not try to cut this groove to final dimension, there will be more work on it as you are finishing up, these first steps are simply wasting out some of the mass.
5 the third and fourth steps are all done on the piece that will become the rake, again, do not cut to final depth, just waste out some of that mass.
6 look carefully at the 5th pair from the top, part of the shaft of the rake has been mass wasted, the tips of the pick are still flat between the grooves of the chainsaw file. the undercut near the tip of the pick has been somewhat finished, while the undercuts of the rest of the rake are still unfinished, and the undercut on the single peak part of the pair is only marked with a centering point done with the edge of the triangular file.
the pair beneath that (with the yellow plastic keeper) shows both of the pair cut to a profile that may be now tweaked for dimension, the pick tips have been dressed to points, and the shafts are cut above and below. to make a slightly tapered shaft.
7. Not sure what to point out in that 7th pair, the photo is a bit muddy it may be where I was useing a very fine rattail file to skid along the sharp edges and make a bevel, its important at this step, to keep the file skidding and not let it stay anywhere long enough to cut a groove, do not use a flat file as the edges will dig in. The rat tail file has no edges, and I did say VERY FINE, I am using a grobet swiss 6th cut rattail.
8. this is a nearly finished pair, if you notice some finer detail in dimensions from the 7th pair, this has been worked out in the sanding. with the rougher grits the sanding is still a cutting and shaping process and should be done with shaping in mind.
9. Sanding with grits from 320 to 600 or so, wrap the sand paper around a stick that fits the job, round for the rounded areas, flat for the sides and shaft edges on top and bottom, keep the sandpaper on the stick with rubber bands, hold the stick and move the pick along it, making the file marks accross the the shaft, but just before moving on to the next degree of finer grit, finish by sanding at 90 degees to the direction of the tool marks that you produced with the first sandings. Always change direction 90 degrees before moving to the finer grit. do this by push pulling the pick shaft at the sand stic.
Ththethe thats all folks. 
-
raimundo
-
- Posts: 7130
- Joined: 21 Apr 2004 9:02
- Location: Minnneapolis
Return to Lock Picks
Who is online
Users browsing this forum: No registered users and 25 guests
|


