


Tools:
Hand files, needle files, Xacto razor saw, junior hacksaw, electric drill and bits, marker pen, scriber, centre punch, hammer, vice.
Materials brass:
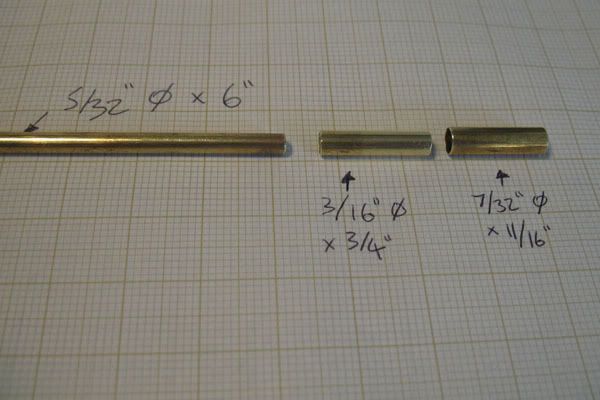
1x Rod 5/32†diameter x 12â€, 1x Tube 3/16†diameter x 12â€,
1x Tube 7/32†diameter x 12â€, 1x Strip 1/16†x 1/2†x 12â€
The 5/32†dia. brass rod will fit inside the 3/16†dia. brass tube, and this will fit inside the 7/32†dia. brass tube.
Other: wooden wheels, glue, silver solder and flux.
Available from good model shops or mail order.
Description:
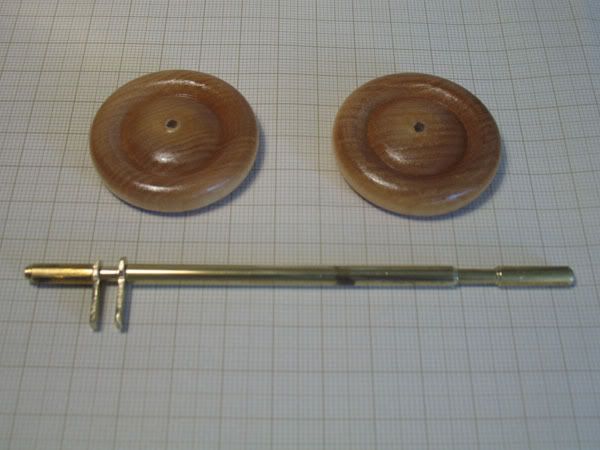
The tool consists of two parts, the inner (primary) shaft and outer (secondary) shaft, which move independent of each other. The tang on the inner assembly locates in the talon of the bolt thrower and thus provides the means to apply tension to the bolt. The tang on the outer assembly is used to raise the individual levers in the lock, which enables the lock to be picked. This assumes the bolt thrower is located at the back of the lock, behind the levers. If the bolt thrower is located at the front of the lock, the outer assembly will engage the talon and the inner assembly will be used to raise the levers.
Procedure:
The inner assembly.
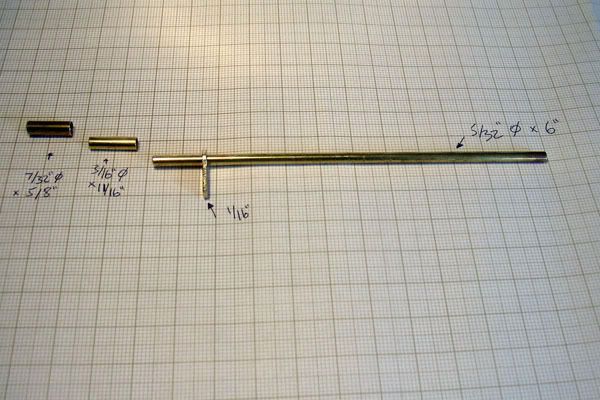
Cut the materials as listed in the photos, none of the measurements are critical though, the diameters are fixed but you can vary the lengths to suit.
The main (primary) shaft.
Cut a 6†length of 5/32†dia. rod
Tip:
Scribed lines can be made to stand out by coating the materials with a permanent marker pen beforehand.
The tang.
Drill a 5/32†dia. hole in a small piece of the flat brass and with hole aligned and held flush behind the keyway, the outline of the keyway can then be transferred to this with a scriber.
Saw and file the piece to roughly the right shape. Final shaping will be done after the silver soldering process.
Cut the two collars from 3/16†tube and 7/32†tube, slide an off cut of rod/tube or a combination of both into the tube to prevent it from collapsing when held in the vice.
Deburr all pieces.
Procedure:
The outer assembly.
The outer (secondary) shaft.
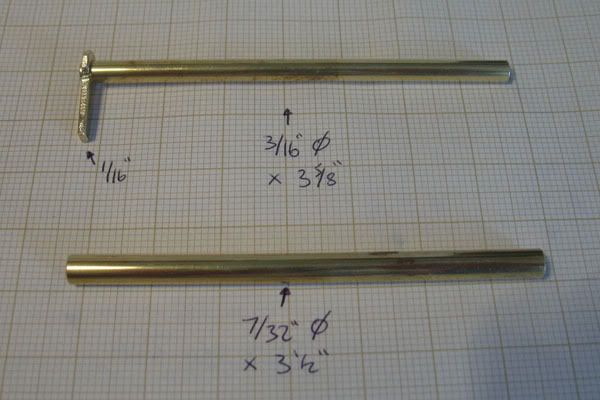
The two pieces of tube are telescoped together to provide a greater wall thickness and hence more strength. The inner tube passes through the tang while the outer tube butts up to it.
The tang.
The tang for the outer assembly is as described above, but with a 3/16†dia. hole instead of 1/8†dia.
Deburr all pieces.
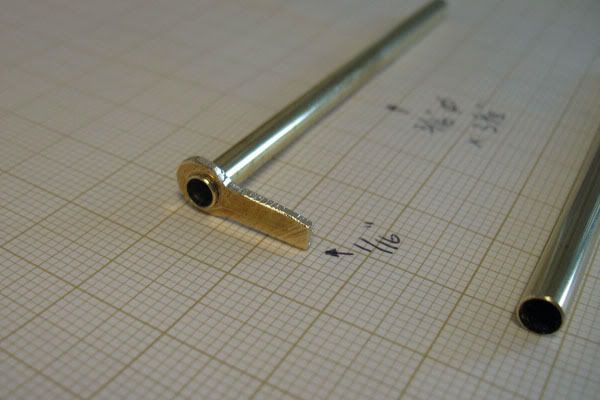
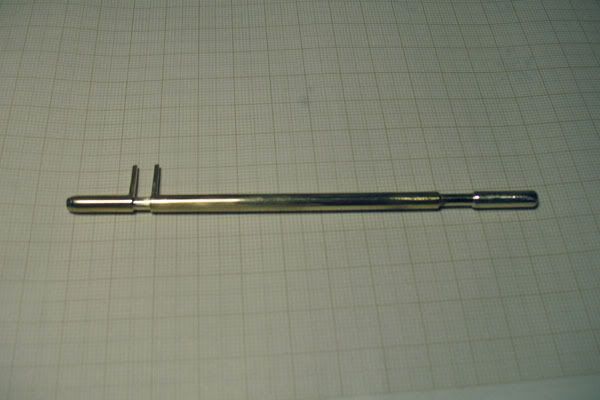
The tang end of the two shafts, assembled, deburred and degreased.
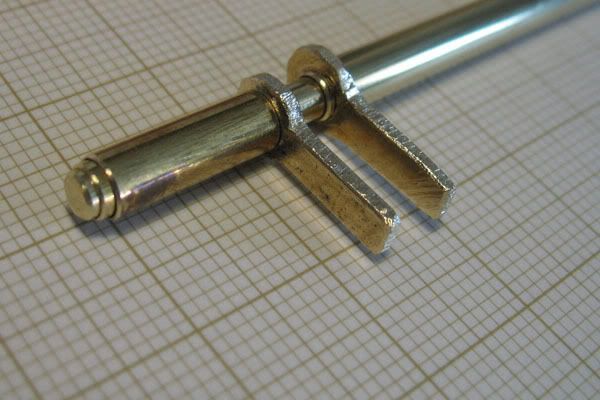
The inner and outer shafts are silver soldered as two separate assemblies.
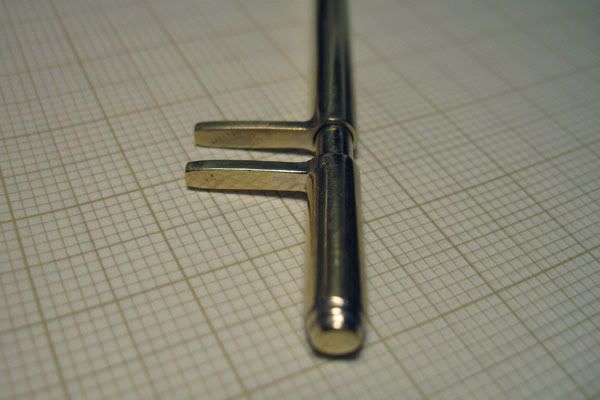
The outside dia. was reduced slightly (with files) to approx 5g / 5.30mm to fit the lock, final measurements of the tangs and are obtained from the lock and levers.
The thickness of the tangs may need reducing depending on the levers.
After a clean and polish, looking good!
The handle end of the inner shaft
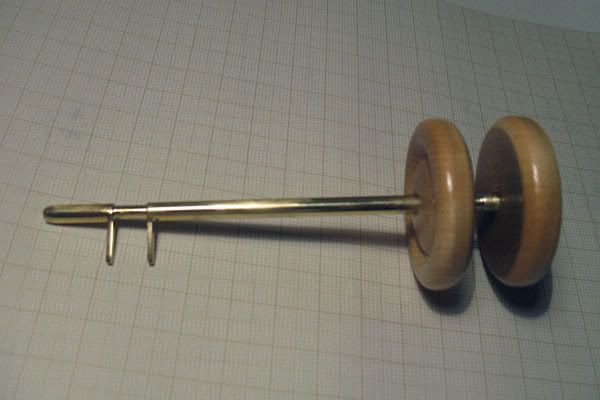
The two pieces of tube are silver soldered to the end of the inner shaft. This serves two purposes, firstly to stop the outer shaft from sliding off the end, and secondly to provide a base for the attachment of one of the wheels.
The metalwork completed, the positions where the wheels (handles) will go, has been roughened and degreased to help the adhesive make a good bond.
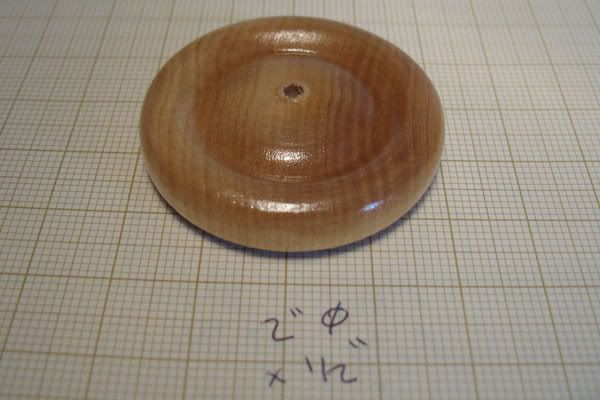
Wheels
They were given two coats of sealer and two coats of lacquer. A hole of 7/23†was drilled in each and they were attached with epoxy glue.
When the glue is set (24 hours) if you can wait that long, it’s time to put it to the test.
As they say “It does what it says on the tinâ€.
Very satisfying opening a lock with a home made tool, it took me longer to write this than to make the tool.
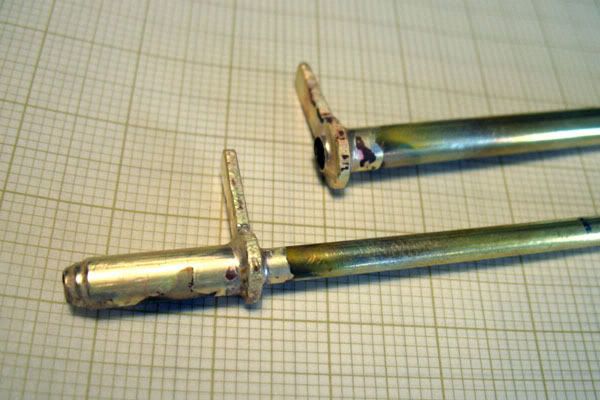
Left to right, LH 5g wavy keyhole, Universal 5g plain keyhole, Universal 5g plain keyhole made for this article.
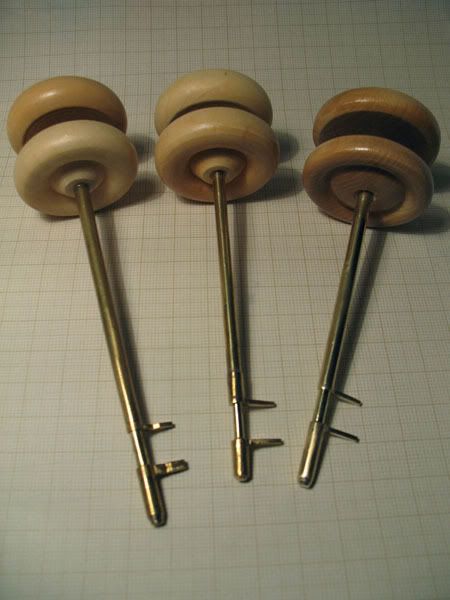
Buy two pairs of wooden wheels, as one length each of the brass sections listed will be enough for two picks.
An enjoyable afternoon in the garage, an opportunity to use my new camera in anger and another pick for my toolbox.
A big thank you to all of you who have posted articles on silver soldering, the operation, picking techniques and tools for 2 and 3 lever mortice locks, without which my DIY 2in1 picks would still be a dream.
