|
When it comes down to it there is nothing better than manual tools for your Lock pick Set, whether they be retail, homebrew, macgyver style. DIY'ers look here.
 by zerg49 » 19 Dec 2006 21:14 by zerg49 » 19 Dec 2006 21:14
What is the best way to attach templates to metal for grinding because I tried elmer's white glue and thinking, it would dry clear, it did but after a few minutes of quenching it turned into a gooey mess and I completely screwed up the pick.  so any tips from the experts, because I have seen many picks others have made on this site and they are amazing!
-
zerg49
-
- Posts: 36
- Joined: 19 Oct 2006 21:13
- Location: Florida
 by UWSDWF » 19 Dec 2006 21:21 by UWSDWF » 19 Dec 2006 21:21
first start by using informative subject lines to attract potential help.
next use a sharpie to draw it on or try contact cement
 DISCLAIMER:repeating anything written in the above post may result in dismemberment,arrest,drug and/or alcohol use,scars,injury,death, and midget obsession.
-
UWSDWF
- Supporter

-
- Posts: 4786
- Joined: 27 May 2006 13:01
- Location: Toronto, ON. Canada
 by zerg49 » 19 Dec 2006 21:28 by zerg49 » 19 Dec 2006 21:28
ok thanks, sry about the subject
-
zerg49
-
- Posts: 36
- Joined: 19 Oct 2006 21:13
- Location: Florida
 by What » 19 Dec 2006 21:54 by What » 19 Dec 2006 21:54
or quench more often, just dont quench for as long.
-
What
-
- Posts: 948
- Joined: 9 Jan 2006 23:17
- Location: universe, solar system, earth, n. america, USA, california, orange county
 by jackbeef » 20 Dec 2006 7:27 by jackbeef » 20 Dec 2006 7:27
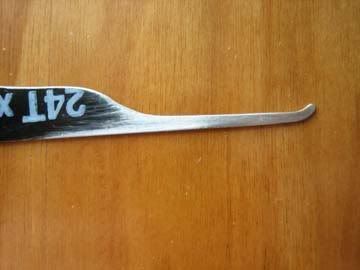
You could try using Elmers Stick Glue and then take your template and turn it upside down. Rub the glue onto the back of your template and make sure you get the edges. Then take your template and stick it to your piece of metal. Then take a black permanent marker (Sharpie) and start on the template and draw a line straight off the edge of the template onto the metal and keep doing that until you've gone around the whole template. Then peel your template back up and you will have a reverse image of your template on the metal like my picture. The glue pulled up some of the cardboard backing on my notebook, but on metal it will be fine. Then just grind away all the metal that has black marker on it and what's left is a pick. Then you can sand the glue off if there is still any on your metal.

-
jackbeef
-
- Posts: 54
- Joined: 10 Dec 2006 8:34
- Location: Texas
-
 by zerg49 » 20 Dec 2006 22:14 by zerg49 » 20 Dec 2006 22:14
ok I will try that exept I have black hacksaw blades but I think a silver or white sharpie should work, thanks all
-
zerg49
-
- Posts: 36
- Joined: 19 Oct 2006 21:13
- Location: Florida
 by Kaotik » 20 Dec 2006 23:17 by Kaotik » 20 Dec 2006 23:17
I have never seen a white Sharpy marker but a silver one will work fine. you could also use something sharp to scribe a fine line around the template leaving a thin matallic line to follow.
-
Kaotik
- Moderator Emeritus
-
- Posts: 1200
- Joined: 10 Jun 2006 13:38
- Location: Texas, USA
 by snapcarp » 21 Dec 2006 4:28 by snapcarp » 21 Dec 2006 4:28
After removing the paint (if needed), clean and degrease the blank.
Attach double sided tape to the back of a printed template of the pick and attach to the blank.
With a sharp craft knife, cut through the printed template and tape layer and remove the inner pick shape. Use a permanent marker pen to fill in the space created.
Remove the printed template and tape layer and a perfect pick profile should be left on the blank. 
-
snapcarp
-
- Posts: 24
- Joined: 11 Jun 2006 11:57
- Location: Warwickshire, England
 by jackbeef » 21 Dec 2006 13:29 by jackbeef » 21 Dec 2006 13:29
zerg49 wrote:ok I will try that exept I have black hacksaw blades but I think a silver or white sharpie should work, thanks all
Just use sandpaper on the blade first and the black will come off.

-
jackbeef
-
- Posts: 54
- Joined: 10 Dec 2006 8:34
- Location: Texas
-
 by zerg49 » 21 Dec 2006 22:52 by zerg49 » 21 Dec 2006 22:52
Thanks all and I think jackbeef and I buy the same blades, because thats exactly what mine look like, anyway I just have one more quick question, is it helpful to make blanks before making the rest of the pick or can you just start with a normal blade (in my case a sanded blade) and just grind or is it helpful to cut out blanks before hand? , Thanks again
-
zerg49
-
- Posts: 36
- Joined: 19 Oct 2006 21:13
- Location: Florida
 by jackbeef » 21 Dec 2006 23:26 by jackbeef » 21 Dec 2006 23:26
I just snap it to the length I want and start grinding until it's done. But, I do the shaft first and the tip last so I guess somewhere in the process it becomes a blank, but then quickly gets grinded into the actual pick. I use a bench grinder all the way until it looks like a blank, and then use a dremel for the tip.
-
jackbeef
-
- Posts: 54
- Joined: 10 Dec 2006 8:34
- Location: Texas
-
 by unjust » 22 Dec 2006 0:25 by unjust » 22 Dec 2006 0:25
i'm keen on rubber cement/contact cement after a few goes.
thin coat on the blade, and thin coat on teh template back. let try, stick template (un trimed of extra edge) onto blade.
paper -will- degrade in water, but you'r enot bathing the thing you're dipping hot metal in for a second. the resdual heat will dry it out pretty quickly.
rubber cement has the added bonus of starting to discolour when it's getting hot, so you can keep an eye on how hot you're really getting things if you dont' have a feel for it.
-
unjust
-
- Posts: 372
- Joined: 7 Nov 2006 15:19
- Location: Minneapolis MN
 by dmux » 22 Dec 2006 8:22 by dmux » 22 Dec 2006 8:22
i actually just use tape, and do 1/2 of the cutting at a time then retape then the other side, works pretty good for me
-
dmux
-
- Posts: 611
- Joined: 28 Dec 2004 10:56
- Location: MD
Return to Lock Picks
Who is online
Users browsing this forum: No registered users and 14 guests
|
