I noticed some folks asking for advice on how to make picks and also noticed a lot of time has been spent discussing handles but not necessarily forming the tools themselves. Hopefully by the end of today I'll have documented the process of making a basic pick set and that someone may find the experience useful.
I am by no means an expert but I dont think I'm “doin it rong" [sic] the results speak for themselves. What I'm looking to show is that with cheap materials and some inexpensive tools you can make picks that are not only functional but pretty to hold and look at in much less than half a lazy day if you take your time.
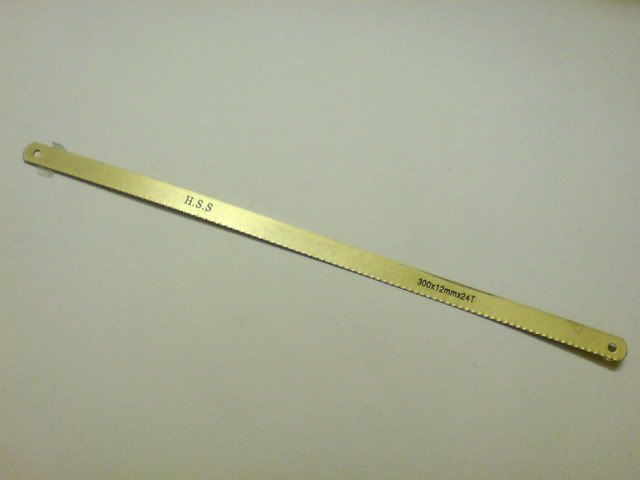
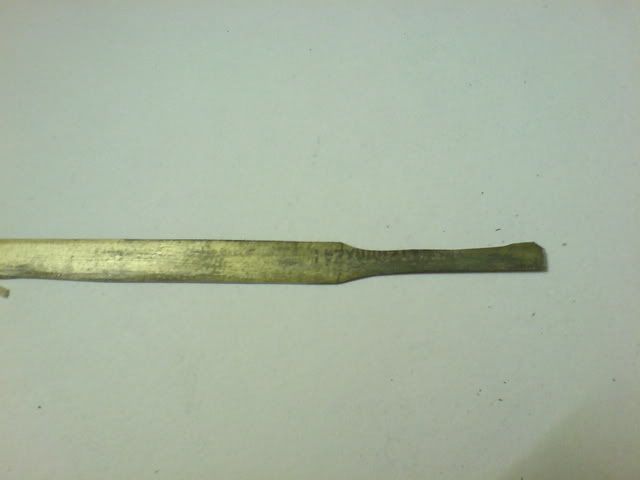
First we get some hacksaw blades. I have experimented with many different varieties but these ones seem to be the best. They also happen to be the cheapest. You can see that they are not straight. Clearly when they are put in an actual hacksaw under tension they will straighten out, however I need to choose the straightest bits out of them to begin with.
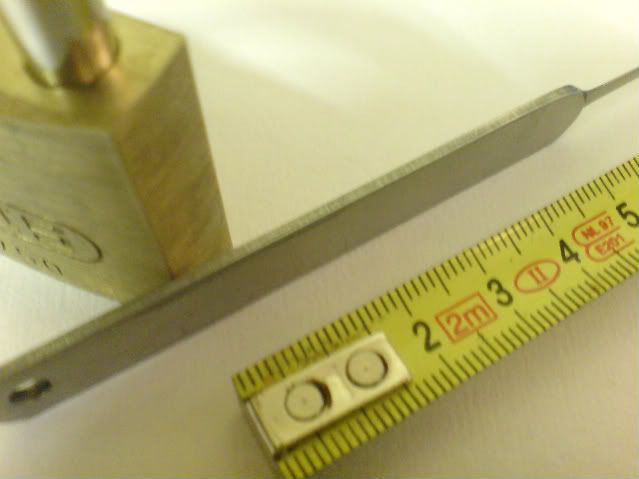
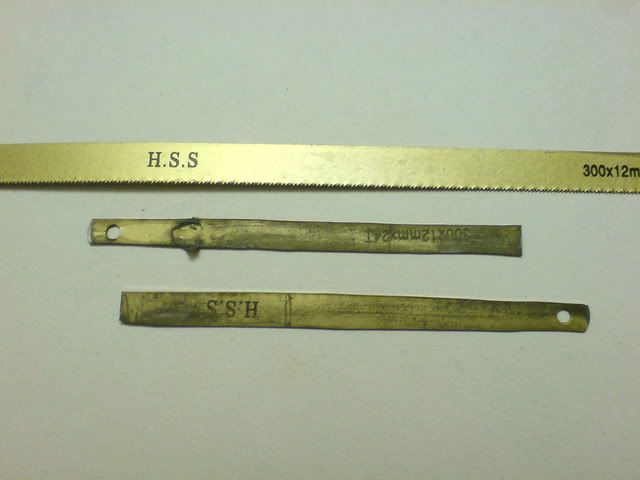
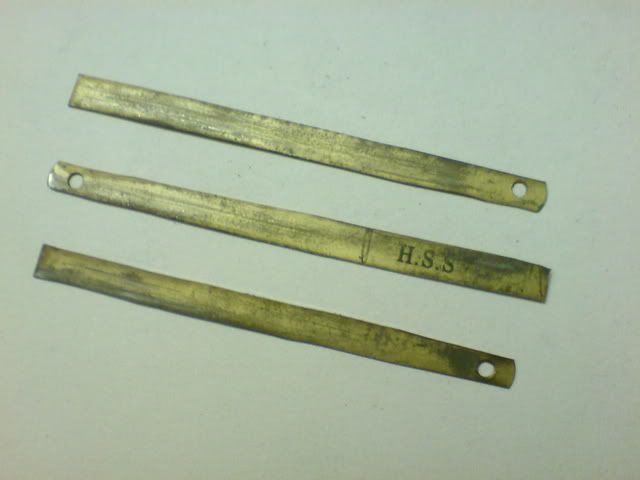
http://i242.photobucket.com/albums/ff164/DuelODDity/lp101/makingpicks/rawblade2.jpgJust over 1/3 of a blade seems to be around the right size.
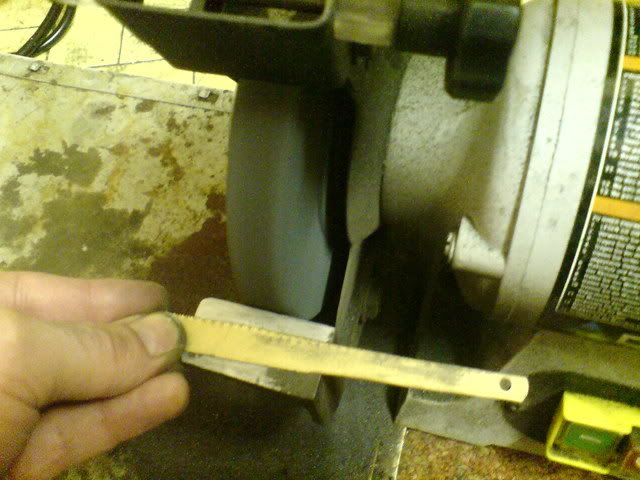
I grind the blade down using the eye as a guide basically leaving a little bit either side of it. I've also drawn lines to give an idea of how long the shaft needs to be.
http://i242.photobucket.com/albums/ff164/DuelODDity/lp101/makingpicks/grindingbegins.jpghttp://i242.photobucket.com/albums/ff164/DuelODDity/lp101/makingpicks/groundblades.jpgBegin to shape the pick, roughly at first to get rid of most of what we don't want.
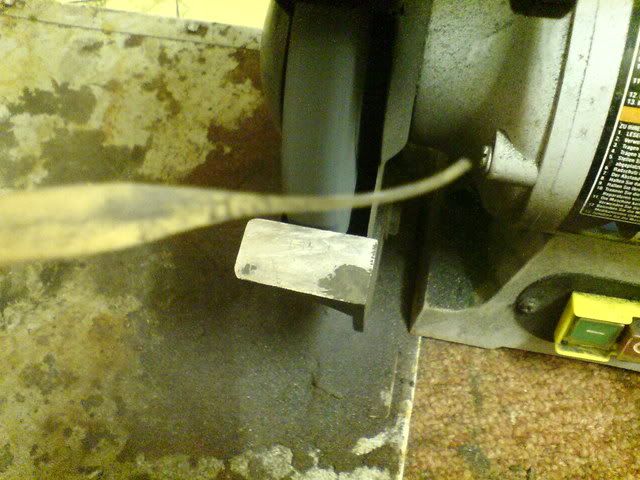
http://i242.photobucket.com/albums/ff164/DuelODDity/lp101/makingpicks/beginshape2.jpghttp://i242.photobucket.com/albums/ff164/DuelODDity/lp101/makingpicks/grindinghand.jpghttp://i242.photobucket.com/albums/ff164/DuelODDity/lp101/makingpicks/beginhookandso.jpghttp://i242.photobucket.com/albums/ff164/DuelODDity/lp101/makingpicks/falleandgrinder.jpgUsing the grinder alone one can get pretty much there.
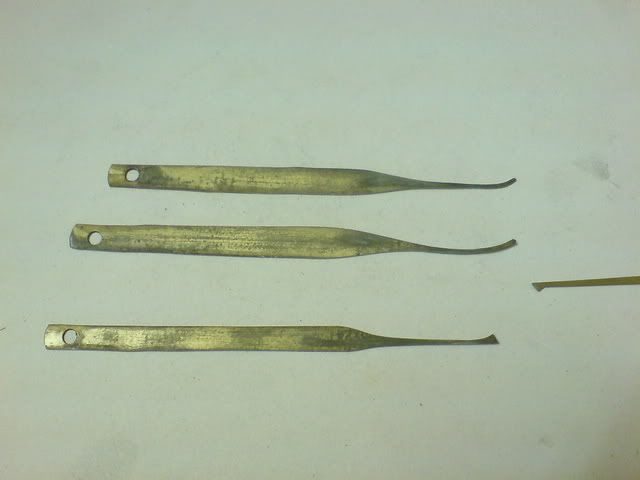
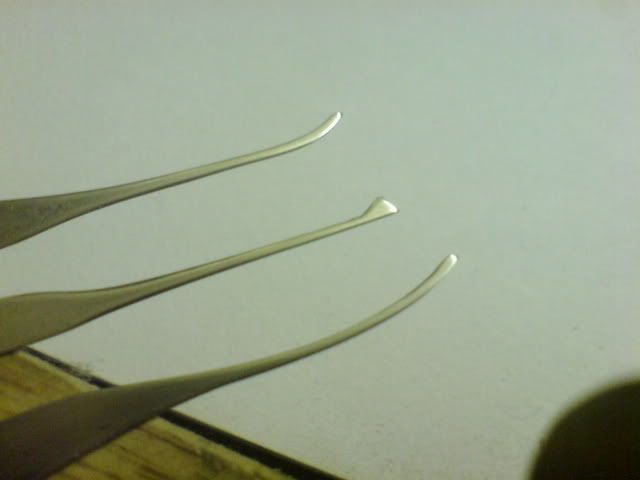
http://i242.photobucket.com/albums/ff164/DuelODDity/lp101/makingpicks/threeroughpicks.jpgTime for a well deserved cup of tea.
http://i242.photobucket.com/albums/ff164/DuelODDity/lp101/makingpicks/tea2.jpgRough cuts done, we can put the grinder to sleep and get the carpet back down, I do all this in my kitchen which I dont recommend but needs must and living on ones own has its benefits.. These would probably work fine after a good sanding but I want to shape them with some files to make them just “soâ€.
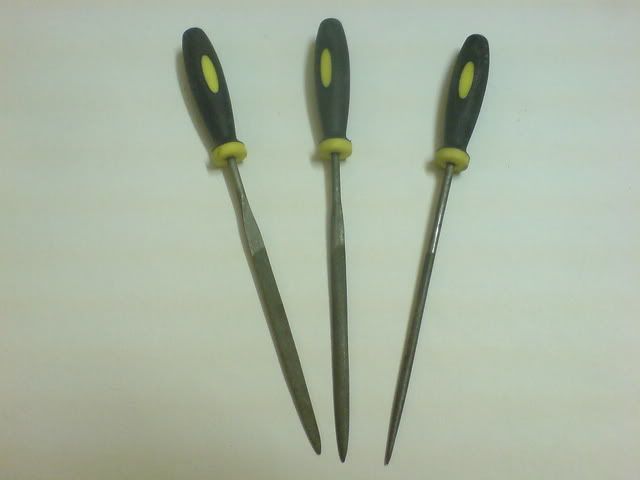
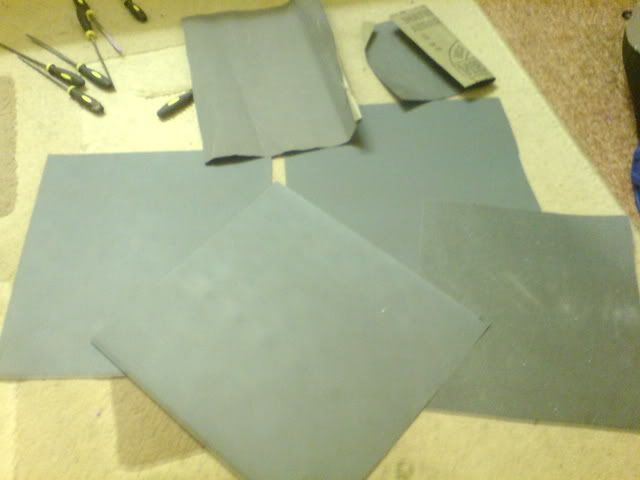
http://i242.photobucket.com/albums/ff164/DuelODDity/lp101/makingpicks/files.jpghttp://i242.photobucket.com/albums/ff164/DuelODDity/lp101/makingpicks/prefileblock2.jpghttp://i242.photobucket.com/albums/ff164/DuelODDity/lp101/makingpicks/threefiles.jpgAfter just one going over with 240 grit we can see what we're dealing with and they start to look much more like proper tools instead of ground bits of metal. I find that the sides are the easy bit but special attention needs to be taken on the top and bottom as these, after all, are the bits that will be gliding smoothly against the plug and under the pins.
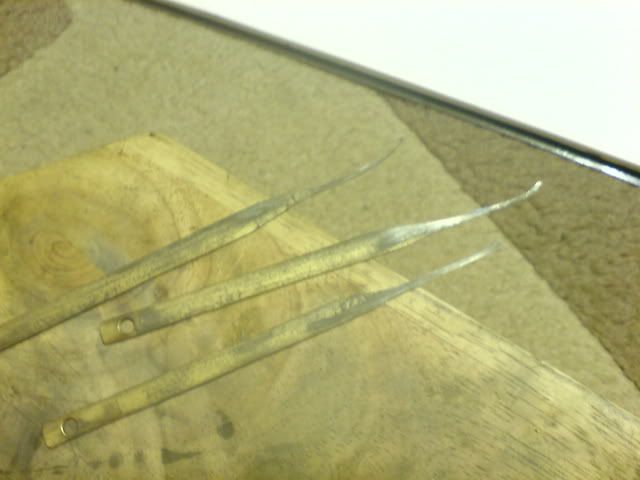
http://i242.photobucket.com/albums/ff164/DuelODDity/lp101/makingpicks/after240.jpgUsing progressively finer grit paper, magically they start to shine and look pretty good.
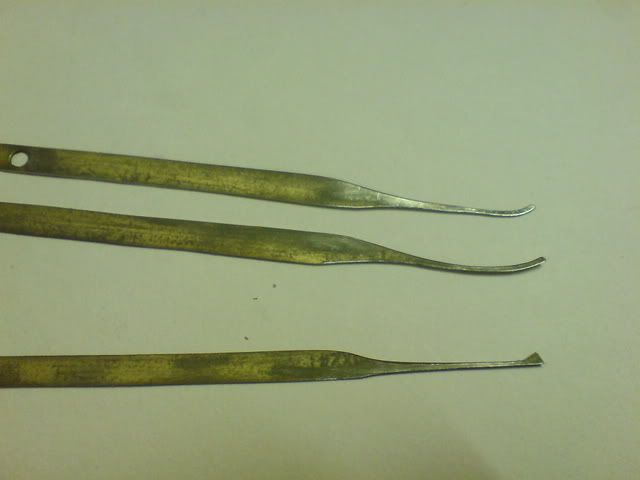
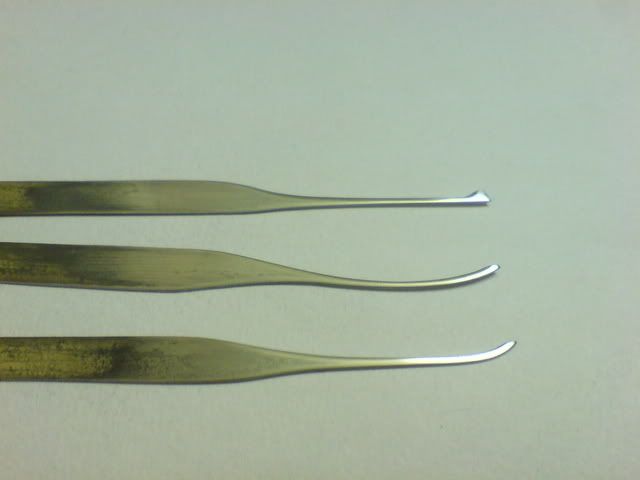
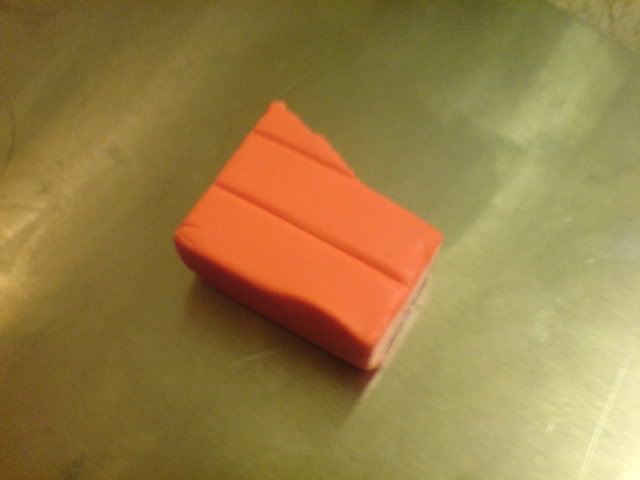
http://i242.photobucket.com/albums/ff164/DuelODDity/lp101/makingpicks/sandpaper.jpgThe finished article! Now you can go one of several ways here; You could sand the whole lot to make them thin and pretty or, you can add handles. My personal favourite is to cut a couple of other hacksaw blades to size and stick them either side with epoxy resin. This needs to be clamped almost overnight for it to dry and then sanded down for a good finish. It makes for a solid pick with great feedback, however here, as I'm all out of blades and happen to have some hot orange “sculpy†I'm going to use that. Like FIMO sculpy is a bit like clay and can be moulded and shaped before you stick it in the oven for quarter of an hour, after which it sets pretty hard.
http://i242.photobucket.com/albums/ff164/DuelODDity/lp101/makingpicks/after400.jpgIt might be a good idea to wash your hands at this point as they'll probably be covered in silicon carbide and metal dust which you dont want in the sculpy on the handles like I did.
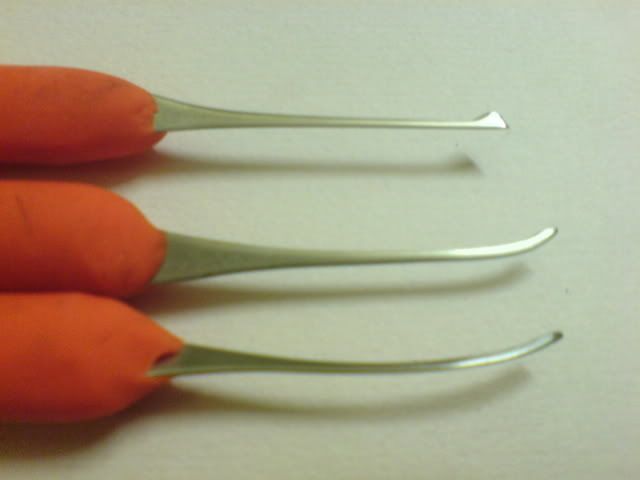
http://i242.photobucket.com/albums/ff164/DuelODDity/lp101/makingpicks/orangesculpy.jpgI cover the pick in sculpy and roll it on a flat surface. I could've spent longer getting the handles really nice but these will do as an example.
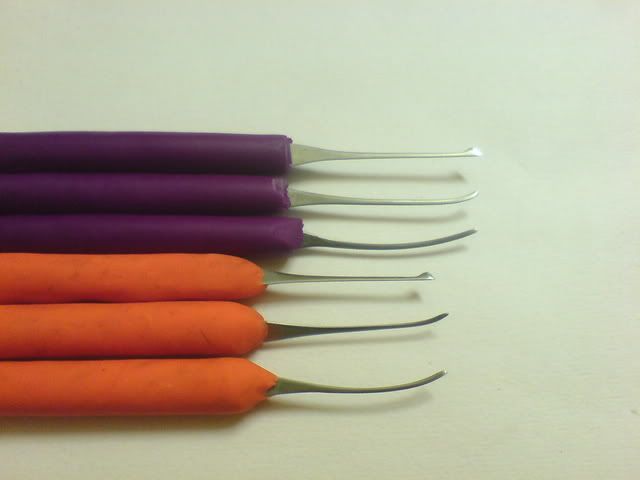
http://i242.photobucket.com/albums/ff164/DuelODDity/lp101/makingpicks/finishedclose.jpghttp://i242.photobucket.com/albums/ff164/DuelODDity/lp101/makingpicks/withpurpleset.jpgThat's it! Happy pickin'
OB
EDIT: Changed IMG to URL so pictures can be seen since the PhotoBucket fiasco. GWiens2001 


