


I recommend that you read this in it's entirety before you start work on your pick.
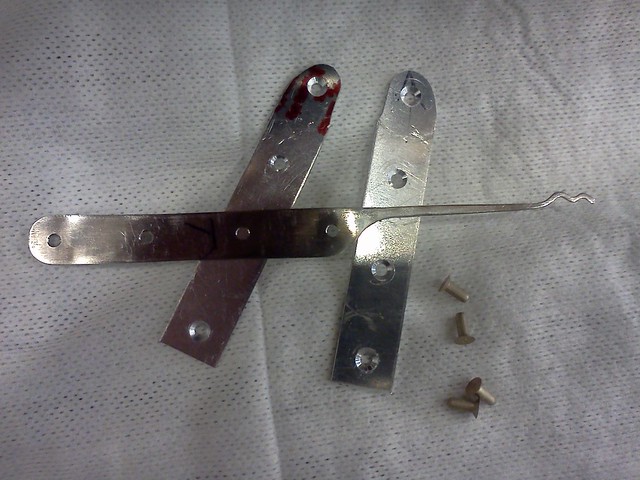
In this guide, I will walk you though making lock picks like these (I am working on the assumption that you already know how to make a pick with no handle):

Required materials/tools:
Steel for the picks
Aluminum for the handles
Rivets or some other rivet-like fastener such as brass bar stock
Temporary fasteners (Clecos or nuts/bolts) and/or clamps
Drill bits, drill and drill bushings or drill press
Saw – band saw preferred
Grinder and/or sander
Band saw or other cutting tools
Hand files
Sandpaper – various grits
Hammer & anvil
Dremel with accessories
Countersink and deburr
Polish and lint-free cloth
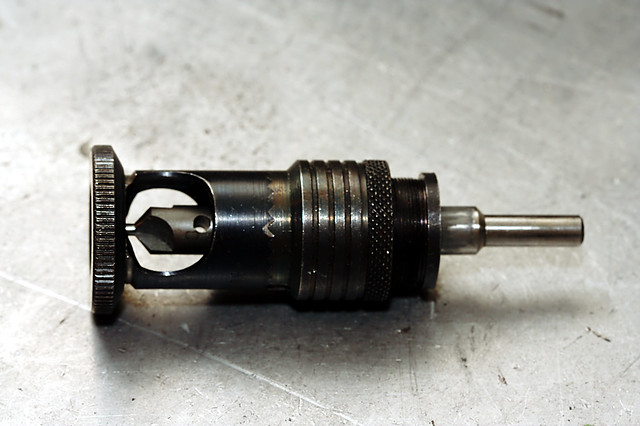
Here are a few of the tools I use; the countersink:

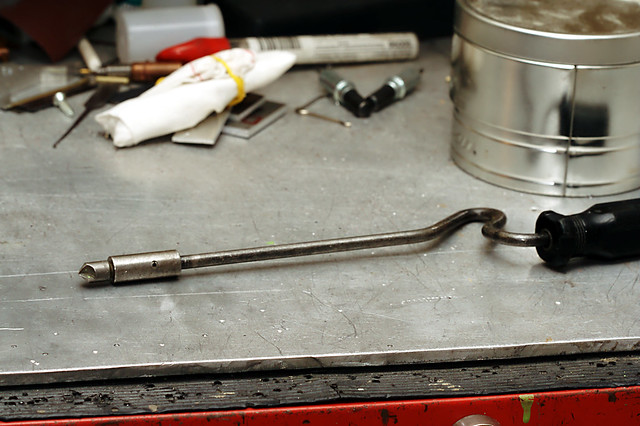
Deburr:
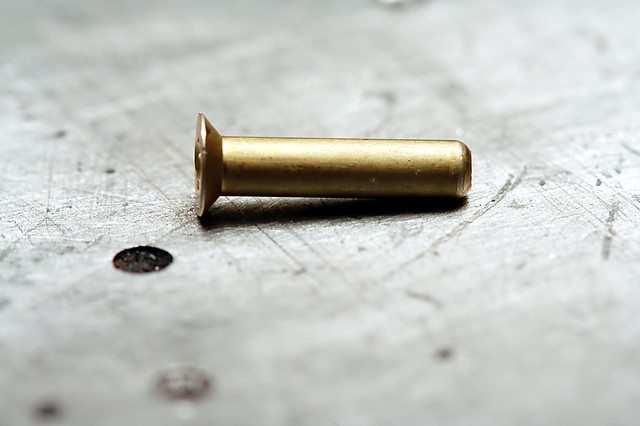
Rivets (MS20426E3-7 in this photo – length will be determined by the pick/handle thickness):
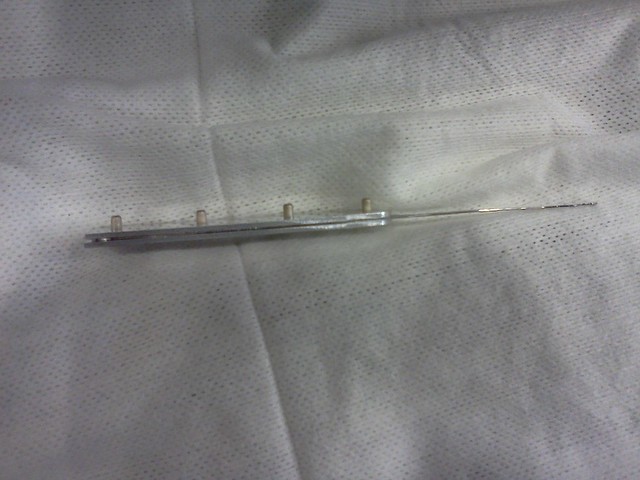
The first step is to make a pick as you normally would, but try to keep in mind the shape of handle you want to end up with. Don't worry about polishing the pick yet. You might make it something like this:

After you make the pick, the next step is to drill holes in it for the rivets. In the photo above, I used 4 equally spaced #40 (.098”) holes. A note on drilling steel – low RPM and high pressure is best. “High feed, low speed.” A Dremel will not work for this – they do not have the torque required at low RPM. A drill press or pneumatic drill motor is best. Center punching the desired hole location will help ensure that the drill bit doesn't “walk” when you start drilling.
Now we need to cut and drill the aluminum handle blanks. Still using the photo above as a reference, clamp the pick onto your aluminum, drill the holes, and trace the edges. Depending on the thickness of the aluminum, you may need to use either a drill press or drill bushings to ensure that the holes are perpendicular to the surface of the metal. If they are not, it will be difficult to install the rivets. If you have the slightest doubt about your ability to drill a perfectly straight hole – use a drill press or bushings.
Clamp the pick to the aluminum securely or use temporary fasteners as you go to ensure that the aluminum does not shift between drilling each hole – you want all of the holes to line up perfectly.
Repeat this for the other side.
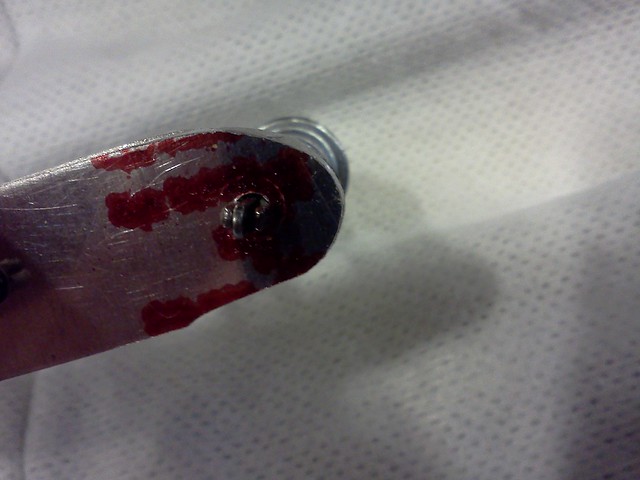
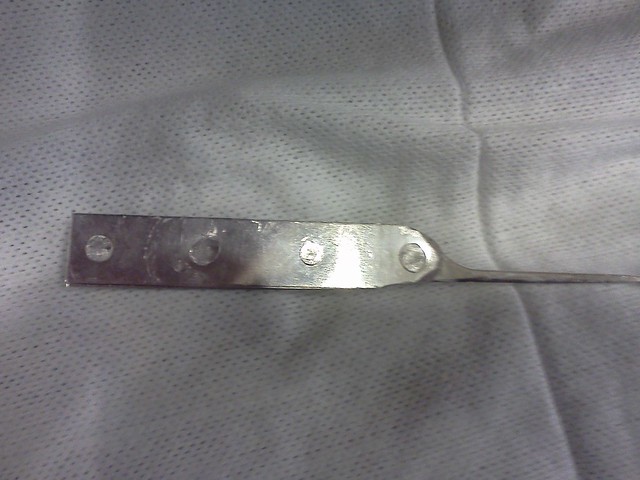
Now, we need to countersink the holes. The countersinking is easier to do before you trim the handles down. Countersink the outside, and deburr the inside. If you are using commercially manufactured rivets, you'll want to countersink the “tail” side less than the head side. If you're using brass bar stock, do whatever feels good. Just kidding – you'll just have to figure that out for your self. Honestly, I have never used brass bar stock as a rivet before, but other people have great results with it. Though, I will say that when you do the countersinking, you do not want to “knife-edge” the material. You want to have at least 30% of the material thickness to be a straight walled hole.
(In this photo, I have already done the rough cut and sanded the nose down. I got ahead of myself a little... You can do it that way, but it is easier to do the countersinking while the handles are still over-sized.)
Next, cut out your blanks on the band saw. You'll want to leave a little bit of material on the outside of the line you traced earlier.
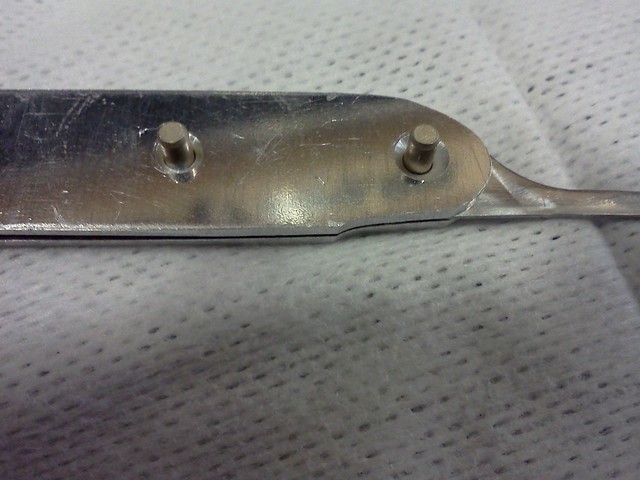
Now, we need to temporarily assemble it all. The handles will still be very rough at this point, but that's fine. Use some type of temporary fastener to secure the handles to the pick. I use commercially available Clecos, but screws and nuts would work just as well. Just make sure that they are a snug fit in the hole.
Here, they are cleco'd together:

If you did everything right up till now, the holes will all line up perfectly. If you have to force the screw/cleco in the hole, something is off. If it is a little off, you have two options … start over, or try running a drill bit through it to align the holes. That will enlarge the holes, but if they were only slightly off, it may be OK. You'll have to be the judge on how good is good enough...
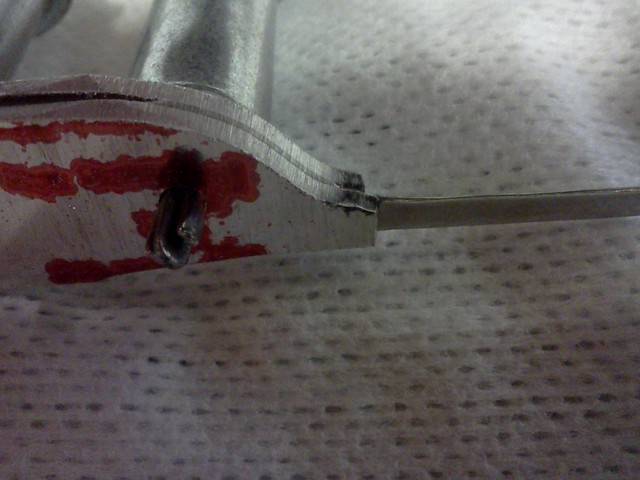
Next, we need to get the “nose” sanded down to where we want it.
Sand the aluminum down where the pick protrudes from the handles till you get to the pick material. Like this:
You don't need to worry about the rest of the handle yet at this stage. We'll address that later.
Now, take it apart, then reassemble just the handles. Like so:
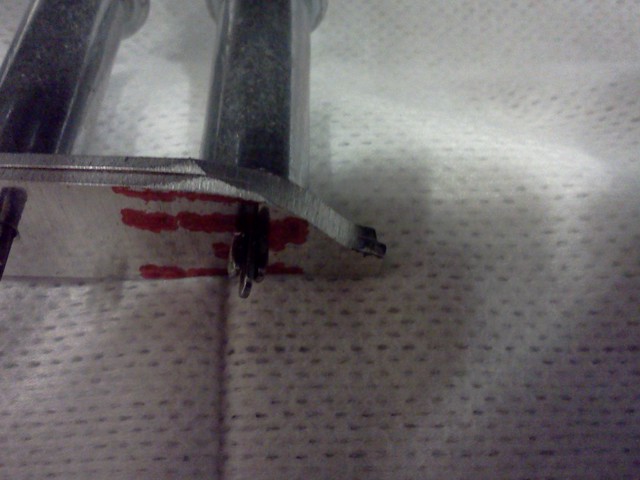
Now we're going to round the end off, to make both sides of the handle the same. Like this:
At this point, you should sand the pick shaft down to a fairly good surface. You don't have to get a mirror finish on it yet, but go ahead and sand it down nice and smooth. It will be easier to do now, before we attach the handles.
So, at this point, we should have a decently finished pick, countersunk handles – trimmed at the nose but long everywhere else.
We can go ahead and rivet it together now.
Rivet length will depend on the total thickness. I'll give you a tip though – before “bucking”, the rivet should be 1.5 times it's diameter longer than the thickness of the material.
For rivets this small, a hammer and anvil is perfectly fine.
Insert the rivets, then lay it on an anvil or other suitable surface, then flatten the “tail”.
Again, I have never used brass rod as rivet material – it's certainly possible, but getting it to fill the countersinks is just something you'll have to figure out on your own. I would suggest practicing on some scrap material.
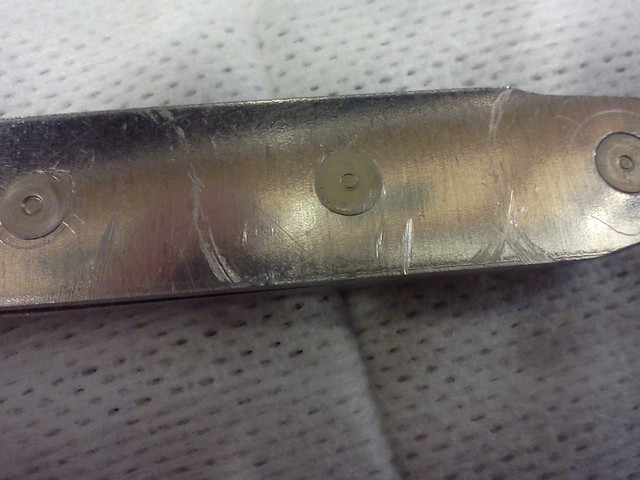
Now flatten the tails with a hammer.
If the tails don't fill the countersinks completely, use a ball peen hammer to work them into the edges of the countersink.
OK, now it's starting to look like a lock pick. You could actually use it as is, if you wanted a really ugly lock pick – haha.
OK, so, now we need to sand everything else down. Go ahead and sand down the edges till you get to the pick material all the way around.
Once you have the aluminum sanded down where it's even with the steel pick material, start rounding everything off. You'll be doing a lot of sanding/filing – put finger grooves in it, whatever you want. There is no wrong way.
Once you have it looking pretty good, start sanding by hand. Get a pretty good finish on it. This is probably the hardest and most time consuming part. The more sanding you do now, the less buffing you'll have to do later.
At this point, I switch to a Dremel with a buffing pad and polishing compound. Do that till you're satisfied with it. I then move on to hand polishing. I personally love, and highly recommend Flitz polish – but use whatever you want.
If the rivets are the same alloy as the handle material, they will pretty much completely disappear once you start polishing. If they are a different alloy, they will appear to be a slightly different shade than the surrounding material. It's no big deal if you can see them, but personally, I like them to be invisible.
I think that's pretty much it... Feel free to modify steps as you need to – this isn't the only way to do it, just the way that I do it.
----------
I hope I didn't miss anything. If you have any questions, ask and I will answer. Most of the pictures were taken with a phone, so please don't complain about picture quality, lol. Anything you might have to say about picture quality - trust me, I already know. I think that they will be 'good enough' for this though.
And, if any of you guys make any picks using this guide, please post pictures of them!
Glad to help, and I hope I did.
PS - As far as the attribution bit on the license, attribute it to Josh66 on lockpicking101.com, or Joshua Engler - either is fine with me.
