Well, why aren’t you answering the question?
OK, guess we’ll figure it out together.
This pictorial starts with the lock disassembled, instead of with it whole. Took some pictures of the lock during disassembly, but this is a family-friendly site. Not going to post pictures of something as gruesome as the inside of this lock before cleaning. Suffice it to say that some of the people using this lock had followed the instructions of using graphite, and some had not. And this lock has had a loooong life. It took over an hour of raking and spraying with WD-40 to clean out enough stuff from the core to allow the pins to move at all, let alone pick the thing open or to control.
As said, no keys. But that is the goal of this site, isn’t it?
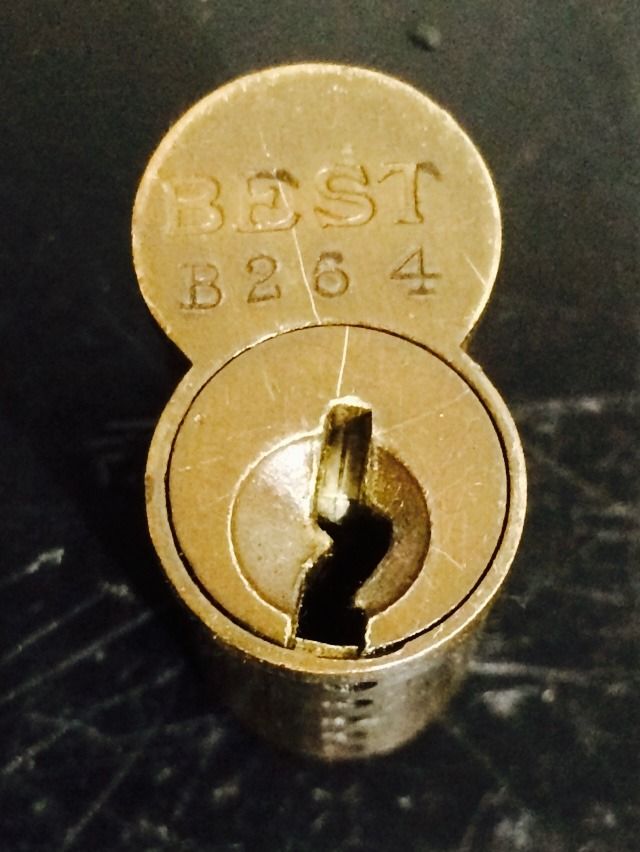
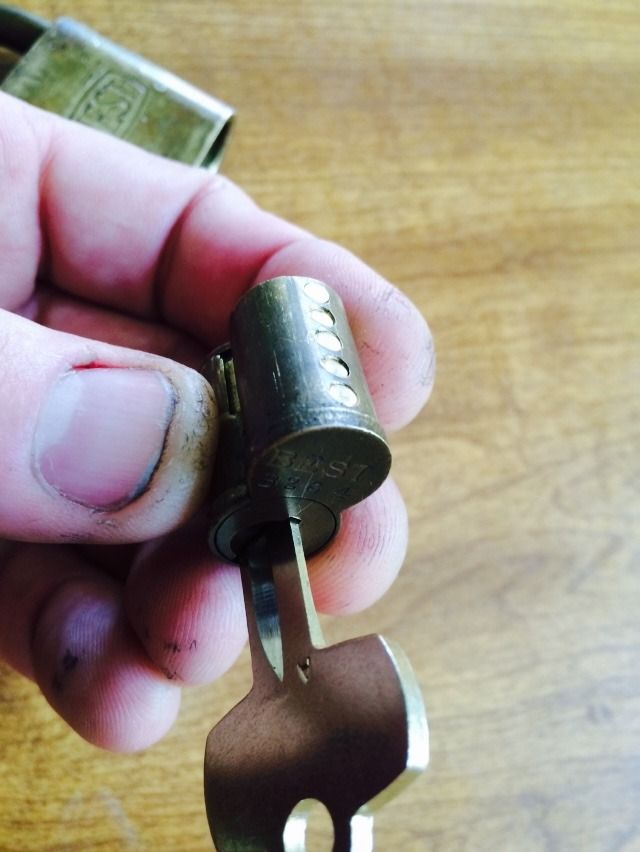
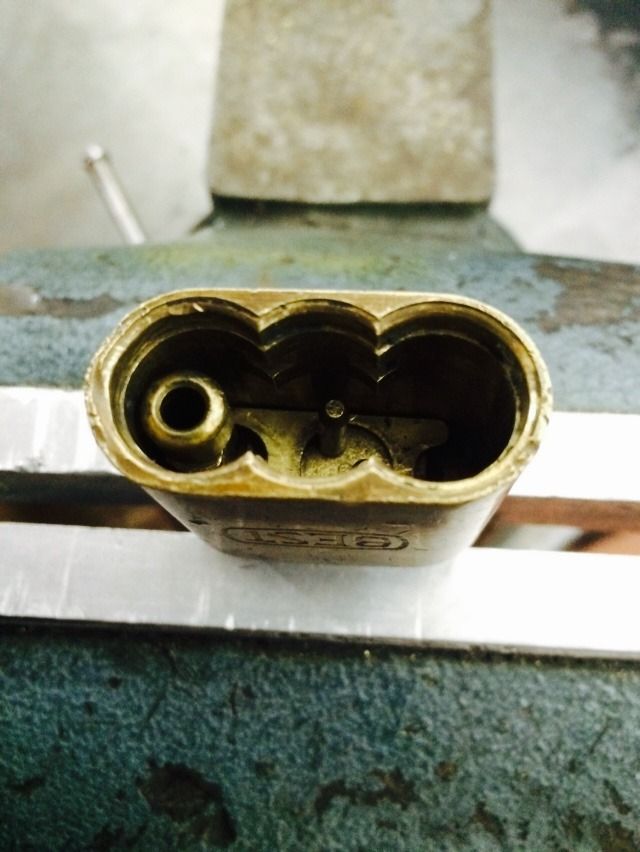
This lock is shorter than the modern BEST SFIC cores. This one has only five pin stacks, rather than the six or seven pin stacks of more recent cores.

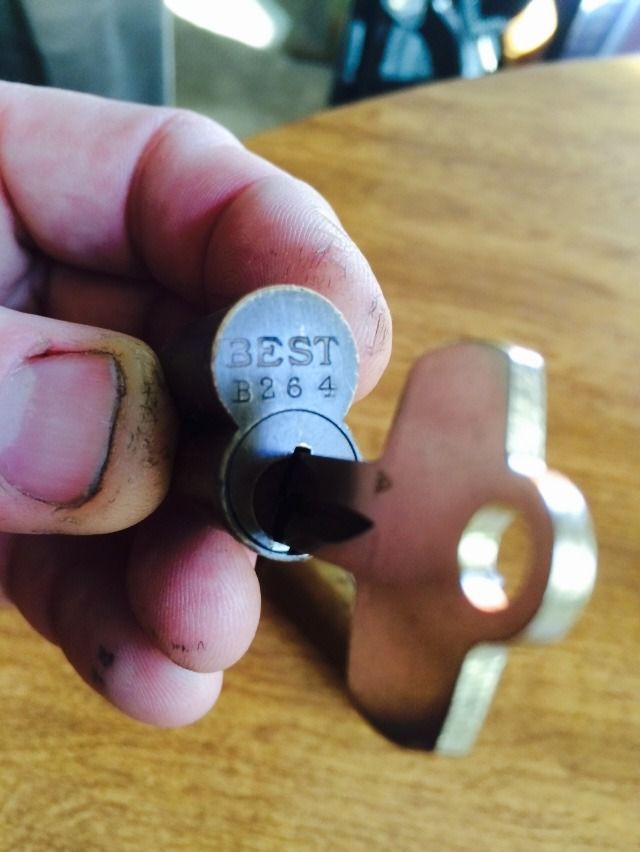
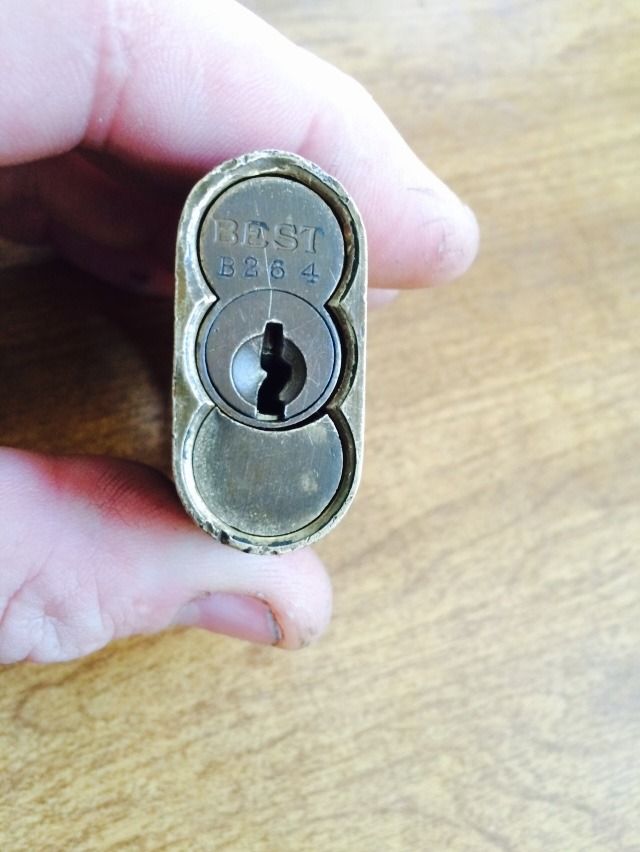
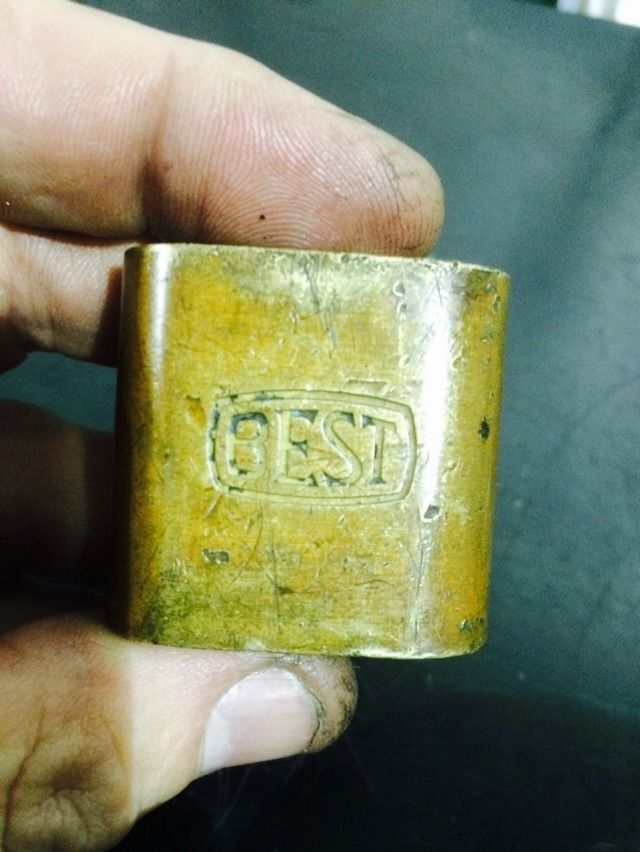
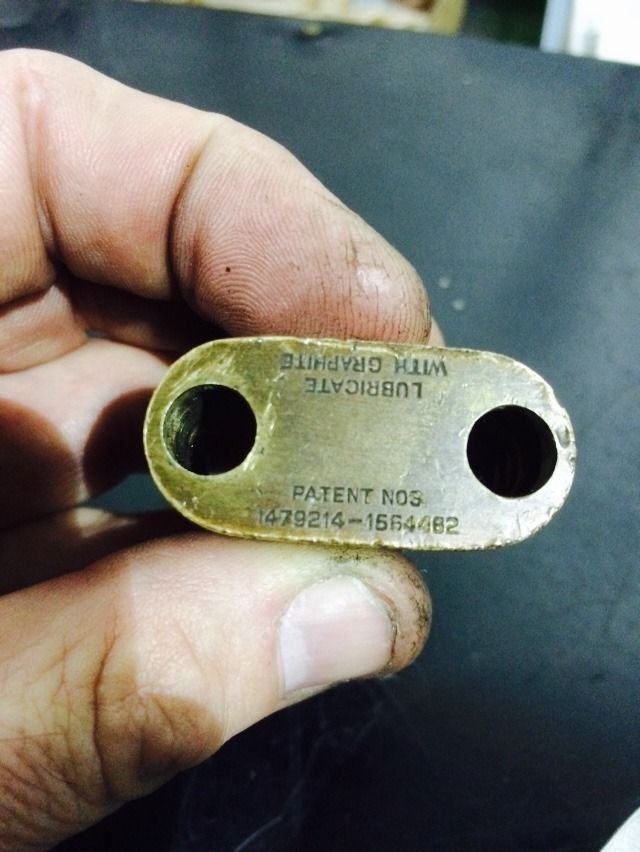
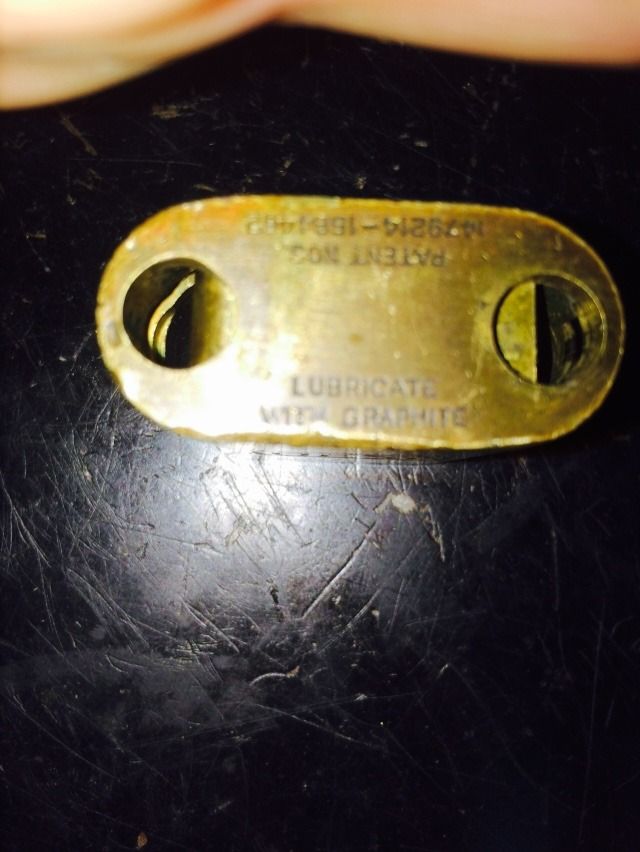
You can also tell it is an older core by the stamping on the back of the core.
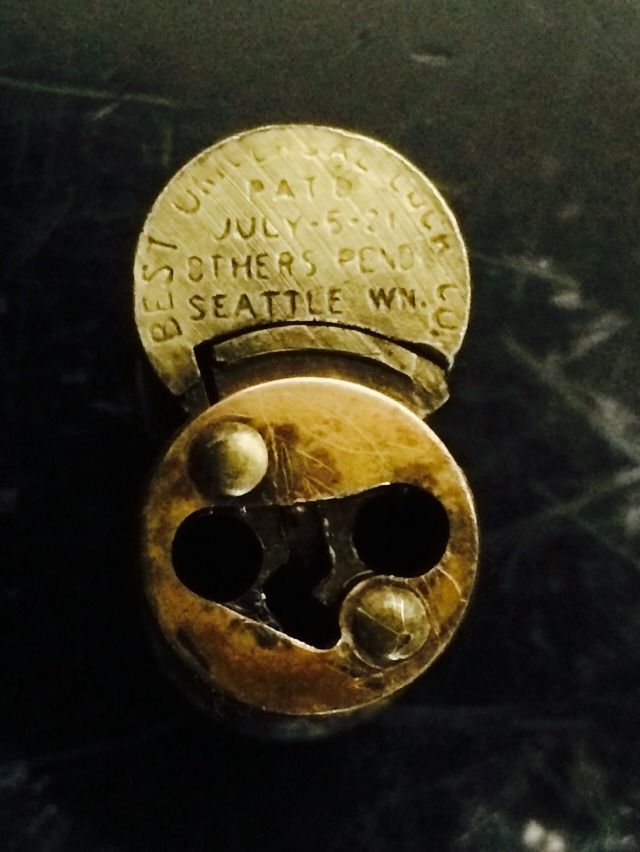
It reads:
BEST UNIVERSAL LOCK CO.
PAT D
JULY-5-21
OTHERS PEND
SEATTLE WN
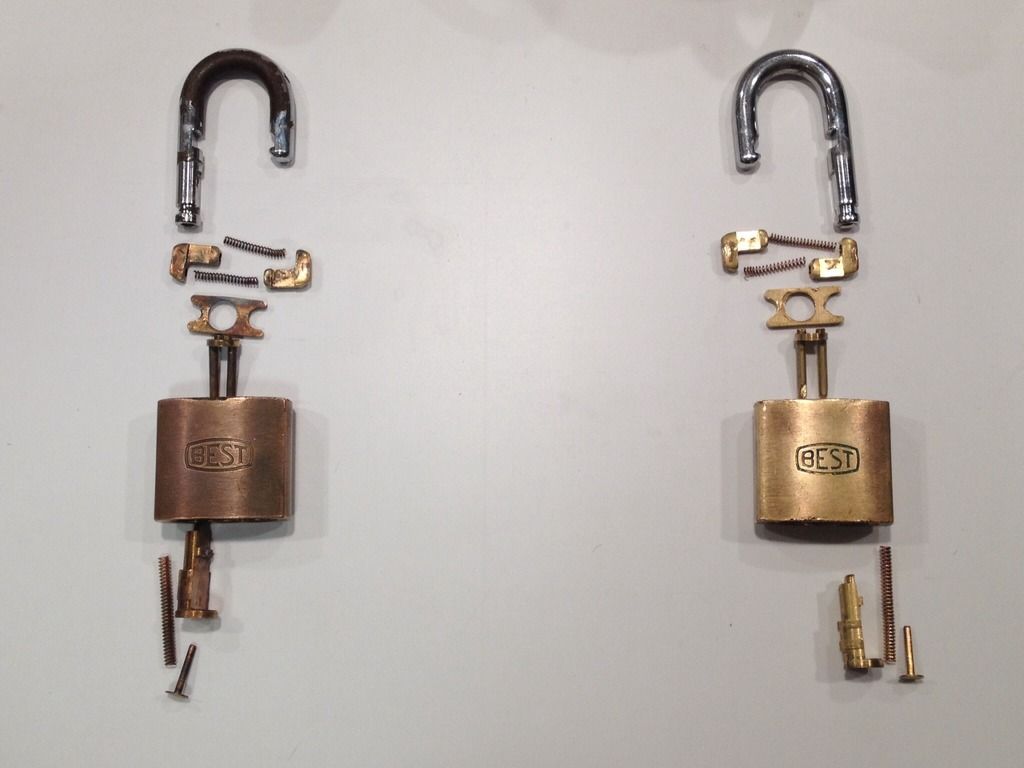
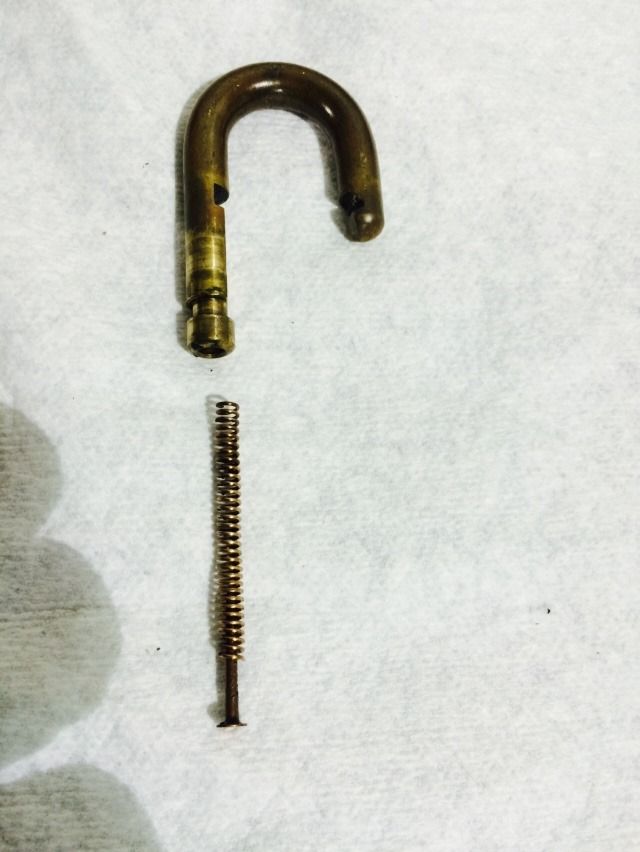
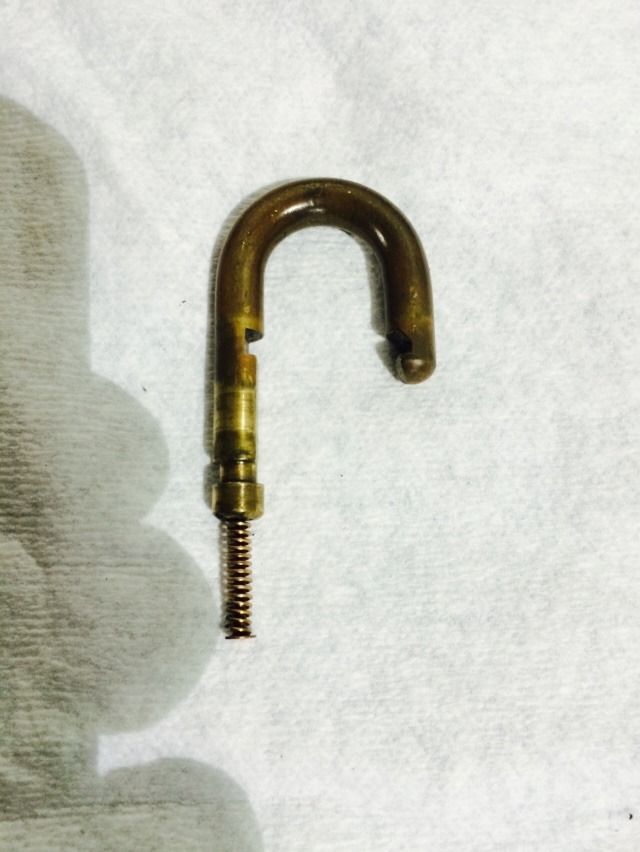
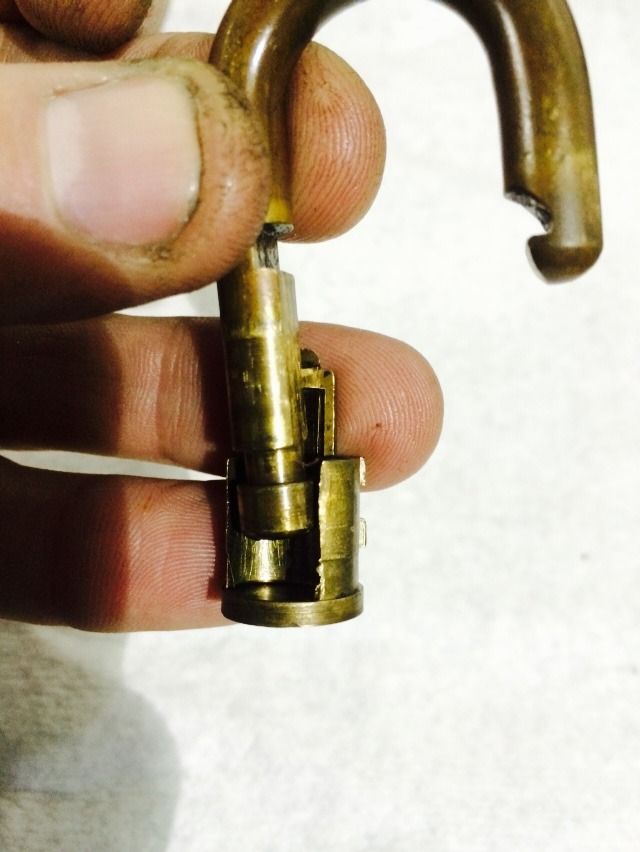
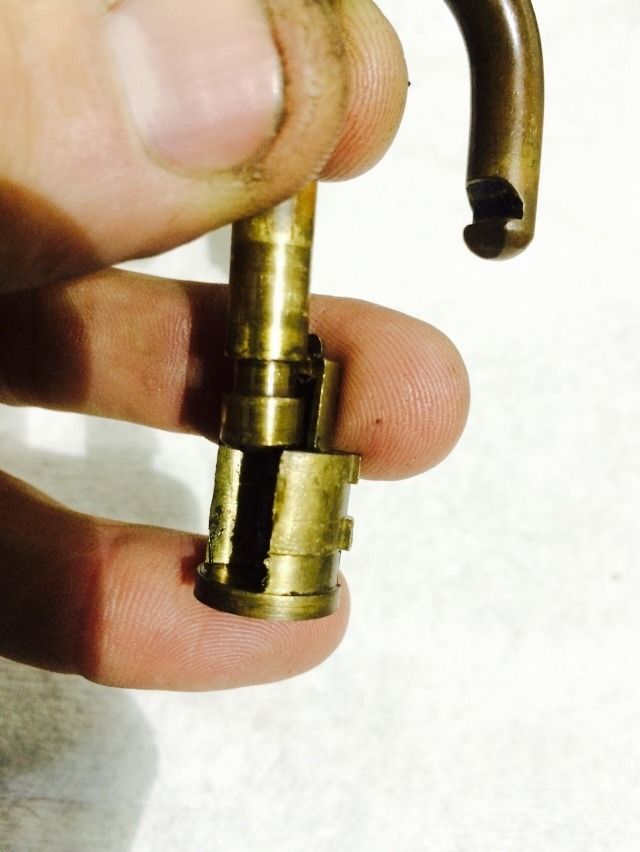
It may be easier to show the parts themselves and how they interact before they are in the lock. So we start with a couple of ‘exploded’ views of the parts:
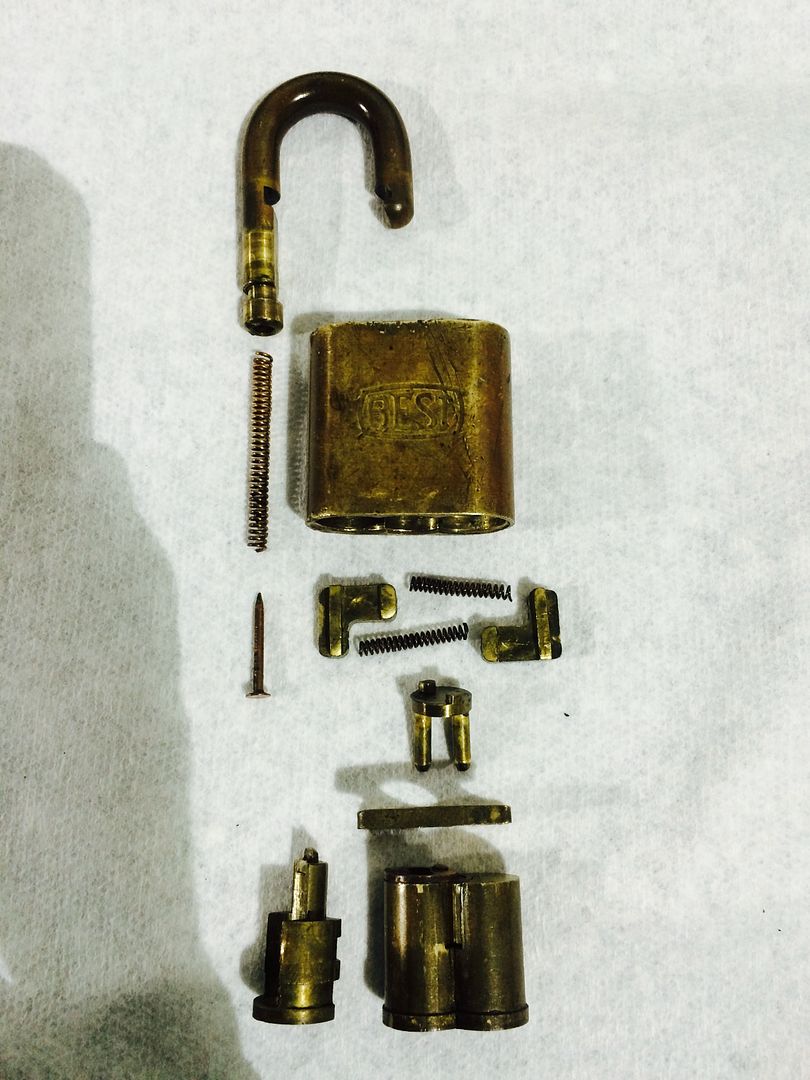
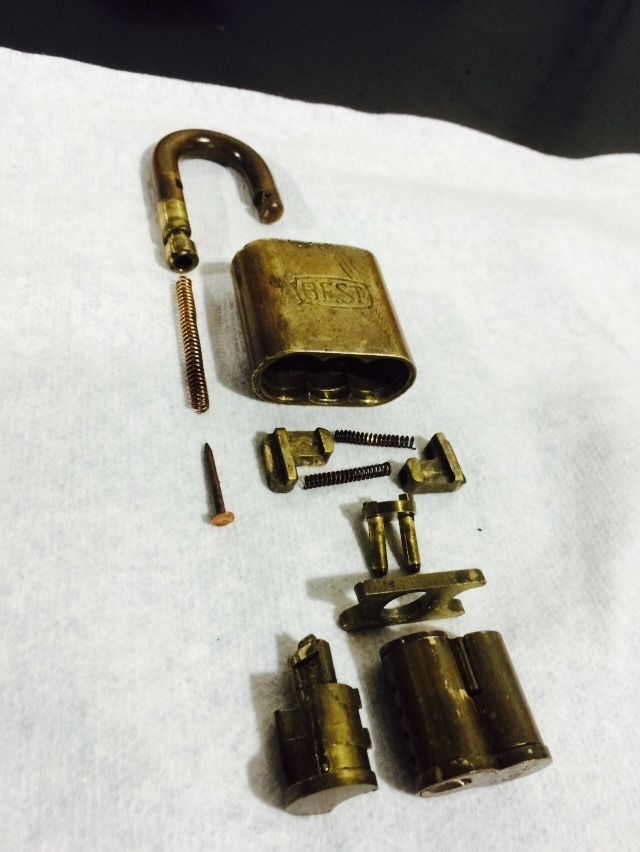
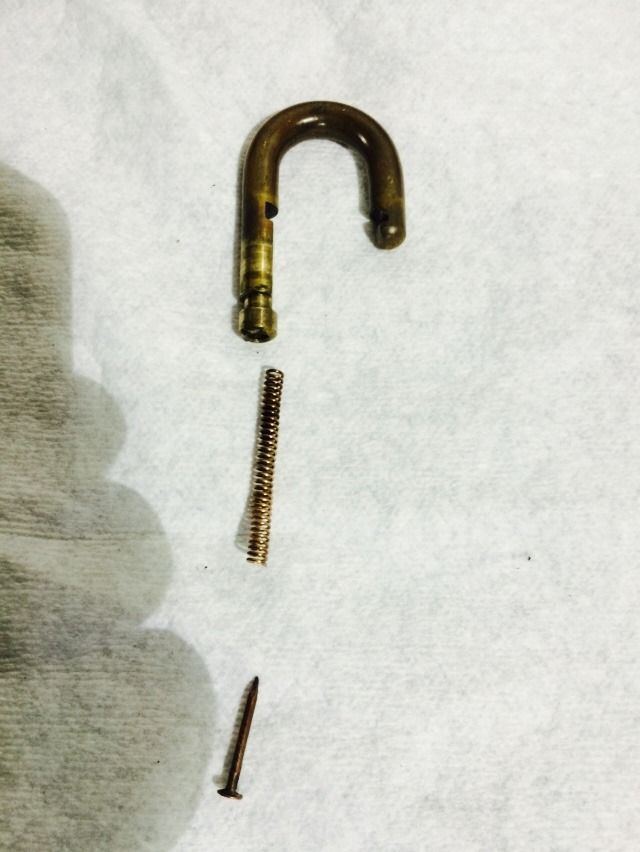
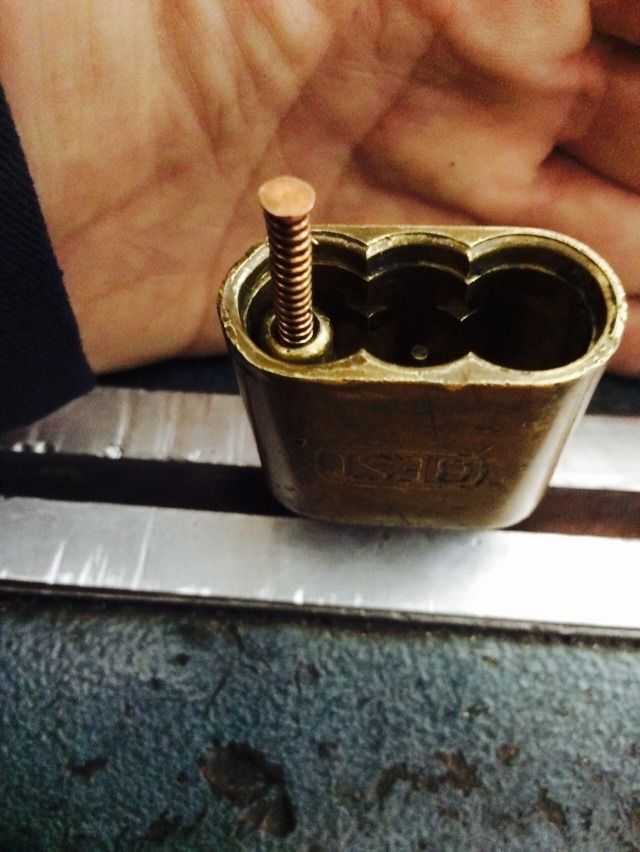
The shackle has a hollow heel into which fits the shackle spring and stiffener (looks like a nail)
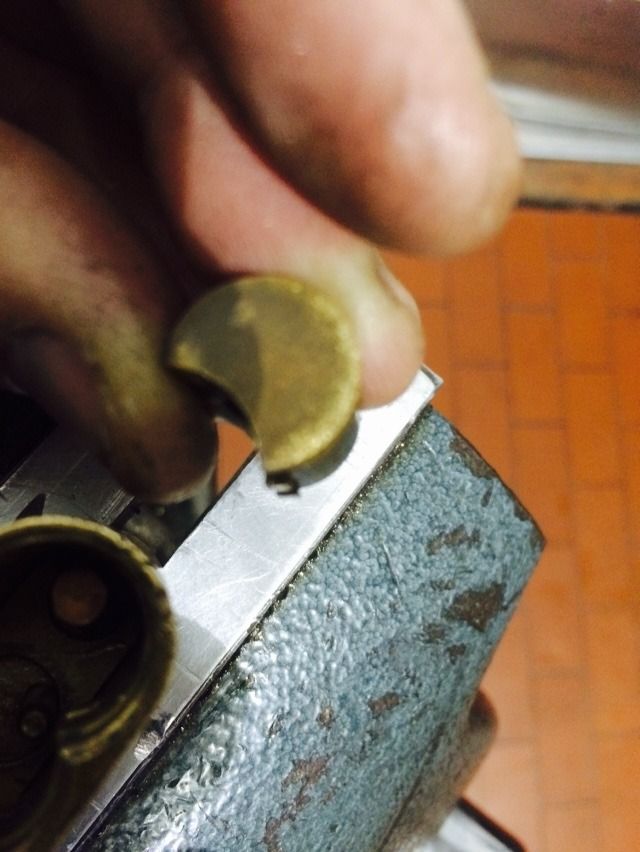
This partial-circle part has a cutout to retain the shackle from being removed and lugs to keep it from being removed.
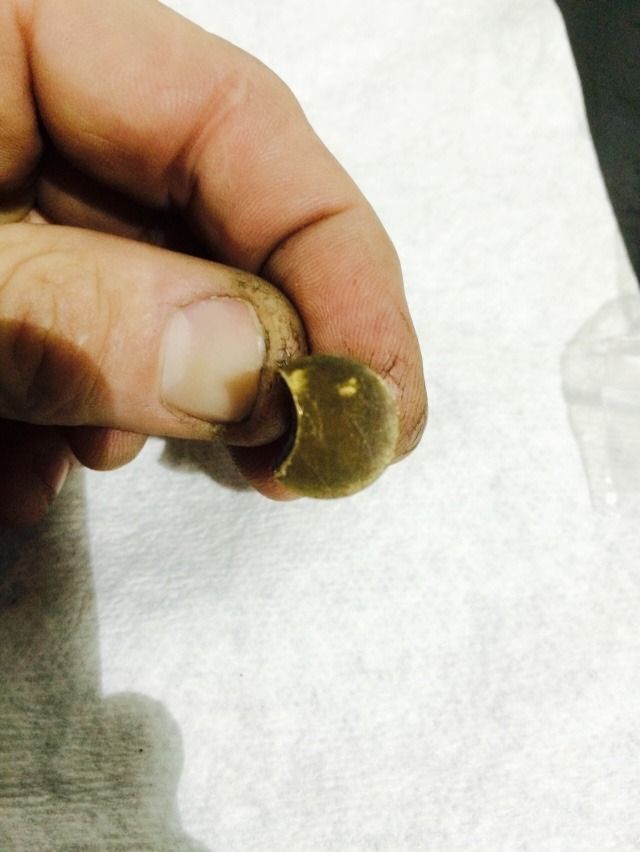
Here is the side that faces the shackle. The lip at the top of the picture is what retains the shackle.
The shackle can slide along…
… until the groove reaches the lip, stopping further movement.
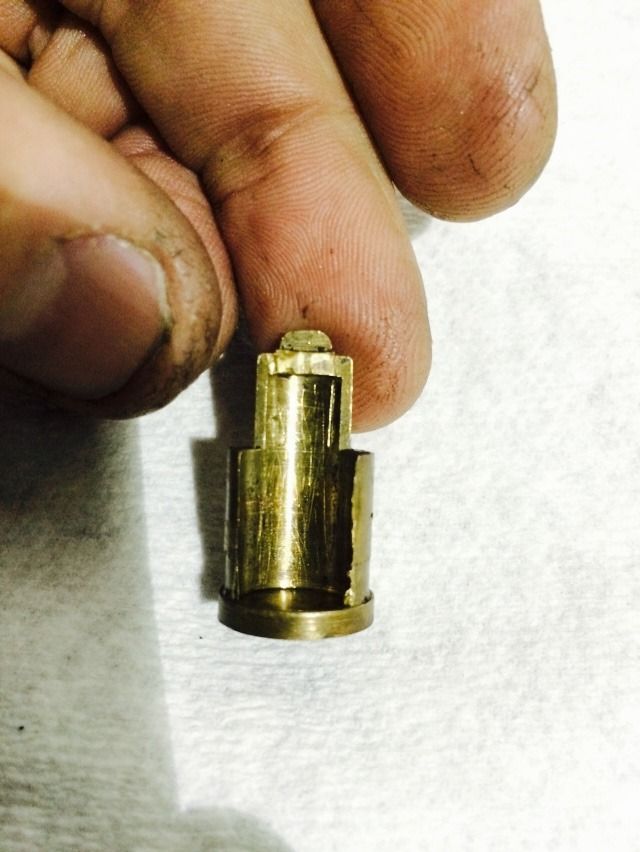
And this is the side that faces the SFIC core. This is the side that has the cutout in the outward-facing end that you see when you look at the assembled lock.
These are the locking dogs and springs.
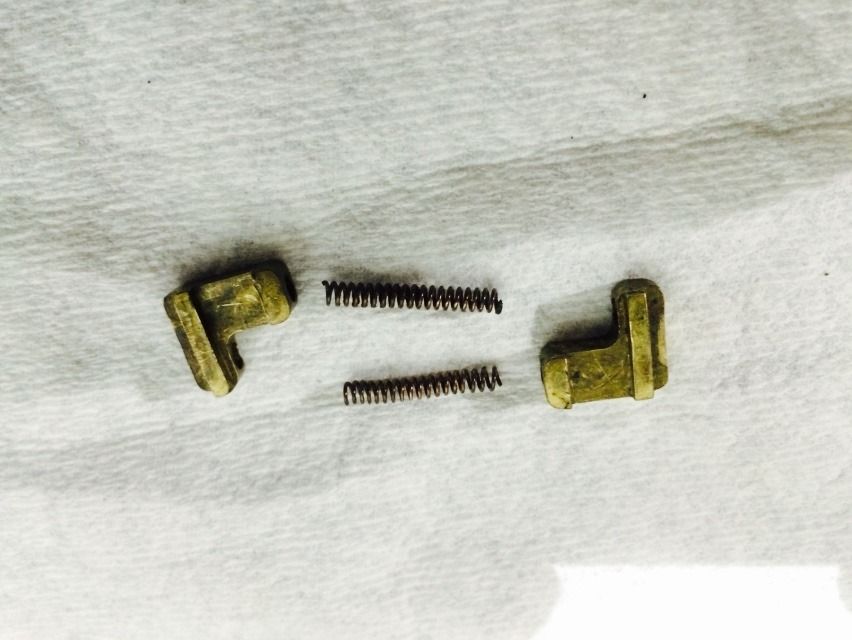
The springs go into deep holes in the dogs…
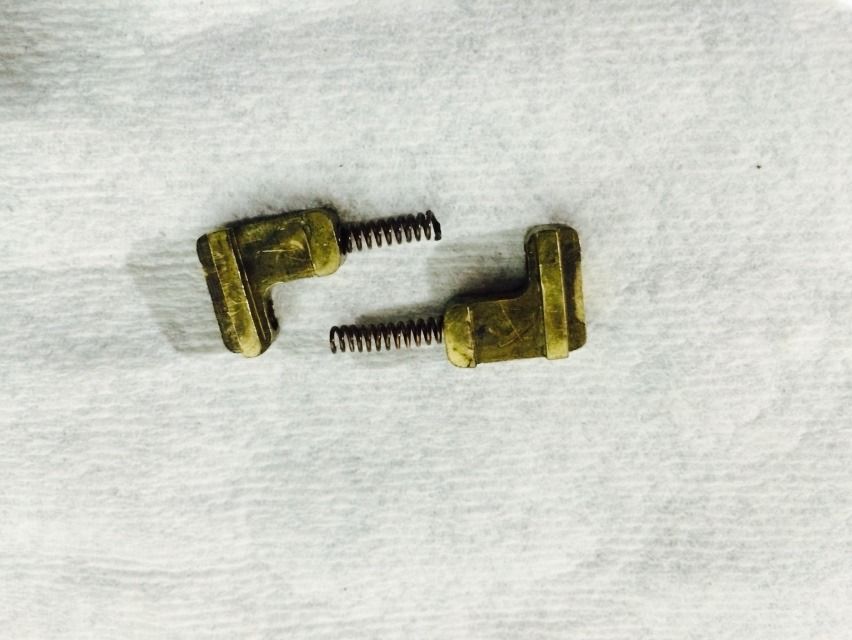
and the other end of the springs go into shallow holes on the opposite locking dog.
They need to be assembled in the lock body.
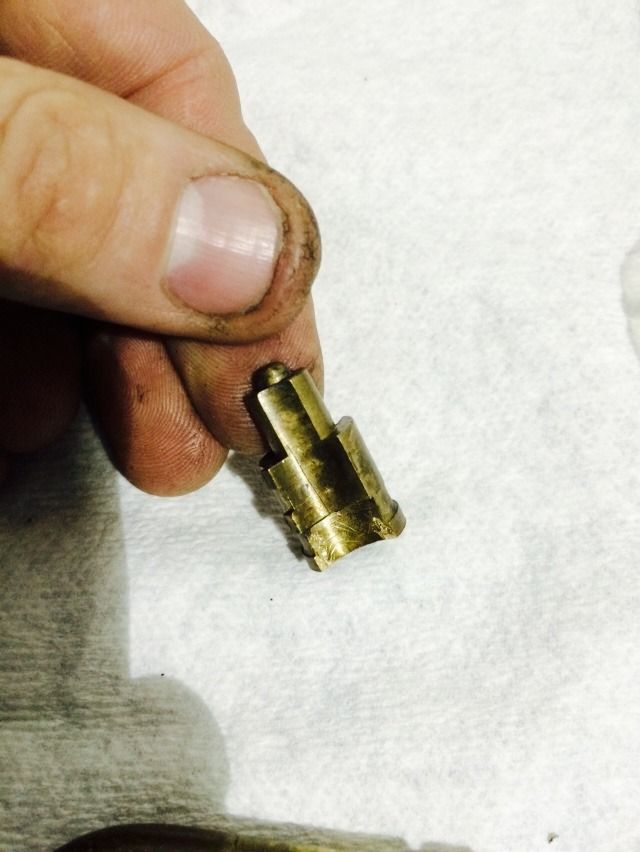
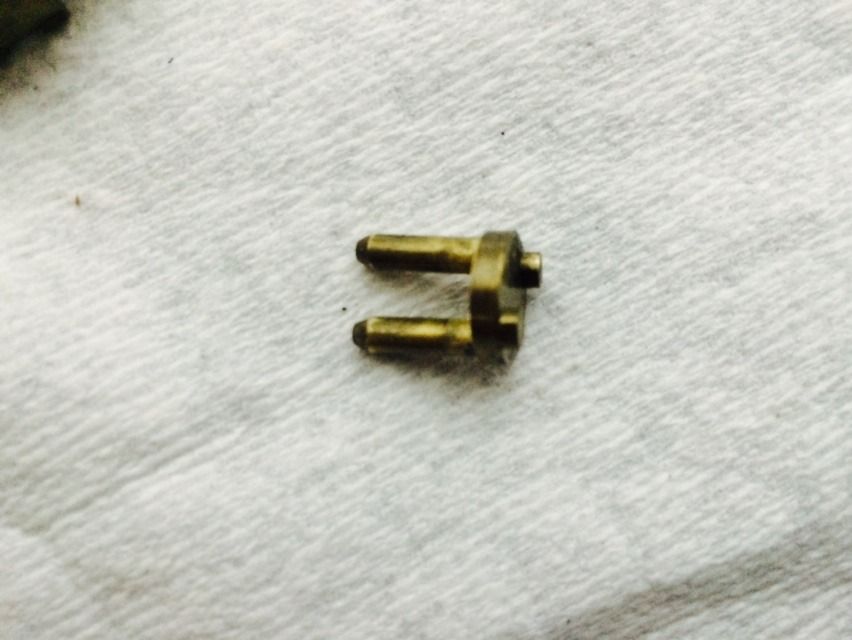
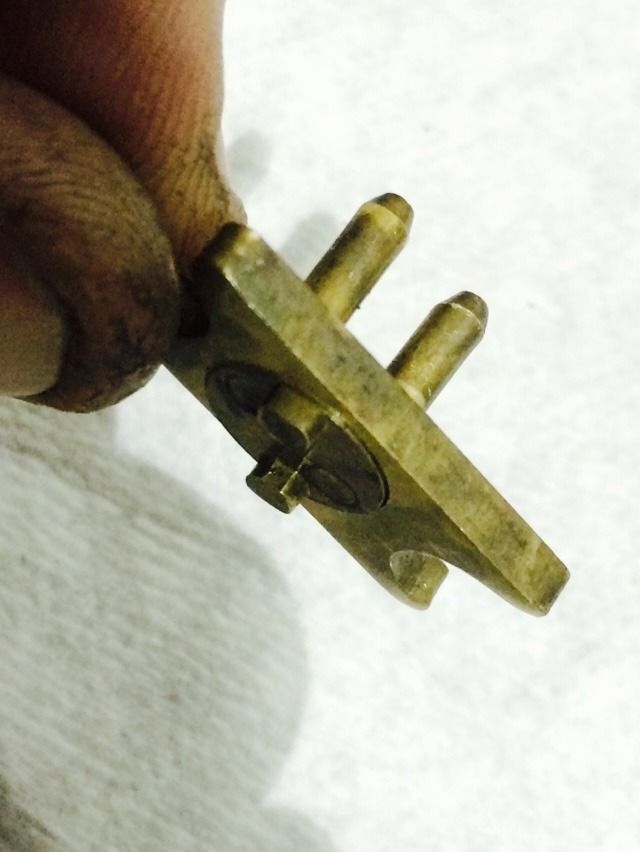
This is the tailpiece/actuator. The two long prongs fit into holes in the back of the SFIC plug, and on the opposite side are two short stubs that engage the locking dogs.
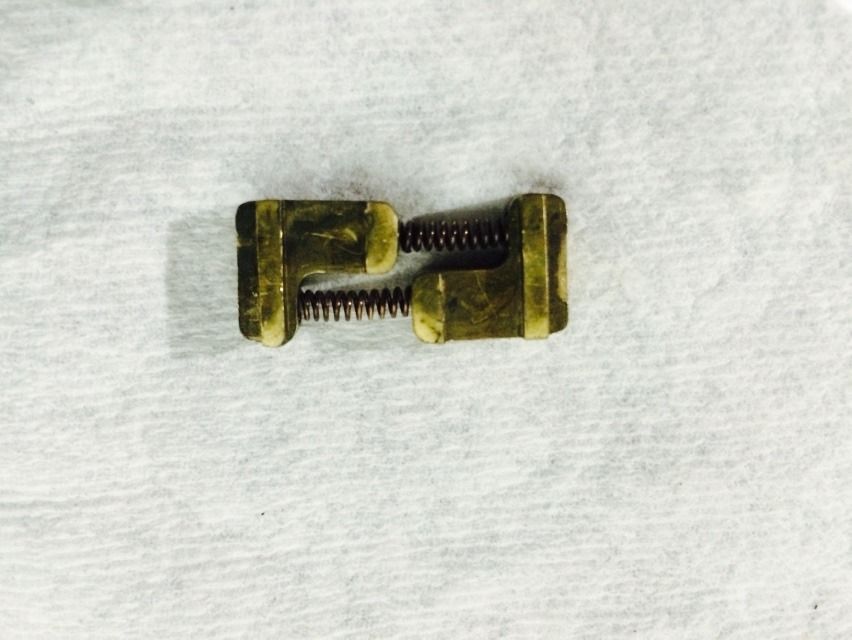
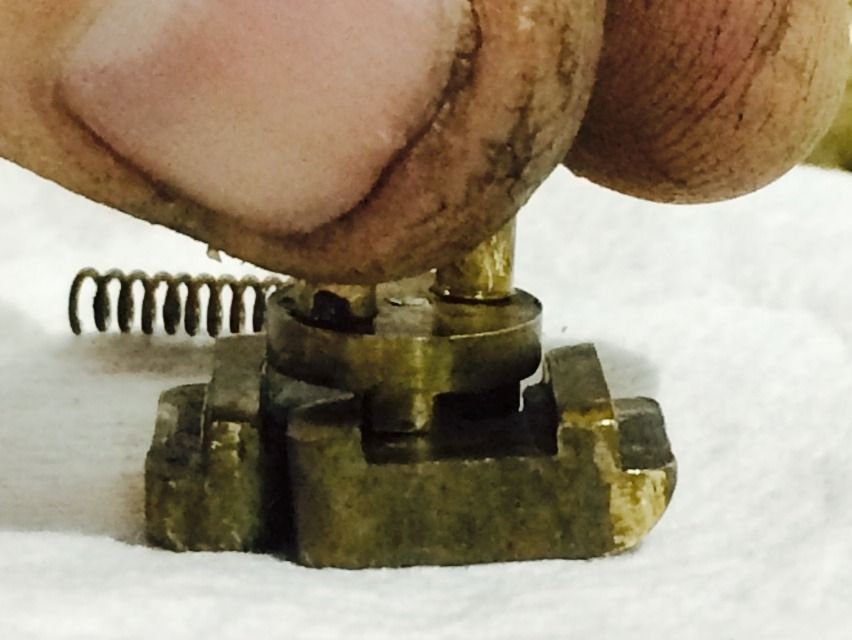
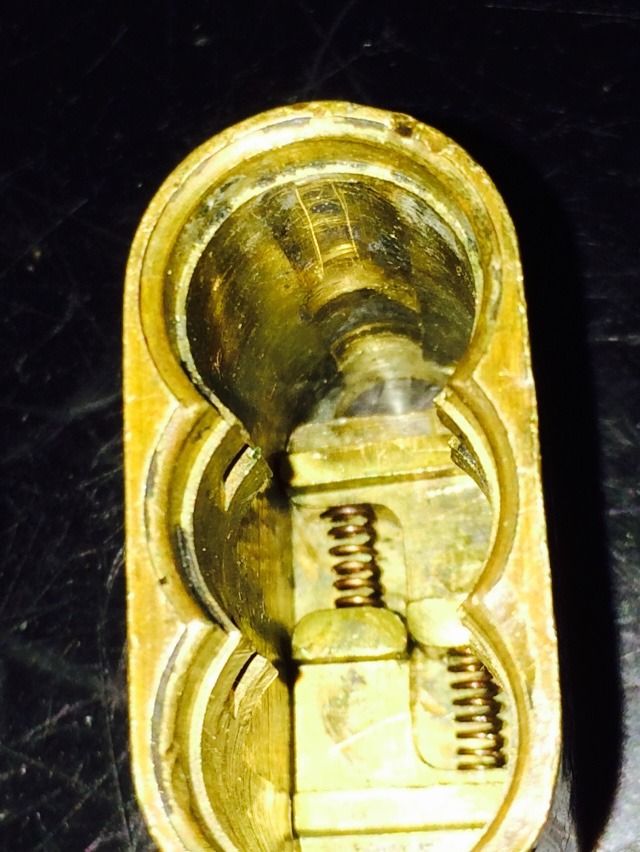
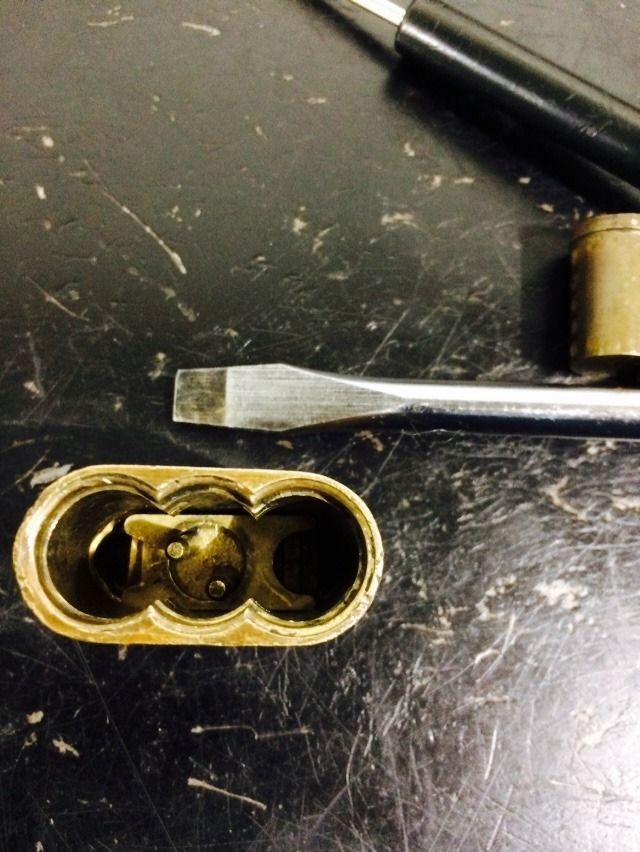
This is the locked position. Please observe that one of the locking dogs has a sloped ramp on the end that fits into the shackle notch, and the other side is squared. The locking dog with the sloped ramp goes on the side facing the shackle toe (the side that is able to swing away from the lock body when it is unlocked). The dog with the squared end goes in the shackle heel (the part of the shackle that stays in the lock even when the padlock is unlocked).
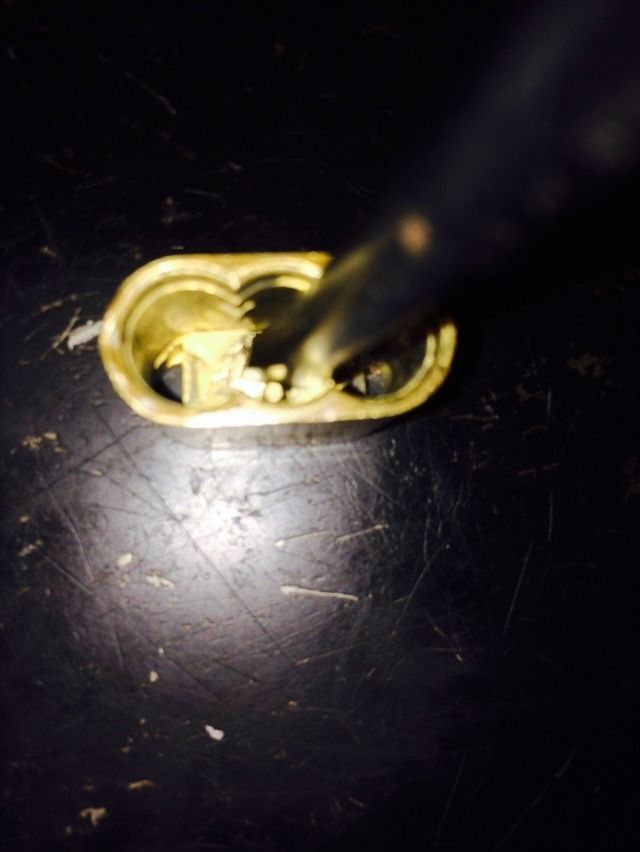
And when the actuator is turned, the stubs pull the locking dogs in to the center, pulling them out of the notches in the shackle.
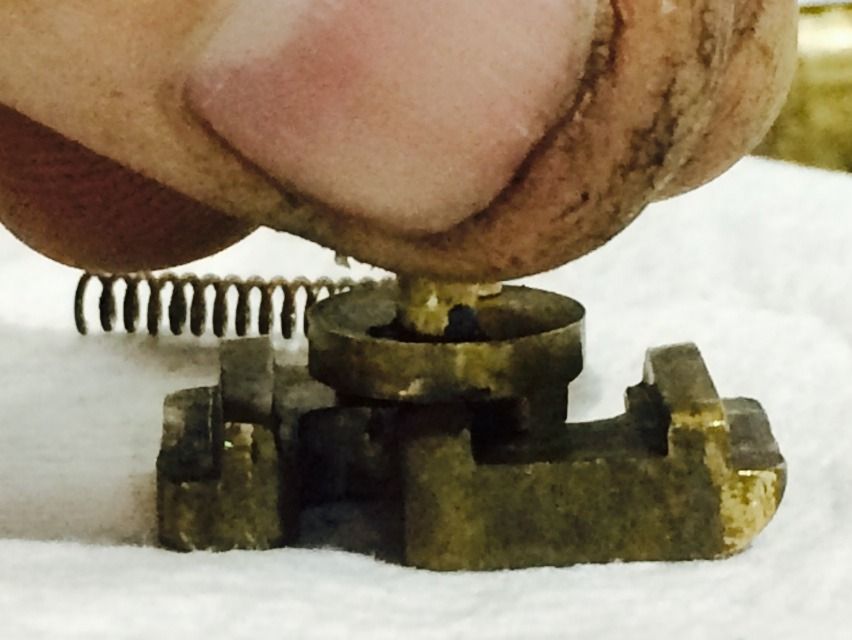
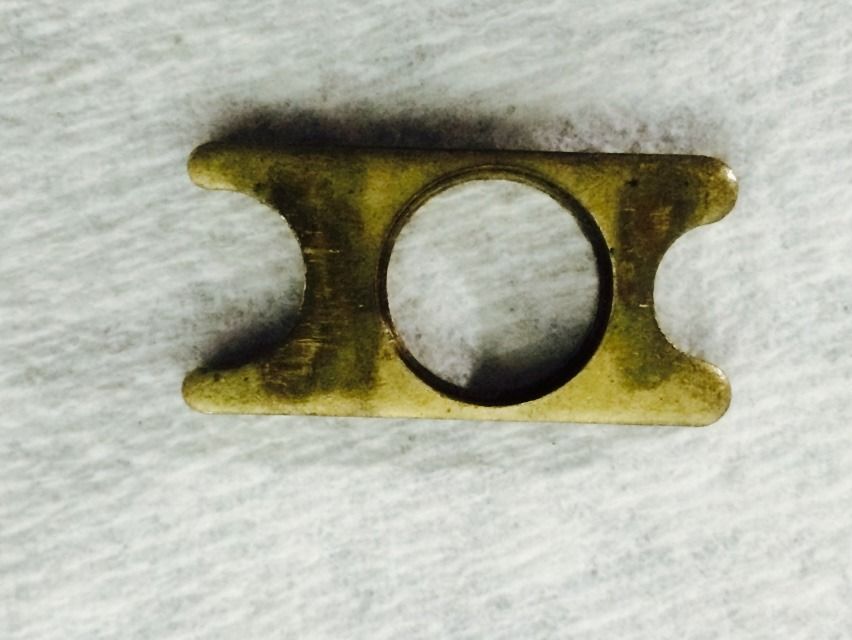
This next part holds the actuator centered over the locking dogs. That way the dogs don’t shift to the side, causing only one dog to release. Notice the inner lip. That lip is on the side facing the SFIC core, and the actuator is installed from the opposite side. Also take note that one end has a wider ‘mouth’ than the other side. The wider end faces the shackle heel.
The actuator then fits flush and in place. This part and the actuator are a major pain to install. More on that later.
And that leaves us with the lock body.
Yes, have already cleaned all components, but just of dirt, graphite, gook, and hardened graphite/liquid lubricants that had solidified. REALLY solidified.
Did not take a picture of the inside of the lock body while it was empty that shows the next piece of information, so you will see the locking dogs installed in this picture. But what you need to know for now is that at the top of the picture inside the lock there is a groove running up most of the way up the lock. There is no groove in the bottom of the picture. The side of the lock body WITH the groove is where the shackle heel fits (and the locking dog with the squared end). Everything will seem to fit until you get to a point of reassembly when you install the shackle retainer (rounded piece), and it won’t turn into place. Then you pull out the lock body and look closely and see the shackle is not installed quite square to the lock body, because the groove is not there for clearance. So trust me, be aware of the groove for reassembly of the shackle and locking dog. Anyway, here is the picture.
OK, you now know the parts. If you are lucky, you got all the parts out of the lock body without launching, losing, deforming or otherwise giving up. When getting the lock apart, you no doubt noticed that some of the parts just plain do not follow the laws of physics about fitting in order to disassemble or reassemble the lock.
Have you seen the puzzles where you have to hold the pieces just right to get the puzzle apart or back together? Well, this is the advanced level of those puzzles. Will try to show reassembly with enough clues to help you get the things back together without resorting to hammers, cutting torches or other implements.
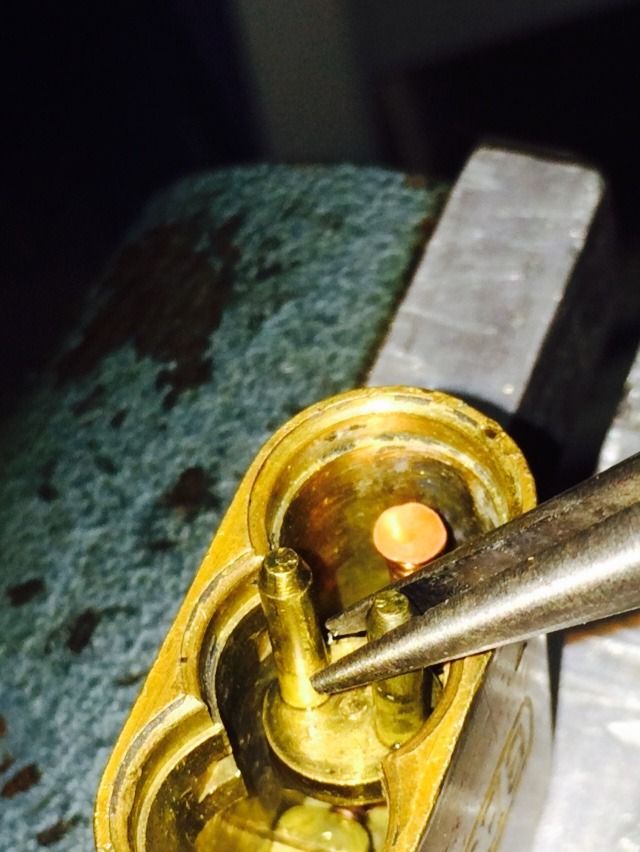
The locking dogs are installed individually, without the springs at first. Use tweezers or needle-nosed pliers to hold the locking dog by the long end (where the spring fits first). Keep it squared to the lock body and angle it in. Pictures show better than words.
Once past the outer ridges milled in the lock body, straighten the dog so the spring hole is facing straight up.
Put both locking dogs in (facing opposite sides), then put the springs into the locking dogs (which are still standing upright inside the lock body).
Then tip the locking dogs over so the springs overlap the opposite locking dog.
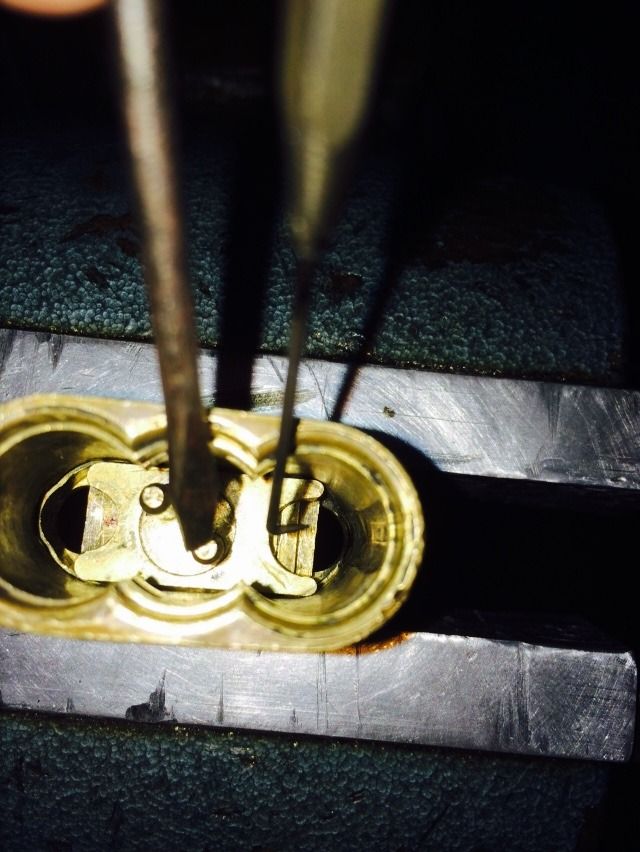
Unfortunately, it is difficult to get the pictures while holding the camera and tools. But here am using a small screwdriver to compress the locking dog spring and move it into the notch in the opposite locking dog.

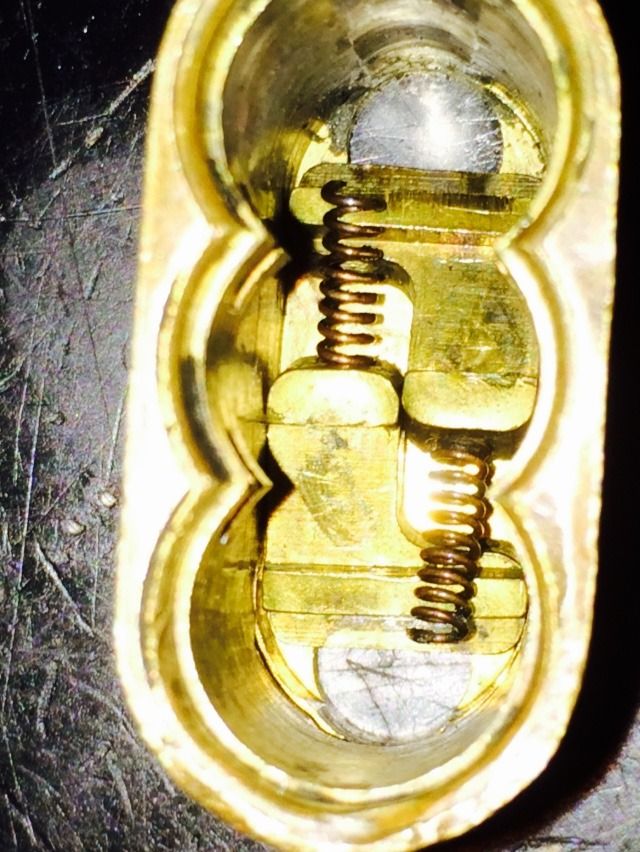
Now both springs are in place.
Now check that you got the correct locking dog on the correct side of the lock. The squared end locking dog needs to go on the side with the groove. The sloped dog goes on the side without the groove inside the lock body.
Now that you have confirmed that you installed the right locking dogs in the wrong place, take it back apart and put them back in the correct locations. Better to check this now rather than find out much later that they are not in the right places. Trust me, I know.
Now put the actuator into the lock. Notice how you see the spring for the shackle in the picture. That is because I did not know that the shackle needs to be installed later.

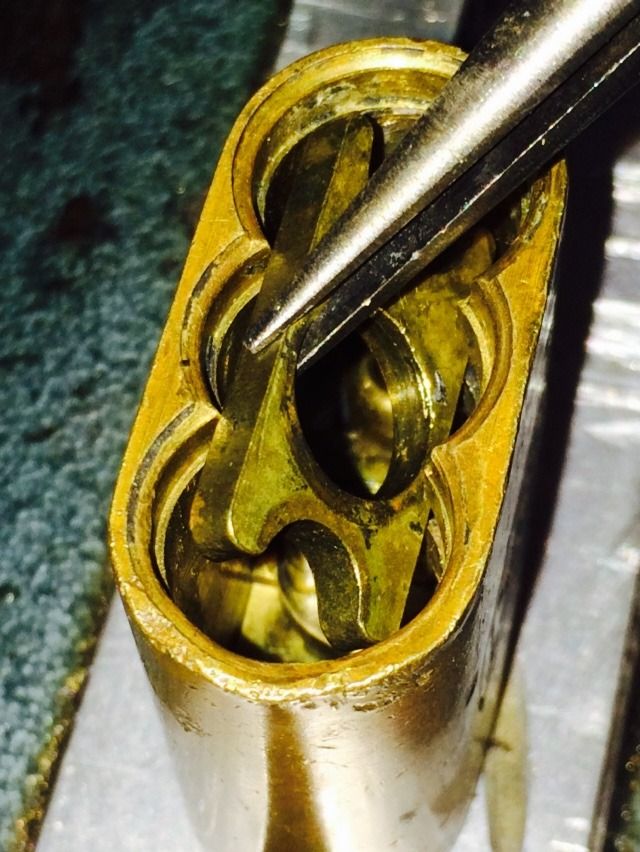
Now put in the actuator retainer. Here I am using a set of tweezers. After a half dozen reassemblies, have found it is easiest to do this using a small straight screwdriver and a small pick with a 90 degree angle. Put the part in at an angle with the long edge square with the bottom of the lock body.
Now that you have learned that you messed up and installed it with the lip down against the actuator so the actuator can’t fit into the circle, take it back out and flip it over, and put it back in. And now you can confirm that you forgot to put the wide-circle end facing the groove where the shackle heel will go, remove it again and turn it over again. Remember how I mentioned a half dozen reassemblies/disassemblies? Yeah, that is how I know.
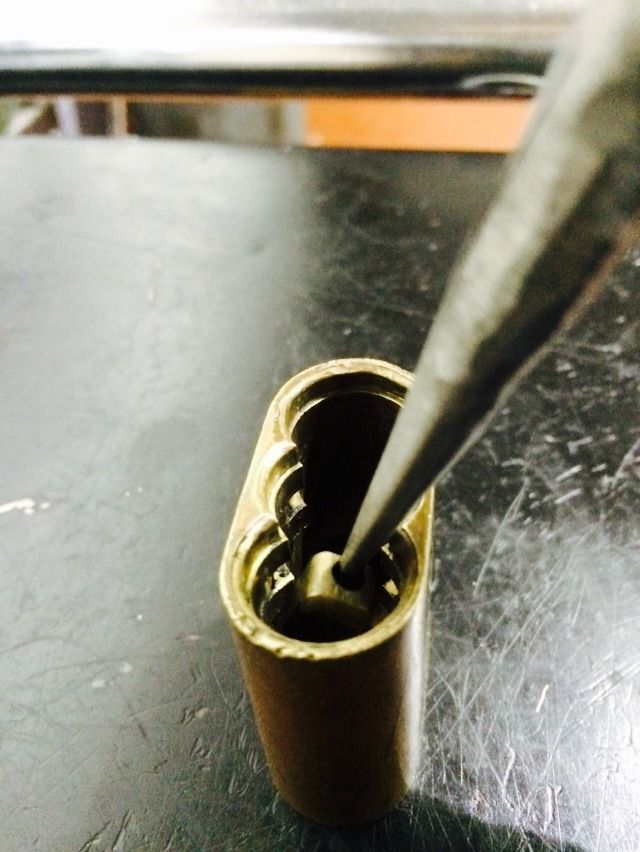
The prongs from the actuator have some sort of magical field that will assure that no matter what you do, the prongs will point anywhere except into the hole in the actuator retainer. This is to make lockies with weaker constitutions find another line of work. But you can make it easier by using a small pick (not lock pick) with a 90 degree angle to lift the center of the actuator retainer higher up while using a small flat screwdriver to press the center of the actuator. With a little practice, this will bring the prongs to nearly face the center of the circle in the retainer. A deft flip of the screwdriver and hook pick and the retainer lugs will be in the center of the circle!!! At last!!!
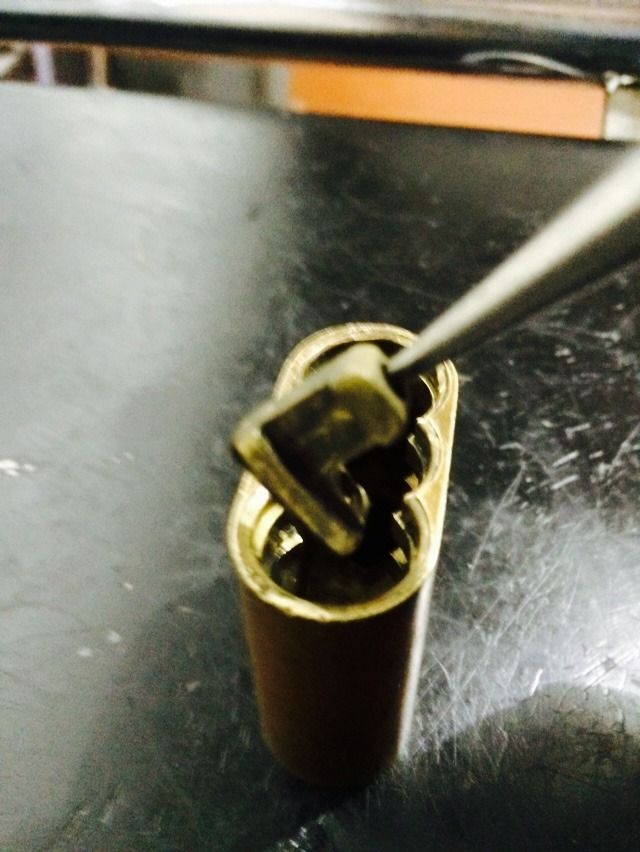
Now for those with all the cool locksmith tools, BEST makes a tool that fits over the lugs of the actuator which you can use to turn it and test that the locking dogs retract correctly. Unfortunately, there is not that particular tool in my collection. But here is another specialty tool that also works.
Place it between the lugs and turn, making sure everything works.
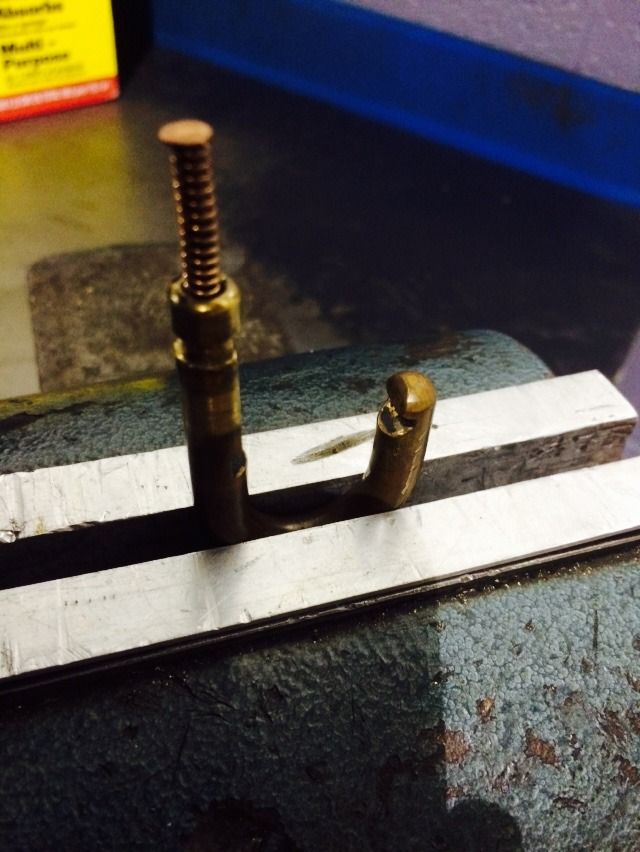
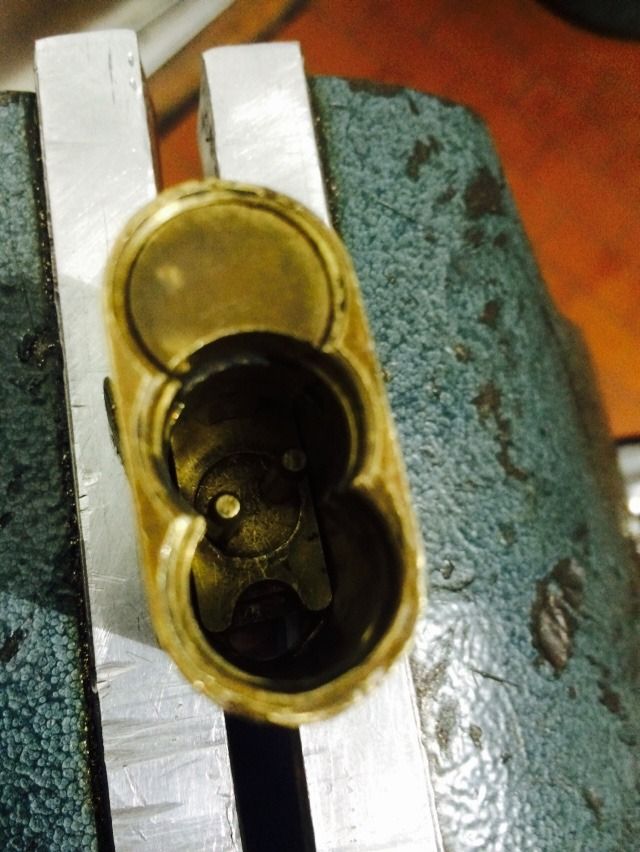
OK, the hardest part of the job is done. Just one tricky part left, and that is installing the shackle. Have found it easiest to put the shackle in a vice. Yes, I put aluminum angle strips in the vice. They protect the lock or key from damage. In the picture, the spring and spring stiffener are installed, just to show where they go. Do not keep them in place during this stage of reassembly.
Put the lock body on the shackle, using a small screwdriver to move the (square ended) locking dog back from the side of the lock body with the groove in it and install the shackle heel into that hole.
Now put in the spring and spring tensioner.
Now for the shackle retainer. Look at the bottom of the part in this picture. You will see two lugs.
The part needs to be rotated so those lugs clear the machining in the lock body for reassembly.
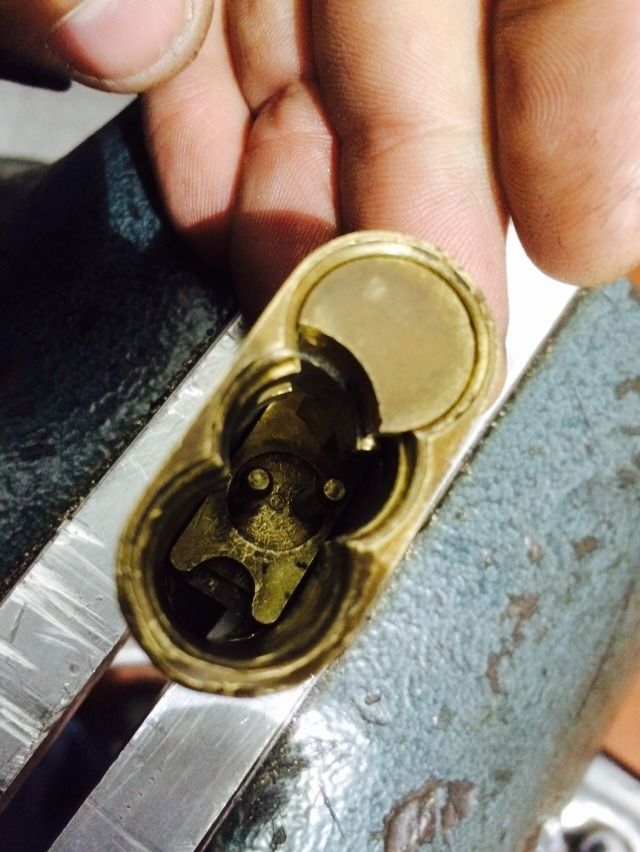
You will need to use your specialized tool to turn the actuator and slide the shackle up and down a bit as you install the shackle retainer or else it will get jammed up. Once it is fully seated, as in the above picture, you can then rotate it so the lugs are in place in the machined slots in the lock body.
Now you can use your specialized tool to test the function of the lock before putting in the core. When you see it is working, you are ready to install the core and you are done!
Now if you will excuse me, need to go punch the pins out of that core and recombinate it to match some keys. Then the job will be done.
Hope you enjoyed!
Gordon