Lock Picking 101 Forum
A community dedicated to the fun and ethical hobby of lock picking.
       

Lock Picking 101 Home
Login
Profile
Members
Forum Rules
Frequent Forum Questions
SEARCH
View New Posts
View Active Topics


Live Chat on Discord
LP101 Forum Chat
Keypicking Forum Chat
Reddit r/lockpicking Chat


Learn How to Pick Locks
FAQs & General Questions
Got Beginner Questions?
Pick-Fu [Intermediate Level]


Ask a Locksmith
This Old Lock
This Old Safe
What Lock Should I Buy?


Hardware
Locks
Lock Patents
Lock Picks
Lock Bumping
Lock Impressioning
Lock Pick Guns, Snappers
European Locks & Picks
The Machine Shop
The Open Source Lock
Handcuffs


Member Spotlight
Member Introductions
Member Lock Collections
Member Social Media


Off Topic
General Chatter
Other Puzzles


Locksmith Business Info
Training & Licensing
Running a Business
Keyways & Key Blanks
Key Machines
Master Keyed Systems
Closers and Crash Bars
Life Safety Compliance
Electronic Locks & Access
Locksmith Supplies
Locksmith Lounge


Buy Sell Trade
Buy - Sell - Trade
It came from Ebay!


Advanced Topics
Membership Information
Special Access Required:
High Security Locks
Vending Locks
Advanced Lock Pick Tools
Bypass Techniques
Safes & Safe Locks
Automotive Entry & Tools
Advanced Buy/Sell/Trade


Locksport Groups
Locksport Local
Chapter President's Office
Locksport Board Room
 

My First BRAMAH-ish Lock

Information about locks themselves. Questions, tips and lock diagram information should be posted here.

Re: My First BRAMAH-ish Lock

Postby jbrint » 14 Oct 2015 11:39

Best part about brazing is you don't have to be particularly good at it so long as you are good at sanding. Ideally a good clean braze but a hot mess can be cleaned up to look quite nice. It happens.
User avatar
jbrint
 
Posts: 208
Joined: 7 Aug 2015 22:27
Location: Houston, Texas

Re: My First BRAMAH-ish Lock

Postby kwoswalt99- » 14 Oct 2015 20:13

I think for key making, silver soldering is the best option. It matches the steel pretty nicely. Brazing is better for repairing fractures, it it's not a clean joint it won't be very strong.
I would recommend getting a jewelers torch instead of an oxy acetylene rig, because it's kinda overkill if you're just going to make keys. I heard somewhere that they stopped producing acetylene, I don't know if it's true though.
kwoswalt99-
 
Posts: 1218
Joined: 17 Mar 2015 15:35
Location: Somewhere.

Re: My First BRAMAH-ish Lock

Postby femurat » 10 Nov 2015 8:38

Image

Thanks for the ideas about soldering, brazing and silver soldering. I've talked to a local expert that concur about silver soldering being my best option. I'll look into that eventually.

Following a suggestion by FrenchKey, I've made a 3D model of the key blank with my PC and sent it to be printed in brass. It's a bit less than 50 euro to get the key printed and shipped to me. I should get it next month. Once I get the key blank I'll make the cuts and hopefully it will work smoothly. Now I can concentrate on the box design.

Cheers :)
User avatar
femurat
Site Admin
 
Posts: 3745
Joined: 22 Sep 2008 9:06
Location: Italy

Re: My First BRAMAH-ish Lock

Postby femurat » 12 Nov 2015 8:44

Image

Today I got a gift a friend made me with a laser cutting machine. It's a flat blank he made based on my 3D model. I just need to round the edges and I may have a nice stainless steel blank. I'll keep you updated about my progress.

Cheers :)
User avatar
femurat
Site Admin
 
Posts: 3745
Joined: 22 Sep 2008 9:06
Location: Italy

Re: My First BRAMAH-ish Lock

Postby femurat » 13 Nov 2015 4:06

Image

I flattened the key tip and carefully drilled a 2,5 mm hole in it. I was thinking to make a gig to help me keep the key parallel to the grinder, or even better, a cutter on the drill.
Then I took out my flat file and started filing the sides round. I cut a slot in a wooden block to help me hold the key. I was almost done when my girlfriend came home and I had to stop and hide the key. I want this to be a surprise. I'll go on filing soon :twisted:

Cheers :)
User avatar
femurat
Site Admin
 
Posts: 3745
Joined: 22 Sep 2008 9:06
Location: Italy

Re: My First BRAMAH-ish Lock

Postby femurat » 16 Nov 2015 4:37

Image

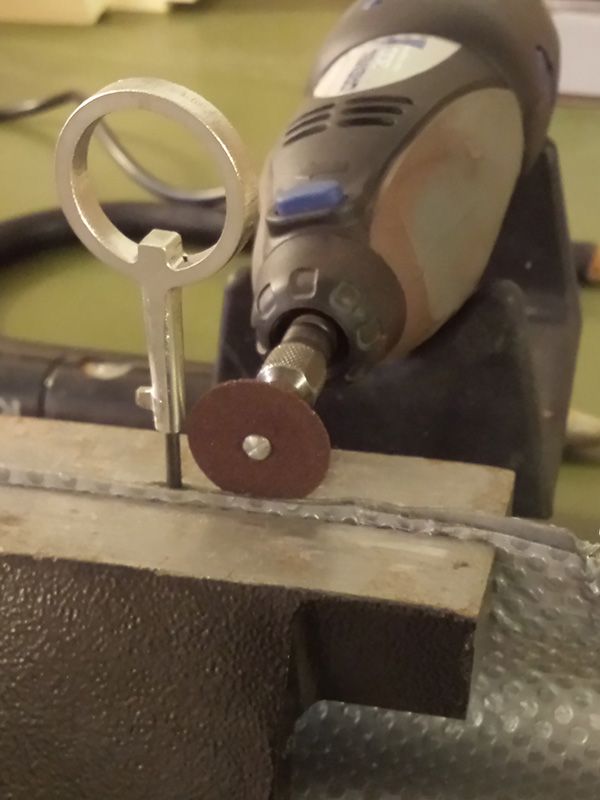
So I used a drill bit in the vice to be sure the key was round and centered on its hole. Made a few unsatisfying tries with the file, that seemed not to work very well because it was not easy to file and rotate at the same time.
As I said, I don't have a drill press, so I dug out the dremel, went all savage and held it by hand. Switched it on, put the tip against a point and then rotated the key by hand. Repeated a bit higher a few times and the tip was round and centered for sure.
I have to admit that, even if I tried to keep the tool still, some vibration and small movement may have occurred. In fact I had to smooth out the surface with the flat file. Nevertheless, I was sure the key was well round and uniform enough for the precision I need to open this lock.
Image

Image

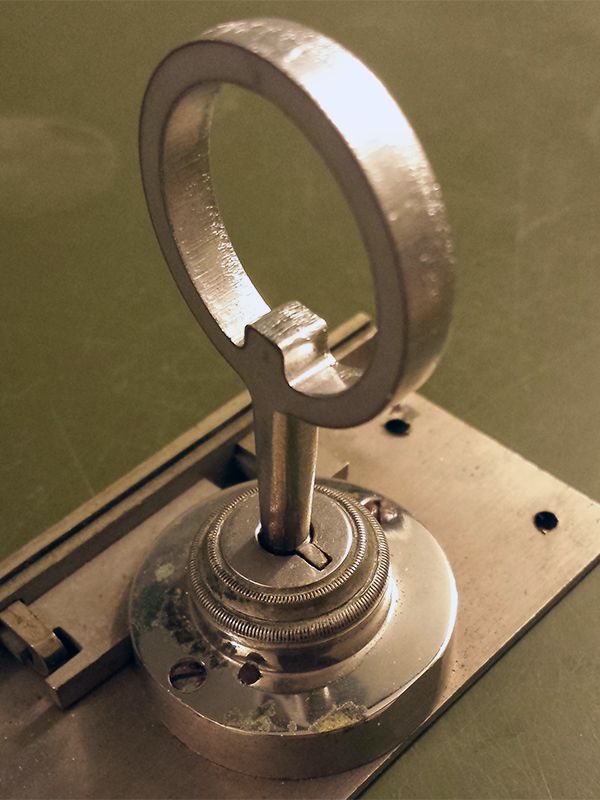
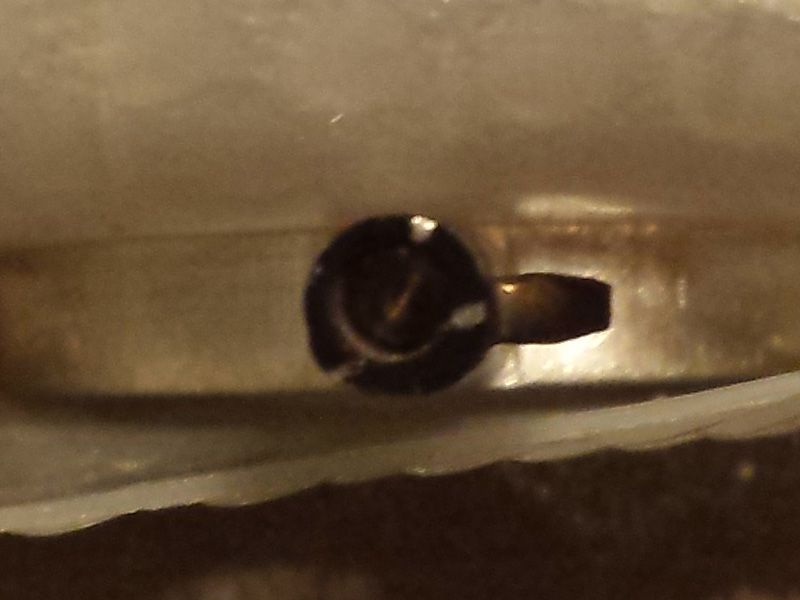
Even if it's still a bit too long, it's nice to see that it enters the keyhole now. I smoked the tip to get the sliders position and am ready for the next steps: establishing the tip length so the flag enter completely the keyway and cut the bittings on the tip.

Cheers :)
User avatar
femurat
Site Admin
 
Posts: 3745
Joined: 22 Sep 2008 9:06
Location: Italy

Re: My First BRAMAH-ish Lock

Postby femurat » 18 Nov 2015 8:27

Image

Image

Image

Image

What a great feeling when the key finally turns!
I wish I went slower with the dremel but couldn't help the urge to finish this key. I still have some marks left, and the hole is not perfectly centered. I'm quite happy anyway. I think I'll keep this as spare key and carefully copy the cuts on the 3D printed one when it arrives.

I hope to start building the box this weekend. I also need to chose the color and material for the inner lining. I'm thinking about Alcantara (Ultrasuede).

Cheers :)
User avatar
femurat
Site Admin
 
Posts: 3745
Joined: 22 Sep 2008 9:06
Location: Italy

Re: My First BRAMAH-ish Lock

Postby kwoswalt99- » 18 Nov 2015 17:46

Ooh, what wood will you use?
I can't see the pics, but i'm sure the key looks great. :)
kwoswalt99-
 
Posts: 1218
Joined: 17 Mar 2015 15:35
Location: Somewhere.

Re: My First BRAMAH-ish Lock

Postby femurat » 20 Nov 2015 5:16

Image

Image

Image

Image

kwoswalt99-, I'm using pine wood. Why can't you see the pictures? Well, thanks for thinking that the key looks great even without having seen it :mrgreen:

I've cut the slot for the lock with a chisel and then made the two big holes with the drill. It still need to be sanded, but after two hours I was tired and hungry. Will refine and glue it next time I have a free hour or two. I need to buy and cut another piece of wood for the cover. I also need some matching screws.

Cheers :)
User avatar
femurat
Site Admin
 
Posts: 3745
Joined: 22 Sep 2008 9:06
Location: Italy

Re: My First BRAMAH-ish Lock

Postby femurat » 24 Nov 2015 5:44

Image

Image

So I was cutting the two slots for the hinges and the first one was looking good. Then while I was finishing the second one I probably hit the chisel a bit harder than I should have, because the wood split badly. I was frustrated and left it alone. I may try to glue it back. I'm not so willing to cut another back panel from scratch.

Cheers :)
User avatar
femurat
Site Admin
 
Posts: 3745
Joined: 22 Sep 2008 9:06
Location: Italy

Re: My First BRAMAH-ish Lock

Postby zeke79 » 24 Nov 2015 7:37

Unfortunately pine splits easily when chiseling as you have discovered. The work looks great so far! I can't wait to see it finished!
For the best book out there on high security locks and their operation, take a look at amazon.com for High-Security Mechanical Locks An Encyclopedic Reference. Written by our very own site member Greyman! A true 5 Star read!!
zeke79
Admin Emeritus
 
Posts: 5701
Joined: 1 Sep 2003 14:11
Location: USA

Re: My First BRAMAH-ish Lock

Postby femurat » 25 Nov 2015 4:13

Image

I tried to glue the piece back in place so I lifted it slightly and put some glue in the crack. Then put a piece of plastic around it and clamped between two other pieces to keep it straight. Then I added another clamp on top (not pictured) and let it dry overnight.

Image

Image

This morning I took the clamps off and, to my surprise, it looks like new! I just need to clean the glue that squeezed out.

Cheers :)
User avatar
femurat
Site Admin
 
Posts: 3745
Joined: 22 Sep 2008 9:06
Location: Italy

Re: My First BRAMAH-ish Lock

Postby femurat » 1 Dec 2015 3:47

Image

Image

Image

I sanded and glued the box, then mounted the lock and the hinges and strike to the lid. The box is starting to assume its final form.
Took it apart again and gave it the first coat of paint. It'll look like light walnut wood once finished.

Cheers :)
User avatar
femurat
Site Admin
 
Posts: 3745
Joined: 22 Sep 2008 9:06
Location: Italy

Re: My First BRAMAH-ish Lock

Postby zeke79 » 1 Dec 2015 7:52

Beautiful work!
For the best book out there on high security locks and their operation, take a look at amazon.com for High-Security Mechanical Locks An Encyclopedic Reference. Written by our very own site member Greyman! A true 5 Star read!!
zeke79
Admin Emeritus
 
Posts: 5701
Joined: 1 Sep 2003 14:11
Location: USA

Re: My First BRAMAH-ish Lock

Postby femurat » 4 Dec 2015 9:29

Image

Image

Image

Image

Image

The 3D printed key arrived yesterday. This morning I was so excited I woke up at 5 so I could file the bittings without my girlfriend noticing.
First of all I smoothed the hole on the tip by hand: I rotated a drill bit with my fingers against the hole a few times. This should help centering the key.
I carefully filed the slots with the needle file, copying the steel key, but left them a bit shallow. Then I finished them one by one while checking the key every few strokes. Now the key works very smoothly.

Now I need to find a place that can chrome it to protect it properly.

Cheers :)

ps: thanks zeke :mrgreen:
User avatar
femurat
Site Admin
 
Posts: 3745
Joined: 22 Sep 2008 9:06
Location: Italy

PreviousNext

Return to Locks

Who is online

Users browsing this forum: Google [Bot] and 7 guests