Lock Picking 101 Forum
A community dedicated to the fun and ethical hobby of lock picking.
       

Lock Picking 101 Home
Login
Profile
Members
Forum Rules
Frequent Forum Questions
SEARCH
View New Posts
View Active Topics


Live Chat on Discord
LP101 Forum Chat
Keypicking Forum Chat
Reddit r/lockpicking Chat


Learn How to Pick Locks
FAQs & General Questions
Got Beginner Questions?
Pick-Fu [Intermediate Level]


Ask a Locksmith
This Old Lock
This Old Safe
What Lock Should I Buy?


Hardware
Locks
Lock Patents
Lock Picks
Lock Bumping
Lock Impressioning
Lock Pick Guns, Snappers
European Locks & Picks
The Machine Shop
The Open Source Lock
Handcuffs


Member Spotlight
Member Introductions
Member Lock Collections
Member Social Media


Off Topic
General Chatter
Other Puzzles


Locksmith Business Info
Training & Licensing
Running a Business
Keyways & Key Blanks
Key Machines
Master Keyed Systems
Closers and Crash Bars
Life Safety Compliance
Electronic Locks & Access
Locksmith Supplies
Locksmith Lounge


Buy Sell Trade
Buy - Sell - Trade
It came from Ebay!


Advanced Topics
Membership Information
Special Access Required:
High Security Locks
Vending Locks
Advanced Lock Pick Tools
Bypass Techniques
Safes & Safe Locks
Automotive Entry & Tools
Advanced Buy/Sell/Trade


Locksport Groups
Locksport Local
Chapter President's Office
Locksport Board Room
 

Use for cheap MTL padlock cylinders

Information about locks themselves. Questions, tips and lock diagram information should be posted here.

Use for cheap MTL padlock cylinders

Postby adi_picker » 18 Nov 2017 4:20

Gday Guys,

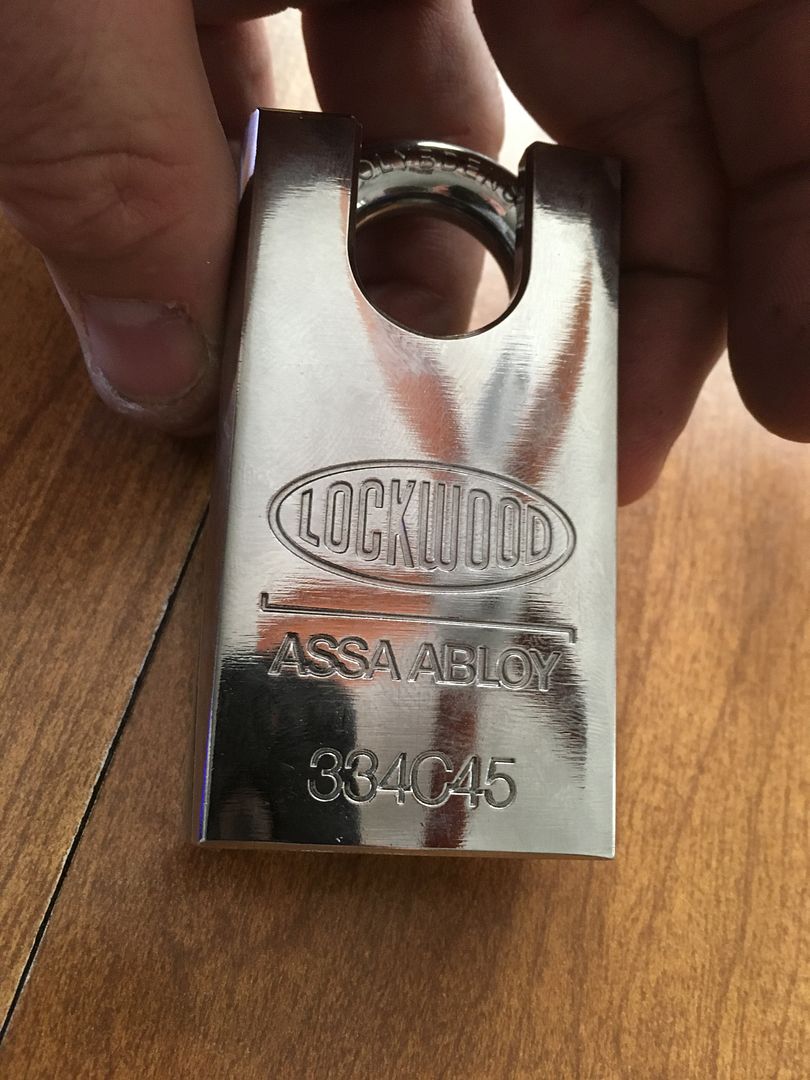
Just a little back, I found some MTL Interactive padlock cylinders on eBay rather cheap, and with no use for them other than picking them, purchased a handful. Once they arrived, of course I picked them all a couple of times over a few days, then set them down and wondered if I could make use of any of them. I didnt have a pile of MTL padlock bodies lying around sans cylinder, but I did have a pile of Lockwood 234's and 334's. I took a quick look and ascertained that although close, the body was not quite big enough for them, so I packed them in their bag, and put them in my collection box. Not long after, I was browsing Noctis's Youtube Channel and seen that the bugger had already done it!

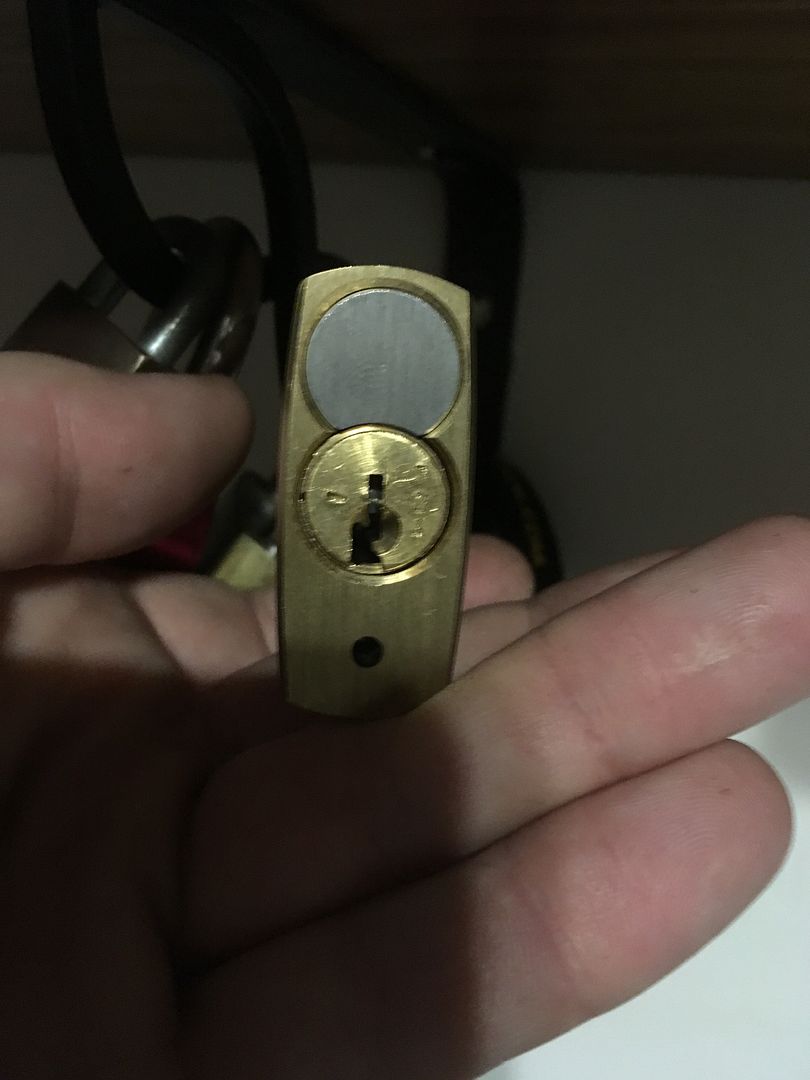
After a brief watch of the video, I decided I wanted to convert one of my Lockwoods as well. I did one of the 334's and with a little effort, it fit and worke beautifully, upgrading a nice medium security padlock that I have a lot of, to a excellent high security padlock that I had none of! Of course, once I had done one I started looking at all my other Lockwoods, and decided to modify my 290S84 shutter lock as well. I figured that you guys might like it, so I took a few photos of it afterwards.

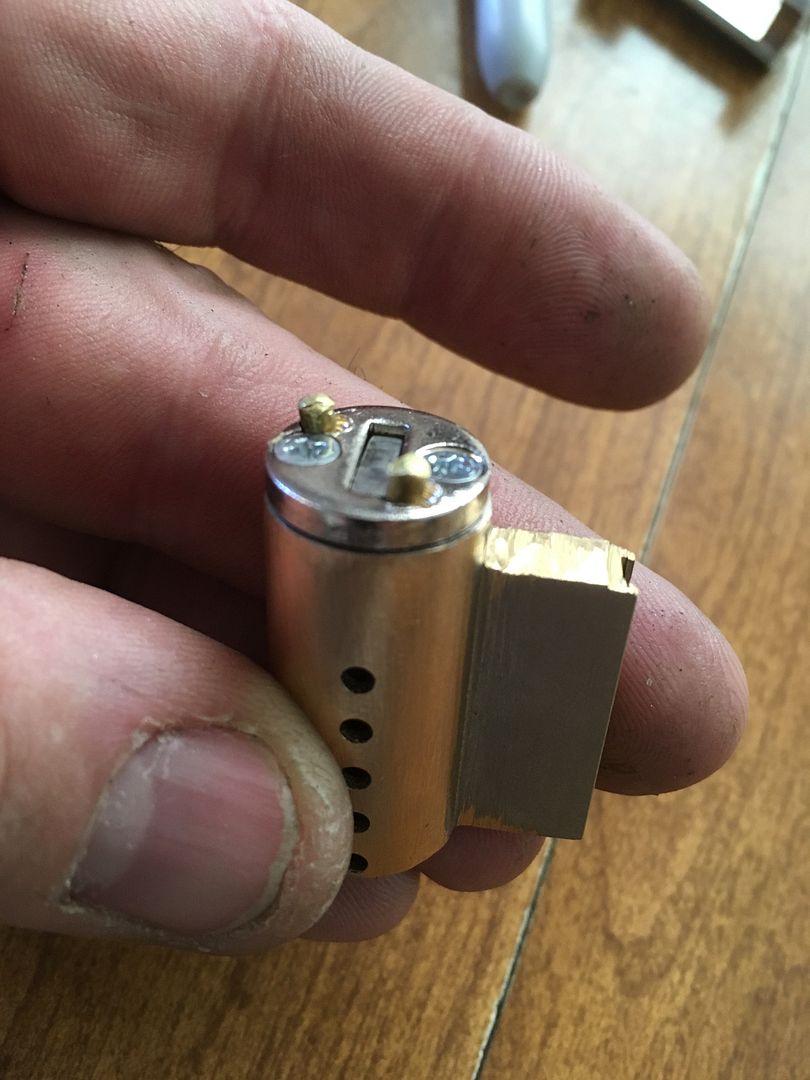
First of all, the body is a little too small as I mentioned above, when I measured, it was .0005" thou different. Not much! I used a small sanding wheel on my dremel to open up the body, unlike Noctis, who did the inverse, and sanded down the cylinder. Either way will work.

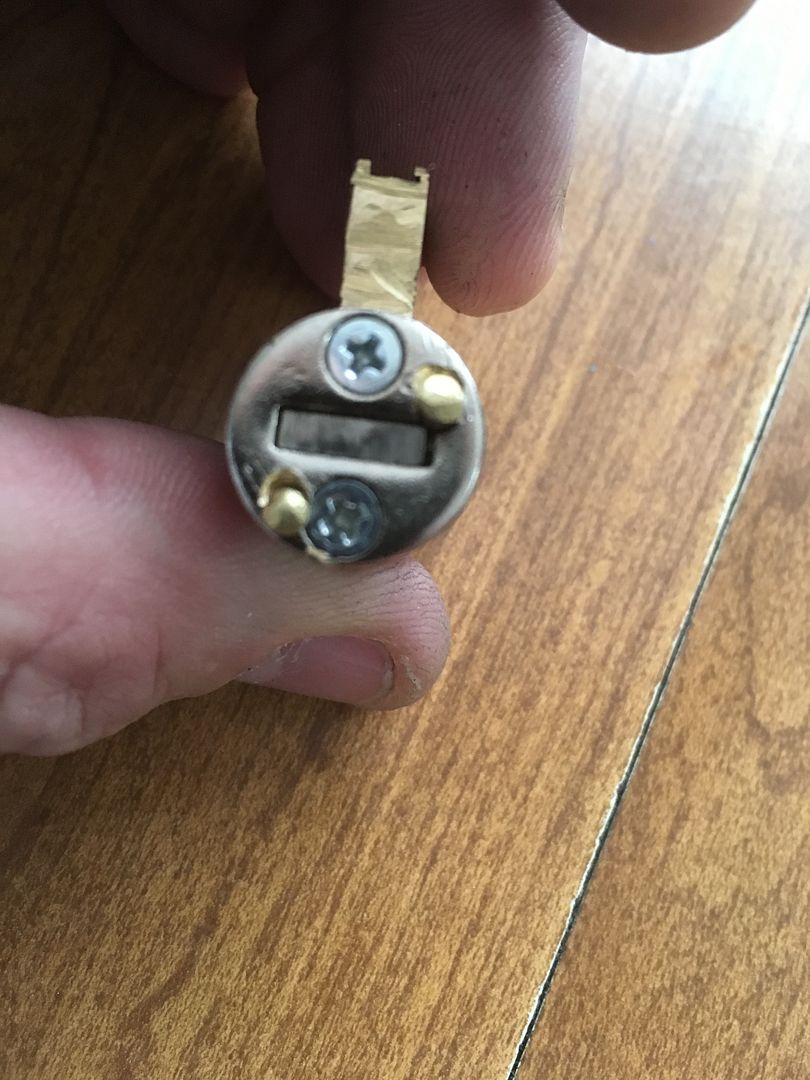
Next, I set about modifying the bible, in order for it to fit into the other part of the Lockwood IC assy. Take a little off the front and a bit more off the back, being careful not to cut or file into any of the chambers. I was moving a bit fast on my first go and ruined a cylinder by doing exactly this. When you are finished, it should look a little like this.

Image

Next, I had to find a tailpiece that would operate the lock in the correct fashion, as the original was oriented 90deg differently from the Lockwood. I got lucky on this step, and found one that fitted the bill amongst my parts, I think it may have originally been in a BiLock padlock? Either way, it pays to hoard ;)

Image

Lastly, I put it all back together! I had to adjust / sand a little more out of the body, but other than that, the cylinder fits and works a treat. Oh, and it looks super cool with all its chrome 8)

Image

Image

Image

Now, the thing is, I still have a whole lot of Lockwood padlock bodies, and only a few more cylinders, so I can't possibly use them all. I know that quite a few of you guys also bought the cylinders, so I was thinking I would be happy to send anyone a body if you wish to do the same, for the price of the postage to wherever you may be. I'm located in Western Australia, and for a rough guide, sending the body to the US would set me back about $10 AUD. If you want one, hit me up with a PM and Ill get it done for you, and when you build it, post a pic here so we can all cop a look!

adi_picker
adi_picker
 
Posts: 276
Joined: 21 Aug 2015 12:12
Location: Australia

Re: Use for cheap MTL padlock cylinders

Postby GWiens2001 » 18 Nov 2017 14:59

Nice work, adi. :D You motivated me to get off my lazy hindside and do something with one of those inexpensive MTL cores and a Lockwood body. I did file down the KIK cylinder diameter just because it would allow the core to be moved to another padlock if I decided to do so in the future. And did, of course, shorten the bible on both ends. (Sorry, no more Genesis or Revelations). :P

Image

Image

But, being lazy, I did not go all out on making a new tailpiece. Just drilled the MTL tailpiece in two places and tapped in some brass rods. Cut down the actuator from the MTL so it does not extend past the tailpiece, and it works. Now I have a Lockwood Interactive. :mrgreen:

Image

Image

Gordon
Just when you finally think you have learned it all, that is when you learn that you don't know anything yet.
User avatar
GWiens2001
Site Admin
 
Posts: 7550
Joined: 3 Sep 2012 16:24
Location: Arizona, United States

Re: Use for cheap MTL padlock cylinders

Postby adi_picker » 18 Nov 2017 23:20

Excellent Gordon! Is that the Lockwood body I sent the Twin in to you?

I forgot to post it yesterday, but there is another caveat. That is when you remove the original MTL tailpiece, it leaves a gap in the end of the plug, which given that the key is tip stopped, causes the key to overshoot its stop point, and not turn. I found a pin that was slightly larger than the groove and used the tailpiece and its screws to push the pin into the right spot.

Image

In the photo above you can clearly see the pin in the groove. This has brought the tip stop position back to where it should be, so the key works pefectly again.

Also took a shot of the first lock I did.

Image

Looks great!

adi_picker
adi_picker
 
Posts: 276
Joined: 21 Aug 2015 12:12
Location: Australia

Re: Use for cheap MTL padlock cylinders

Postby Noctis » 19 Nov 2017 3:37

Nice one, Gareth! Looks like it all worked out well. Great job!

Resisting the urge to modify a boring Lockwood is difficult. :)

Image
Noctis
 
Posts: 3
Joined: 29 May 2016 2:02

Re: Use for cheap MTL padlock cylinders

Postby GWiens2001 » 19 Nov 2017 9:14

adi_picker wrote:Excellent Gordon! Is that the Lockwood body I sent the Twin in to you?

I forgot to post it yesterday, but there is another caveat. That is when you remove the original MTL tailpiece, it leaves a gap in the end of the plug, which given that the key is tip stopped, causes the key to overshoot its stop point, and not turn. I found a pin that was slightly larger than the groove and used the tailpiece and its screws to push the pin into the right spot.

Image

In the photo above you can clearly see the pin in the groove. This has brought the tip stop position back to where it should be, so the key works pefectly again.

Also took a shot of the first lock I did.

Image

Looks great!

adi_picker


Yes, it does happen to be the Lockwood you sent the Twin in. Since the Twin had a brass plug, I moved it to a brand new brass bodied Lockwood body. Now it brass matches brass and steel matches steel.

Image

Image

Image

Image

Somewhere I have another of the same type of chrome bodied Lockwood padlocks with a factory core, but would have to dig around for it. Would have used that one, but was in a hurry and had that brass one still NIB sitting on my desk. So a core swap to make everything match seemed a good idea. 8)

As for the actuator being missing on the tailpiece you removed, found the same problem with the tip stop being removed. So I simply cut it down so it did not extend beyond the original tailpiece. But if you make a new tailpiece, might as well just make the raised part below to tip stop the key.

Image

Nice swap with the BiLock, Noctis! Looks great. :D

Gordon
Just when you finally think you have learned it all, that is when you learn that you don't know anything yet.
User avatar
GWiens2001
Site Admin
 
Posts: 7550
Joined: 3 Sep 2012 16:24
Location: Arizona, United States


Return to Locks

Who is online

Users browsing this forum: No registered users and 1 guest

cron