Lock Picking 101 Forum
A community dedicated to the fun and ethical hobby of lock picking.
       

Lock Picking 101 Home
Login
Profile
Members
Forum Rules
Frequent Forum Questions
SEARCH
View New Posts
View Active Topics


Live Chat on Discord
LP101 Forum Chat
Keypicking Forum Chat
Reddit r/lockpicking Chat


Learn How to Pick Locks
FAQs & General Questions
Got Beginner Questions?
Pick-Fu [Intermediate Level]


Ask a Locksmith
This Old Lock
This Old Safe
What Lock Should I Buy?


Hardware
Locks
Lock Patents
Lock Picks
Lock Bumping
Lock Impressioning
Lock Pick Guns, Snappers
European Locks & Picks
The Machine Shop
The Open Source Lock
Handcuffs


Member Spotlight
Member Introductions
Member Lock Collections
Member Social Media


Off Topic
General Chatter
Other Puzzles


Locksmith Business Info
Training & Licensing
Running a Business
Keyways & Key Blanks
Key Machines
Master Keyed Systems
Closers and Crash Bars
Life Safety Compliance
Electronic Locks & Access
Locksmith Supplies
Locksmith Lounge


Buy Sell Trade
Buy - Sell - Trade
It came from Ebay!


Advanced Topics
Membership Information
Special Access Required:
High Security Locks
Vending Locks
Advanced Lock Pick Tools
Bypass Techniques
Safes & Safe Locks
Automotive Entry & Tools
Advanced Buy/Sell/Trade


Locksport Groups
Locksport Local
Chapter President's Office
Locksport Board Room
 

ALC Galaxy - Caution - Picture Heavy

Information about locks themselves. Questions, tips and lock diagram information should be posted here.

ALC Galaxy - Caution - Picture Heavy

Postby GWiens2001 » 10 Nov 2017 23:50

Just received an ALC (Australian Lock Company) Galaxy, so it is time for a new write-up. :mrgreen:

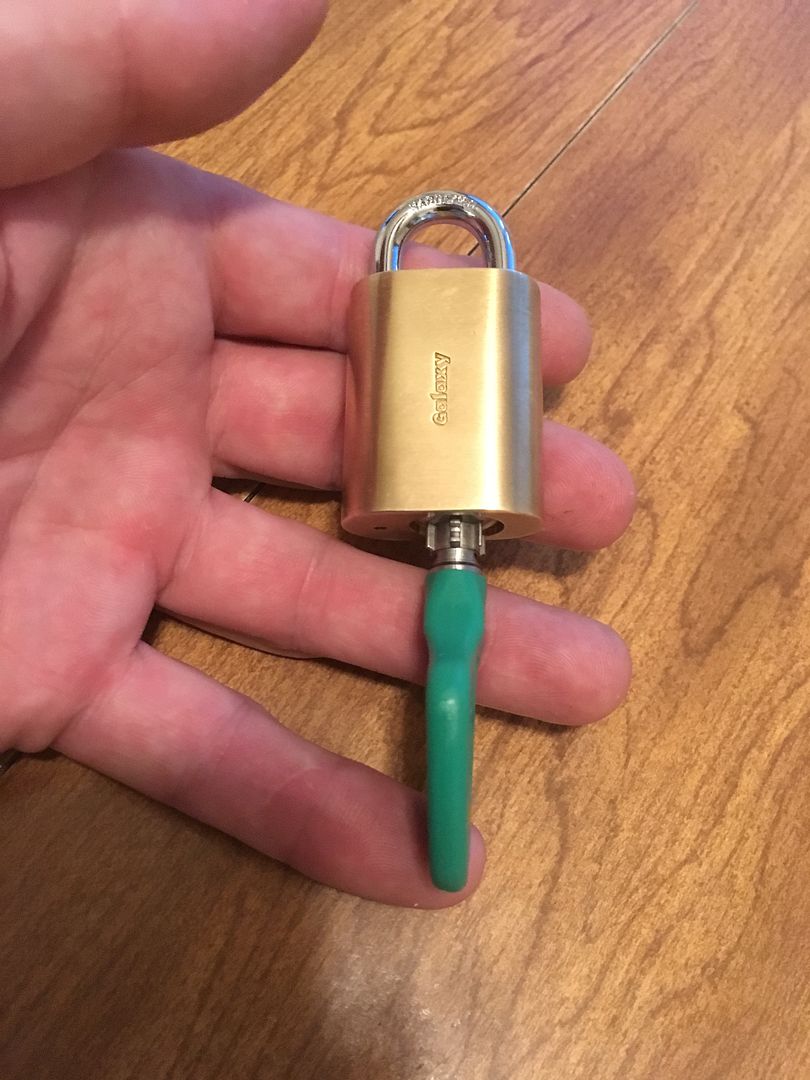
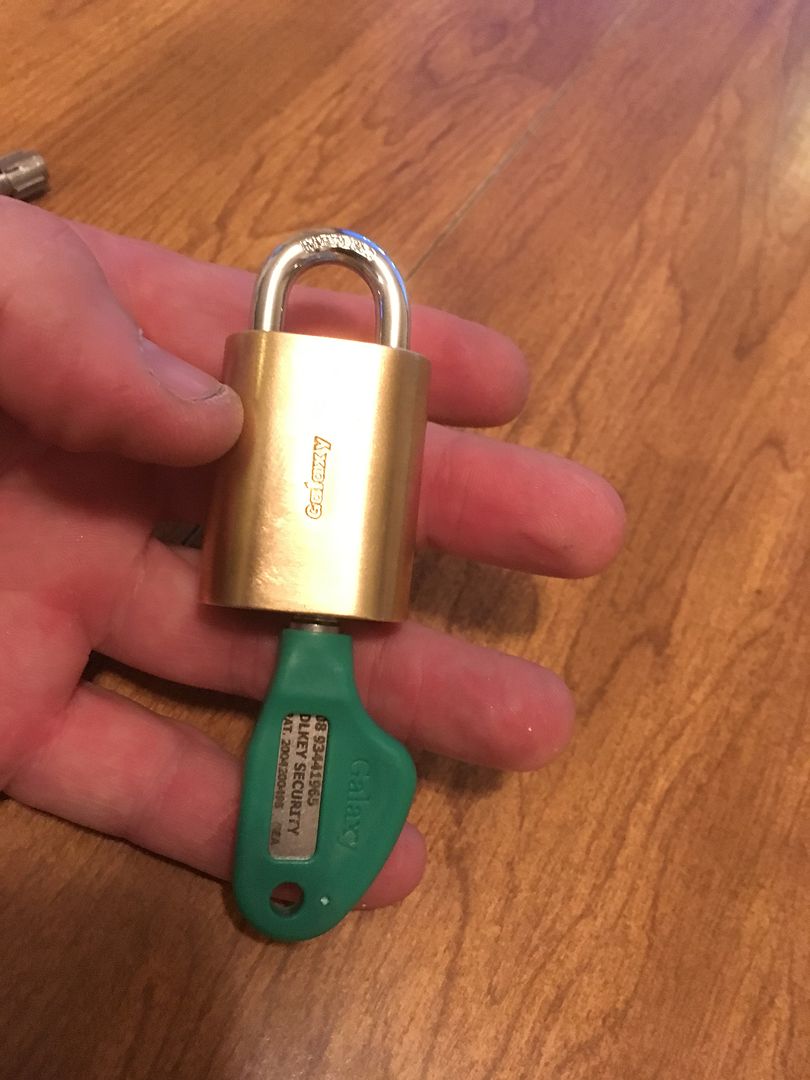
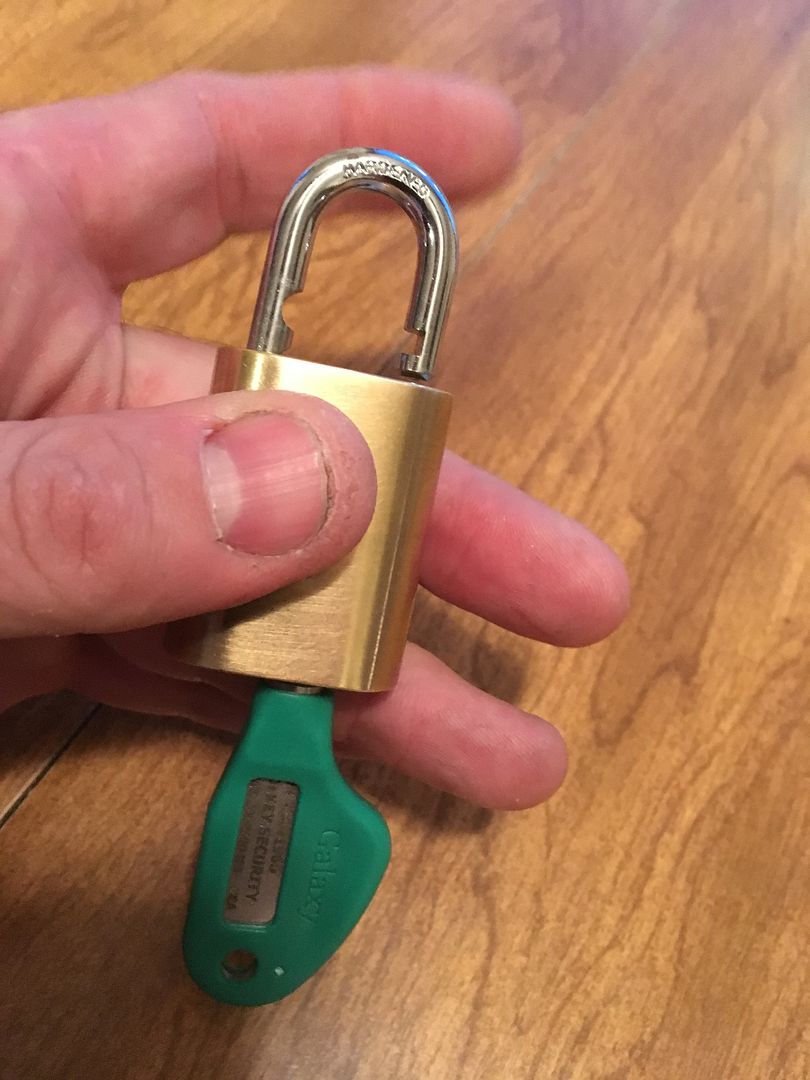
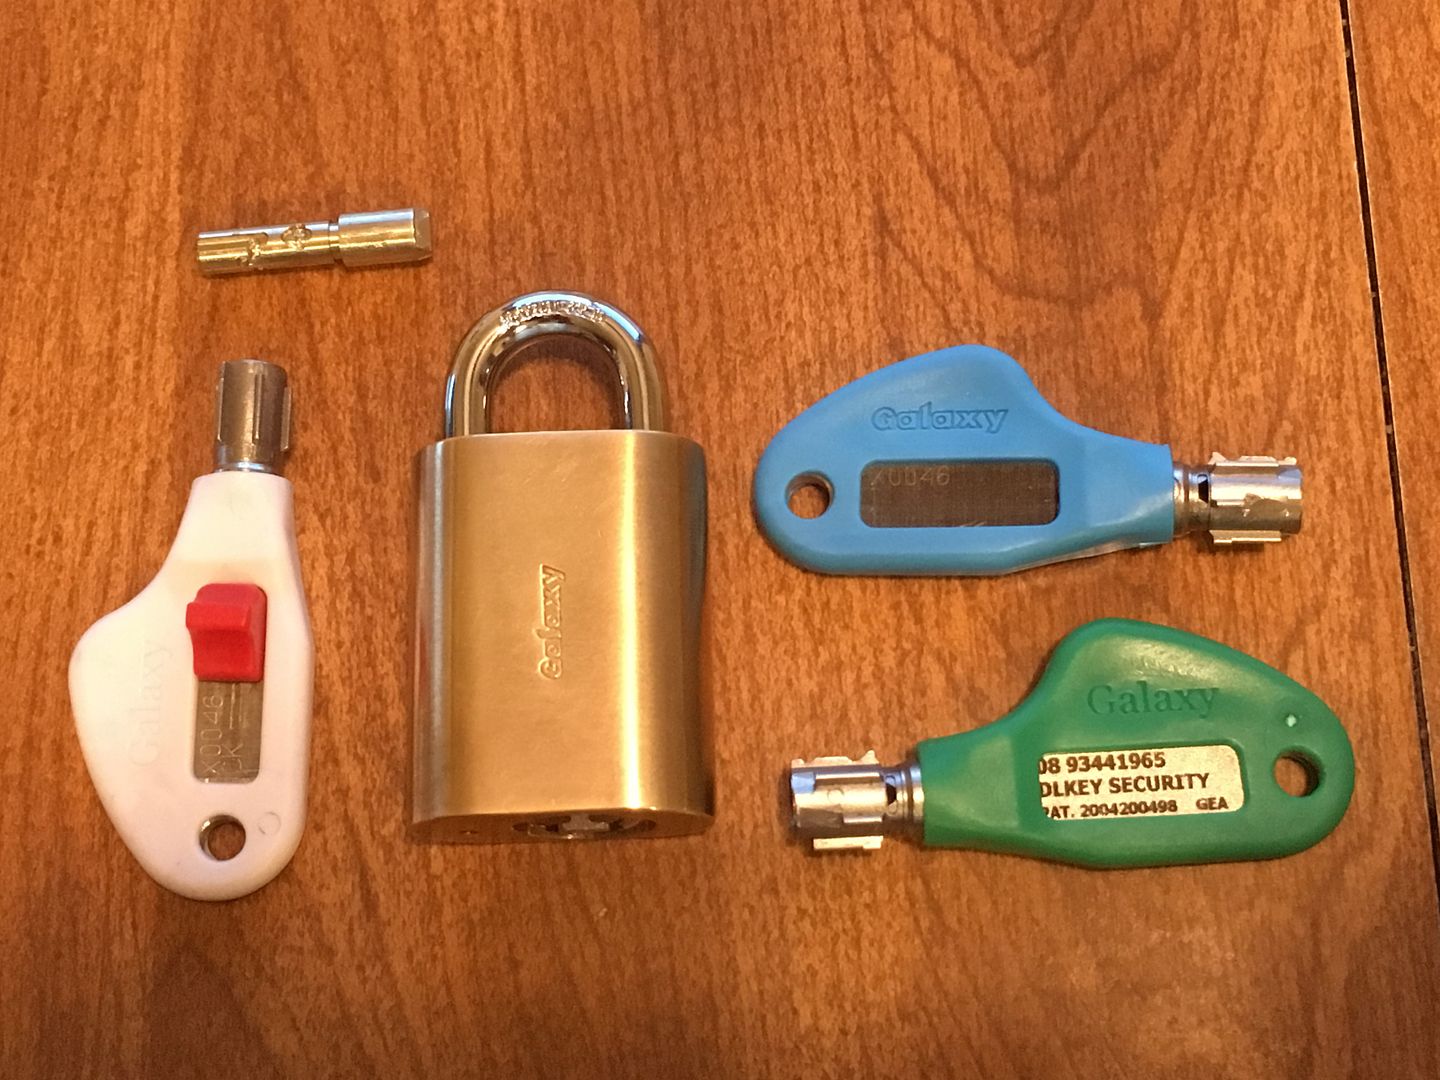
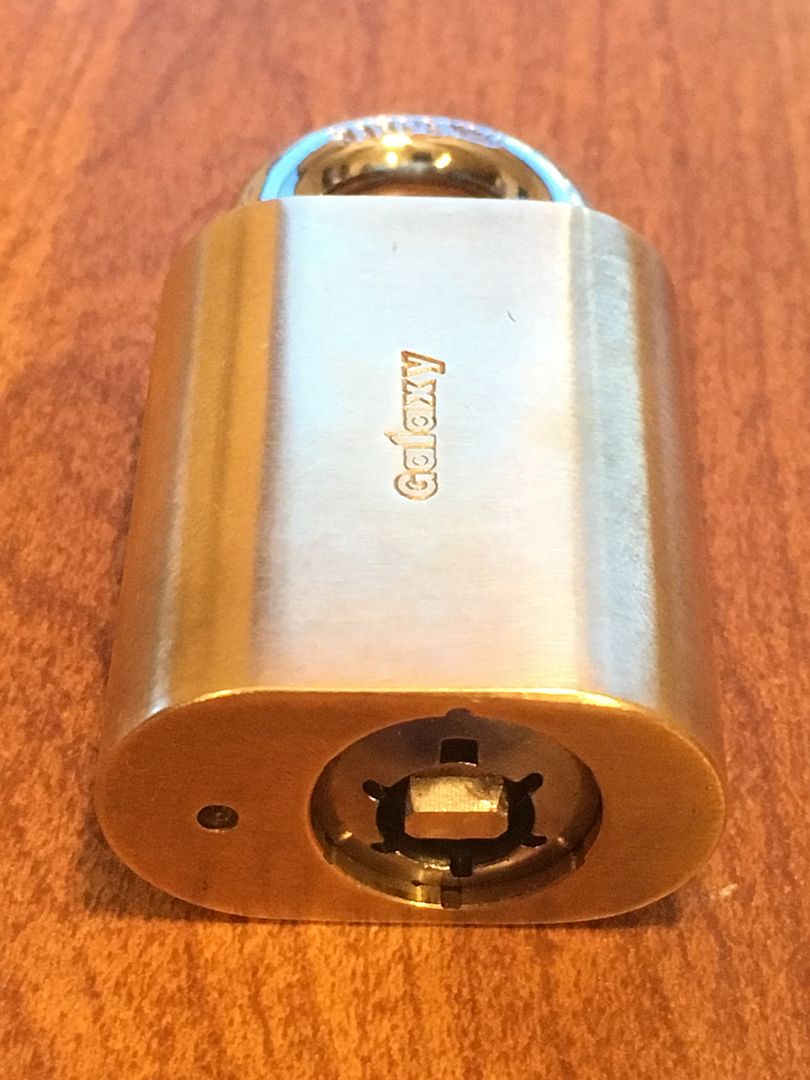
First, here is the baby. It sure is cute.
Image

Image

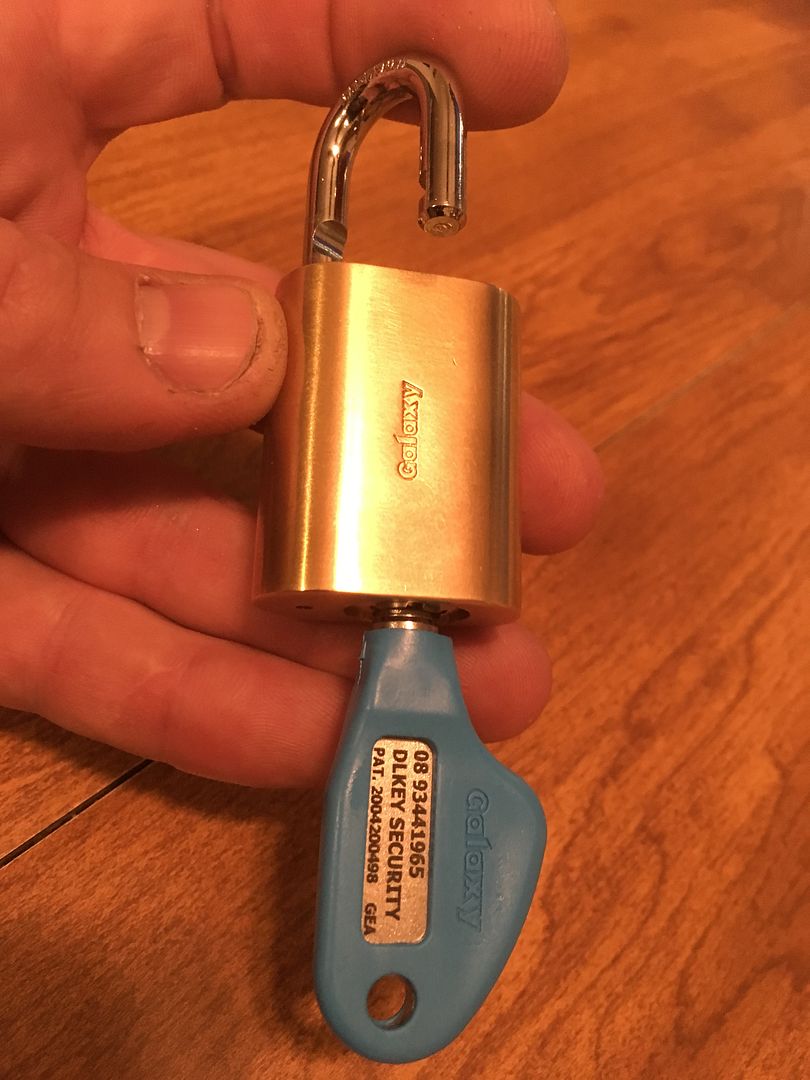
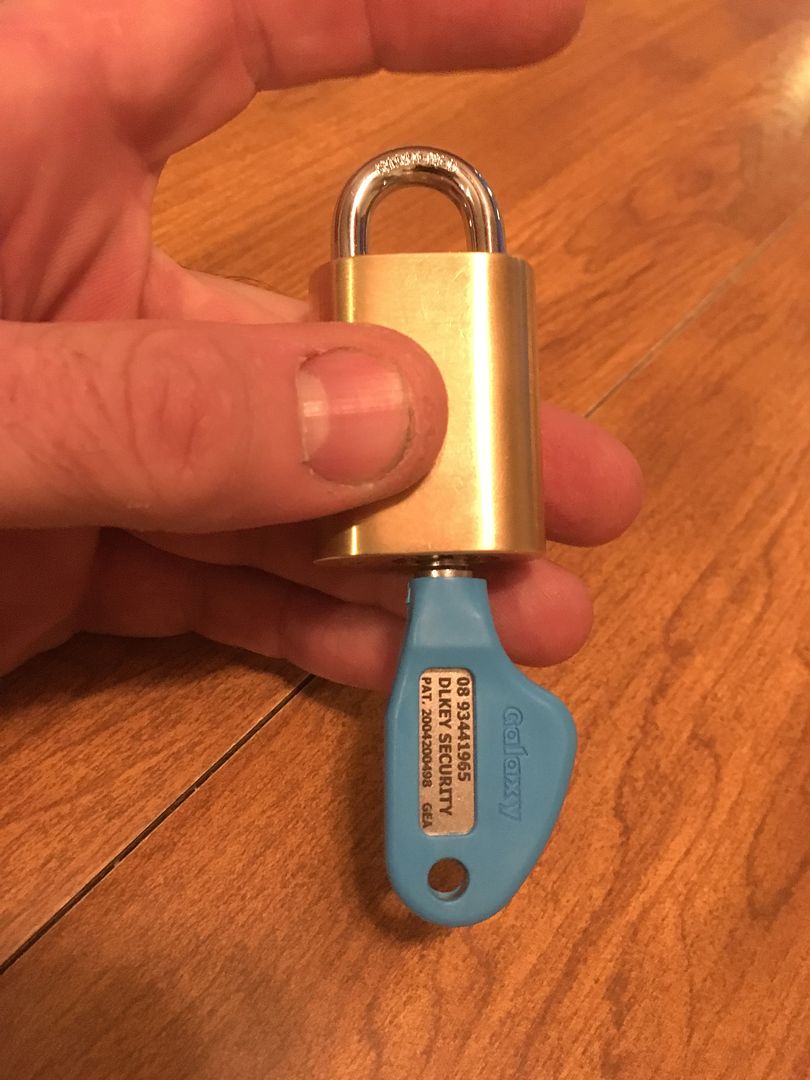
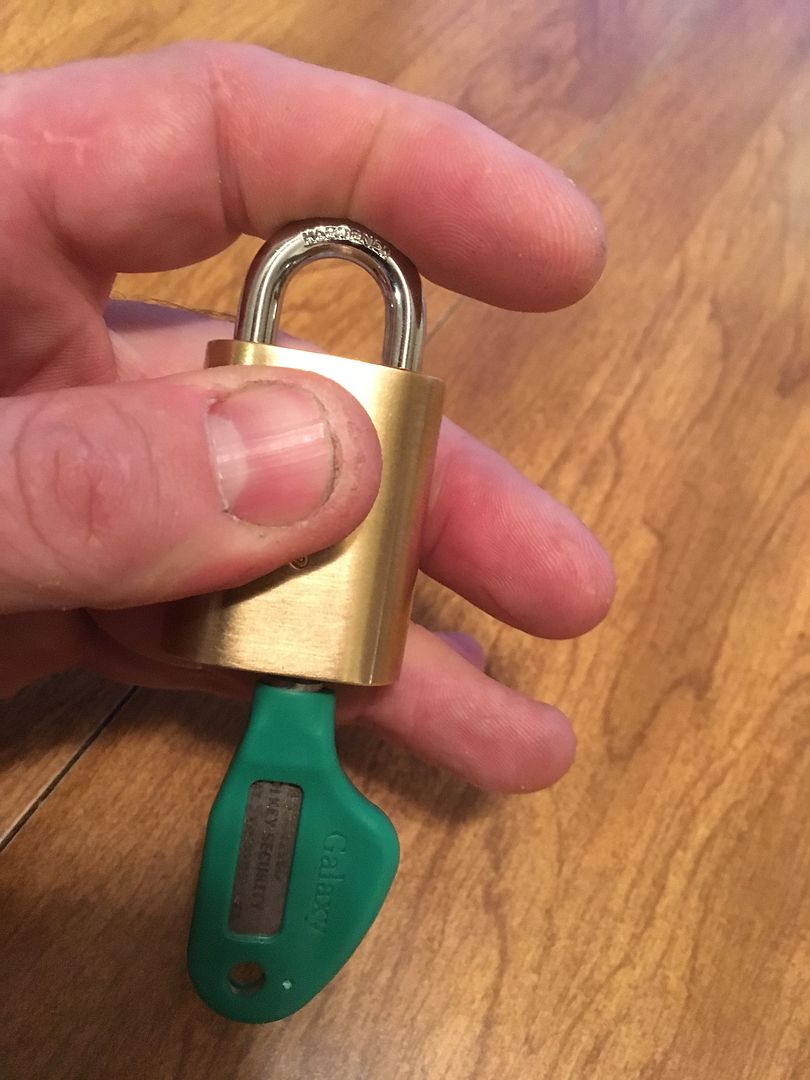
This version is a pretty small padlock, though the lock is available in several sizes of padlocks and other lock formats as well. The padlock is about the same size as the key.
Image

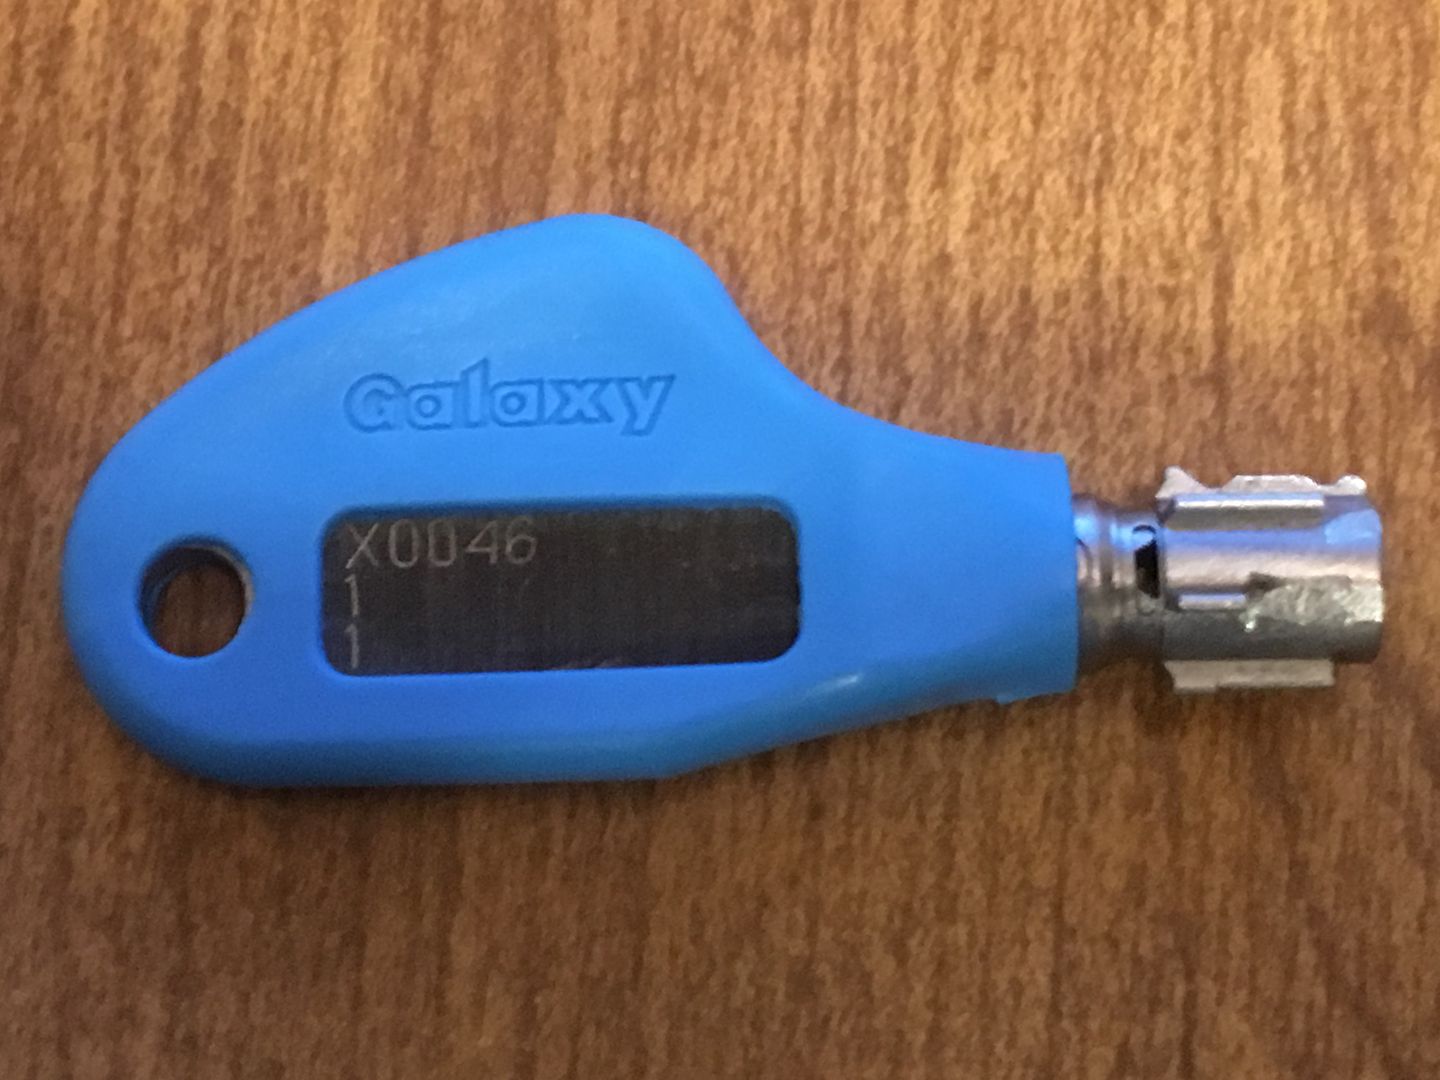
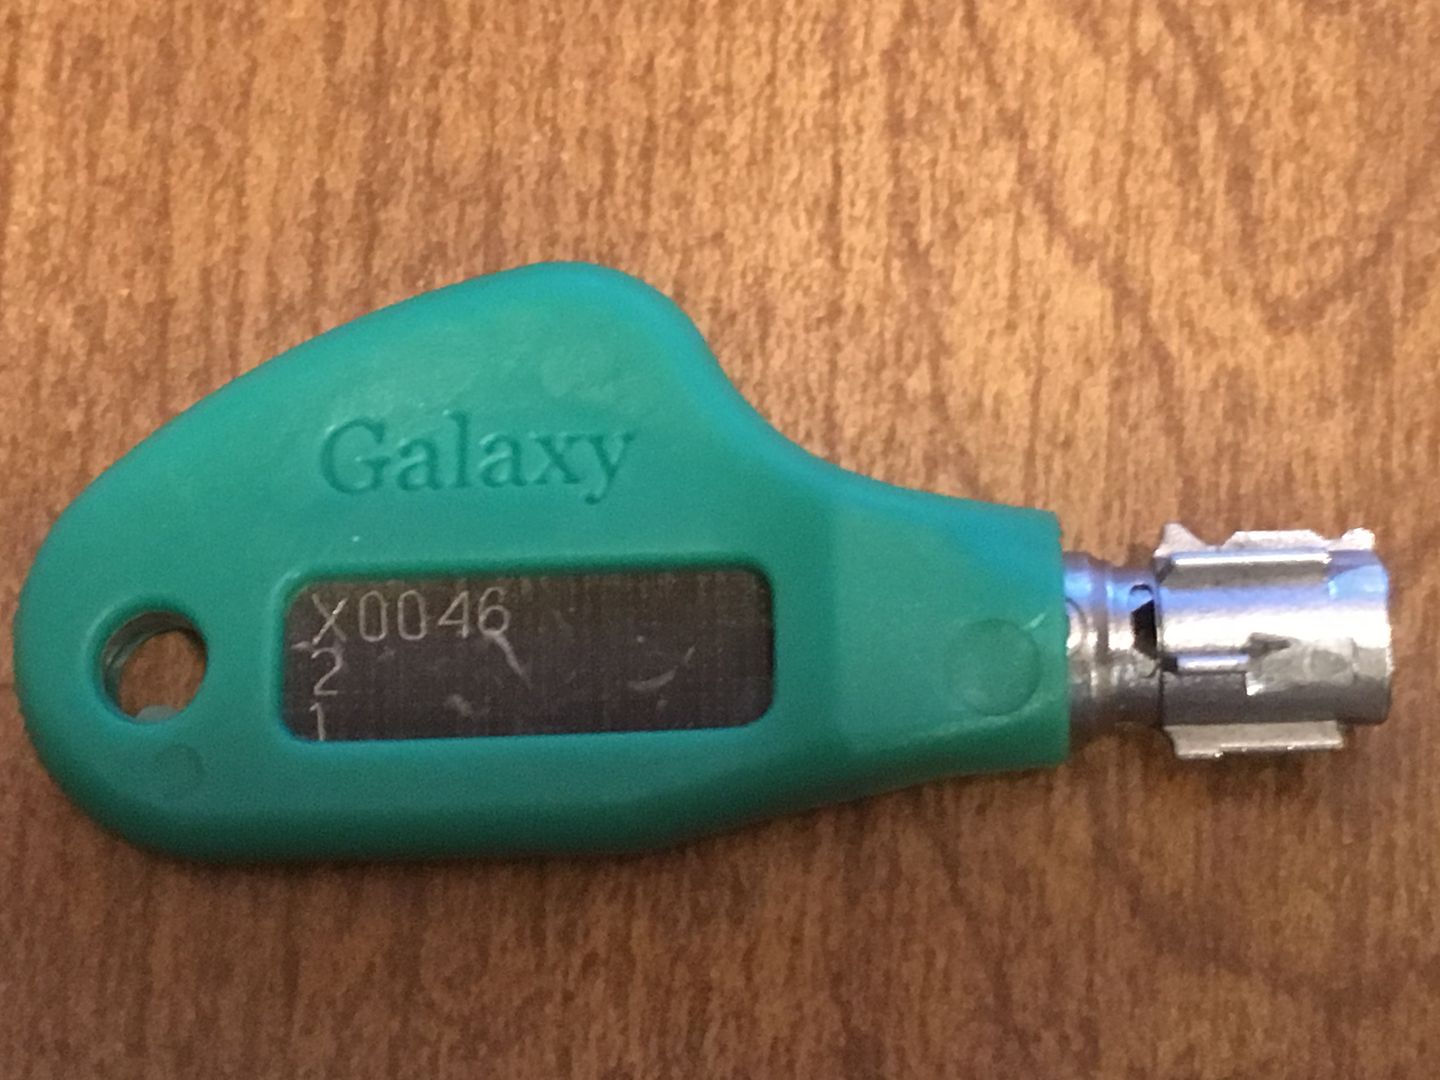
Here are the three keys. The first two are normal keys. Found it interesting that the two keys (that are differently bitted) have slightly different fonts for the Galaxy name. Must be a running change.
Image

Image

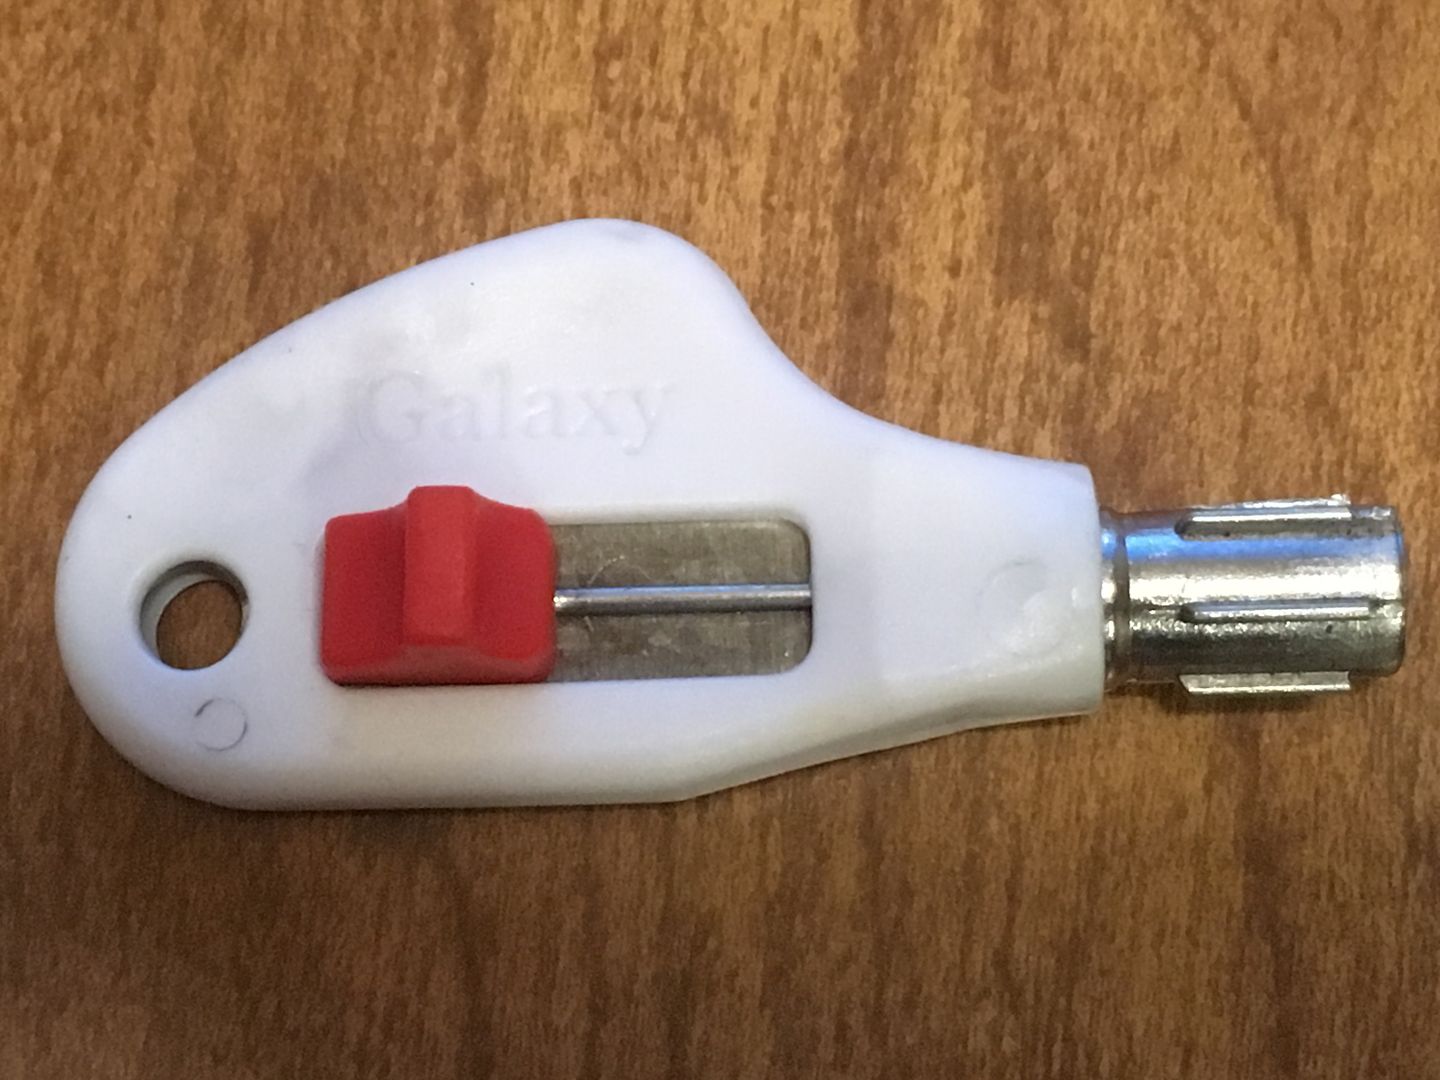
And the third key is the Removal Key. More on this key shortly. Patience, guys and gals. :P
Image

For those wondering how the lock itself works internally, there are a couple of videos put out that show. Since the lock can not be disassembled, this is the best that I'll get.

This is how the lock itself works:


And this is how the key removal key works:


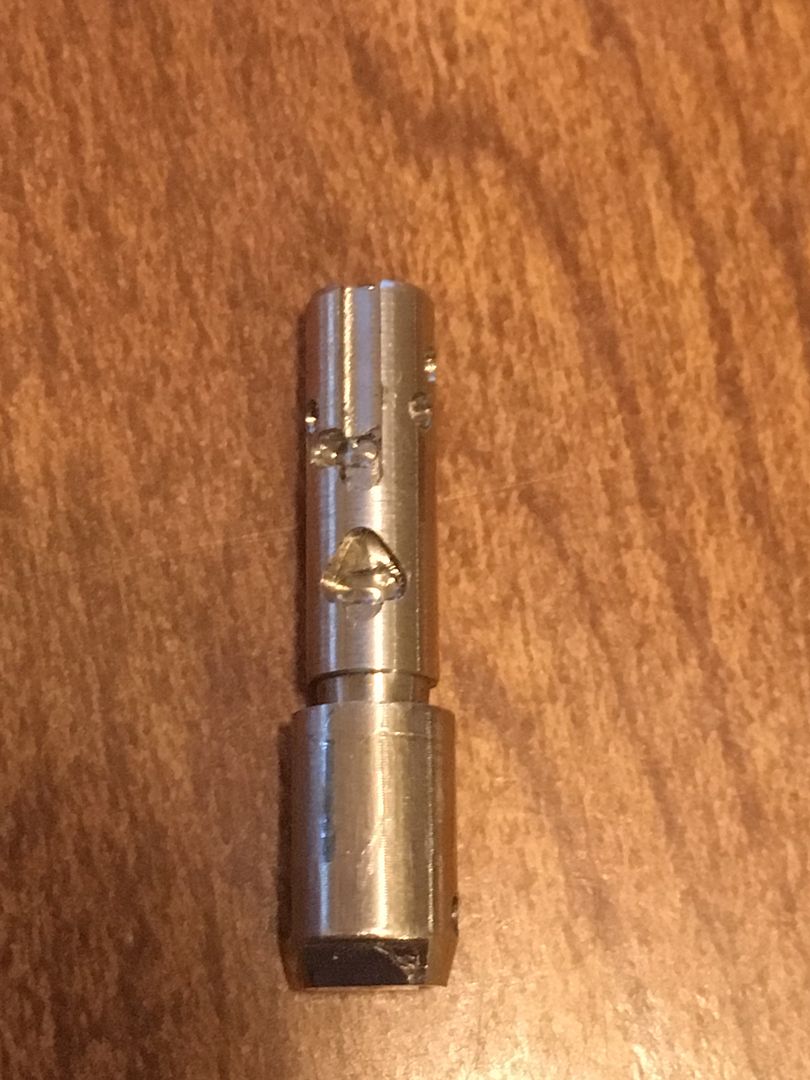
The lock works by having five sidebars around the outside of the lock. The key slides the sidebars to the correct position further into the lock. When the key is turned, the sidebars are forced inwards towards the center of the lock (called the codebar). If all the sidebars are aligned with their proper locations, then there will be a bitting hole for a post on the sidebar to drop into in the codebar, and the key can be turned.

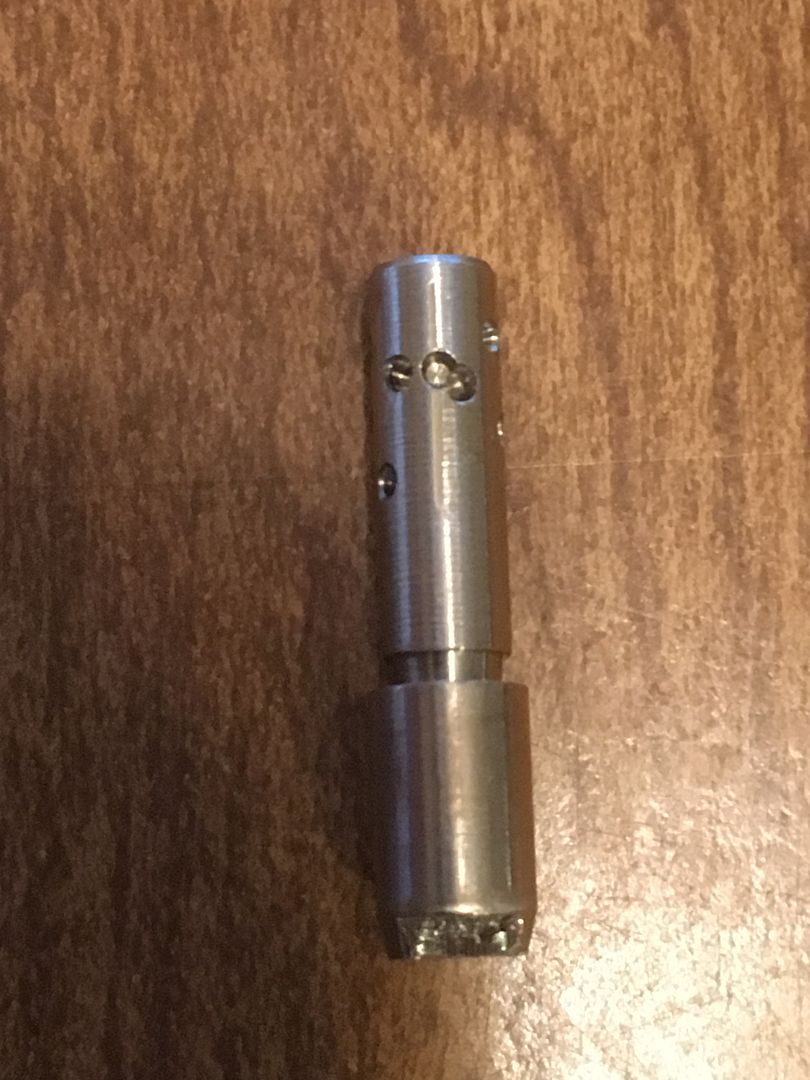
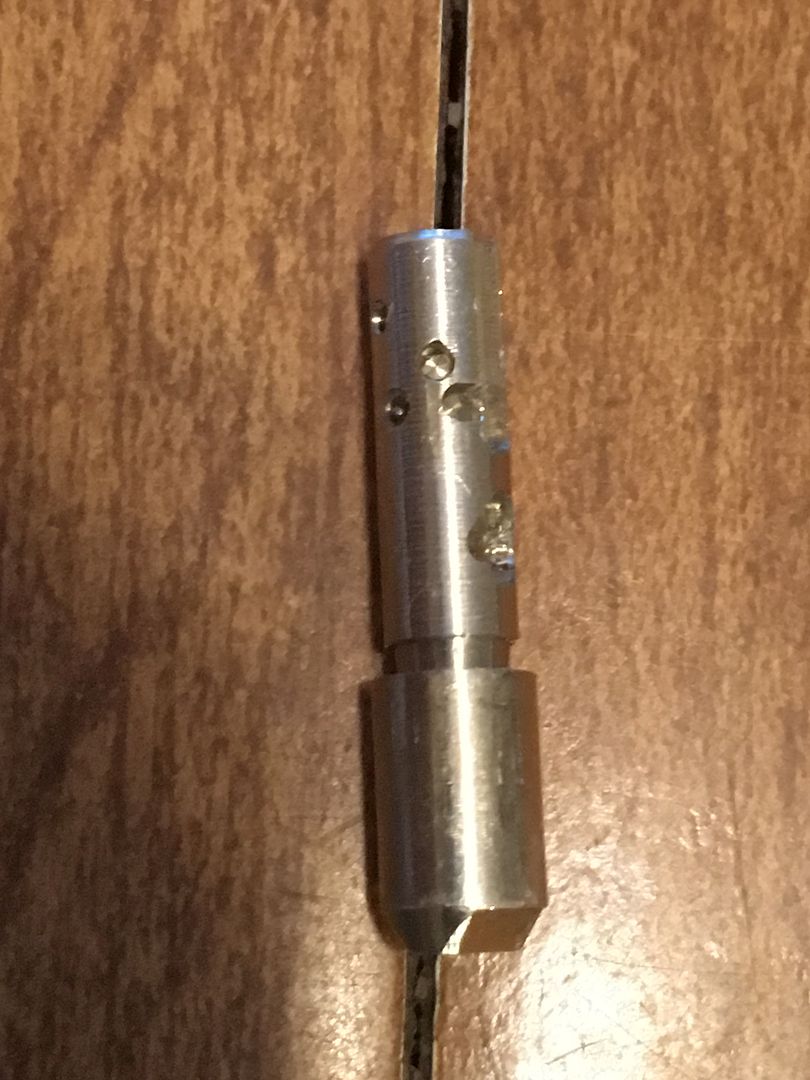
Here is a codebar. Will rotate it a couple of times so you can see all sides of it.
Image

Image

Image

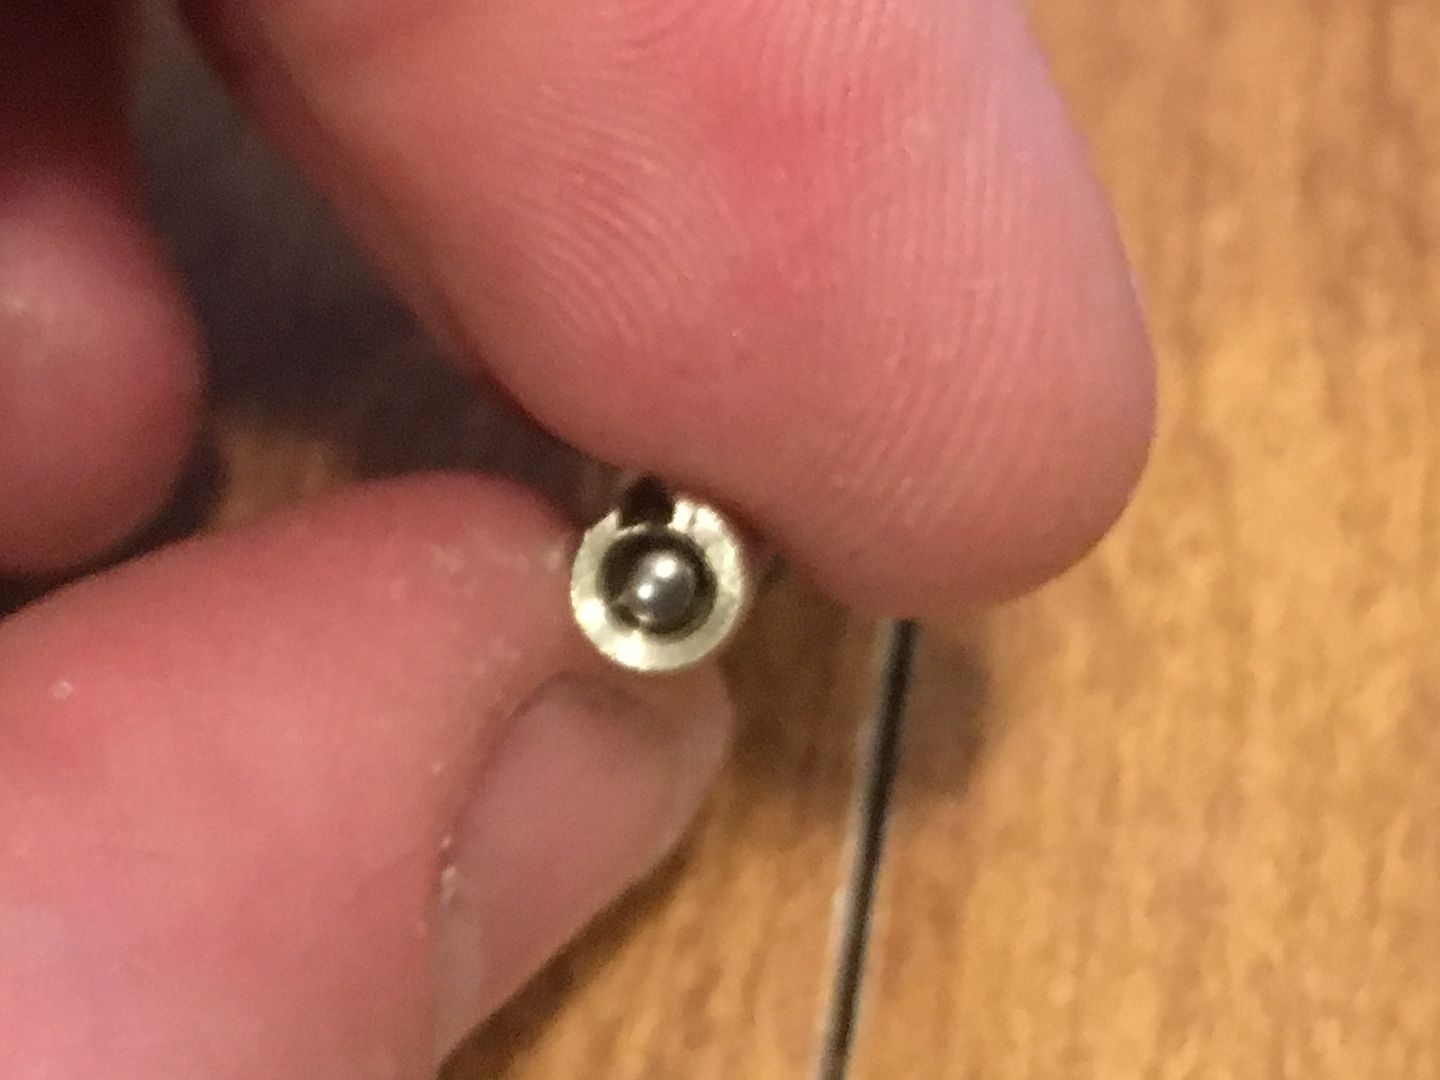
This is the end of the codebar opposite where you put in the key. The ring shaped cutout is for a spring.
Image

This is a side view of the end that contacts the key. The bevel fits inside the key, which has the opposite shape, so it can be correctly rotated. Wrong rotation, and even if the key bittings are correct for the sidebar, the bittings of the codebar will not line up with the sidebars. Fairly sure that hole next to the bevel is used by the machine to align/rotate the codebar in the machine that programs (cuts) the bittings.

Image

The codebars can be set up to be horizontal to the keyway, left rotation or right rotation. Think of Medeco pins and their rotation. But longitudinally. The codebar can even be cut (programmed) for more than one rotation on the same codebar.

OK, time for operation of the lock.

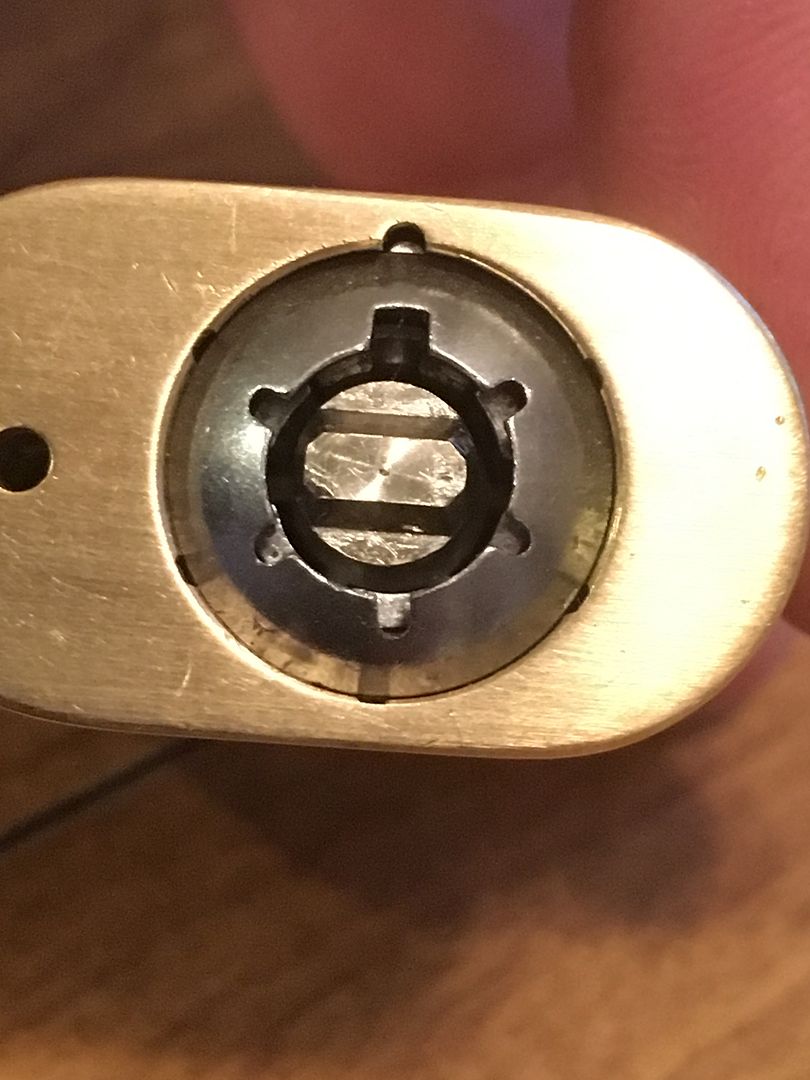
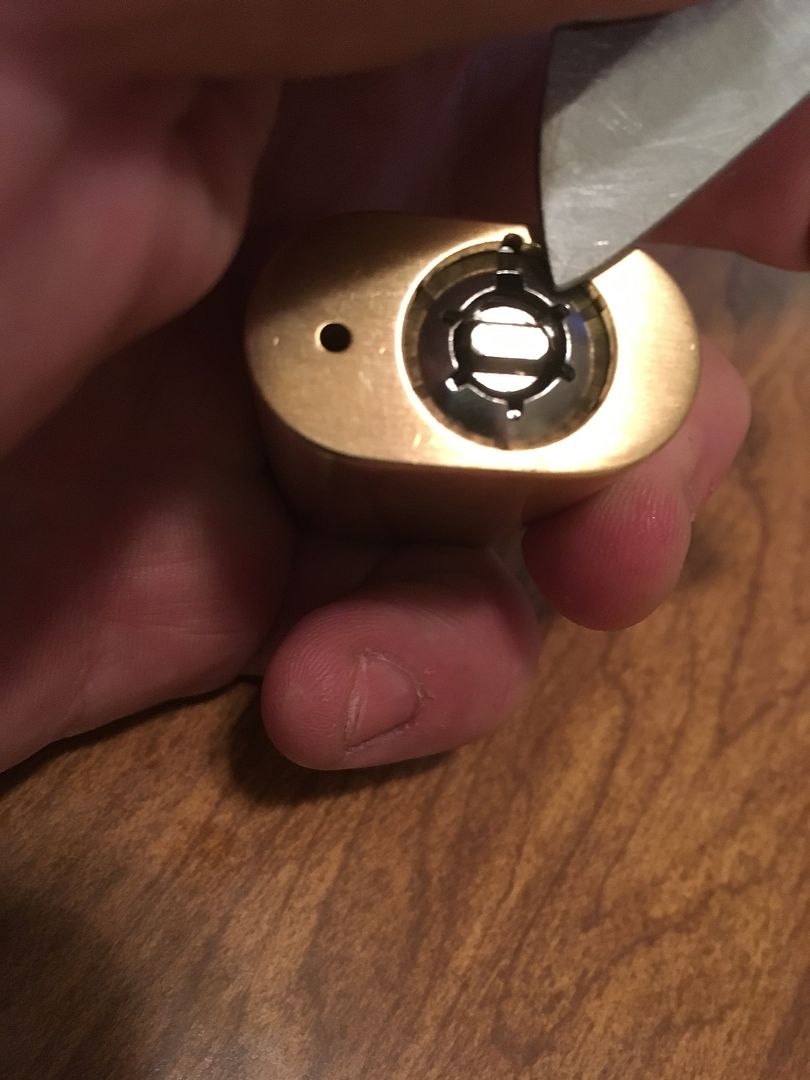
This is the keyway. Just inside the keyway, in the center, you see the end of the codebar. Notice that the width of one of the the keyway 'arms' is wider than the other five. That is for ease of aligning the key.
Image

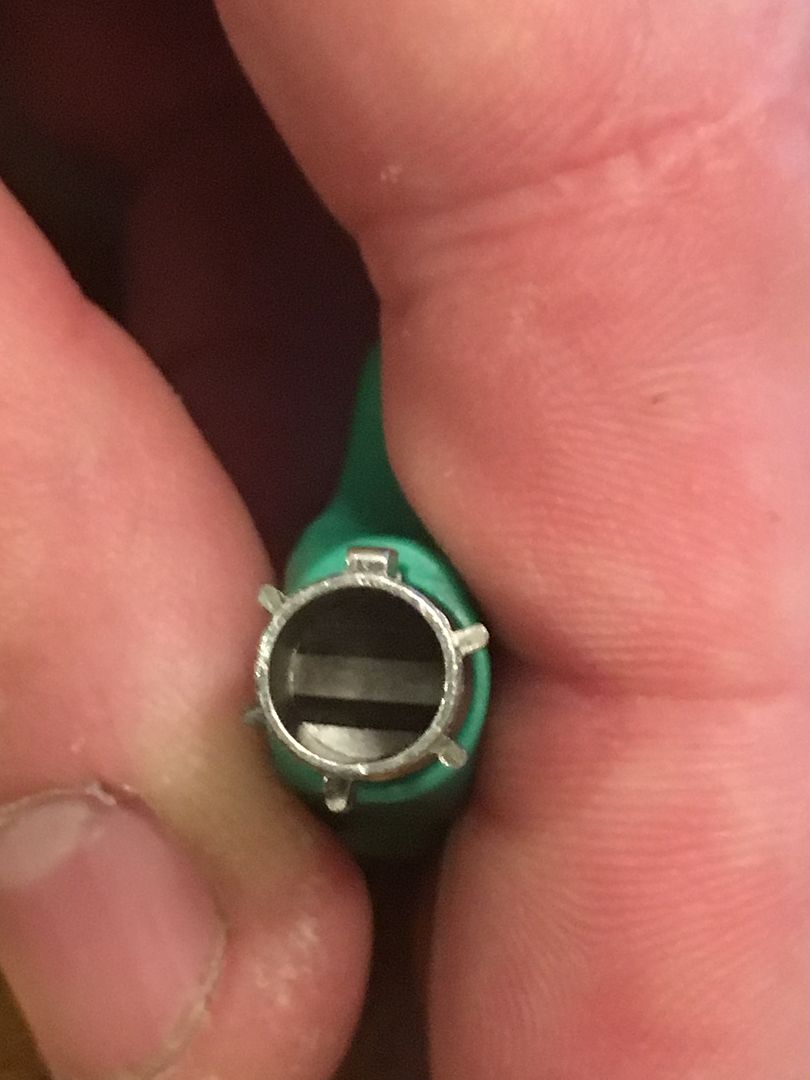
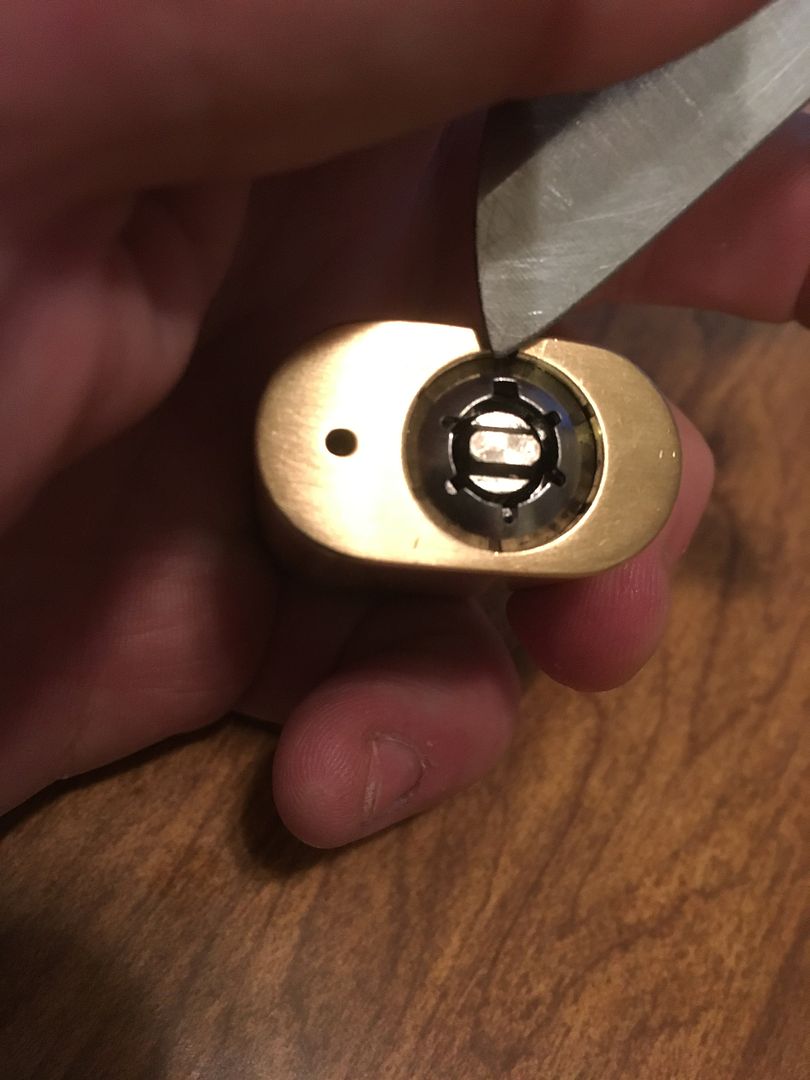
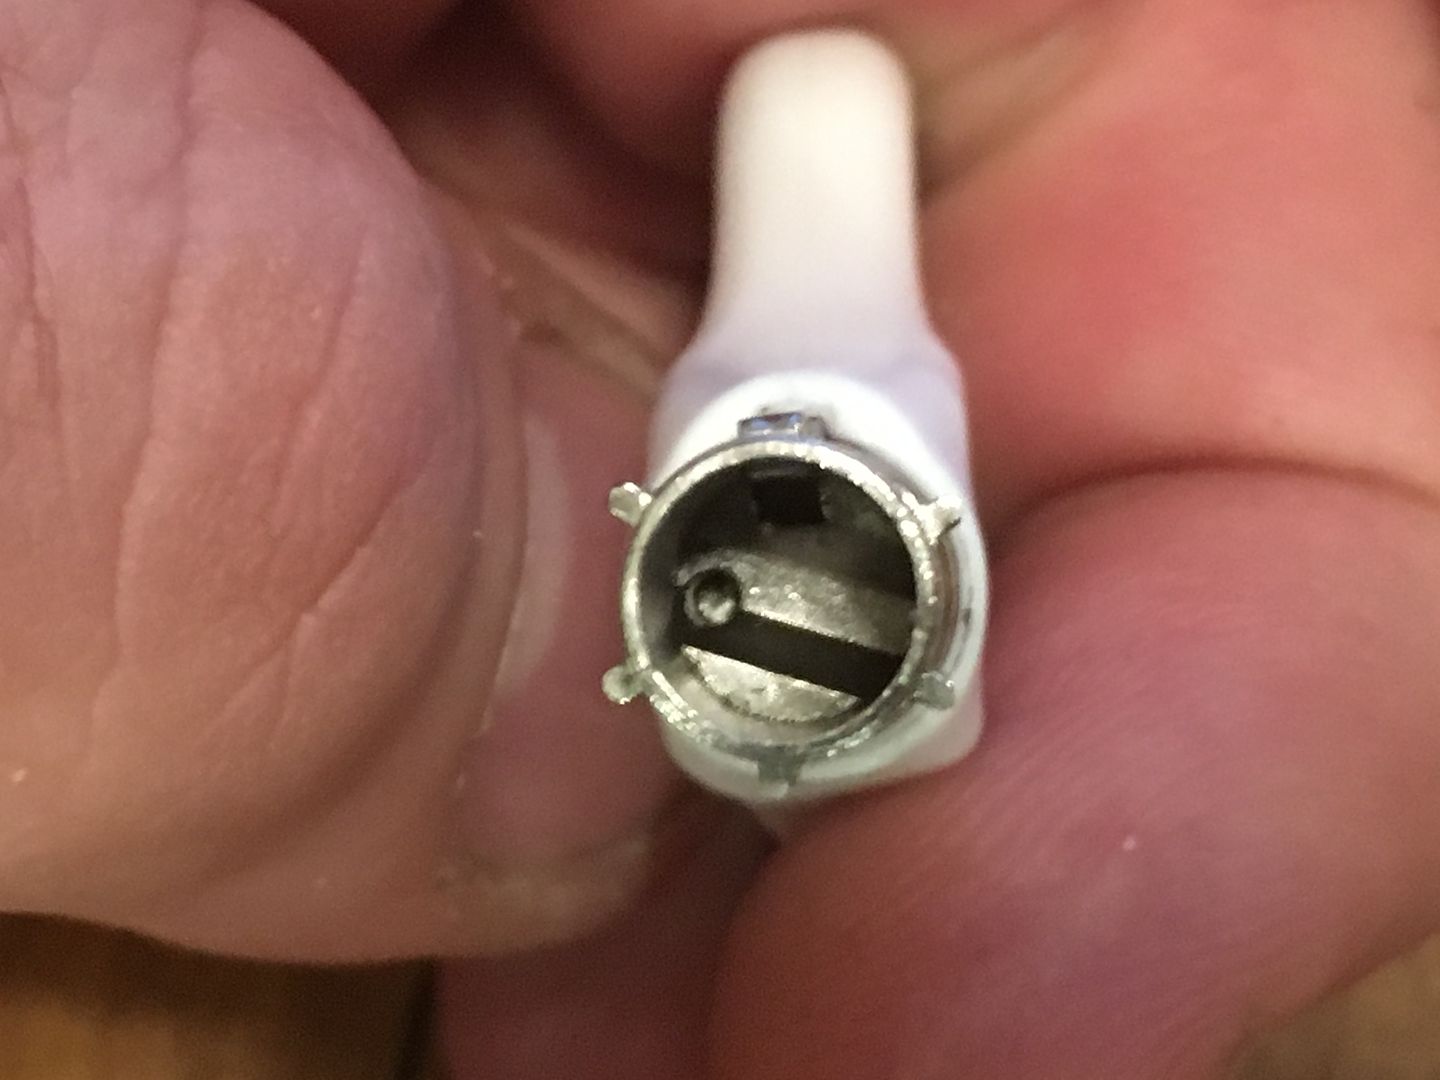
Inside the key. You can see the thicker 'arm' at the top, and the cutout inside for the codebar rotation.
Image

Image

Put in the key.

Image

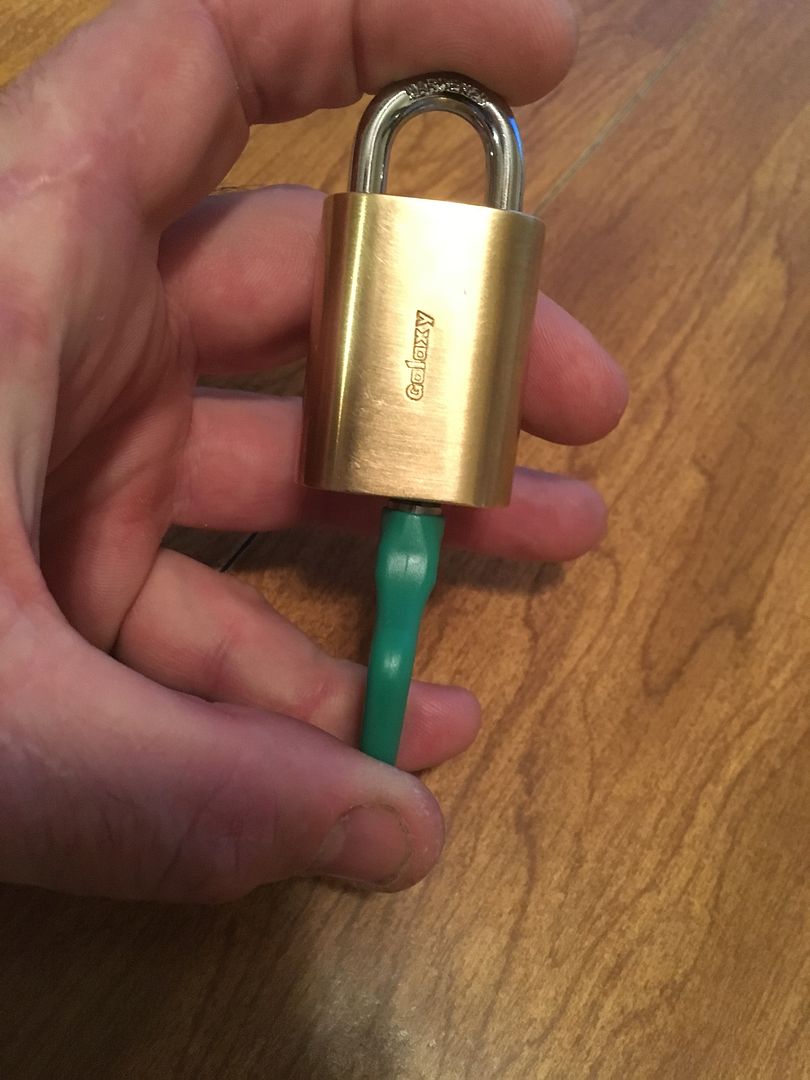
This is a push key lock, so, well, push in the key.
Image

And turn it 90 degrees.

Image

This is where the lock caught me off guard at first. The key turned, but the shackle did not pop open. Even when I tugged on the shackle. Figured out that you need to push in the shackle...
Image

Then release it.

Image

OK, how do you rekey the lock if you can't disassemble the lock? You replace the codebar, of course! I got this lock with an extra codebar that was cut differently than the original, the operating key that matches the second codebar, and a removal key that operates with both codebars.

First, remember the thicker 'arm' of the keyway? The removal key will be put in aligned with that position. Unlike the operating keys, the removal key can be put into the lock in any position. But it will only turn for removal if the key is put in like the normal key.

Image

The removal key will be turned to the next opening to the right.
Image

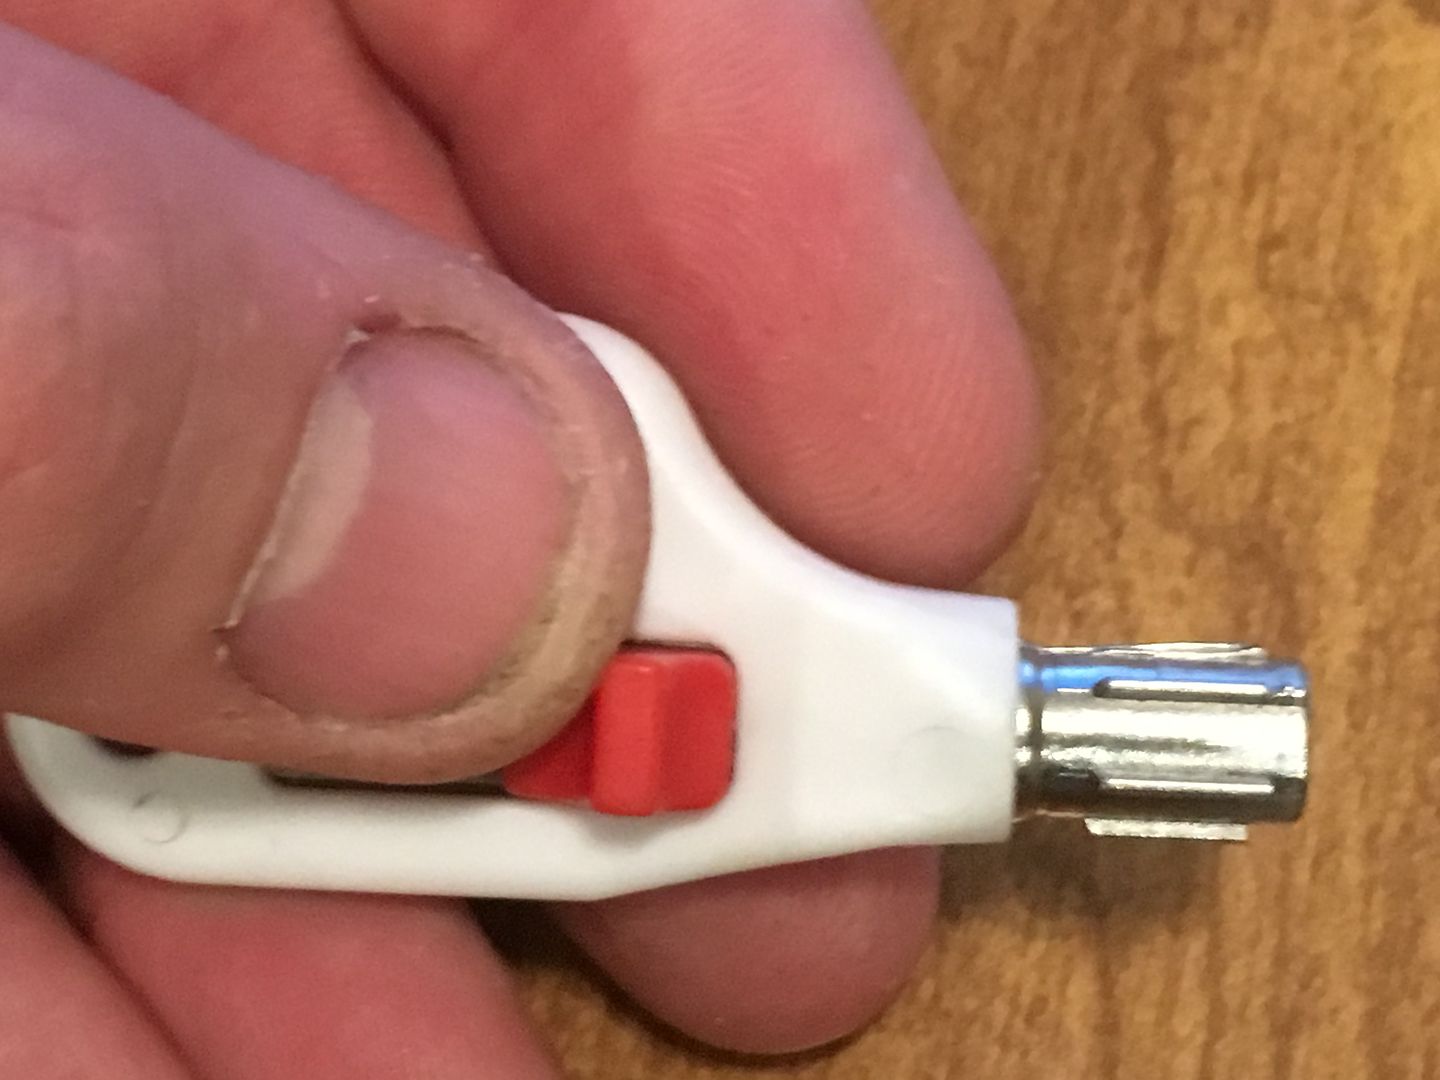
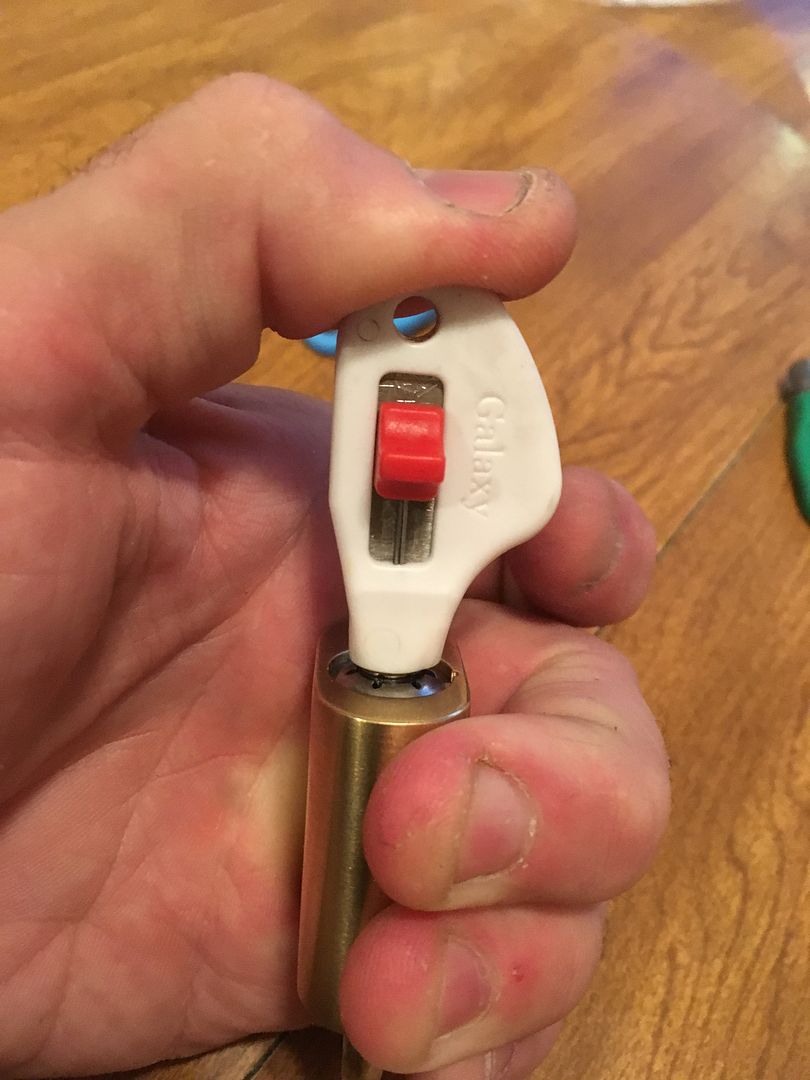
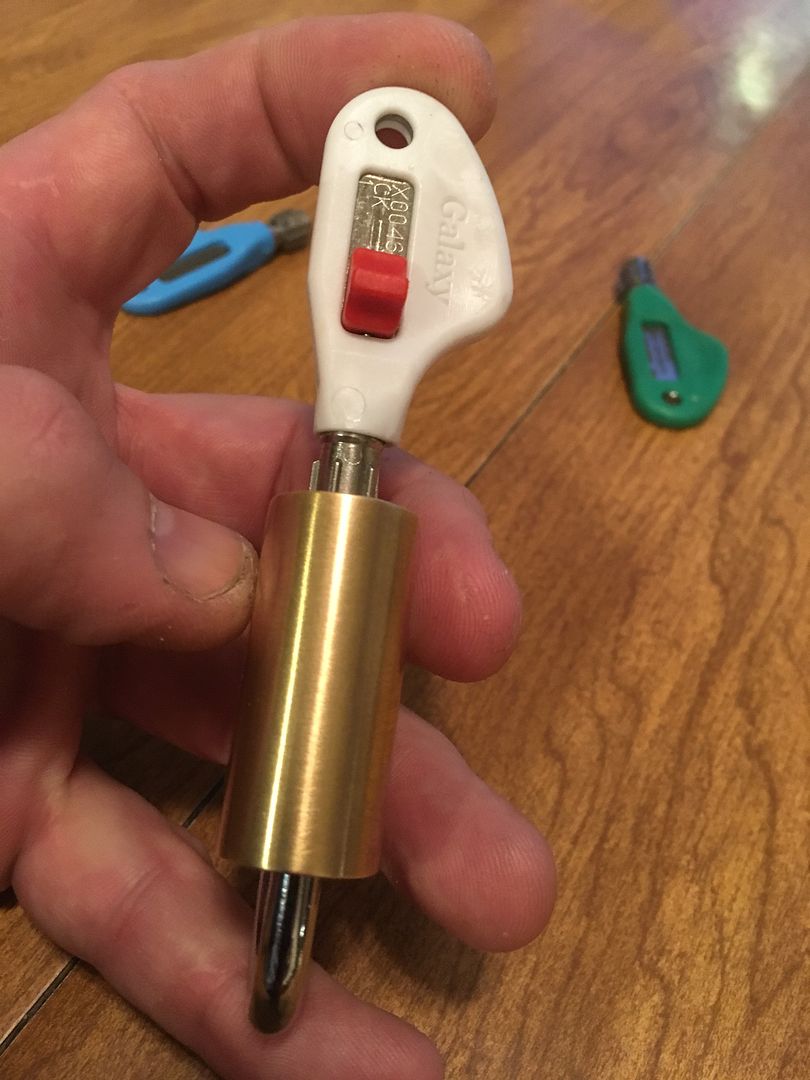
This is the removal key. Let's take a closer look at it. It has a slider knob on the side of it, which operates a movable post inside the key.

Image

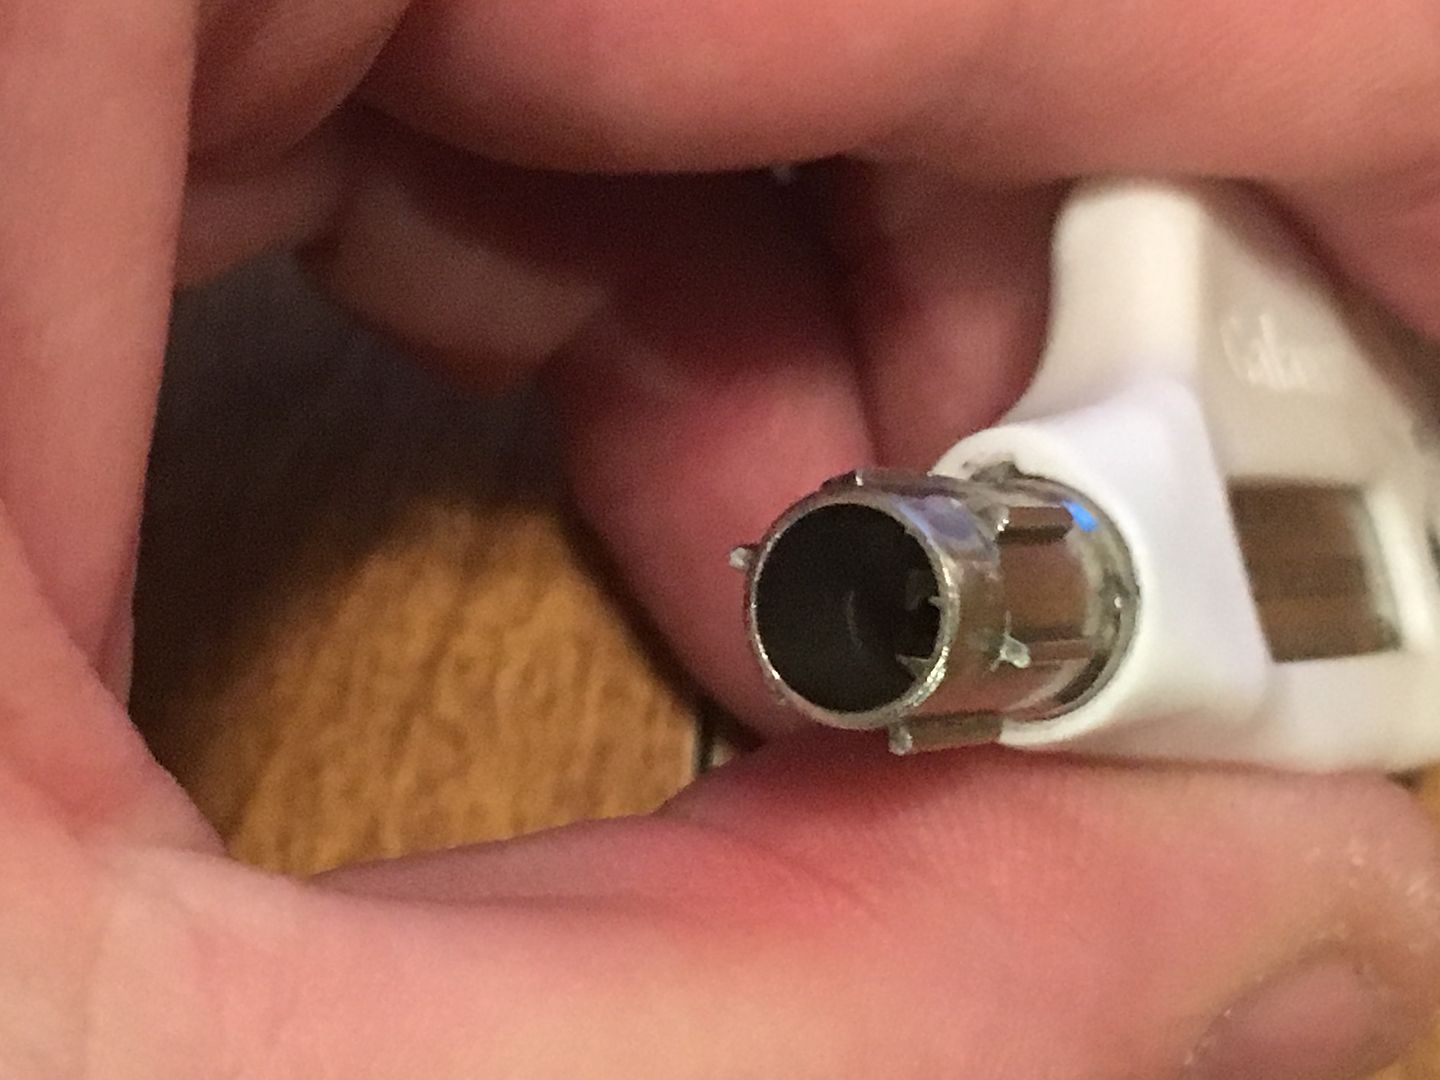
Look inside the key. Notice that the orientation of the cutout for the sidebar is not fully horizontal like the operating keys in my lock. Also look on the left inside the key, you will see a hole.
Image

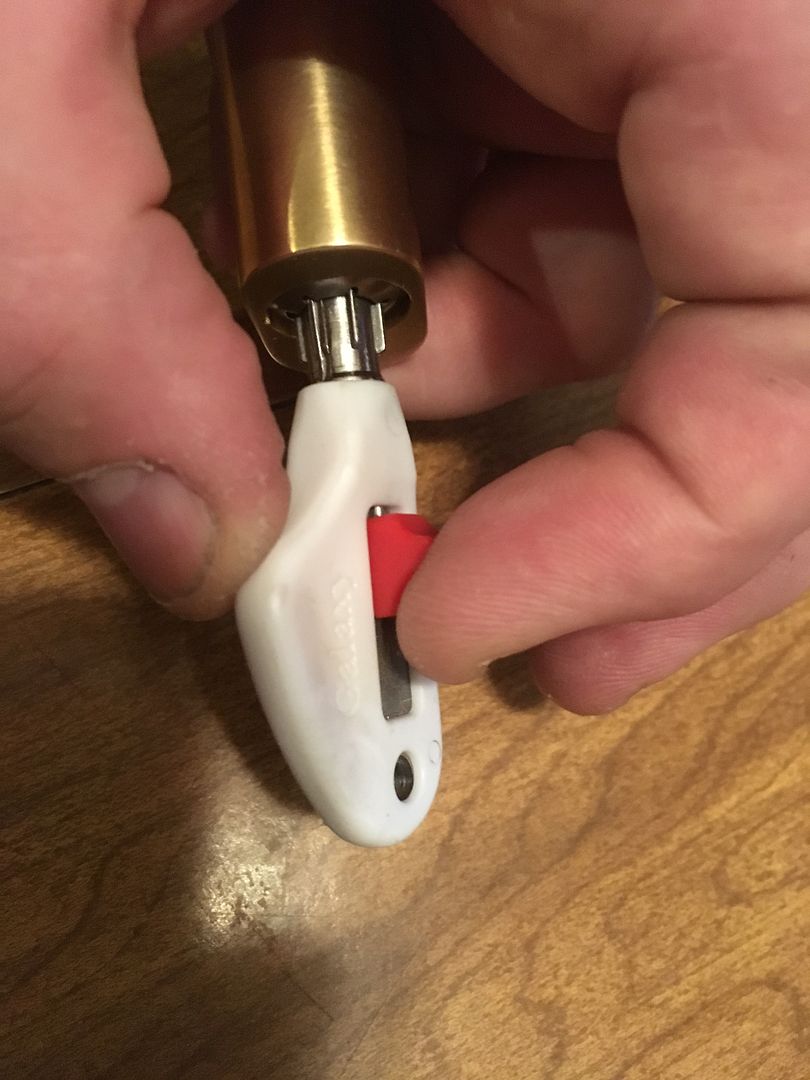
When you slide the knob forward...

Image

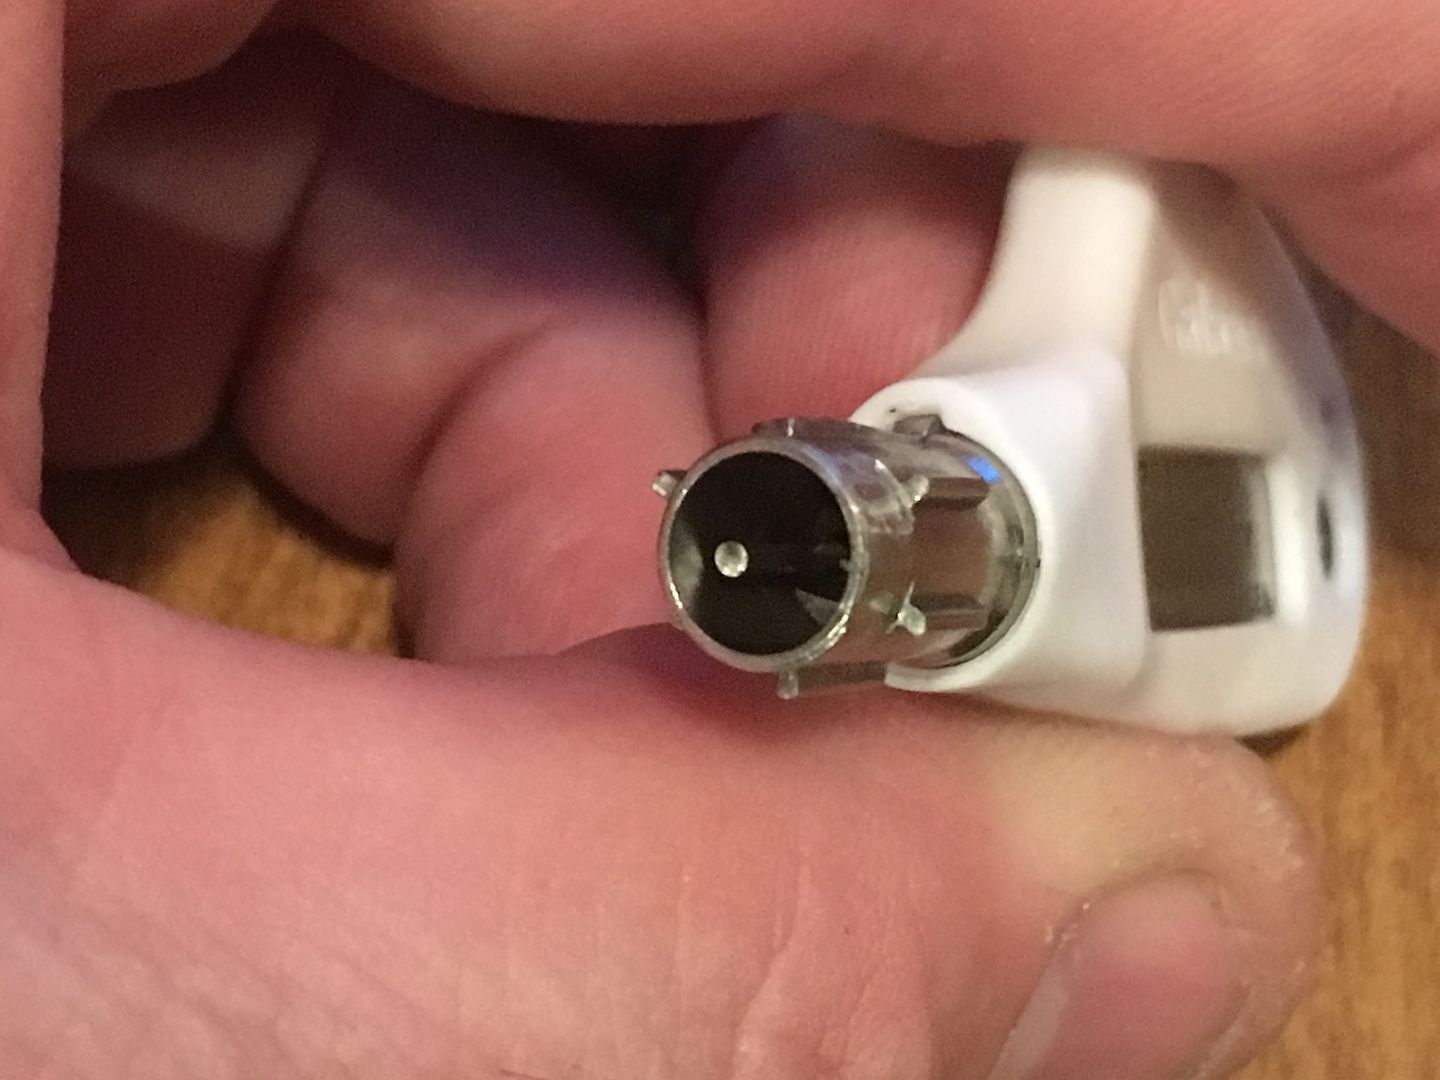
The rod slides forward.

Image

Image

Put in the removal key with the knob slid fully towards the tip of the key... (notice that I am holding the lock face down. That is so gravity works right for an Australian lock. :mrgreen: )
Image

push... (Actually, it does not matter whether the lock is facing up or down, in case you missed the humor). As you push in the key the red knob will slide itself back. That is OK, allow it to do so. It is supposed to do that. :wink:
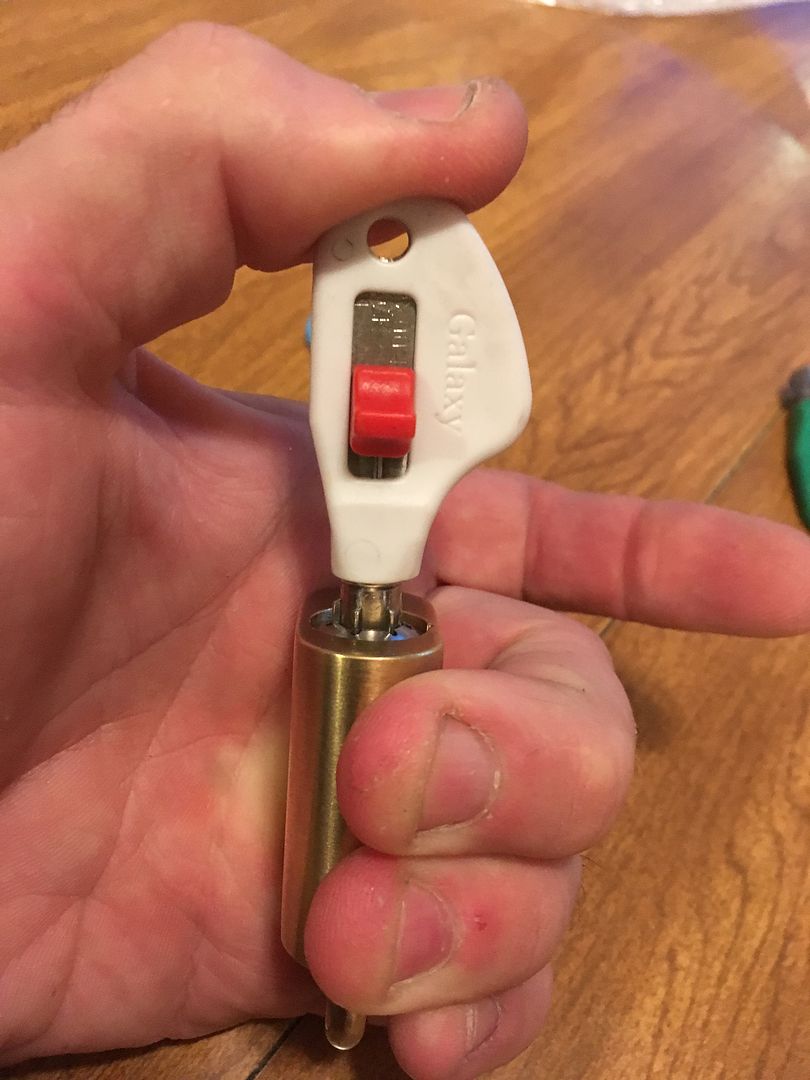
Image

Image

And turn the lock to that first cutout to the right mentioned above. If you turn it a full 90 degrees, it will work like a operating key, just like a BiLock QC control key.
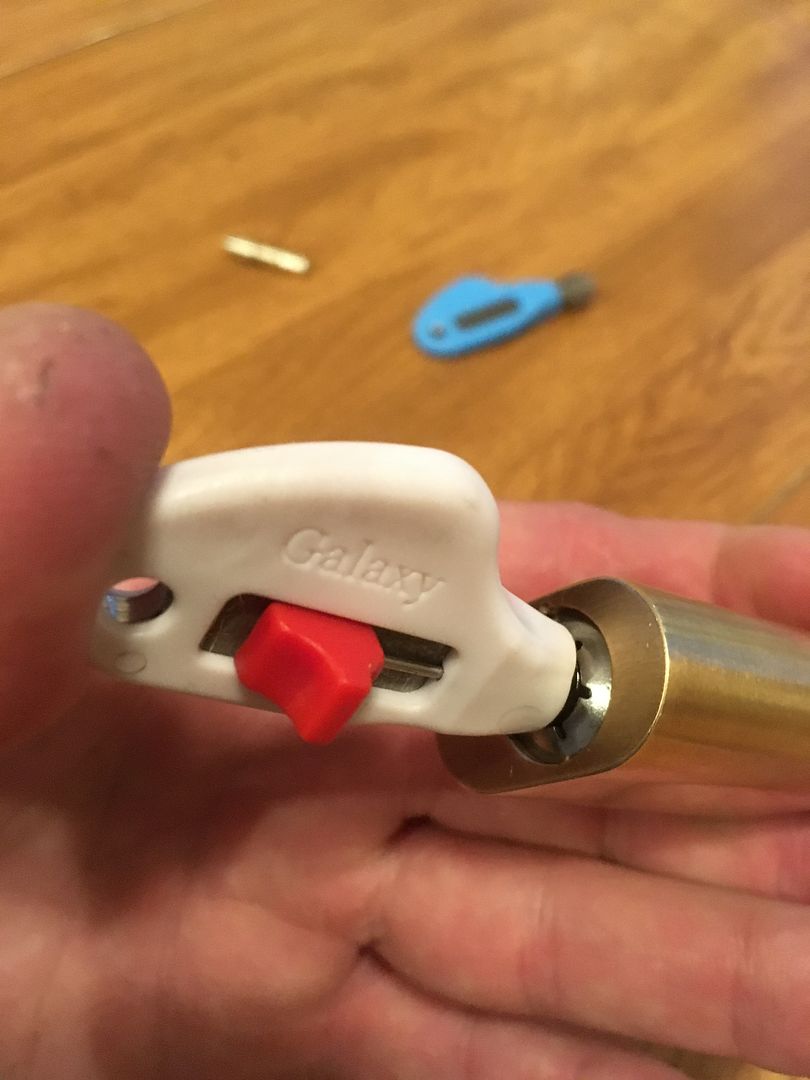
Image

Now slide that knob forward fully as you lightly pull outwards on the key.

Image

Image

The lock will practically eject the key once the codebar has been pulled to the removal position.
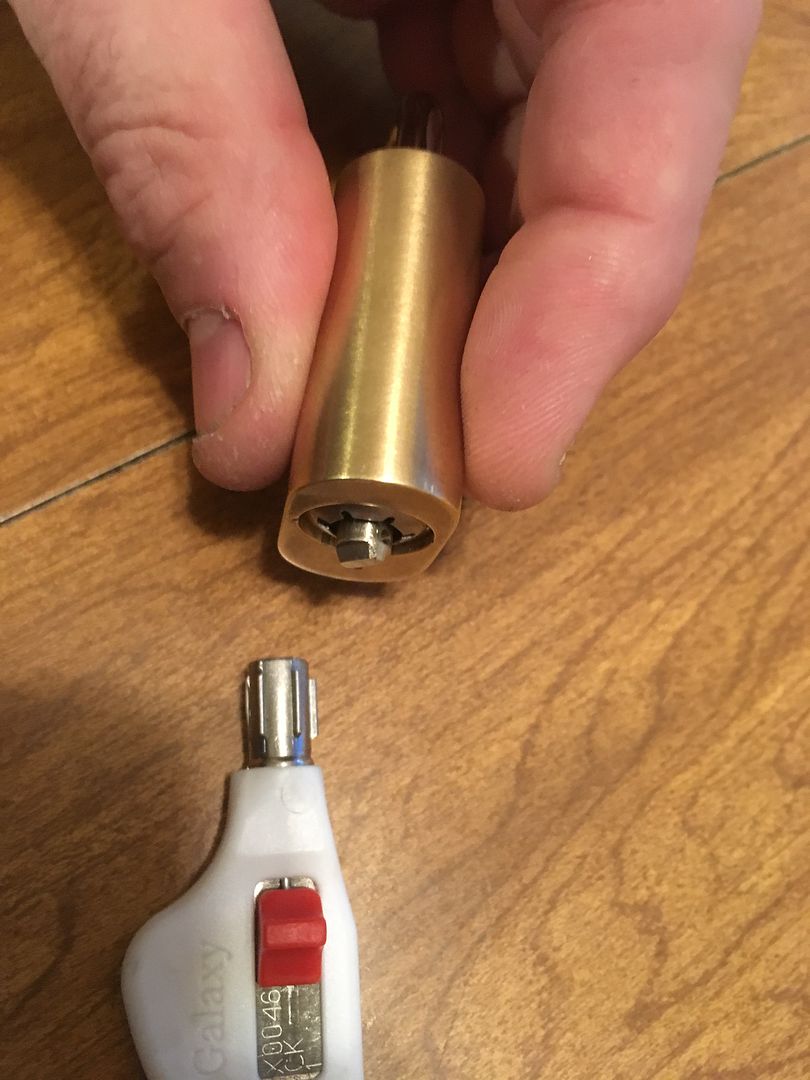
Image

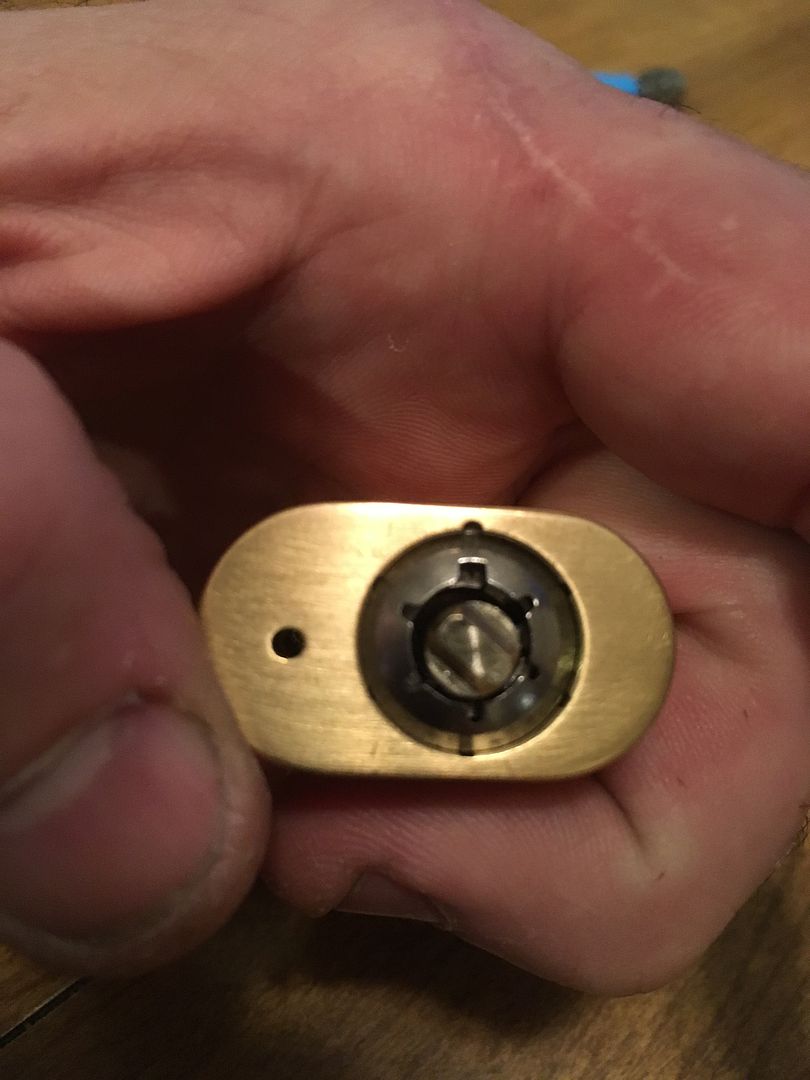
Now look at the codebar. It will be rotated right of where it was aligned when you started as well as being sticking out a little.
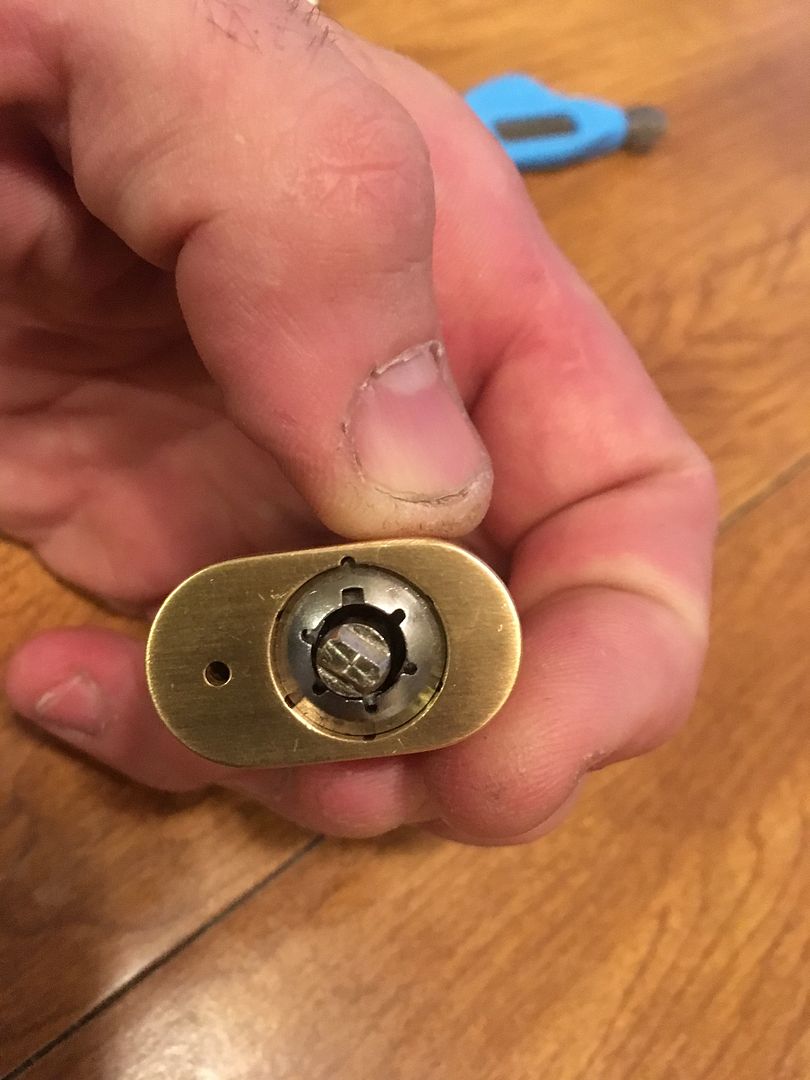
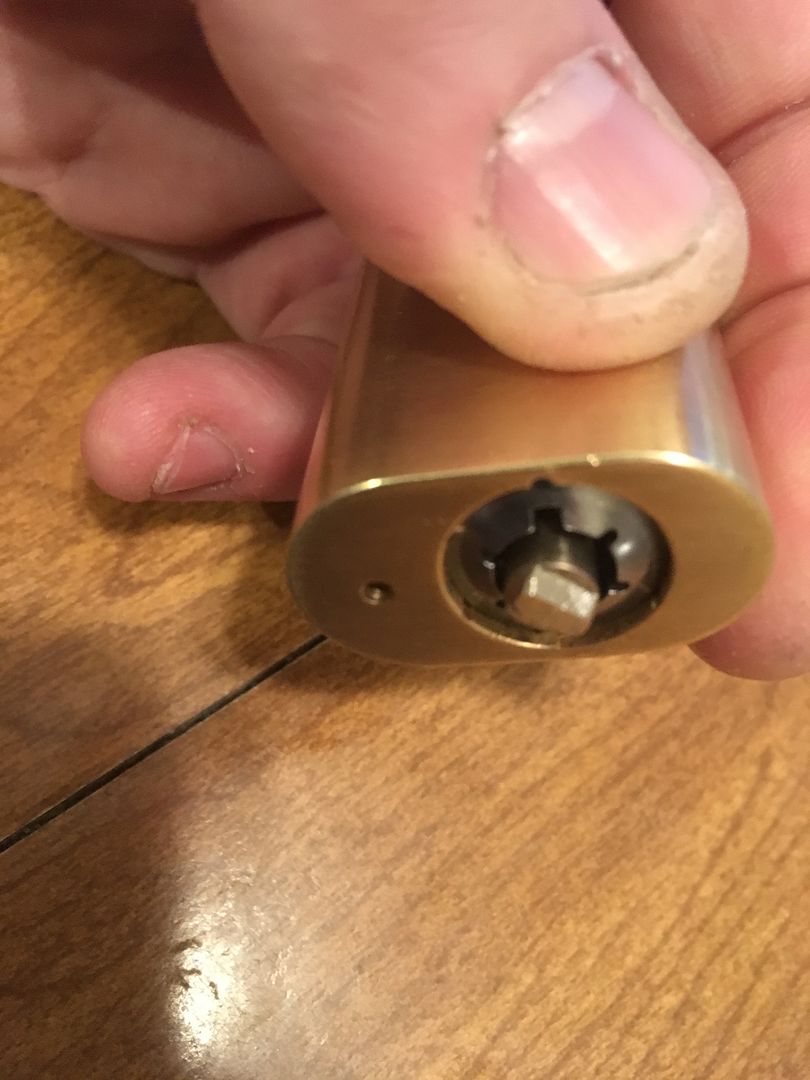
Image

Image

Image

Use your fingers to rotate the codebar back to the original orientation.
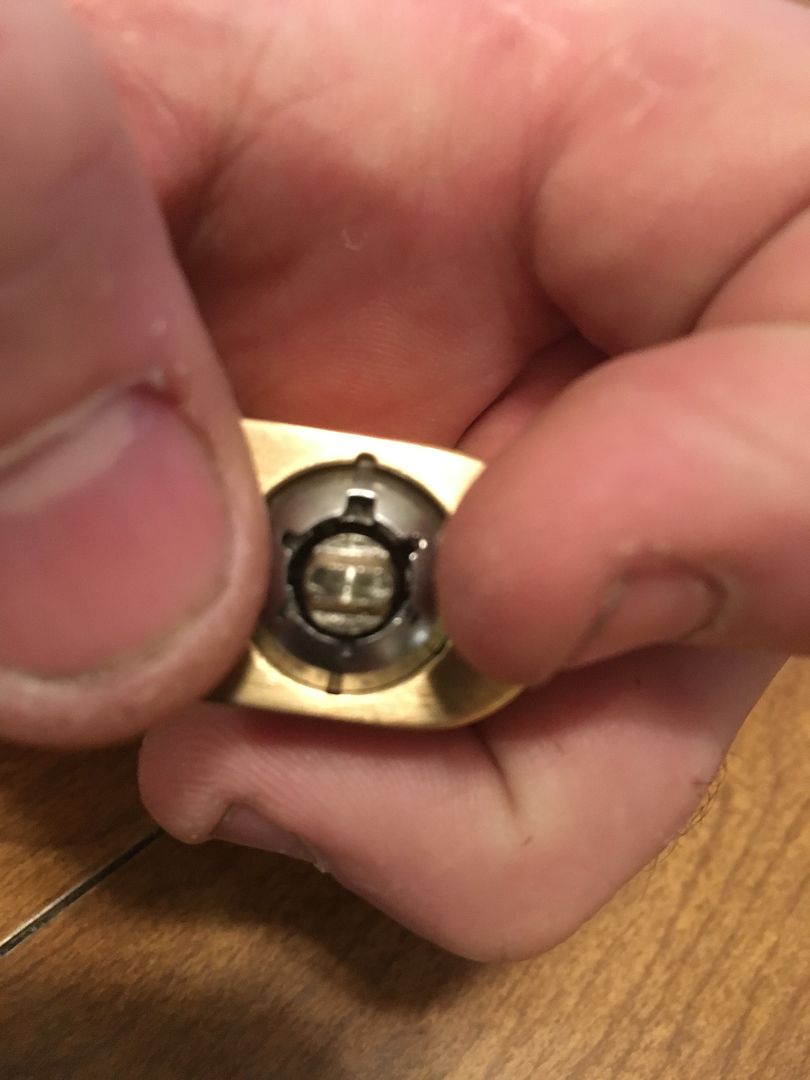
Image

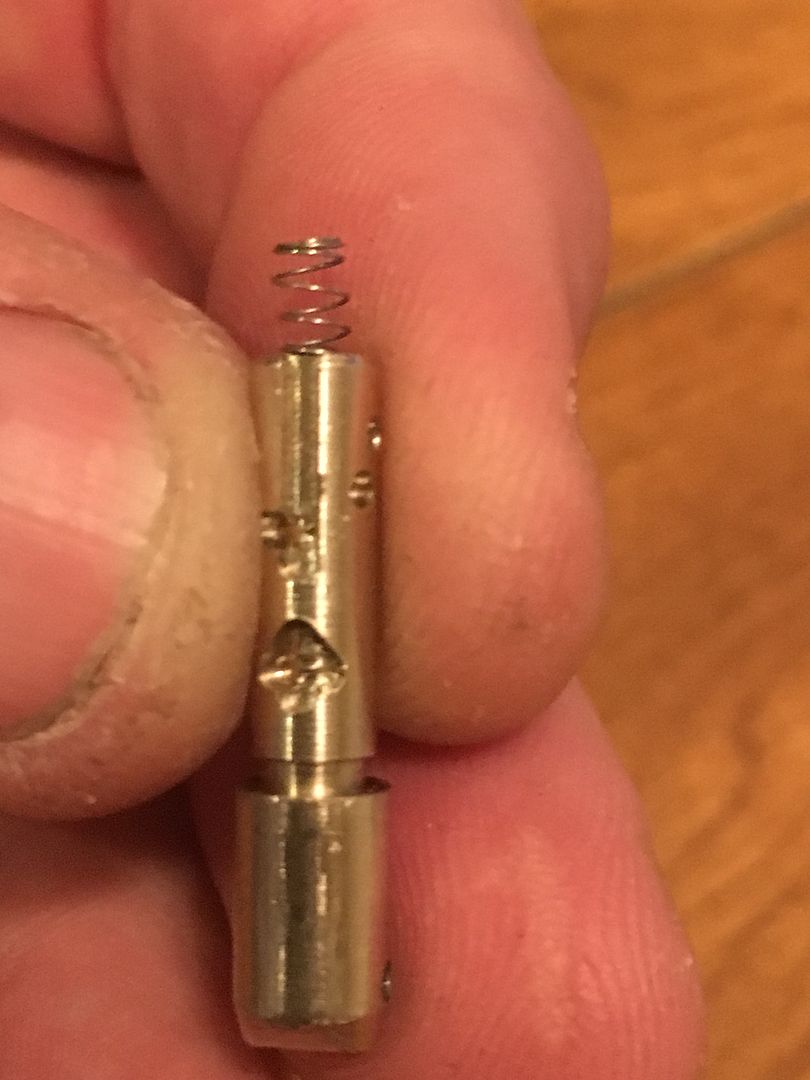
Then use your fingers to pull the codebar straight out. CAUTION: WATCH FOR THE SPRING ON THE BACK OF THE CODEBAR It is not under tension, but it is small and you probably don't want to lose it.
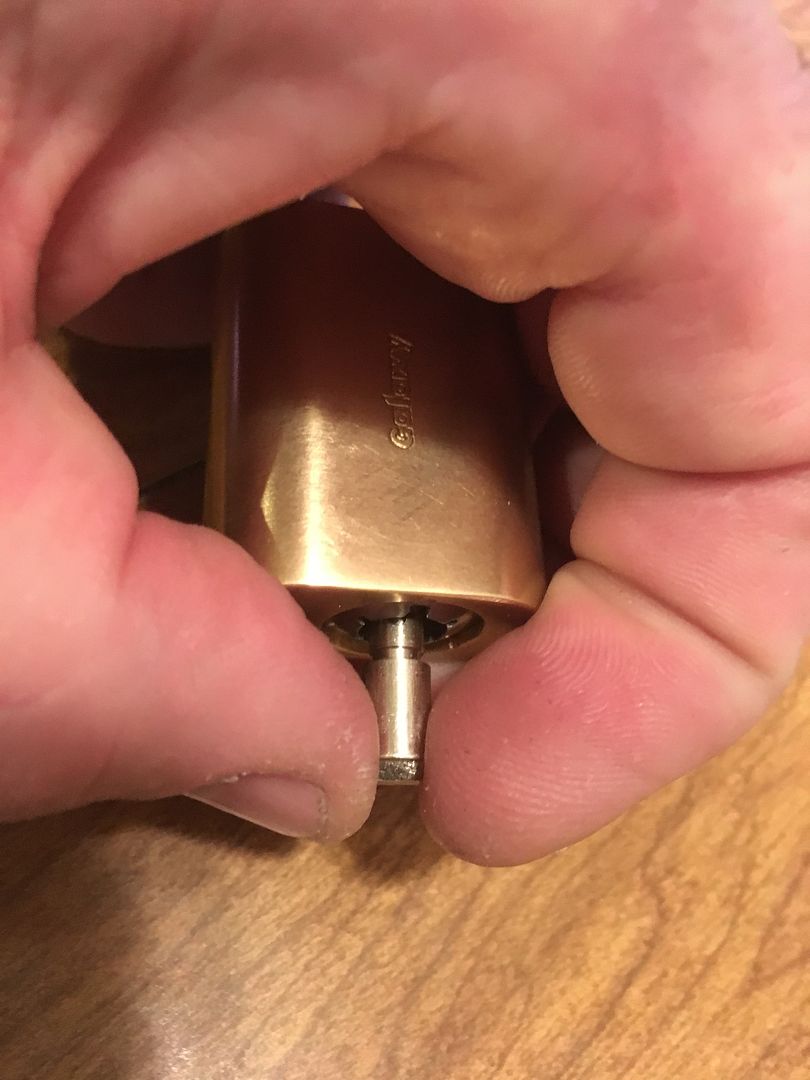
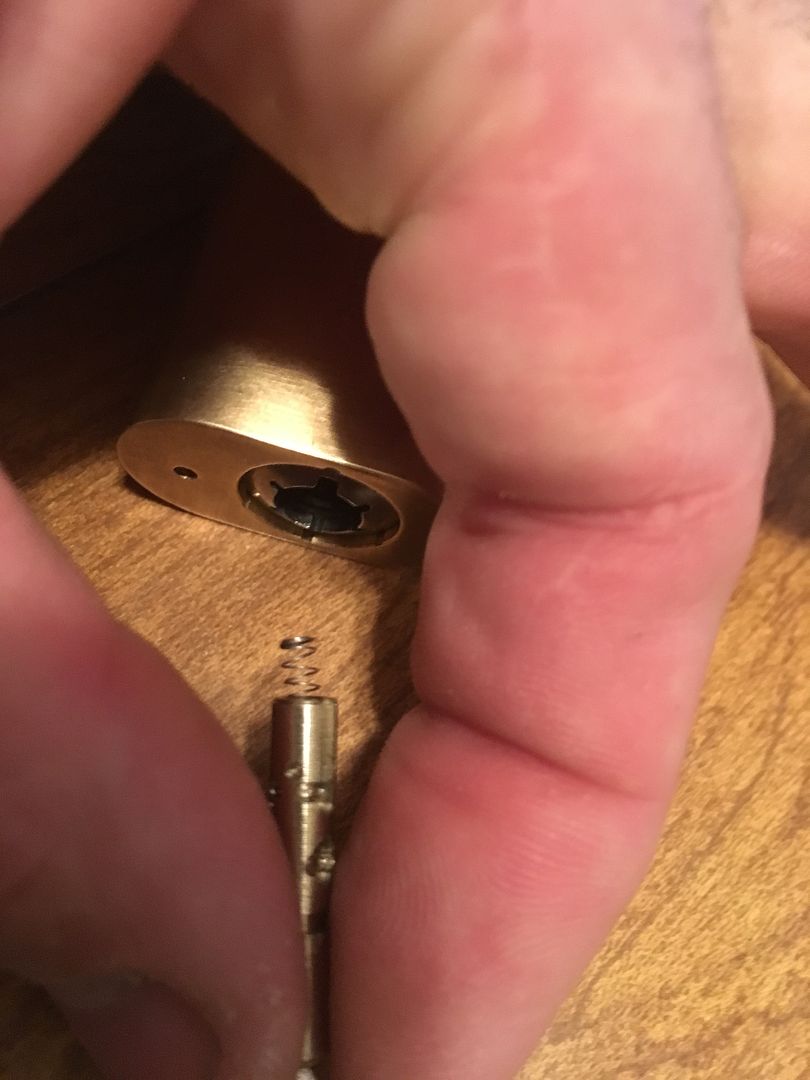
Image

Image

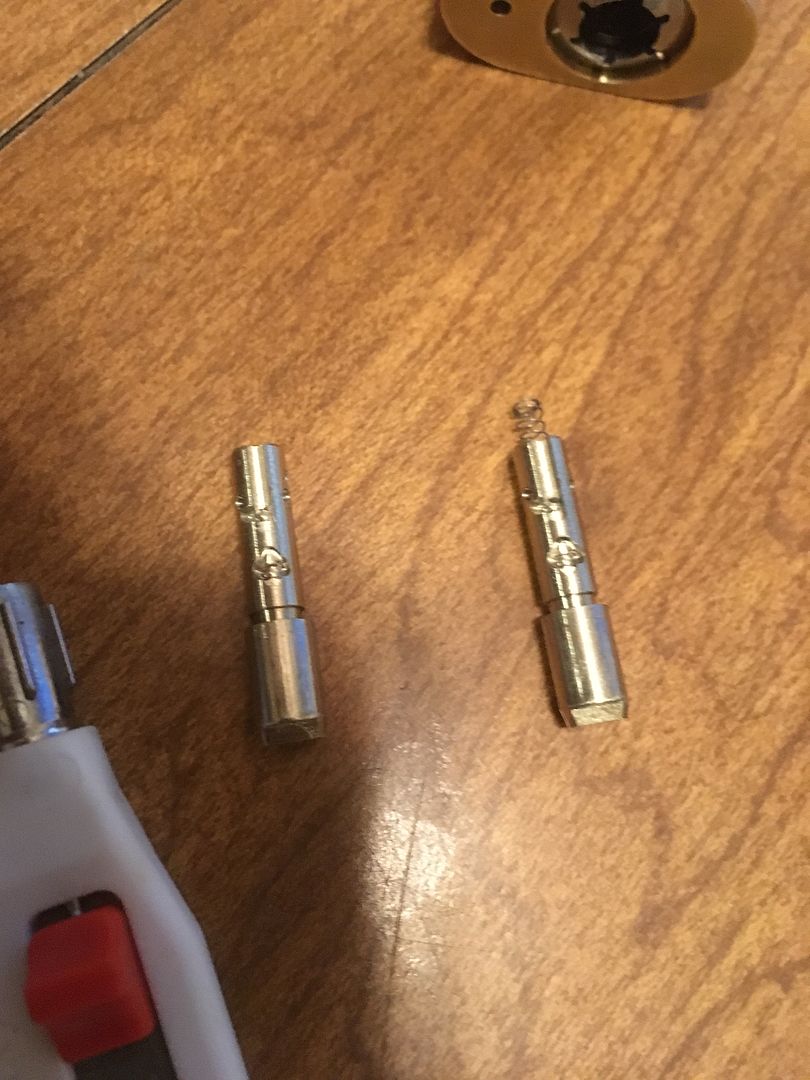
The original and replacement codebars side by side. The spring is currently on the original codebar.
Image

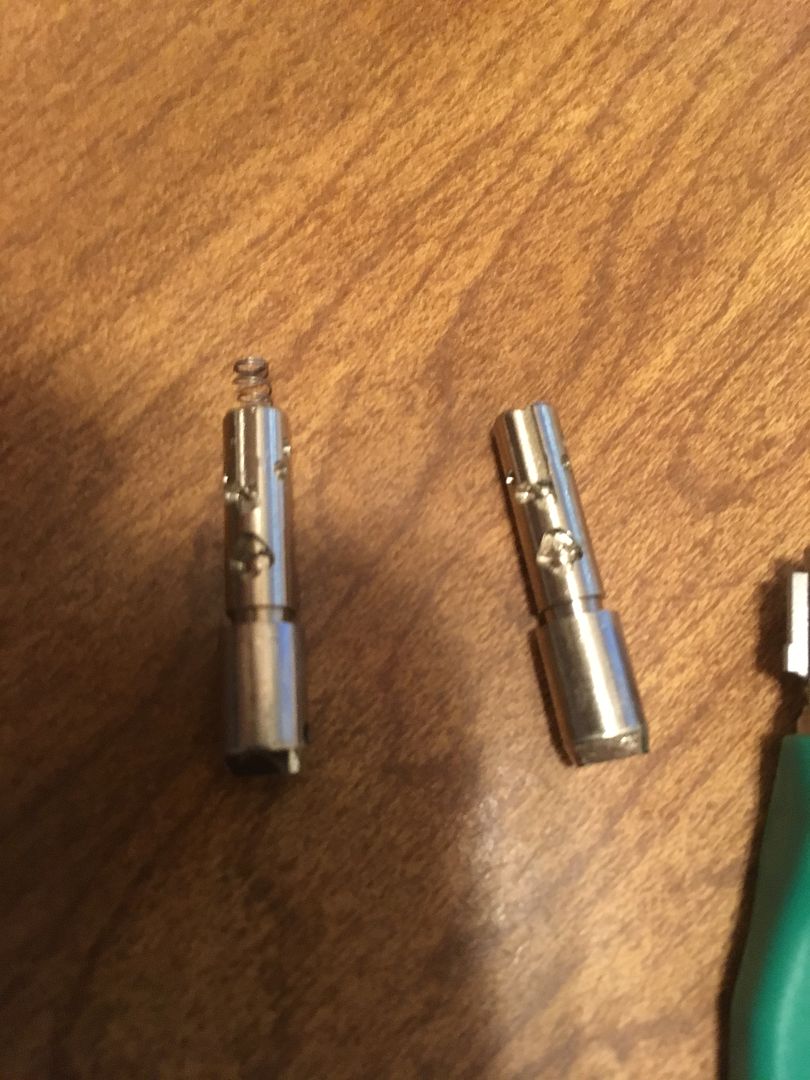
Transfer the spring to the new codebar.
Image

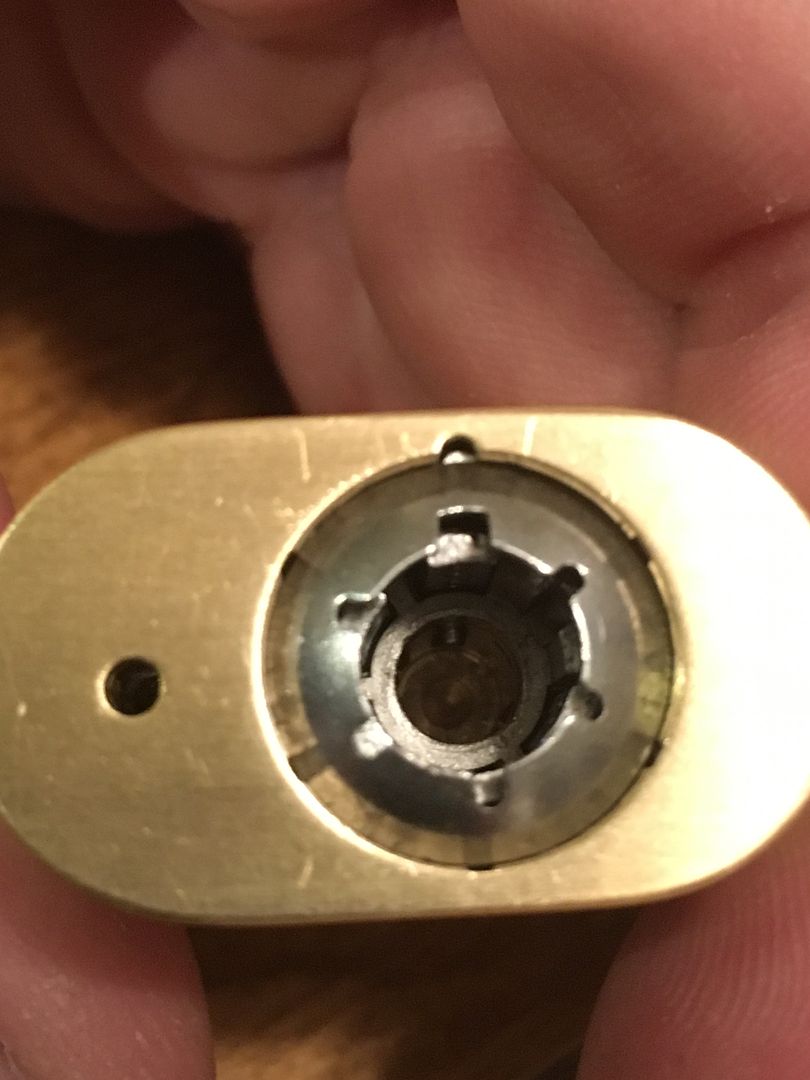
Look inside the lock core. With the thick 'arm' at the top, you will see a pin sticking down in the back. That pin is an alignment pin for the codebar.
Image

It is hard to see in the pics, but the groove is at the tip of the codebar, goes in a short distance, then angles sharply to the side.
Image

Slide the codebar (with the spring installed at the tip) into the keyway.
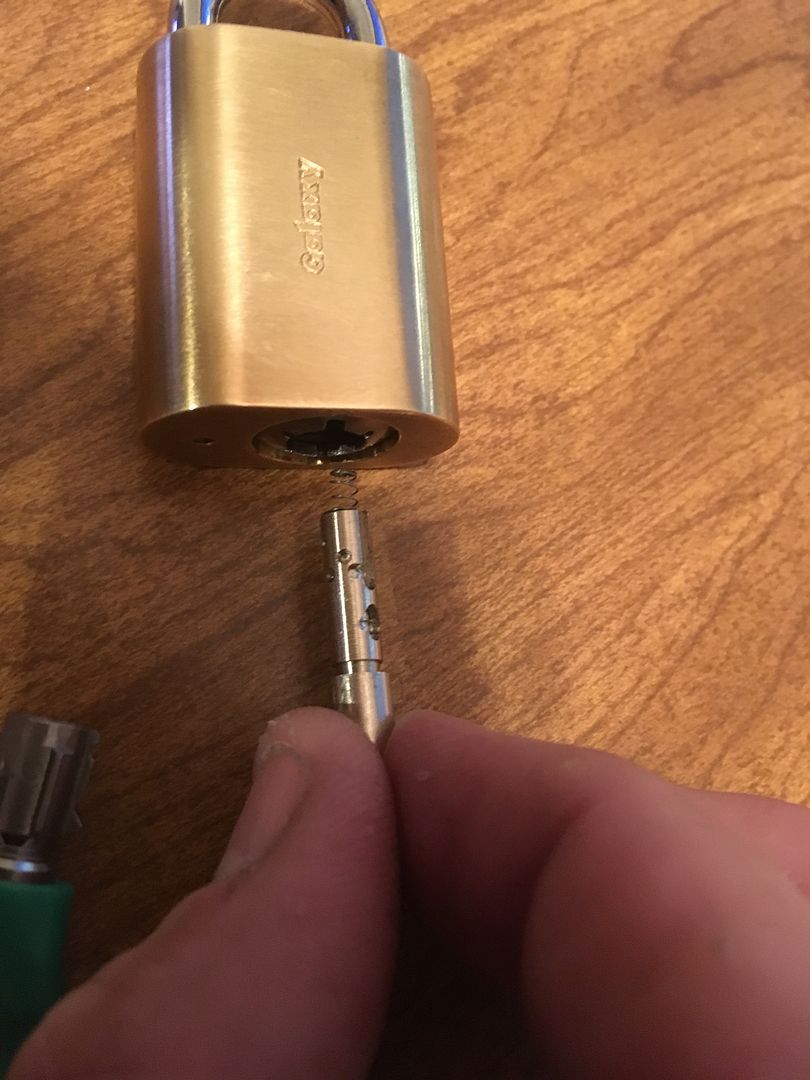
Image

At about this depth, you will find that you can not insert it further without having the codebar aligned with the pin. If it won't go in further, don't force it! Just rotate it until the pin and the codebar slot line up.
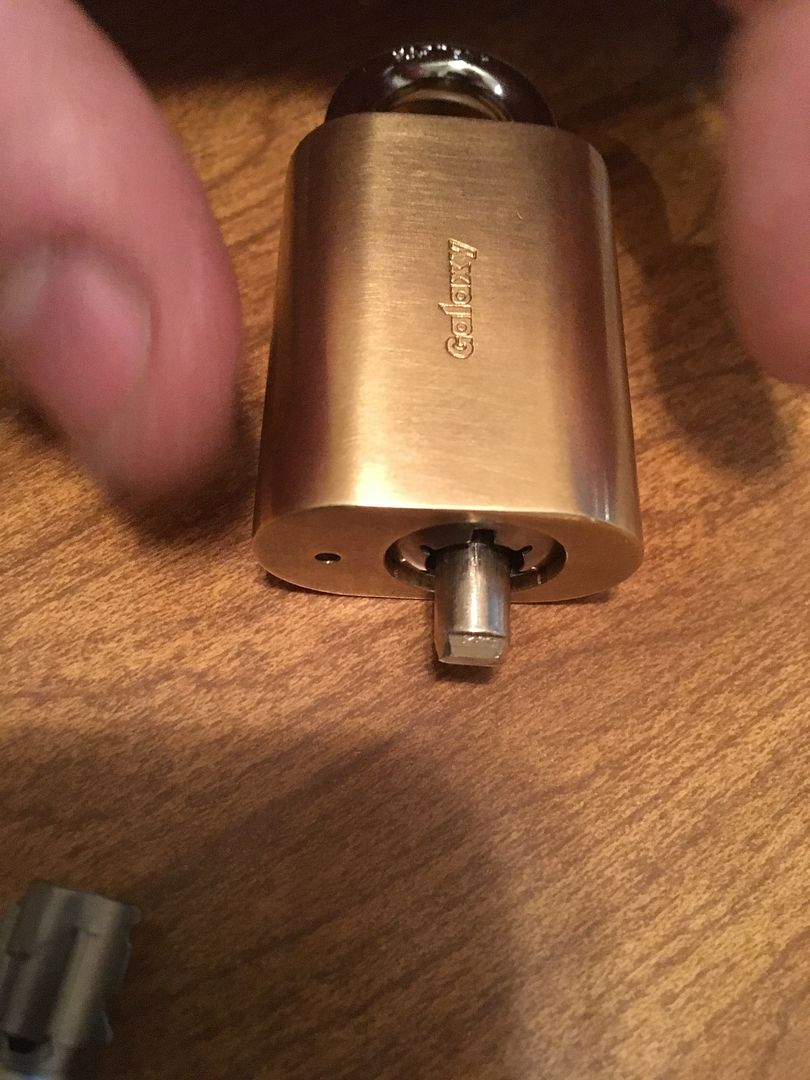
Image

Once you have it aligned and it can go in further, apply turning pressure to the right as you slide in the codebar. Once it is in the correct depth, it will rotate to the angle needed for the removal key.
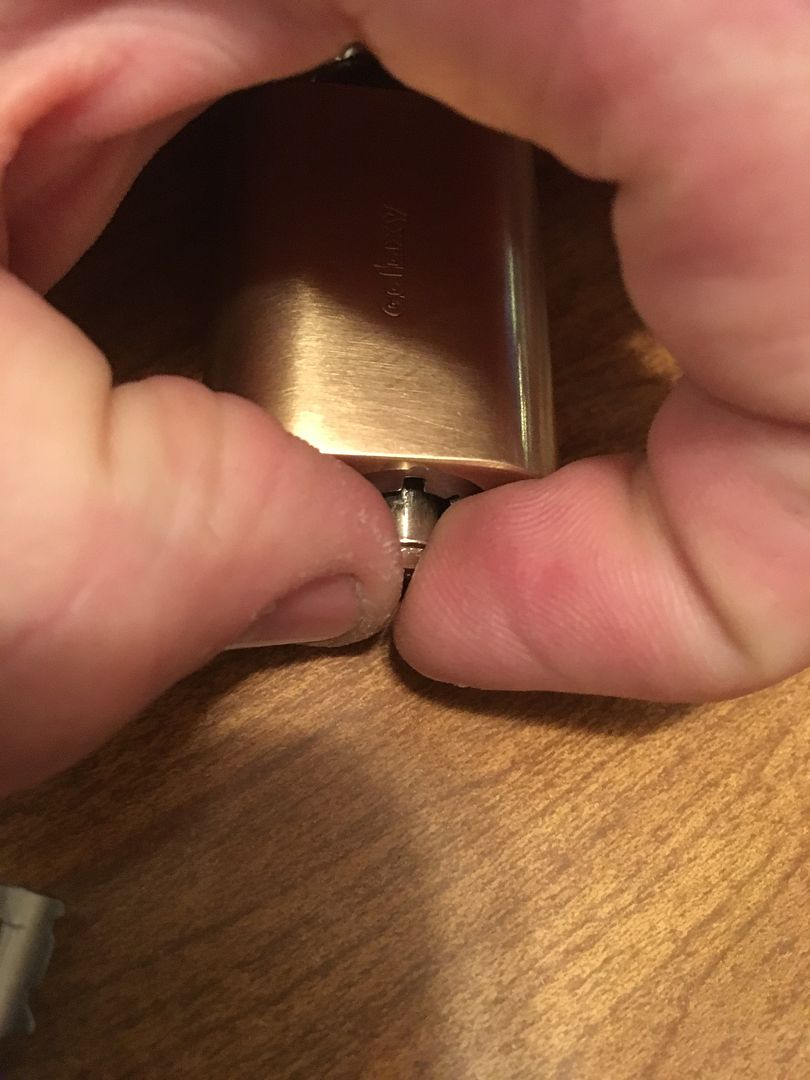
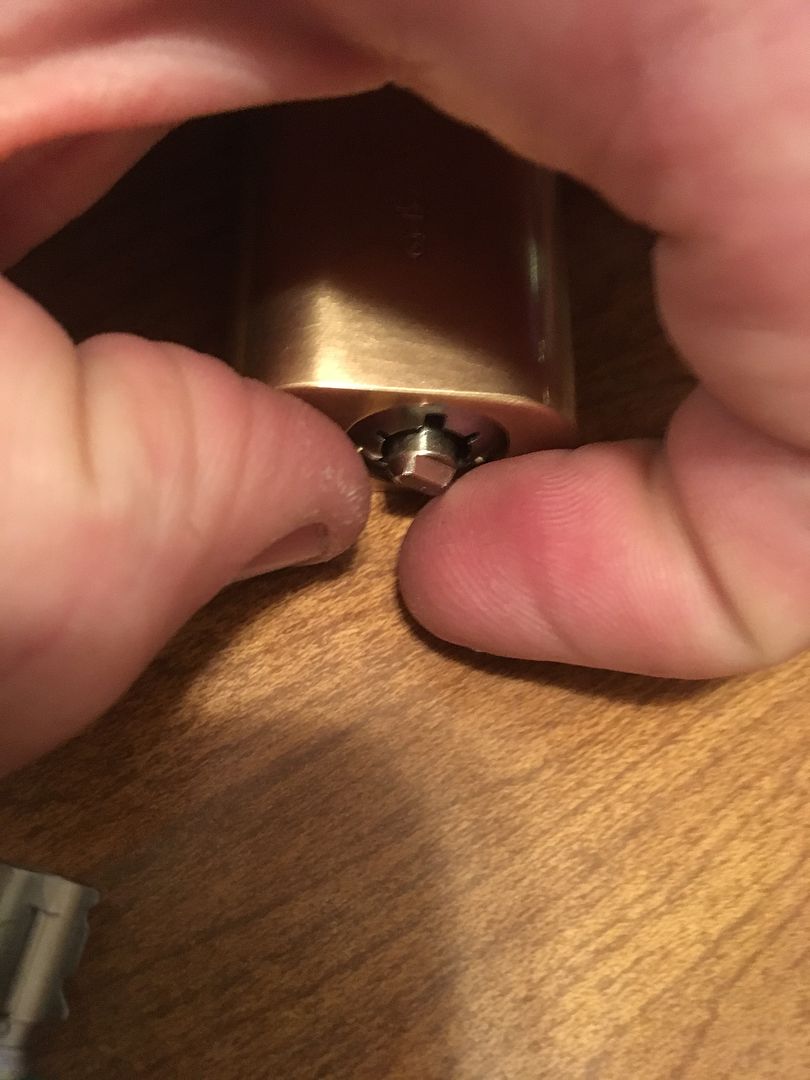
Image

Image

Start with the codebar knob slid fully towards the tip of the key.
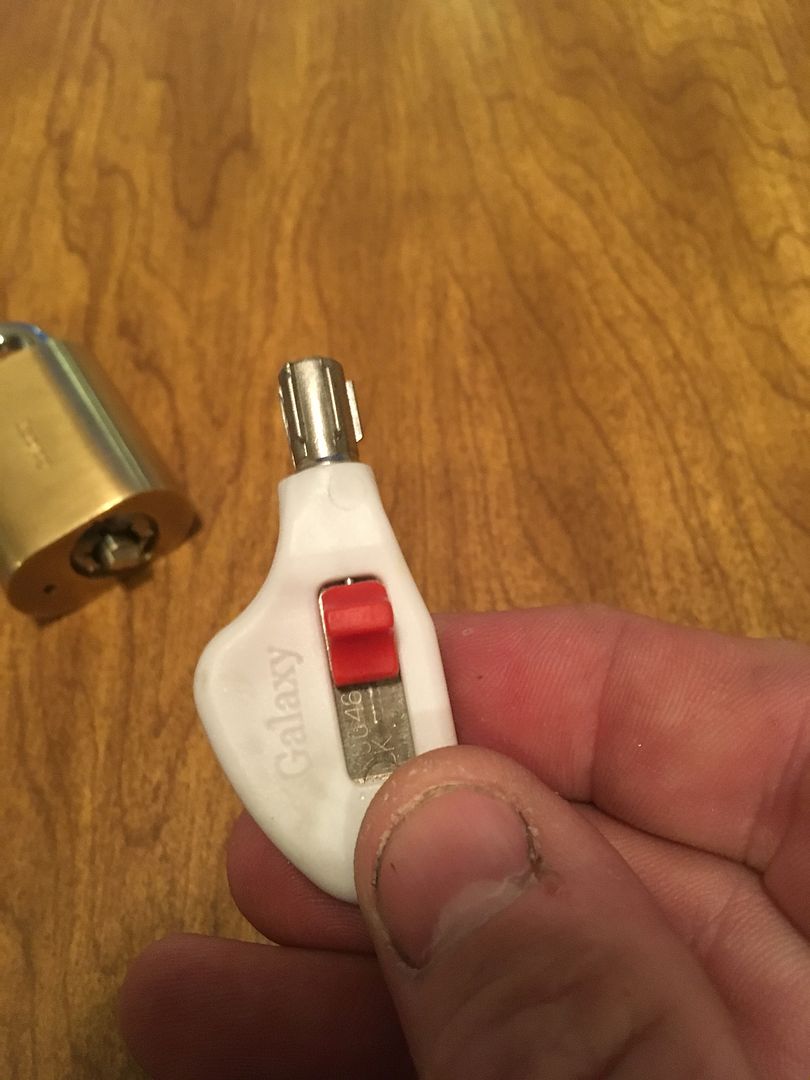
Image

Push it in, allowing the knob to slide back on its own.
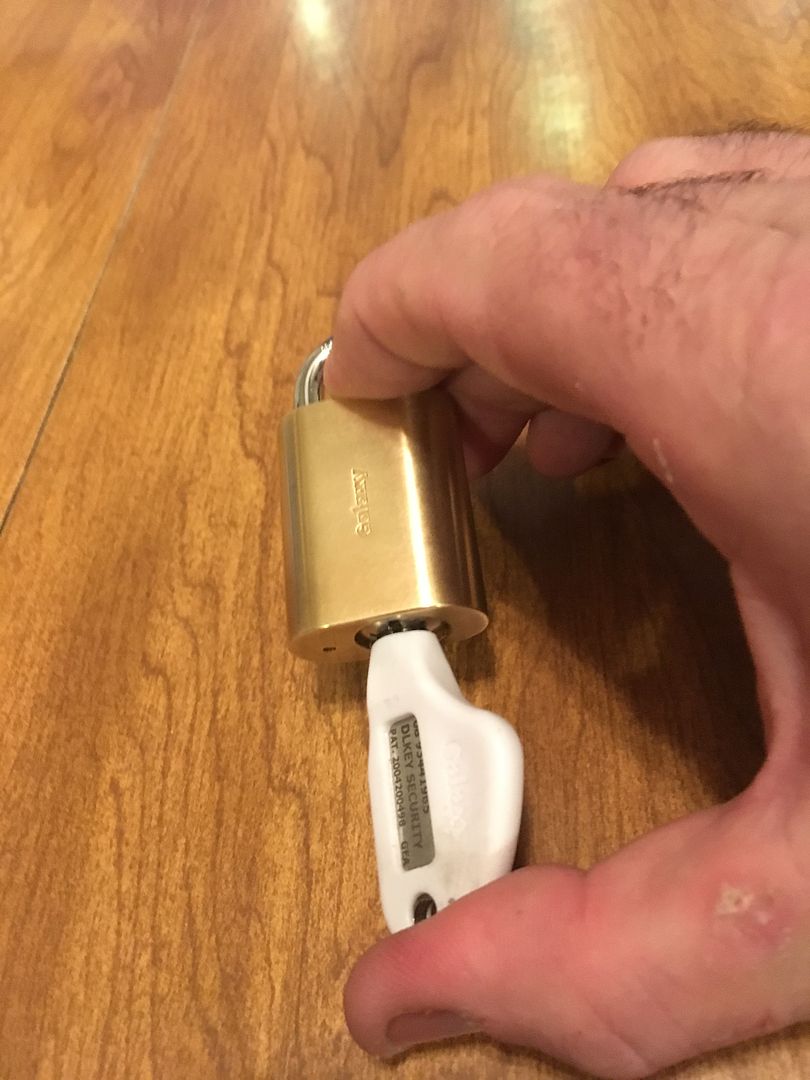
Image

Turn the key left to the original location.
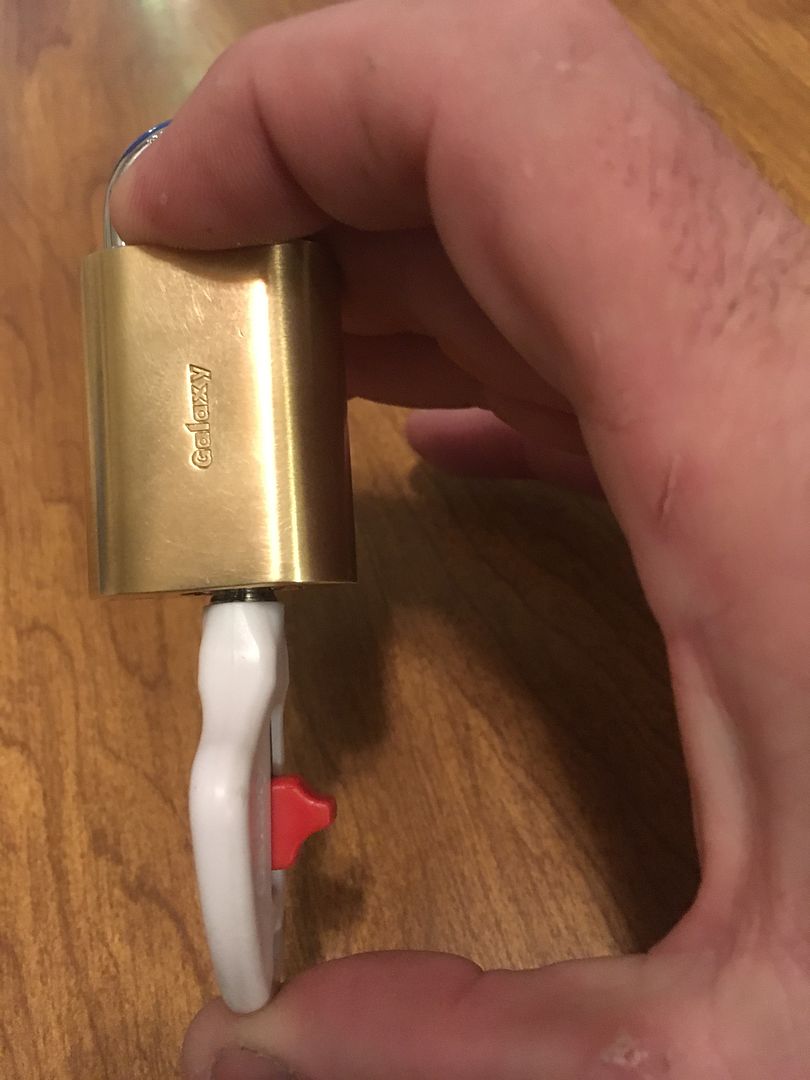
Image

Then let the spring tension push out the removal key.
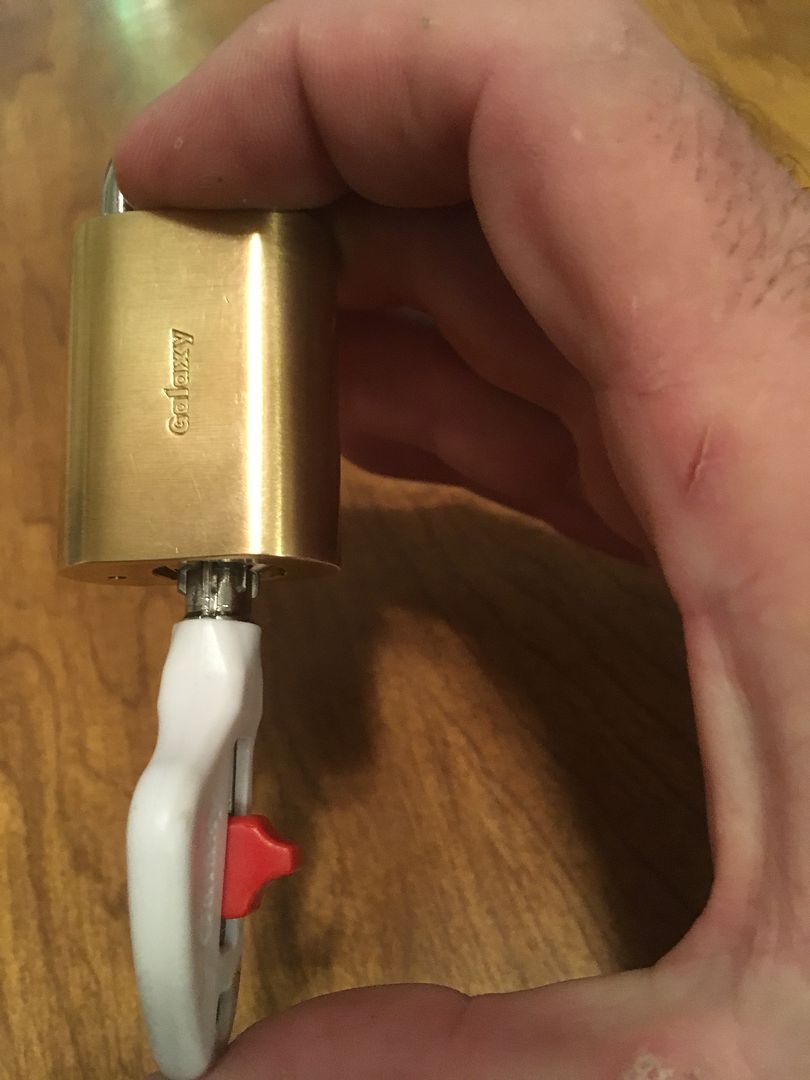
Image

The rekey is completed! Test out your new key.

Image

Image

And there you have it. Hope there were not too many pictures, and that it gave the info you were looking for. :?

Gordon
Just when you finally think you have learned it all, that is when you learn that you don't know anything yet.
User avatar
GWiens2001
Site Admin
 
Posts: 7550
Joined: 3 Sep 2012 16:24
Location: Arizona, United States

Re: ALC Galaxy - Caution - Picture Heavy

Postby peterwn » 12 Nov 2017 3:39

It would be interesting in the medium term how successful the Galaxy has been from a marketing viewpoint. The market that would benefit the most would seem to be universities, student hostels and the like. A significant segment of the masterkeyed lock business has been eroded in recent years with the advent of access control systems and hotel room card locks. The turnover of occupants in a university or hostel situation would be less than in a hotel meaning that access control or card locks would be uneconomic for professors' or students' rooms and mechanical masterkeyed locks would be the most economic solution even if re-keying is needed from time to time. The Galaxy would take most of the 'sting' out of re-keying because if a masterkey goes missing or is compromised, the affected locks can be re-keyed without having to provide fresh change keys and then retrieving keys from and issuing keys to a multitude of occupants. similarly other masterkeys need not be changed.
The cylinder is effectively a 'tricentric' cylinder (cf Yale Bicentric) since each of the three levels of keys have their own 'key space' and do not impinge on each other. Two levels have approximately 1M differs each so the system maintainer is unlikely to run out of differs. The top level has 65,000 or so differs only since one tumbler is required for the withdrawal function. This also means that someone cannot derive the top master key cuts by examining a number of change keys.
Construction keying is no problem since cylinders can be supplied with a construction codebar which can be swapped when needed with the operational codebar. The makers benefit from re-keying since a new codebar has to be machined and selling aftermarket codebars would be profitable. The other advantage the manufacturer has is the significant number of types of cylinder shells developed for BiLock are also usable with Galaxy the only difference being that five sidebar slots need to be broached to take a Galaxy plug compared with the two slots for a BiLock plug.
peterwn
 
Posts: 161
Joined: 22 Aug 2010 23:31

Re: ALC Galaxy - Caution - Picture Heavy

Postby greengrowlocks » 12 Nov 2017 18:46

Excellent write up Gordon, they are always so informative. Now I have to find one.

Any luck on picking yet?
greengrowlocks
Supporter
Supporter
 
Posts: 338
Joined: 18 Mar 2017 15:14
Location: Seattle, WA

Re: ALC Galaxy - Caution - Picture Heavy

Postby Ralph_Goodman » 16 Nov 2017 12:55

Can we expect this to be the thread where you post updates on picking or making any tools you will need? :D
Ralph_Goodman
 
Posts: 255
Joined: 2 Oct 2015 12:25

Re: ALC Galaxy - Caution - Picture Heavy

Postby Hippo_vibrations » 28 Jan 2019 8:57

Very nice, thanks for sharing! :D A few of your pictures have disappeared, though,

Image

I guess you were showing too deep secrets for photobucket to handle :wink:
"Information theory 101," the boy said in a lecturing tone. "Observing variable X conveys information about variable Y, if and only if the possible values of X have different probabilities given different states of Y." - HPMOR.com
User avatar
Hippo_vibrations
 
Posts: 35
Joined: 26 Nov 2018 2:26
Location: Finland

Re: ALC Galaxy - Caution - Picture Heavy

Postby GWiens2001 » 29 Jan 2019 22:56

Hippo_vibrations wrote:Very nice, thanks for sharing! :D A few of your pictures have disappeared, though,

Image

I guess you were showing too deep secrets for photobucket to handle :wink:


If you reload the page a time or two and don't scroll until the thread is fully loaded, then most or all of the pics will be there. That is a problem that seems to occur when you have so many pics in a single post. Seems to happen a lot to my posts, for some reason. Can't be because of too many pics, can it? :roll:

As for those with questions on picking, yes, it is very pickable if you make the right tensioner. But that is in the advanced forum since this is supposed to be a high security lock.

Gordon
Just when you finally think you have learned it all, that is when you learn that you don't know anything yet.
User avatar
GWiens2001
Site Admin
 
Posts: 7550
Joined: 3 Sep 2012 16:24
Location: Arizona, United States


Return to Locks

Who is online

Users browsing this forum: No registered users and 6 guests