Lock Picking 101 Forum
A community dedicated to the fun and ethical hobby of lock picking.
       

Lock Picking 101 Home
Login
Profile
Members
Forum Rules
Frequent Forum Questions
SEARCH
View New Posts
View Active Topics


Live Chat on Discord
LP101 Forum Chat
Keypicking Forum Chat
Reddit r/lockpicking Chat


Learn How to Pick Locks
FAQs & General Questions
Got Beginner Questions?
Pick-Fu [Intermediate Level]


Ask a Locksmith
This Old Lock
This Old Safe
What Lock Should I Buy?


Hardware
Locks
Lock Patents
Lock Picks
Lock Bumping
Lock Impressioning
Lock Pick Guns, Snappers
European Locks & Picks
The Machine Shop
The Open Source Lock
Handcuffs


Member Spotlight
Member Introductions
Member Lock Collections
Member Social Media


Off Topic
General Chatter
Other Puzzles


Locksmith Business Info
Training & Licensing
Running a Business
Keyways & Key Blanks
Key Machines
Master Keyed Systems
Closers and Crash Bars
Life Safety Compliance
Electronic Locks & Access
Locksmith Supplies
Locksmith Lounge


Buy Sell Trade
Buy - Sell - Trade
It came from Ebay!


Advanced Topics
Membership Information
Special Access Required:
High Security Locks
Vending Locks
Advanced Lock Pick Tools
Bypass Techniques
Safes & Safe Locks
Automotive Entry & Tools
Advanced Buy/Sell/Trade


Locksport Groups
Locksport Local
Chapter President's Office
Locksport Board Room
 

Skold's nOOb Guide to Fitting a key to a cylinder.

THE starting place for new members. FAQ's, instructions on how to pick a lock, valuable information like product reviews, links to lock picking related sites, forum rules, lockpicking tool vendors, and more. START HERE.

Skold's nOOb Guide to Fitting a key to a cylinder.

Postby skold » 23 Oct 2005 3:43

Well i was bored and i decided to make something that resembles a guide to cutting keys to code without a code machine.

I suppose once in our lives as lock pickers we were at a stage when we needed or wanted to learn to cut keys to code – cutting a key to code is cutting the key according to the pin code of the lock. The pin code s generally five to six numbers depending on the make of the lock. A simple key code can look something like this “987473”. This number tells me I need to make the key to work in a lock with these pin sizes.

Pin sizes in most locks are 0-9 or 0-6 depending on the lock, but for this guide we will be using 0-9 to demonstrate.

As we all do not have code machines many decide to do it by hand, with files and key blanks. There are many ways you can do this; one is with depth keys – which have slots for measuring key cuts or using a cylinder for the particular key you are cutting and using pins to determine whether the key has the correct cuts in it.

For us that don’t use or own depth gauges it is easier to use the pin and cylinder method.
The way we do that is to have the following tools and equipment:

Key blanks
3-4mm chainsaw file
Small flat file
Pins – the pins that make up the code you are cutting the key to
A marker
Lock cylinder of the same make of the lock you are cutting the key to.

Image
Box of key blanks, cylinder, lock and chainsaw file.
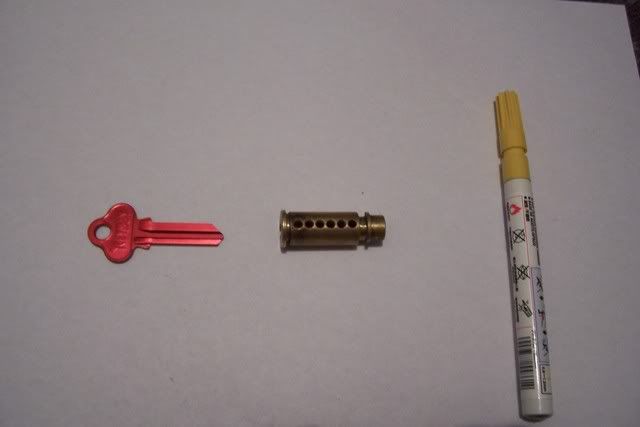
Image
Key blank, lock cylinder and marker.

Marking the key

1. Insert the blank fully into the lock cylinder
2. Put the tip of the marker in each hole so that you leave a mark for each cut you are going to mark (it marks the exact spacing so there is no risky guesswork involved)
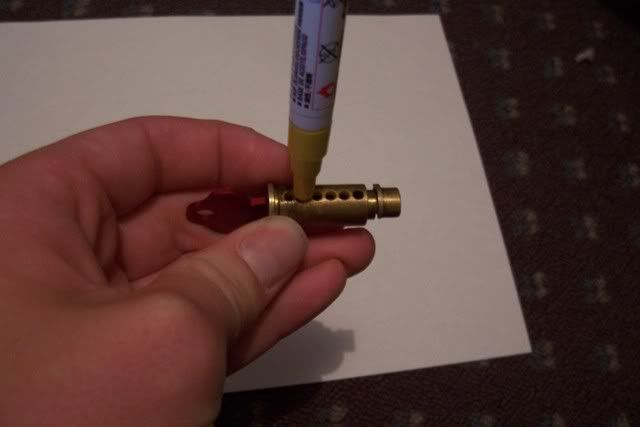
Image


Cutting the key

1. Start cutting the first mark from the shoulder with the chainsaw file, regularly checking to see how far you have to go before the cut is finished. (this is done by placing the pin that is associated with the first number of the key code in the first hole of the cylinder)
2. Repeat until the code has been cut into your blank.

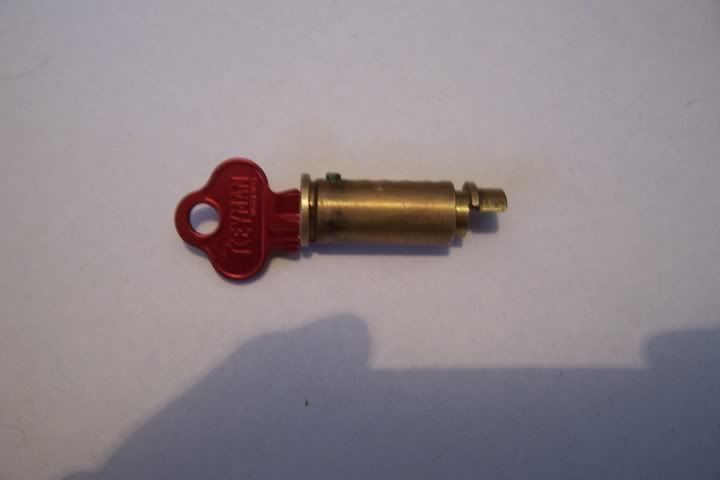
Image
Image
As you can see the cut isn't quite deep enough.
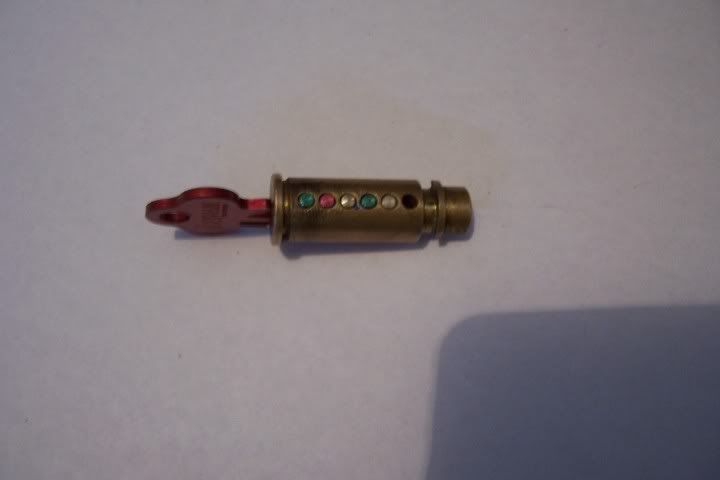
Image
This is what the cylinder should look like once all the cuts have been made into the correct depth. The pins should sit flush with the top of the cylinder.


Making the key useable

1. Before putting the key into the lock it needs to be made useable, you will notice the points are jagged and are cylinder shaped (this means if the key is inserted into a working lock the pins will set into the cylinder cuts and trap the key) You will need to use the small flat file to file the jagged parts down to a useable height.
2. Once this is done and there appears to be no risk of the key being trapped, insert the key into the lock and test to see if it works.
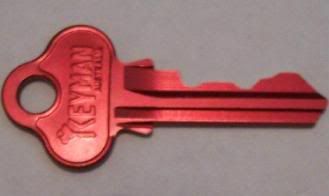
Image
Finished product.

Well as you can tell i was really bored. This is not the best guide but it gives me something to refer people to if they ask about cutting keys to code.
Image
skold
 
Posts: 2250
Joined: 24 Feb 2004 3:59
Location: Australia

Postby Chrispy » 23 Oct 2005 4:58

Well I'll be!! Skolds laziness has ended!! Praise the lockpicking gods!! :P

J/k man :wink: . Good work. I never thought of using a permanent marker to mark the spacing. Listen up bumpnoobs, All you need is one #9 pin and this guide. Think about it. :wink:
Image
Some things may be pick proof, but everything can be bypassed....
Chrispy
 
Posts: 3569
Joined: 24 Mar 2005 15:49
Location: GC, QLD

Postby skold » 23 Oct 2005 5:02

Exactly.
Image
skold
 
Posts: 2250
Joined: 24 Feb 2004 3:59
Location: Australia

Postby Dimmy Locks » 23 Oct 2005 5:29

Can't fault the method there :) except for the following day when you get another code for another lock to do, you'll have to repeat the whole process again.

Humble sugguestion here, seeing as you have a spare core and pins, would'nt it have been more prudent to have cut depth and spacer keys for easy future use? It's what I do whenever I come across a lock I dont have a card on my Blitzâ„¢ for.

Might also be worth noting that the same principle also applies for wafer locks, 1 and 2 sided as well as most laser keyed locks.
Dimmy Locks
 
Posts: 124
Joined: 19 Oct 2005 14:56
Location: London, England

Postby Keyring » 23 Oct 2005 5:33

That was a nice post, I enjoyed the concept of using the cylinder (and sized pins) to position the cuts. :D Just an observation though. The cuts on your key are flat, whereas a key from a lock manufacturer would tend to rise each side of the pin positions. I assume this is to help the key to position itself positively, so it is obvious when you haven't put it in the lock the right amount.

Of course the key will work fine in the lock, and the flat cuts are much easier to do accurately. But for a bump key you couldn't just file it flat!

As I say, it's just an observation, and in no way a critisism of the excellent post.

(Actually it reminds me of the first cylinder key I filed a copy of, many years ago. There were 2 cuts the same height and then 3 cuts the same height as each other, so the key had just 2 levels, and looked nothing like the original, even though it worked fine.)
Keyring
 
Posts: 486
Joined: 23 Mar 2004 8:01
Location: uk

Postby Dimmy Locks » 23 Oct 2005 6:06

I often cut pin lock keys using a flat tipped cutting blade which is actually designed for wafer locks. The reason being, many older pin locks I come across as a vehicle locksmith have dented or damaged face plates and shoulder stop plates. By having a flat and not perfect "V" to the trough of the key allows for and missalignment due to these imperfections. I also often will actually cut the keys right down to each pin level across the blank.. I.E. assume we have a 5 depth gauge and 6 cut spacing to the lock. the code being 34453. I would cut the key down to depth 3 RIGHT ACROSS the blank. ( 3 depth being the heighest part of key required). I would then flatten off positions 2,3 and 4 down to depth 4 ( the next depth). Finally I would deepen cut 4 down to depth 5.

The overall effect is to have "steps" in the key rather than sharp points. naturally the sides of each depth are angled so as to allow the pins to rise and fall smoothly as the key is pushed in and out.
I have found this method extremely useful for older/ damaged locks.
N.B. having a flat contact surface for the pin also helps with impressioning as its clearer to see any marks made by pins.
Dimmy Locks
 
Posts: 124
Joined: 19 Oct 2005 14:56
Location: London, England

Postby Chrispy » 23 Oct 2005 6:14

Using the right blank with an untouched shoulder will take care of it.
Image
Some things may be pick proof, but everything can be bypassed....
Chrispy
 
Posts: 3569
Joined: 24 Mar 2005 15:49
Location: GC, QLD

Postby ThE_MasteR » 23 Oct 2005 8:30

Very nice guide Skold, the only thing thing the sucks is that you need to have a rekeyable cylinder lol.
ThE_MasteR
 
Posts: 1120
Joined: 14 Apr 2005 11:11
Location: Canada, Montreal

Postby Keyring » 23 Oct 2005 9:51

the only thing thing the sucks is that you need to have a rekeyable cylinder

Not really. You can get the cylinder out of almost any lock. Hint: dremel etc...
Keyring
 
Posts: 486
Joined: 23 Mar 2004 8:01
Location: uk

Postby Keyring » 23 Oct 2005 9:53

... probably meant barrel... :oops:
Keyring
 
Posts: 486
Joined: 23 Mar 2004 8:01
Location: uk

Postby sturmgrenadier » 11 Jul 2006 3:11

Hey there,
Struggling to learn lockpicking, but still picking away:) I happened to go to an auction that turned out to be for the estate of a former locksmith:) I wnet to check out the coins, but stumbled across a treasure trove of locksmithing/lockpicking tools,equipment and resources and managed to buy buy some for sub-firesale prices. One of the items I picked up was a working Ilco 025 'Manual' key grinding machine. Can anyone tell me if there is a really steep learning curve for operating this rig? Are user/instruction manuals usually published for these machines? (I tried checking the company's website, but alas, they make no mention of a manual for this model. I think it is an older one that may no longer be supported). Any tips for getting started? What does 'Manual' mean on the machine as opposed to 'Automatic' on another machine that some other guy won at the auction? Are 'automatic' key grinders idiot-proof/self-guiding? Do I need to learn about key codes? WHere? Why not just use a copy of the key as a template for cutting? Sorry for the twenty questions. I get excited and my penning tends to resemble diarrehea. If you care to answer/enlighten my ignorance, please spell things out over-simply. As Digital Blue will tell you (he has been mega-generous (an understatement) with trying to coach me in learning the basics of picking), I need to be told something a few times and still make little or no progress. So be warned and thanks for your patience!
sturmgrenadier
 
Posts: 44
Joined: 6 Jun 2006 16:35
Location: Vienna, Virginia

Postby readyman » 11 Sep 2006 20:55

hi i'm new to this and read across your thread while waiting on my pick to come..ok.. here comes my question..
1 i went and brought 2 master locks for this i cut and got the cylinder out of 1 .. being lock stupid 3 springs and 8 pins came outnot knowing where the go i stood them all up side by side to see a difference.
not knowing where the came from i decided to put the key back in and reinsert the pins.. done 4 went in flush and the key would't move that let me know i had the right ... now what about the other 4 pins cause i didnt see anything about those..
2 did you use different color markers cause you diagram shows different colors but all my pins are the same color
readyman
 
Posts: 5
Joined: 9 Sep 2006 21:02
Location: ga

Postby Shrub » 11 Sep 2006 21:39

Dont worry about the colours, they are from a pinning kit,

The pins you have that have a point on them are the key pins and the others are the top pins, put the springs in and then the top pins,

Look for illusions guide on repinning a lock and use those techniques to do it,

You quickly find the guide buy clicking the picture on my post,
Shrub
Moderator Emeritus
 
Posts: 11576
Joined: 23 May 2005 4:03
Location: uk

Postby TheonlyQ » 6 Oct 2006 19:00

Hi guys, interesting stuff but I am confused why without filling down after the initial 'cuts' the key might 'jam' in the lock?

Probably very somple but I am missing this, can anyone explain.

Thanks

Q
TheonlyQ
 
Posts: 9
Joined: 14 Aug 2006 15:19
Location: Kent - UK

Postby Sesame » 7 Oct 2006 20:48

The pins need a ramped surface to ride up as the key is moved in and out of the lock. No ramp, the pin just binds and the key won't come out.
Nothing is so embarrassing as watching someone do something that you said couldn't be done.
- Sam Ewing
Sesame
Supporter
Supporter
 
Posts: 127
Joined: 8 May 2006 1:40
Location: Idaho

Next

Return to Lock Picking 101 - FAQs, Tutorials, and General Information

Who is online

Users browsing this forum: No registered users and 5 guests