Lock Picking 101 Forum
A community dedicated to the fun and ethical hobby of lock picking.
       

Lock Picking 101 Home
Login
Profile
Members
Forum Rules
Frequent Forum Questions
SEARCH
View New Posts
View Active Topics


Live Chat on Discord
LP101 Forum Chat
Keypicking Forum Chat
Reddit r/lockpicking Chat


Learn How to Pick Locks
FAQs & General Questions
Got Beginner Questions?
Pick-Fu [Intermediate Level]


Ask a Locksmith
This Old Lock
This Old Safe
What Lock Should I Buy?


Hardware
Locks
Lock Patents
Lock Picks
Lock Bumping
Lock Impressioning
Lock Pick Guns, Snappers
European Locks & Picks
The Machine Shop
The Open Source Lock
Handcuffs


Member Spotlight
Member Introductions
Member Lock Collections
Member Social Media


Off Topic
General Chatter
Other Puzzles


Locksmith Business Info
Training & Licensing
Running a Business
Keyways & Key Blanks
Key Machines
Master Keyed Systems
Closers and Crash Bars
Life Safety Compliance
Electronic Locks & Access
Locksmith Supplies
Locksmith Lounge


Buy Sell Trade
Buy - Sell - Trade
It came from Ebay!


Advanced Topics
Membership Information
Special Access Required:
High Security Locks
Vending Locks
Advanced Lock Pick Tools
Bypass Techniques
Safes & Safe Locks
Automotive Entry & Tools
Advanced Buy/Sell/Trade


Locksport Groups
Locksport Local
Chapter President's Office
Locksport Board Room
 

Tutorial - Different Ways to Cut Keys

Picked all the easy locks and want to step up your game? Further your lock picking techniques, exchange pro tips, videos, lessons, and develop your skills here.

Tutorial - Different Ways to Cut Keys

Postby GWiens2001 » 13 Apr 2014 16:00

Different Ways to Cut Keys

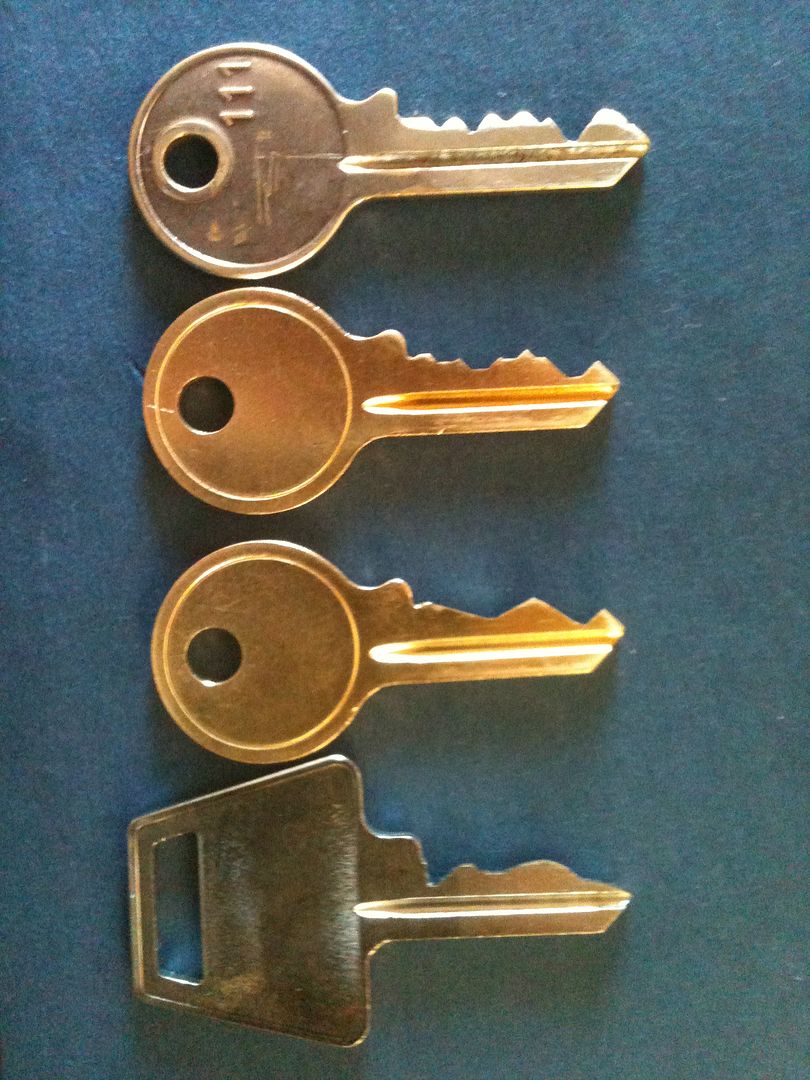
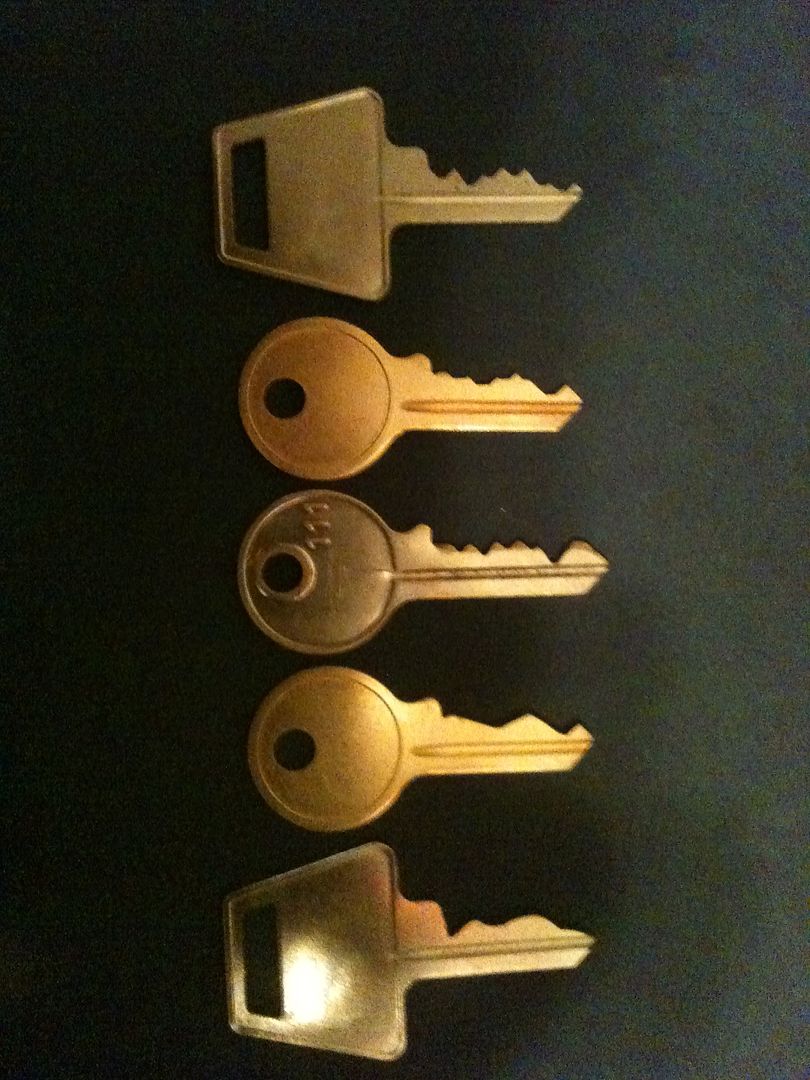
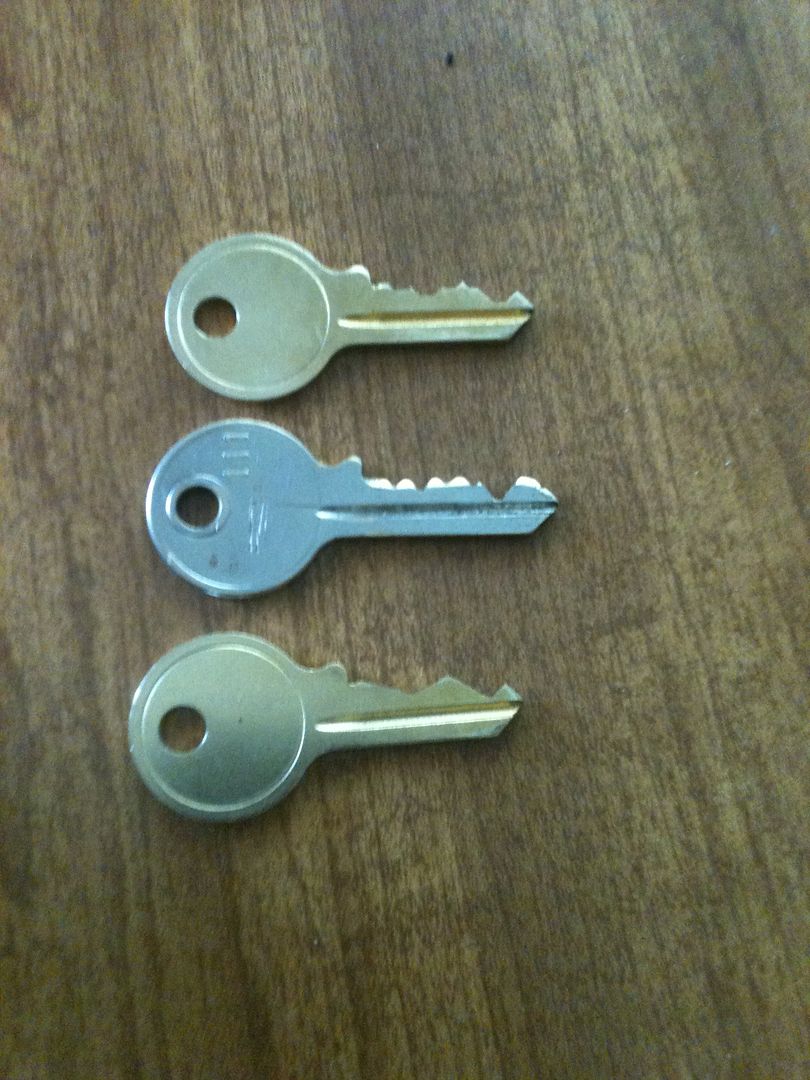
Take a look at these keys:

Image

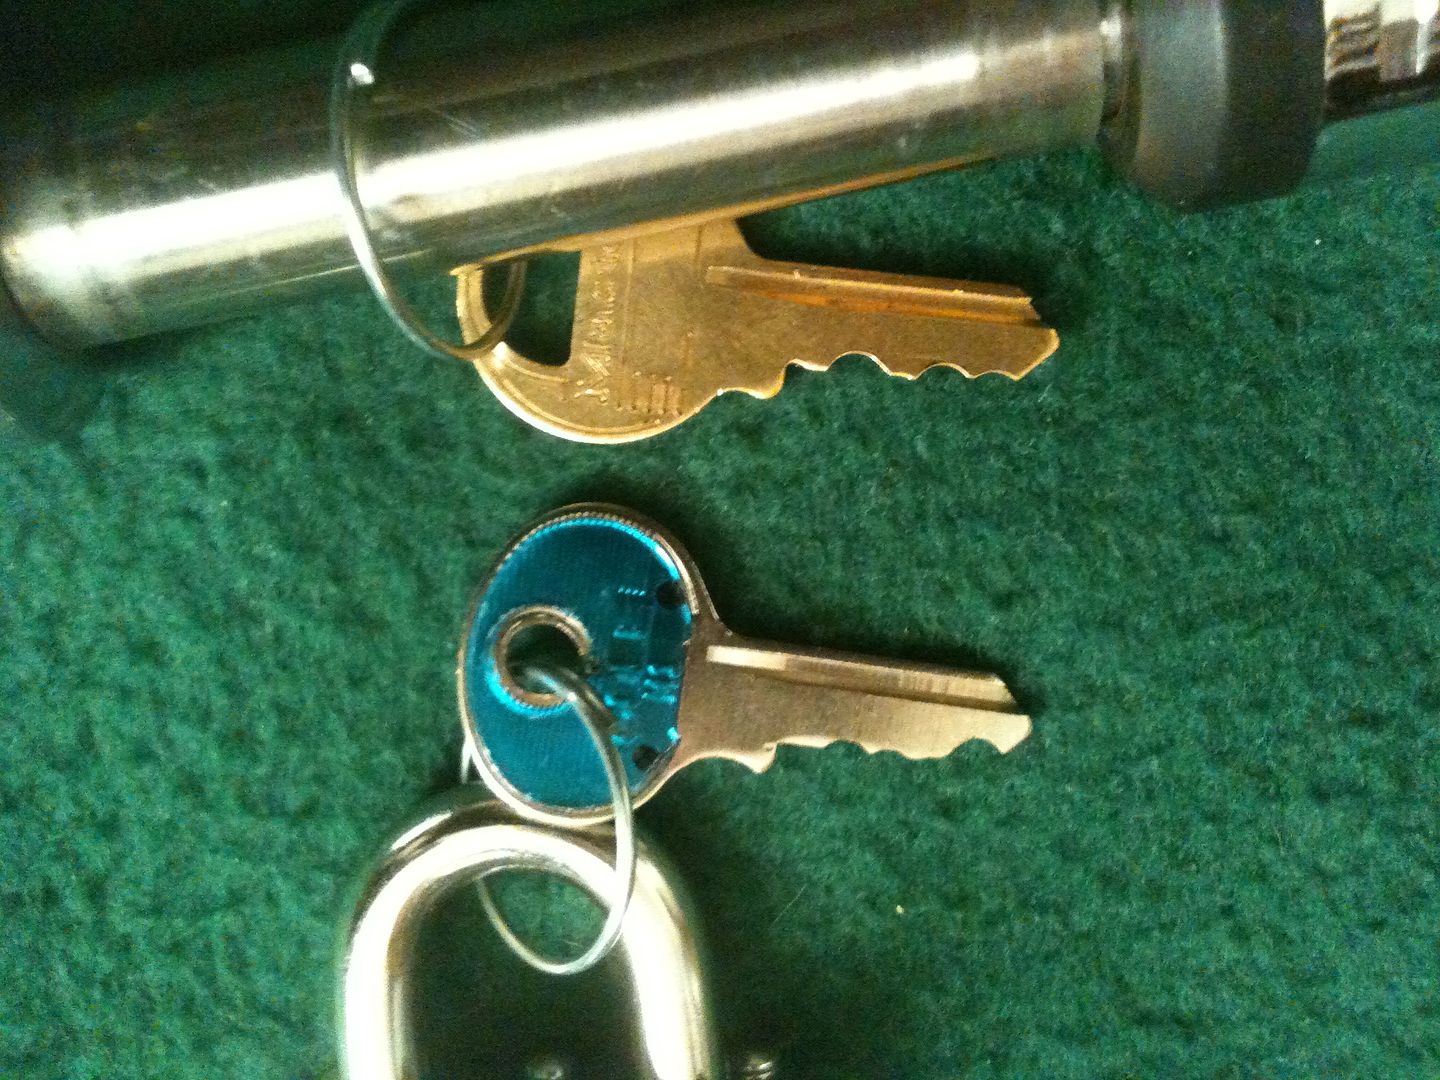
How about off the key ring…

Image

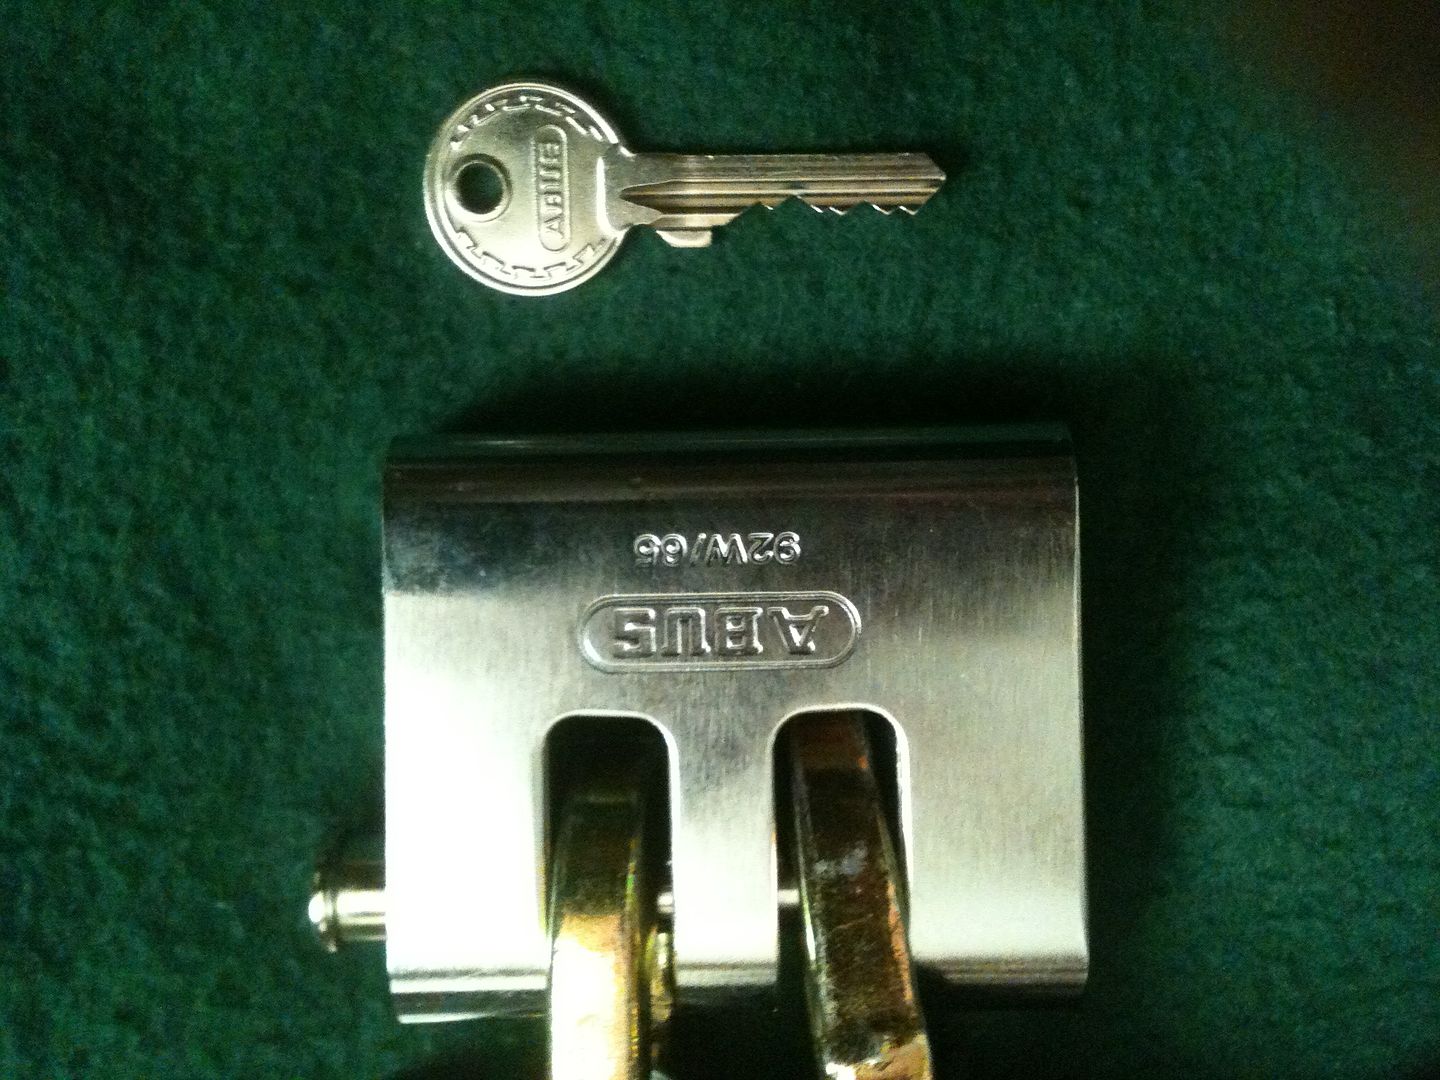
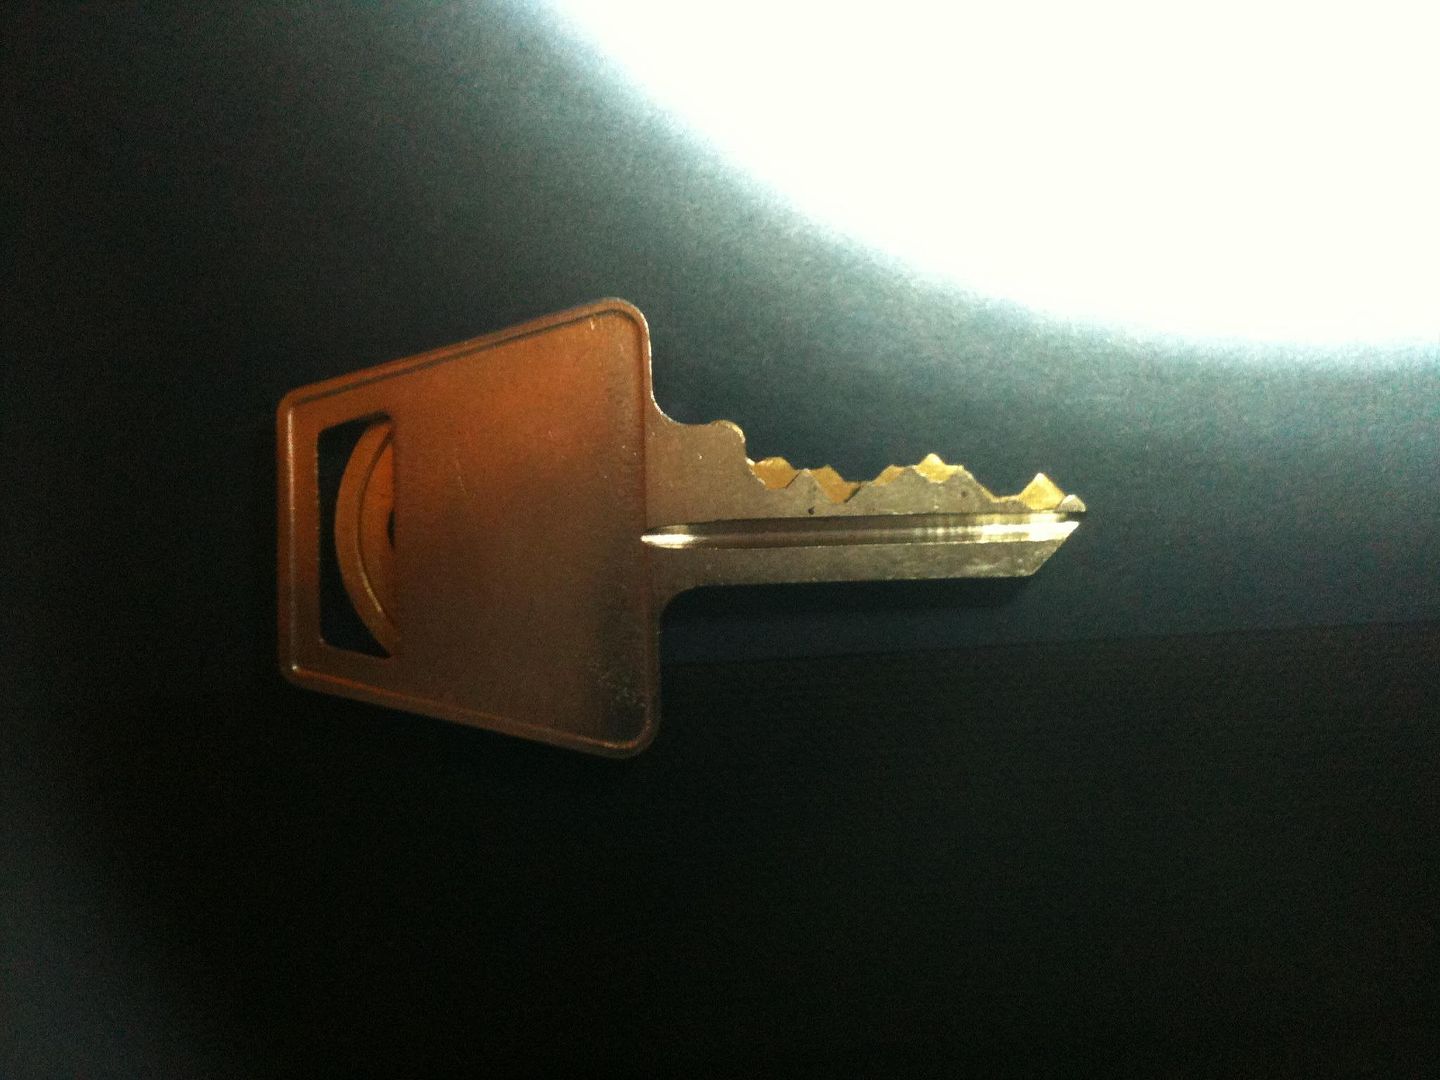
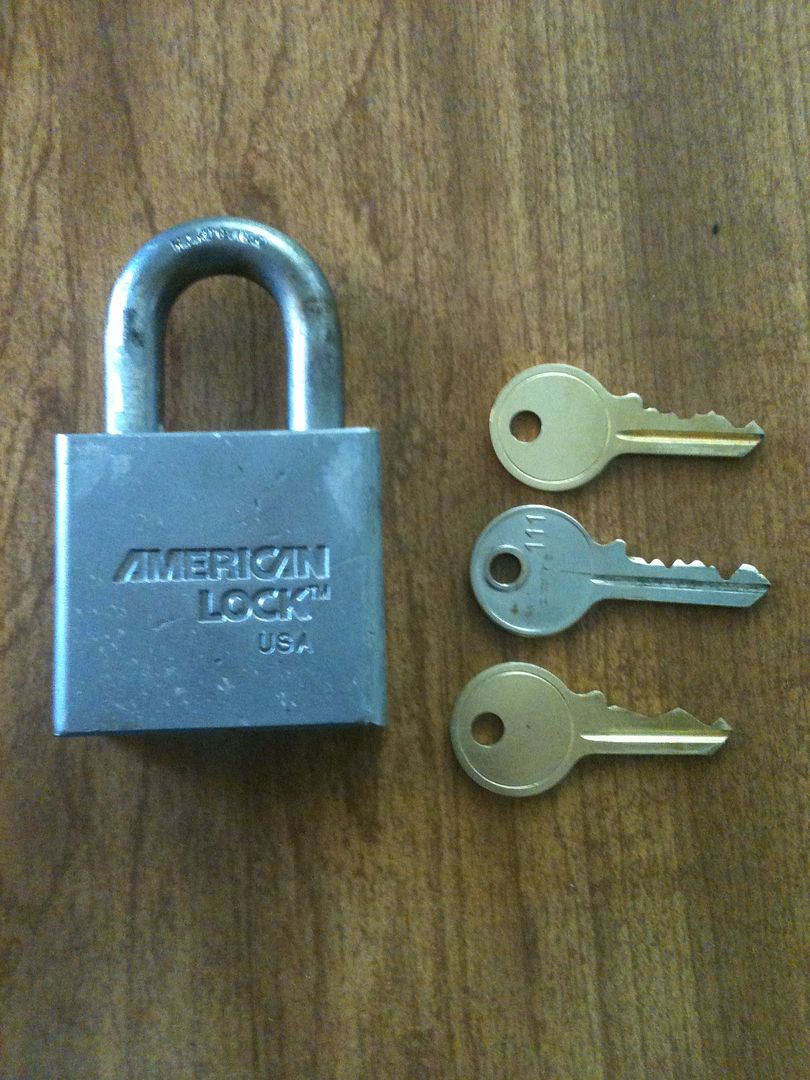
What do they have in common? Give up? They all open this lock:

Image

Not only that, but the lock is not master keyed. That is correct. The keys all have the same bitting!

How can this be if they all look so different? It has to do with how the pins interact with the key.

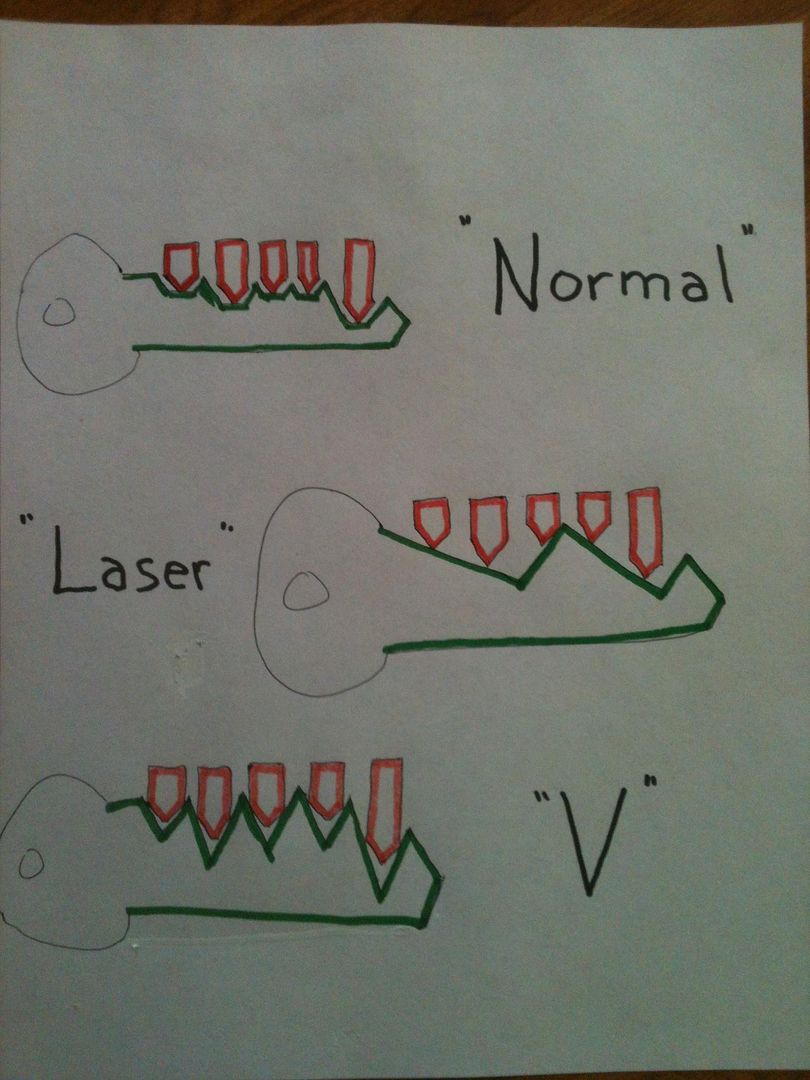
On a “normal" key, the tip of the key pin rests at the center of the flat spot at each bitting, so the tip of the key pin is used to set the pin at the correct height.

In a “V” cut, the edges of the pin are held, not the tip of the key pin. The edges of the ramp and pins are what is used to set the pin height.

On a “Laser” key (Not to be confused with a laser track key), the ramps can use either the tip of the key pins or the edges of the key pin to set the pins at the correct height.

Image

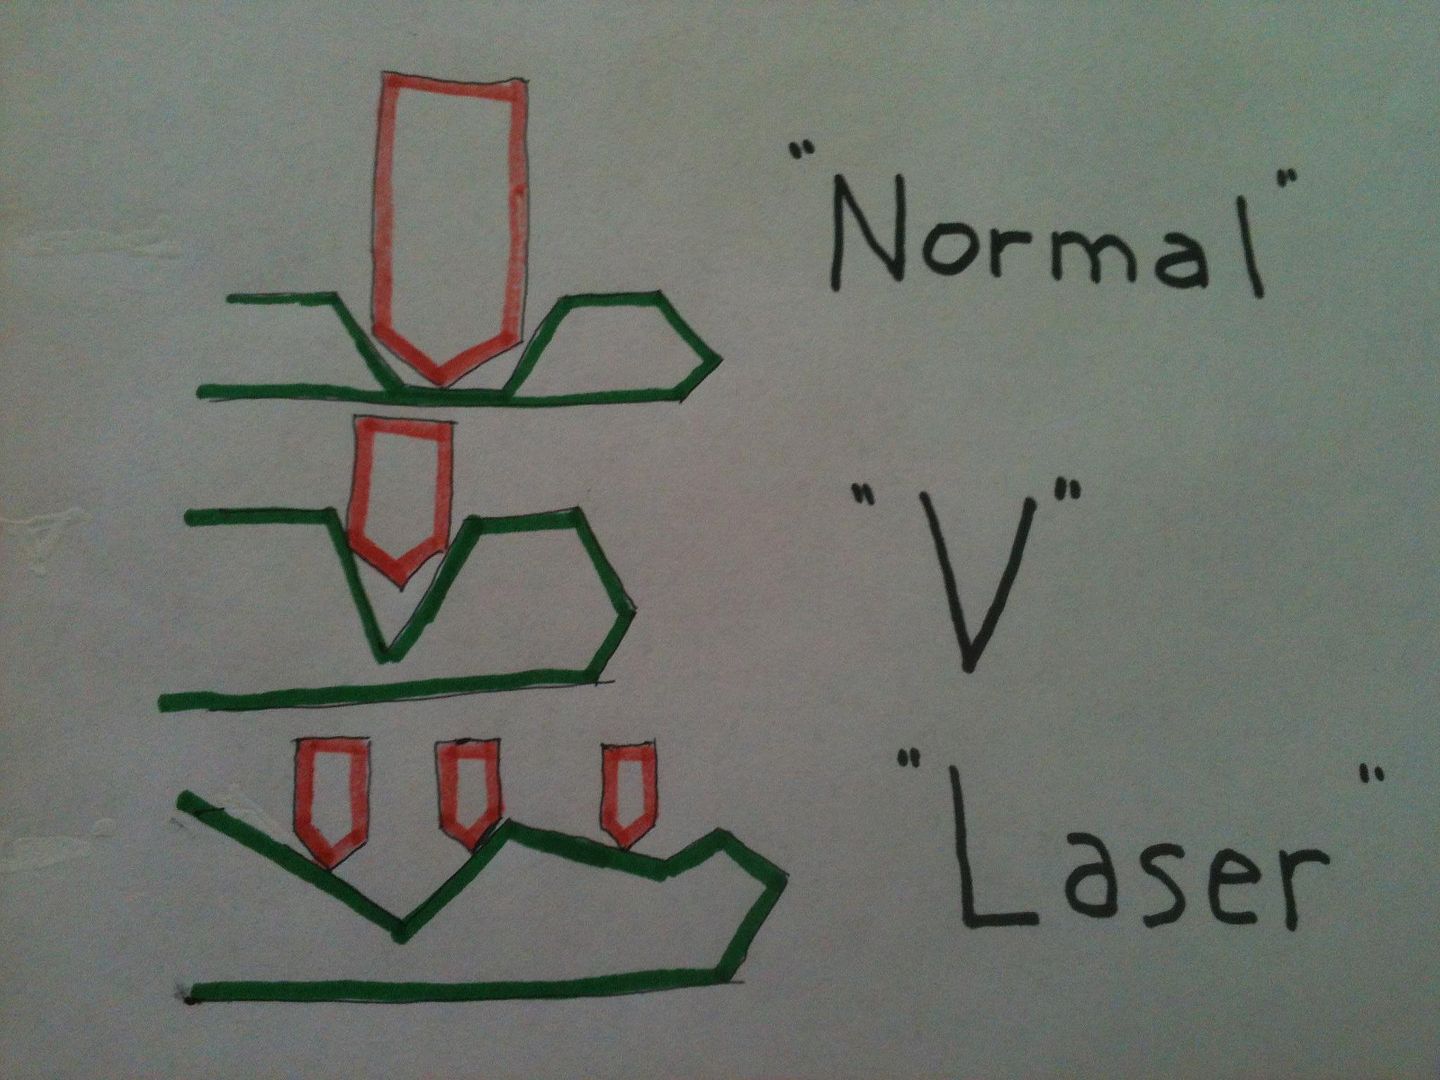
So you can see that on a “normal" key pin, the edges of the key pin are not used to set bitting height, but they are on a “V”, while on a “Laser” key, either can be used.

Now in this highly accurate drawing (yeah, right :roll: ), you can see how each of these key types are used to set the key pins at the same height, even though they look different.

Image

Used a key machine and depth keys to cut the “Normal” key, but hand filed each of the other two types of keys.

Why have different ways of cutting the keys? A couple reasons. The key machine cut key (Actually the last of the three I made) is how you expect the key to look. So the same keys, side by side, will look like they are for different locks. Also, the “Laser” key, with fewer peaks, would cause less pin wear.

The “V” key (made first, a year or so ago), especially used with a 6 pin blank instead of a 5 pin blank, can (and was) used so the key did not look like someone would expect… it was the same key, but disguised. (Someone wanted me to have a key, but not have others know that I had it, even if they looked at my key ring). So this is a bit of a way to ‘hide’ the bitting of the key.

The “Laser” key is specifically made to make visual decoding especially difficult. This is extra-true with this key, since I specially made it so none of the pins align with either the peaks or the valleys of the cuts.

All three keys work in the lock as well as a factory cut key - in fact, the “Laser” key works even more smoothly for insertion and extraction from the lock.

You can make a “Laser” key for pretty much any bitting, but will probably need to cut/file it by hand unless you have access to a special key cutting machine. When I make them, my goal is to make all the angles different, and have them being different lengths, to make decoding harder.

The American 5260 padlock pictured is no longer in use where it came from, so not worried about posting actual pictures of the bitting. It was given to me when the person sold their shed without the lock.

So next time you want to make a key, there is your challenge: make your key a bit differently… if you can make it work properly. Just be sure that the key and lock works smoothly and reliably before you try using it on a lock you depend on.

Have fun!!!

Gordon
Just when you finally think you have learned it all, that is when you learn that you don't know anything yet.
User avatar
GWiens2001
Site Admin
 
Posts: 7550
Joined: 3 Sep 2012 16:24
Location: Arizona, United States

Re: Tutorial - Different Ways to Cut Keys

Postby GWiens2001 » 13 Apr 2014 16:02

Hey Zeke and Squelchtone... is this a record for me? A tutorial without 500 pictures? :mrgreen:

Gordon
Just when you finally think you have learned it all, that is when you learn that you don't know anything yet.
User avatar
GWiens2001
Site Admin
 
Posts: 7550
Joined: 3 Sep 2012 16:24
Location: Arizona, United States

Re: Tutorial - Different Ways to Cut Keys

Postby Divinorum » 13 Apr 2014 16:07

Thank you very much for sharing this :D. Really cool that the keys look nothing alike but all open the same lock. I was under the impression that a key cut with V cuts was not the correct way to file a key and that a hand filed key should rather a flat space for the pin to settle into. What do you think about this? Is there a particular way to achieve the flat spot for the pins to settle into when hand filing? I have started hand filing keys recently and making the bottom of the cut flat is giving me trouble :oops:
Image
User avatar
Divinorum
Supporter
Supporter
 
Posts: 470
Joined: 6 Dec 2013 16:18
Location: New York

Re: Tutorial - Different Ways to Cut Keys

Postby GWiens2001 » 13 Apr 2014 16:54

Personally do not try to make the bottoms completely flat. Most of my impressioned keys are round bottomed, but a little wider than the round edge of a file. You can make them flat with a flat needle file or with the flat side of the tip section of a pippin file, then make the angles in the same manner. It is tricky, and takes practice. Another member here, Oldfast, makes keys that look like they are machine cut, though he will tell you that it takes him a LONG time to do so.

The "V" cuts can be a little tricky, as if you make the angles too steep, you will trap the key in the lock. Some locks need a wider angle, and some, like a Wilson Bohannan, can handle a very steep angle without missing a beat.

I rarely make keys with a "V" cut, and had a specific reason in mind when I made the one in the pictures above. But some locks, such as many of the ABUS padlocks, are factory made with keys cut in a "V". Here is one of them:

Image

While here are a couple of impressioned keys for Master locks (#3 and a trailer hitch lock). You can see that the valleys of these two are round.

Image

Gordon
Just when you finally think you have learned it all, that is when you learn that you don't know anything yet.
User avatar
GWiens2001
Site Admin
 
Posts: 7550
Joined: 3 Sep 2012 16:24
Location: Arizona, United States

Re: Tutorial - Different Ways to Cut Keys

Postby GWiens2001 » 13 Apr 2014 18:31

And just added a fourth style - sort of a wave shape:

Image

It works on the same way as the ‘Laser’ key, but has no angles. Only curves.

Cut down low straight from the shoulder to help hide the bitting of the first cut, and cut off the ramp at the front of the key to help hide the fifth cut.

As you can see, it makes yet another key that looks like it won’t work in the lock, but does! ;)

Gordon
Just when you finally think you have learned it all, that is when you learn that you don't know anything yet.
User avatar
GWiens2001
Site Admin
 
Posts: 7550
Joined: 3 Sep 2012 16:24
Location: Arizona, United States

Re: Tutorial - Different Ways to Cut Keys

Postby YouLuckyFox » 13 Apr 2014 19:31

I don't bottom out my depths either, I like them being rounded just fine; though I appreciate having hand-filed key that looks like excellence in craftsmanship. Great post, Gordon, as always! Have you thought of a negative key? As in, rather than depths you would have heights. It would make the peaks look like valleys to throw of decoding.
YouLuckyFox
 
Posts: 630
Joined: 10 Aug 2012 19:25

Re: Tutorial - Different Ways to Cut Keys

Postby GWiens2001 » 13 Apr 2014 19:39

That was to be my next project in this series. Great minds, and all that stuff, Fox. :-)

Gordon
Just when you finally think you have learned it all, that is when you learn that you don't know anything yet.
User avatar
GWiens2001
Site Admin
 
Posts: 7550
Joined: 3 Sep 2012 16:24
Location: Arizona, United States

Re: Tutorial - Different Ways to Cut Keys

Postby spandexwarrior » 13 Apr 2014 20:07

Most of the automatic code machines have the option to do a normal/laser/flat/plunge cut. I've done some on the ITL 9000A that ended up looking pretty cool.

-Brian
spandexwarrior
 
Posts: 155
Joined: 11 Aug 2007 23:00
Location: Colorado, USA

Re: Tutorial - Different Ways to Cut Keys

Postby GWiens2001 » 13 Apr 2014 21:13

And the fifth (and probably last) key style for this lock. Pins contact at the top of the peaks. A bit tricky making this one with precise points for peaks, and tried to make flats between the peaks.

Image

Compared to a 'normal' key:

Image

Gordon
Just when you finally think you have learned it all, that is when you learn that you don't know anything yet.
User avatar
GWiens2001
Site Admin
 
Posts: 7550
Joined: 3 Sep 2012 16:24
Location: Arizona, United States

Re: Tutorial - Different Ways to Cut Keys

Postby jtucek » 13 Apr 2014 22:10

First; this is awesome.

Second; , you kinda beat me to it. I mean, you've been more awesome about it (as in actually making keys), but I've been wondering about a closely related topic.

Third..
GWiens2001 wrote:Image

Can we call this a "^" key, alternatively a "carrot" key?

Anyway, I've gotten factory code-cut keys for a couple of different locks, some of which look like what you call "Normal" and some of which look like your "V". So I don't think that "V" is necessarily non-standard, just perhaps not the most common. I've *never* seen a carrot key, nor a "laser" key (I have seen many laser car keys, though), but I think I can see reasons why; both would be sensitive to the exact wear-and-tear on the shoulder and the pins. OTOH, for a well-maintained lock, they may have advantages.

I'm going to propose something I'll call "sub-normal". "Normal" keys have little "^" shaped bumps in between the flat bits. Call them humps. Also, let's call the flat bits "lands"; this matches terminology in some other technical areas, and if anyone has a previously existing lock-specific terminology I'd be happy to adopt it. In any case, on my keys, I tend to start with a "normal" key (code-cut or filed with a \_/ profile file). Flat lands that the pins rest on when you turn it, separated by humps. I then try to make the slope between the lands as shallow as possible, sacrificing the humps as I need to. If nothing else, I just file the humps flat. Out of superstition that there must be a reason that there are humps between the lands (alignment for poor shoulders?) I leave the last pin or two with some amount of hump.

These keys seem to go in/out more easily, and I don't see much downside. My assumption is that all keys are not this way because it would make the code-cutting machines more complex. GWiens2001, your "laser" (you need a better name... maybe "slope-style?") keys seem better, except that I'd be concerned about wear on the sides of the pins.

Would anyone like to comment on 1) do the humps have utility, 2) is the shallower slope beneficial, 3) would wear on the pins be an argument against the "Laser" keys, or are flat lands unnecessary?

-j
jtucek
 
Posts: 24
Joined: 17 Mar 2014 12:06

Re: Tutorial - Different Ways to Cut Keys

Postby somenewguy » 14 Apr 2014 12:30

Isn't there a concern with any key other than 'normal' possibly exceeding the MACS value when going in the lock and having a cut trapped behind a pin and thereby making the key impossible to remove?
somenewguy
 
Posts: 214
Joined: 7 Sep 2013 15:19

Re: Tutorial - Different Ways to Cut Keys

Postby billdeserthills » 15 Apr 2014 23:35

somenewguy wrote:Isn't there a concern with any key other than 'normal' possibly exceeding the MACS value when going in the lock and having a cut trapped behind a pin and thereby making the key impossible to remove?


You won't be able to make a key un-removable, unless you were to put an abnormally tall top pin in place, in which case the key should be unable to be inserted into the lock in the first place. I recall a somewhat misguided so-called locksmith in my area from over 30 years ago, who used to use 91919 as his supposedly "unpickable" super master key. I used to find his special bitting at some clients homes years after he had retired. These clients related that it had been impossible for them to get a working key made anywhere, which brings forth the reason I caution against making these "new" different ways to cut keys, as they will be very difficult to have extra copies made, depending upon the key machine used. Some folks think a key machine will cut an exact copy-Nothing is further from the truth, which is why a professional locksmith will often test their key machine to cut a third generation key. This key will have magnified the faults of the key machine by 3 times, which is generally where normal eyes can see the difference between the first & third keys.
billdeserthills
 
Posts: 3827
Joined: 19 Mar 2014 21:11
Location: Arizona

Re: Tutorial - Different Ways to Cut Keys

Postby GWiens2001 » 16 Apr 2014 0:13

Would agree - the deep "V" cuts do have a risk of trapping a key due to canyoning. Also, the 'reverse cut' key (pins line up with the peaks of the key) would wear more quickly than normal. As for the cuts like the 'laser' cut and keys with no peaks, as long as you are not exceeding MACS, there should be no problems, though with some a normal key machine would not cut the key.

Gordon
Just when you finally think you have learned it all, that is when you learn that you don't know anything yet.
User avatar
GWiens2001
Site Admin
 
Posts: 7550
Joined: 3 Sep 2012 16:24
Location: Arizona, United States

Re: Tutorial - Different Ways to Cut Keys

Postby mechanical_nightmare » 16 Apr 2014 11:26

I like how this would serve to throw off visual decoding attempts. Many people carelessly leave their keys unattended in the open (on a desk, visibly in a vehicle etc.) where it would be pretty easy to photograph them. I have even seen a coworker post her house keys on Facebook to show off her new keychain.. Gordon's laser keys would make that more difficult. Thank you, Gordon for another great post about the art of keymaking!
If you do not manipulate the lock, then the lock will manipulate you
mechanical_nightmare
 
Posts: 253
Joined: 20 Sep 2013 4:03
Location: Istanbul, Turkey

Re: Tutorial - Different Ways to Cut Keys

Postby billdeserthills » 16 Apr 2014 16:22

mechanical_nightmare wrote:I like how this would serve to throw off visual decoding attempts. Many people carelessly leave their keys unattended in the open (on a desk, visibly in a vehicle etc.) where it would be pretty easy to photograph them. I have even seen a coworker post her house keys on Facebook to show off her new keychain.. Gordon's laser keys would make that more difficult. Thank you, Gordon for another great post about the art of keymaking!


Unfortunately, "those people" who don't seem to give a about their keys aren't gonna come forward to pay for this service either
billdeserthills
 
Posts: 3827
Joined: 19 Mar 2014 21:11
Location: Arizona


Return to Pick-Fu [Intermediate Skill Level]

Who is online

Users browsing this forum: No registered users and 15 guests